An ultra minimal static site generator [example blog]
I needed to set up a static site generator for some blogging. And while plenty of these exist (Jekyll, Gatsby, etc.), none were quite as minimal as I liked. So I built my own!
-
Install the package
msgonpm i msgo -
Initialize the folder structure
msgo initThis will create file structure that looks like this:
🗀 build 🗀 src cat.png hello-world.md -
Compile the
srcdirectorymsgo buildThis creates a
/builddirectory, and populates it with HTML, CSS, and images from thesrcdirectory. The script also creates standard metatags for social links (native, OpenGraph, Twitter) and generates asitemap.xml.Open the
index.htmlfile to see your blog. Any.mdfiles in thesrcfolder will have a title, link, and meta description on the landing page.
Well I'm in a code editor all day anyway. I like the syntax.
And the indention is really nice. Especially when I want to provide code snippits. Which I do a lot of when I write tutorials. Since I'm staying in VS code the whole time I can just copy over snippits.
// Convert Meta tags to object
const metaObj = meta.split(/\n/).reduce((acc, el) => {
    if (el.length) {
        const [key, value] = el.split(':');
        acc[key] = value.trim();
    }
    return acc;
}, {});
The default blog style is designed for readability, but it's pretty boring. Luckily you can spice it up with all the custom HTML/CSS you like!
The build step looks for a header.html or footer.html file to the src directory and inserts them into the respective positions.
<body>
	{header.html}
	<article>{content}</article>
	{footer.html}
</body>Any html inserted to the markdown will be transferred as is to the compiled file. You can use this to insert all sorts of interactive elements. Ex:
markdown
# welcome to the blog

## click this cool button

<button onClick="console.log('yo')">Click me!</button>

### that's all!
compiles to
<h1>welcome to the blog</h1>
<h2>click this cool button</h2>
<button onClick="console.log('yo')">Click me!</button>
<h3>that's all!</h3>The top of each .md file needs some configuration for the title, meta tags, and sitemap generation.
title=Markdown Static Site Generator
description=An ultra minimal static site generator
image=https://example.com/cat.png
date=2022-03-18
publish=true
@@@
Which generates something like this:
<!-- Base meta tags -->
<meta charset="UTF-8">
<meta http-equiv="X-UA-Compatible" content="IE=edge">
<meta name="description" content="A stupid simple static site generator for markdown" />
<meta name="language" content="english" />
<meta name="title" content="Markdown Static Site Generator" />
<meta name="viewport" content="width=device-width, initial-scale=1.0">

<!-- OpenGraph -->
<meta property="og:description" content="A stupid simple static site generator for markdown" />
<meta property="og:image" content="undefined" />
<meta property="og:site_name" content="Rysolv" />
<meta property="og:title" content=Markdown Static Site Generator />
<meta property="og:type" content="article" />
<meta property="og:url" content="https://rysolv.com/blog/getting-started.html" />

<!-- Twitter -->
<meta name="twitter:card" content="summary_large_image">
<meta name="twitter:description" content="A stupid simple static site generator for markdown" />
<meta name="twitter:image" content="" />
<meta name="twitter:title" content="Markdown Static Site Generator" />
It also generates a sitemap.xml of all the articles in the src directory.
<urlset
    xmlns="http://www.sitemaps.org/schemas/sitemap/0.9"
    xmlns:xsi="http://www.w3.org/2001/XMLSchema-instance"
    xsi:schemaLocation="http://www.google.com/schemas/sitemap/0.84 https://www.google.com/schemas/sitemap/0.84/sitemap.xsd">
    <url>
        <loc>https://rysolv.com/blog/getting-started.html</loc>
        <lastmod>2022-02-18</lastmod>
    </url>
</urlset>
In the spirit of deploying this in an afternoon, I went with Netlify.
- Sign in to Netlify
- Select
Import an Existing project - Connect to a Git provider
- Select the repo
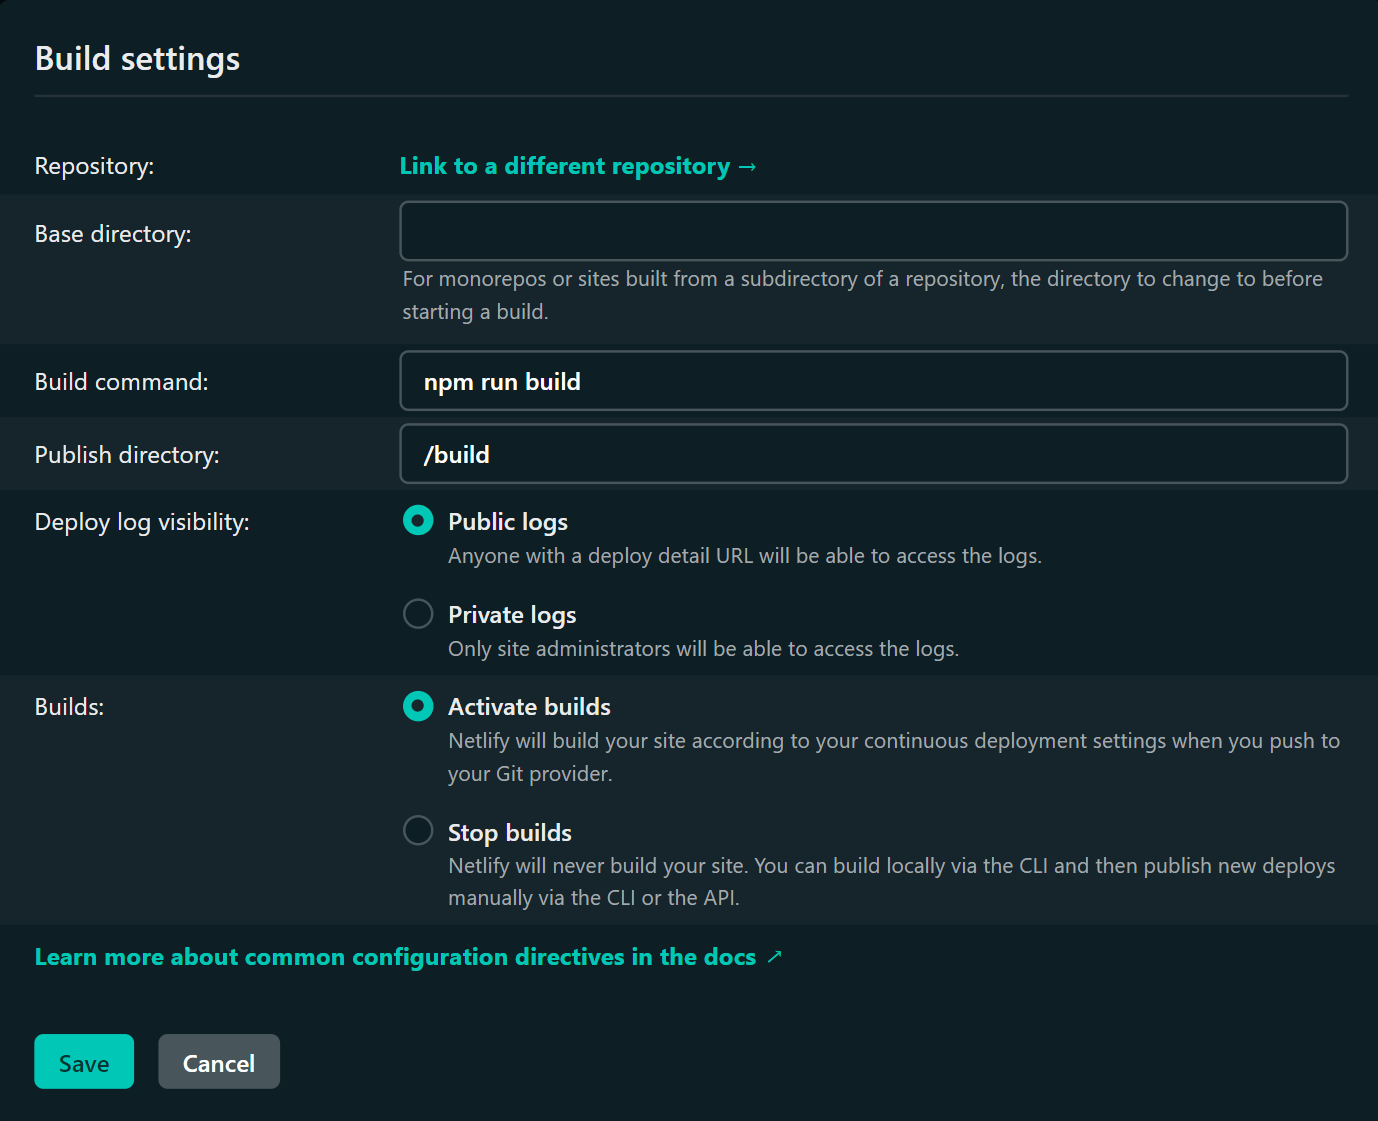
- Set the build step to
npm run buildand the publish directory to/build - Deploy Site!

