The code provided as part of this repository is ONLY for learning purposes!
This repository contains code listings cited as examples from the book "C Ninja, in Pyjama!". There is also supporting YouTube playlist that guides through the chapters and concepts.
 Embedded Systems 101: C Ninja, in Pyjama! The right way to learn C...
All the examples are based on the RISC-V CPU implementing the rv32i instruction set. To avoid having to procure/purchase new hardware, the examples are based on the QEMU emulator that emulates the intended CPU. This makes it easy to learn all the core concepts first before trying to execute them on a real hardware.
To ensure that everyone has the same development environment, we create and use a docker container. Following steps guide on setting up the right docker container locally.
You would need to have Docker engine/desktop installed and running. If you don't already have it, get a copy and install it for your Operating system by following steps here: Docker.
Execute the following to run the setup after Docker is installed and actively running on your local machine.
bash setup.shOpen a new terminal window. If you are using the bash shell then simply execute the following:
c-ninjaImportant: If you are using some other shell, please change to the bash shell first by executing the bash command! Once you are in the bash shell is activated, execute the c-ninja command.
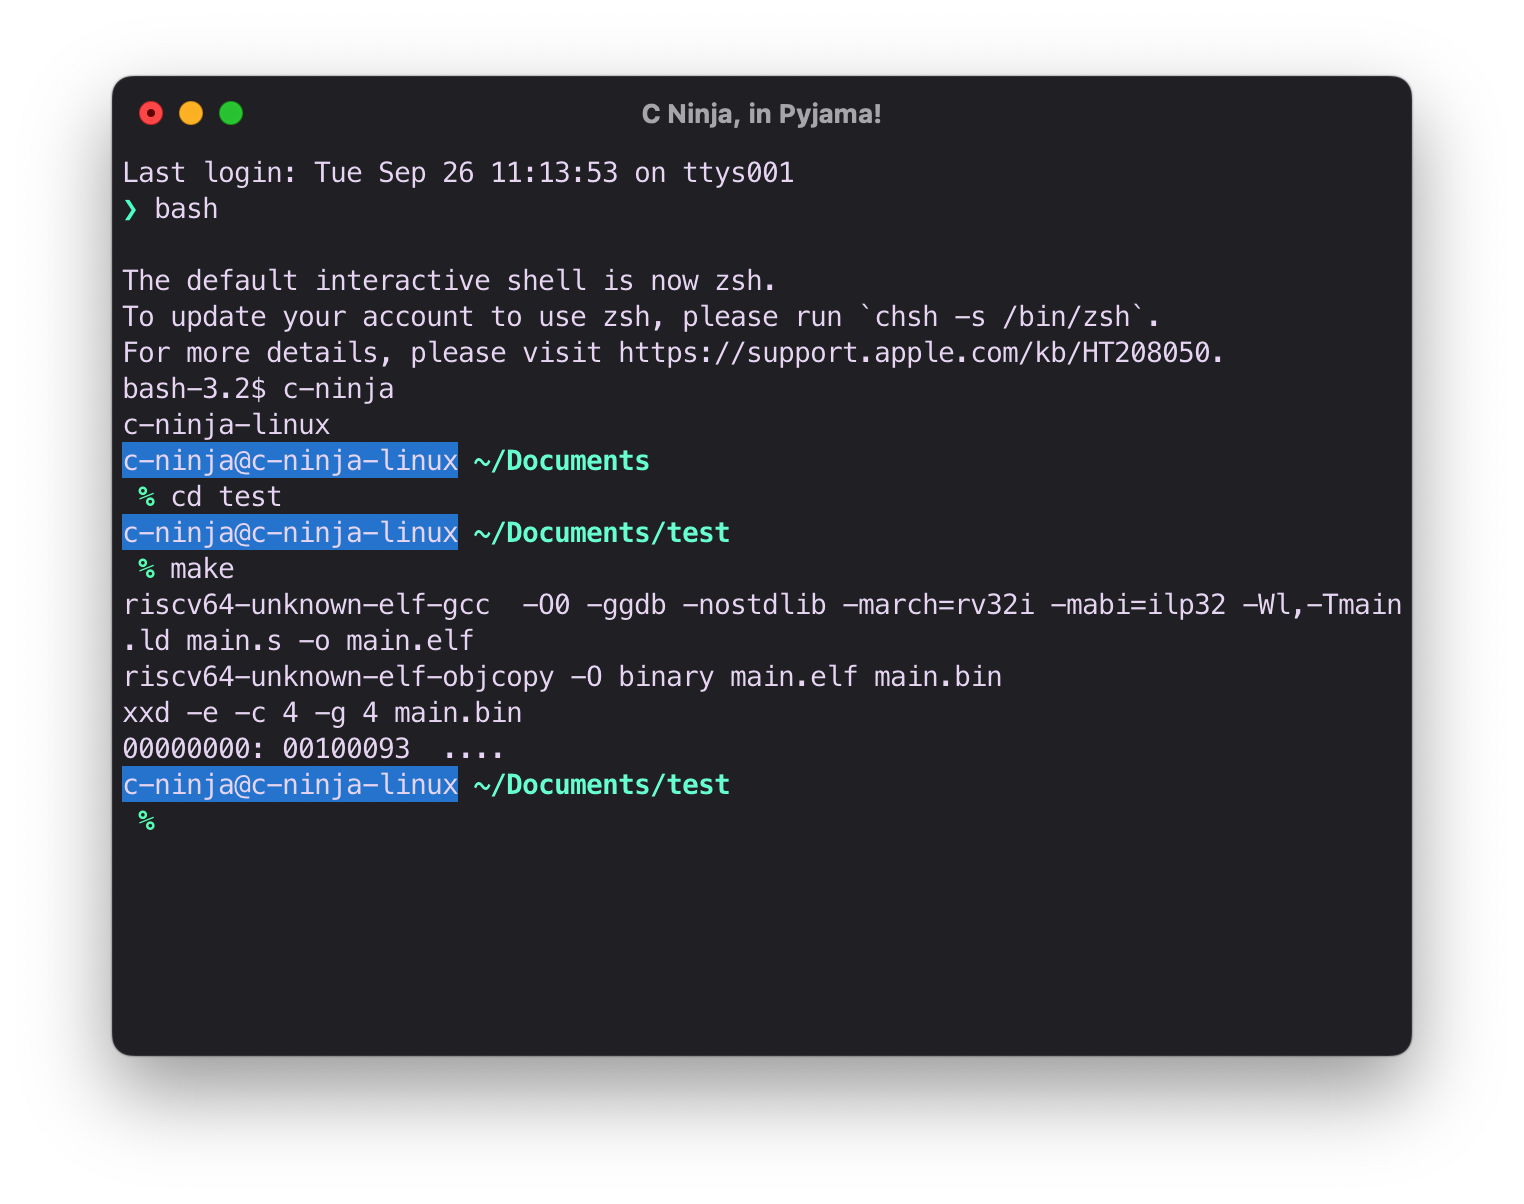
Once within the docker container, execute the following:
c-ninja@c-ninja-linux ~/Documents
% cd test
c-ninja@c-ninja-linux ~/Documents/test
% make
You should see prints as below:
riscv64-unknown-elf-gcc  -O0 -ggdb -nostdlib -march=rv32i -mabi=ilp32 -Wl,-Tmain.ld main.s -o main.elf
riscv64-unknown-elf-objcopy -O binary main.elf main.bin
xxd -e -c 4 -g 4 main.bin
00000000: 00100093 ....The installation of docker is described in detail on the official Docker website: Docker installation on Linux. We cover the steps needed to enable Docker Desktop on Ubuntu Desktop.
Installing docker Desktop on Linux is not straight forward when compared to Mac and Windows.
Open a terminal and update the apt sources by executing the following commands:
# Add Docker's official GPG key:
sudo apt-get update
sudo apt-get install ca-certificates curl gnupg
sudo install -m 0755 -d /etc/apt/keyrings
curl -fsSL https://download.docker.com/linux/ubuntu/gpg | sudo gpg --dearmor -o /etc/apt/keyrings/docker.gpg
sudo chmod a+r /etc/apt/keyrings/docker.gpg

# Add the repository to Apt sources:
echo \
  "deb [arch="$(dpkg --print-architecture)" signed-by=/etc/apt/keyrings/docker.gpg] https://download.docker.com/linux/ubuntu \
  "$(. /etc/os-release && echo "$VERSION_CODENAME")" stable" | \
  sudo tee /etc/apt/sources.list.d/docker.list > /dev/null
sudo apt-get updateInstall the dependencies along with docker-ce-cli.
sudo apt-get install docker-ce docker-ce-cli containerd.io docker-buildx-plugin docker-compose-plugin curl qemu-system-x86 pass uidmapDownload the Docker Desktop Installer. This should download the docker-desktop-4.24.0-amd64.deb file. From the location where this file is downloaded, execute the following command to install the Docker Desktop -
sudo dpkg -i docker-desktop-4.24.0-amd64.debsudo rm /etc/xdg/systemd/user/docker-desktop.service
systemctl --user enable docker-desktopEnsure Docker Desktop is running and from within the directory for this current repository run the following:
bash setup.shThis will create the image and the container.
Open a new terminal window. If you are using the bash shell then simply execute the following:
c-ninjaOnce within the docker container, you will need to change the ownership of the contents within ~/Documents/ in the container. Execute the command as shown below:
c-ninja@c-ninja-linux ~/Documents
% sudo chown -R c-ninja .
This will change the ownership of the files to the local user c-ninja within the docker container. After this you should be able to issue cd test; make as below -
c-ninja@c-ninja-linux ~/Documents
% cd test
c-ninja@c-ninja-linux ~/Documents/test
% make
This should result in prints as below, confirming that the environment is set correctly.
riscv64-unknown-elf-gcc  -O0 -ggdb -nostdlib -march=rv32i -mabi=ilp32 -Wl,-Tmain.ld main.s -o main.elf
riscv64-unknown-elf-objcopy -O binary main.elf main.bin
xxd -e -c 4 -g 4 main.bin
00000000: 00100093 ....Execute the following to run the setup after Docker is installed and actively running on your local machine. You can either double-click this file or execute it from the cmd/power shell prompt. This command has been tested on Windows 11.
setup.batThese commands should download the required Linux image, create a container using it, install all the required packages, create the c-ninja user, and map the current directory as the ~/Documents
You should see a new, c-ninja.bat file generated in the current directory. You can double-click on the file to launch the terminal connected to the docker container.
- Download and Install Vscode for your operating system.
- Launch VScode, open the terminal, and install the extensions -
code --install-extension ms-vscode-remote.remote-containers
code --install-extension ms-vscode-remote.remote-ssh
code --install-extension ms-vscode-remote.remote-ssh-edit
code --install-extension ms-vscode.remote-explorer
code --install-extension zhwu95.riscv
code --install-extension ZixuanWang.linkerscript- Restart VSCode and from the Remote explorer connect to the container.
Copyright © 2023 inpyjama.com. All Rights Reserved.
