This project is implimented with “Open Source Computer Vision Library”, the OpenCV. The aim was to impliment real time simple lane detection and vehicle detection system with OpenCv Python. The lane detection system is a very basic yet very important system when we talk about driver assistance systems or self driving cars. Since 1990s threr have been lot of work done on lane detction systems for various road conditions. like urban and rural roads,highways etc. The lane detection system can play a major role in the driver assistance system. Adding vehicle detection ststem along with the lane detection system can significuntly improve the decision making capability of ADAS systems. by understanding the dynamics of the vehicles.Some of the applications of lane detection systems are
- Lane keep assistance.
- Lane departure warning.
- Road vulnerability detection
Use the package manager pip to install packages mentioned in requirment.txt.
pip install -r requirment.txtThis project is implimented in two distinct phases
The input to this system is video feed from the camera mounted on the fron t side of the back veiw mireor inside the cabin. step by stemp implimentation is given below.
#importing some useful packages
import matplotlib.pyplot as plt
import matplotlib.image as mpimg
import numpy as np
import cv2
we start with the RGB image having lane lines.
"""
The first step to working with our images will be to convert them to grayscale.
This is a critical step to using the Canny Edge Detector inside of OpenCV.
"""
gray_image = cv2.cvtColor(image, cv2.COLOR_BGR2GRAY)
"""
Before we can detect our edges, we need to make it clear exactly what we’re looking for.
Lane lines are always yellow and white. Yellow can be a tricky color to isolate in RGB space,
so lets convert instead to Hue Value Saturation or HSV color space.
"""
# Filter white pixels
white_threshold = 200 #130
lower_white = np.array([white_threshold, white_threshold, white_threshold])
upper_white = np.array([255, 255, 255])
white_mask = cv2.inRange(image, lower_white, upper_white)
white_image = cv2.bitwise_and(image, image, mask=white_mask)
# Filter yellow pixels
hsv = cv2.cvtColor(image, cv2.COLOR_BGR2HSV)
lower_yellow = np.array([90,100,100])
upper_yellow = np.array([110,255,255])
yellow_mask = cv2.inRange(hsv, lower_yellow, upper_yellow)
yellow_image = cv2.bitwise_and(image, image, mask=yellow_mask)
# Combine the two above images
image2 = cv2.addWeighted(white_image, 1., yellow_image, 1., 0.)
plt.imshow(image2)"""
Apply a quick Gaussian blur. This filter will help to suppress noise in our Canny Edge Detection
by averaging out the pixel values in a neighborhood.
"""
kernel_size = 5
gauss_gray = gaussian_blur(mask_yw_image,kernel_size)"""
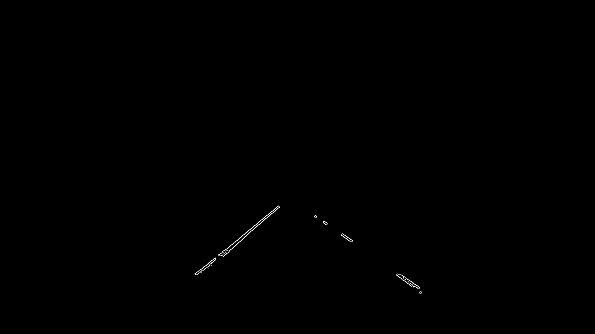
Apply canny edge detection
"""
low_threshold = 50
high_threshold = 150
canny_edges = canny(gauss_gray,low_threshold,high_threshold)"""
We don’t want our car to be paying attention to anything on the horizon, or even in the other lane.
Our lane detection pipeline should focus on what’s in front of the car. Do do that,
we are going to create another mask called our region of interest (ROI). Everything outside of the ROI will be set to black/zero,
"""
roi_image = region_of_interest(canny_edges, vertices)"""
Run Hough on edge detected image
"""
line_image = hough_lines(masked_edges, rho, theta, threshold, min_line_length, max_line_gap)"""
Once we have our two master lines, we can average our line image with the original,
unaltered image of the road to have a nice, smooth
"""
overlay. complete = cv2.addWeighted(initial_img, alpha, line_image, beta, lambda)The OpenCV Recognizer is trained using the GUI tool on all the data collected from the test data. This is done directly by a specific OpenCV function. T For implimentation of the HAAR calssifier i have trained the classifier with the GUI tool developed by AMIN it is an open source tool avilable at https://amin-ahmadi.com/cascade-trainer-gui/
Follw the steps provided in above tutorial and train your own classifier for the vehichle detection. after training the classifier the results will be a .xml file that is saved in “classifier/” directory. use this "cascade.xml"file for vehicle detection.
if you dont want to train the classifier then you can use the cascade classifiers avilable at below link
make sure that you need to create two folders named 'P' and 'n' and keep all the positives and negative images in respective folder.
results images here with different scenaroes.
Scene1 the system properly detecting lane lines as well as vehicle.
Scene2 where HAAR classifier properly detecting the vehicle but the lane detection system detecting lane with cross edges this is because of the improper position of camera and roi change.
list down the challanges here
This project uses Open Source components. You can find the source code of their open source project along with license information below. We acknowledge and are grateful to these developers for their contributions to open source.
Project: road_lane_line_detection https://github.com/georgesung/road_lane_line_detection tutorial:hthttps://medium.com/@galen.ballew/opencv-lanedetection-419361364fc0


