badgeyay is a simple badge generator with a simple web UI to add data and generate printable badges in a zip.
The user should be able to:
- Choose size of badges
- Choose background of badges and upload logo and background image
- Upload a CSV file or manually enter CSV data as: name, type of attendee, nick/handle, organization/project
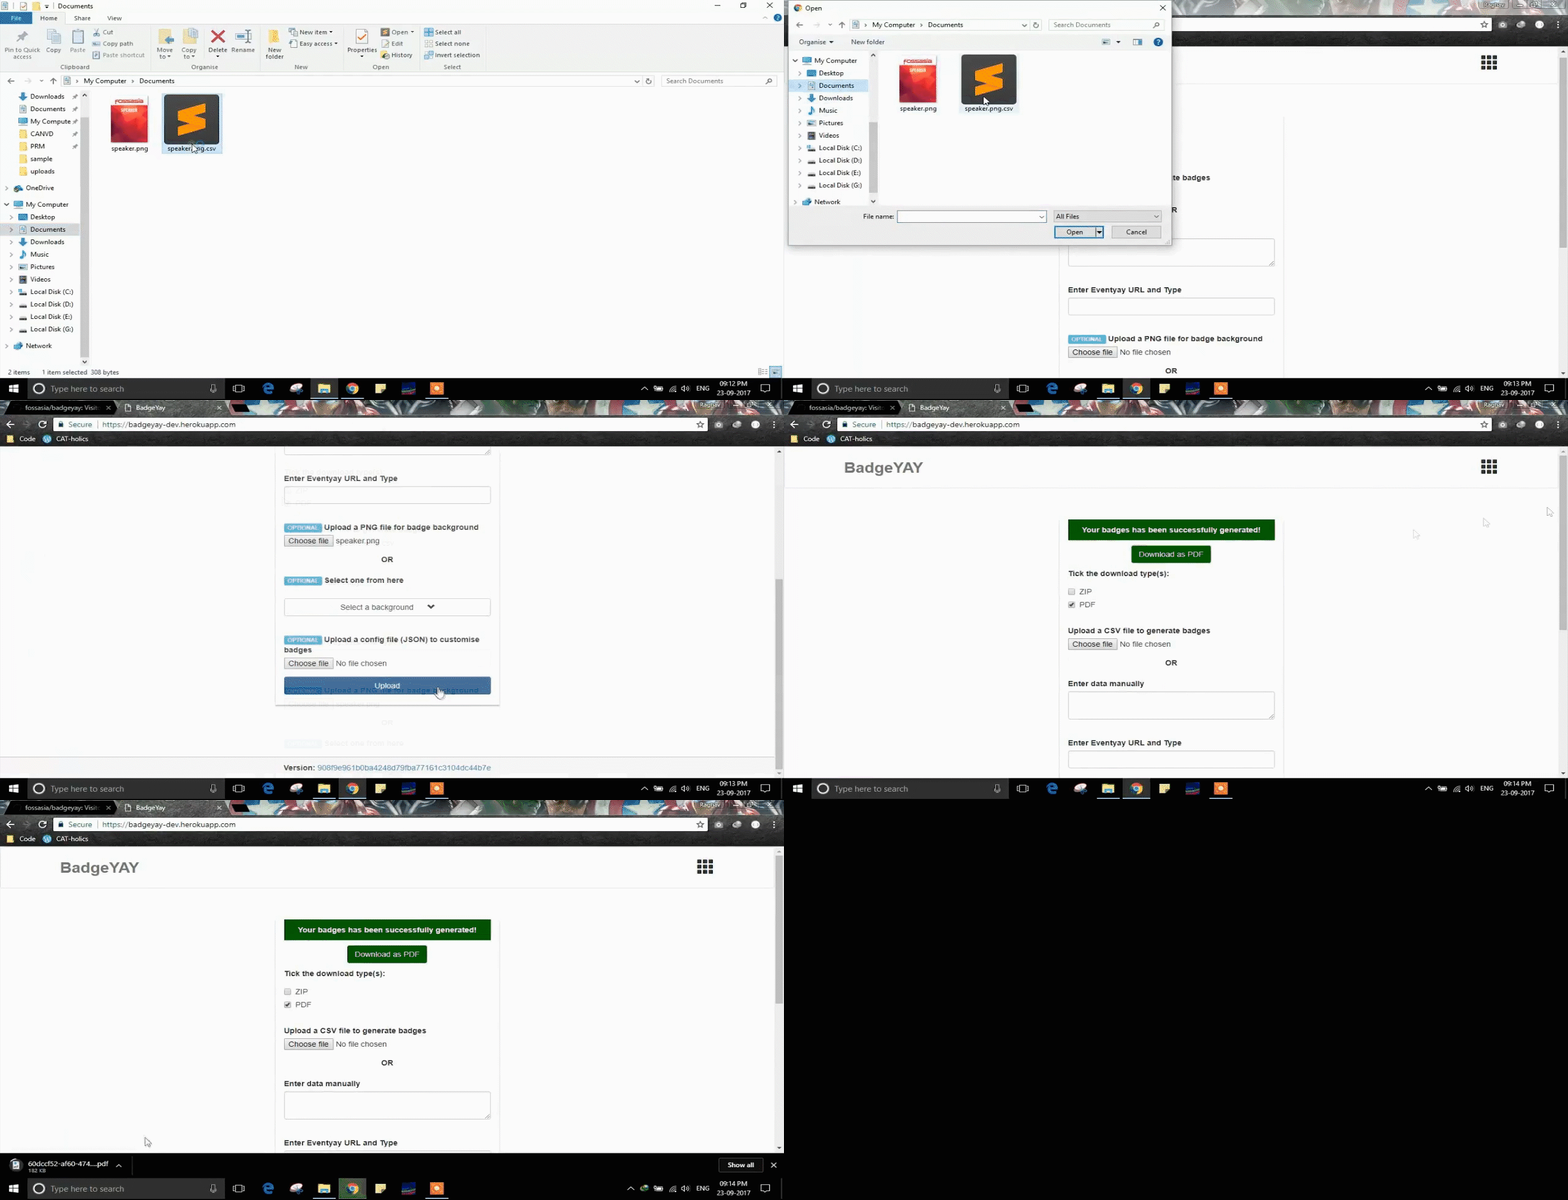
Checkout badgeyay in action:
Badgeyay uses a number of open source projects:
- Flask - Microframework powered by python
- Bootstrap - Responsive frontend framework
- Shell - Script used for merging badges of different types
- Heroku - Webapp deployed here
- Travis - Continuous Integration of the project
- Github Release - Releases are GitHub's way of packaging and providing software to the users
- Python Unit tests - for assertion, with the help of Selenium for web browser automation.
The guidelines for setting up and running the tests are mentioned in the testing docs.
-
The input is a set of csv files in the same folder, UTF-8.
-
The csv file is named after the badge type to take. Example:
vip.png.csvuses the picturevip.png. -
The CSV has up to 4 columns for the name and the twitter handle. They will be filled if this number is filled:
__X___XX_XXXXXXX
-
Optional configuration file in json format to customise badges.
-
A sample configuration file is shown below
{ "options": { "badge_wrap": true, "paper_size_format": "A3" } }- badge_wrap: It can be true or false. If set to true then for each entry in the csv file two badges will be generated so that they can be wrapped around the badge card.
- paper_size_format: As of now it's value can be either "A3" or "A4". The value will decide the size of the page on which the badges (in groups of 8) will be printed. Not required if width and height of parameters are explicitly mentioned.
- width: Width of the page on which badges (in groups of 8) will be printed. Value should be in mm. For example: "297mm"
- height: Height of the page on which badges (in groups of 8) will be printed. Value should be in mm. For example: "420mm".
The output file is svg / pdf / multipage pdf of size A3. Each badge has the size A6. The outputs are in a folder derived from the input csv. The outputs can be either of the two types, viz ZIPs or PDFs, or both. User has the choice to choose from either of the two or from both of them.
You can change the font style, font size, color etc from the .svg file in the folder badges.
Inkscape is generally used for editing of such files.
You need Ubuntu to run the application. Check out the User Input Guide for more details.
Badgeyay requires the following dependencies to be installed
- python3
- rsvg-convert
- pdftk
For Ubuntu/Debian based Package Managers
sudo apt-get update
sudo apt-get install python3 librsvg2-bin pdftk
For Fedora/CentOS/RPM based package managers
sudo -i
dnf install librsvg2 librsvg2-tools
dnf install gcc gcc-c++ libXrandr gtk2 libXtst libart_lgpl
wget http://mirror.centos.org/centos/6/os/x86_64/Packages/libgcj-4.4.7-18.el6.x86_64.rpm
wget https://www.pdflabs.com/tools/pdftk-the-pdf-toolkit/pdftk-2.02-1.el6.x86_64.rpm
rpm -ivh --nodeps libgcj-4.4.7-11.el6.x86_64.rpm
rpm -i pdftk-2.02-1.el6.x86_64.rpm
exit
- Fork the main repo.
- Clone your local repo.
git clone https://github.com/<your_username>/badgeyay.git - Create a virtual environment.
virtualenv -p python3 venv - Activate the virtual environment.
source activate venv - Go to badgeyay directory.
cd badgeyay - Install the requirements.
pip install -r requirements.txt - Run
python app/main.pyto start server.
- Remember:
python app/main.pyshould only be executed from root directory.
- Install Vagrant from Vagrant Download Page
- Install Virtualbox from Vitualbox Download Page
- Clone the project from
git clone https://github.com/<your_username>/badgeyay.git - Enter the directory using
cd badgeyay - In Terminal in the "badgeyay" directory, type
vagrant upto bring up the virtual machine. This will start installation of a ubuntu box within which the server will run with all its components. If after typing "vagrant up" you received an error stating “valid providers not found ...", typevagrant up --provider=virtualbox - After the installation is completed
sshinto vagrant environment usingvagrant ssh. This will bring you to the root directory of the Virtual Machine - Move to your project using
cd /vagrant - To Run the flask server you need to be in the "app" directory. Do
cd app - Run flask server in port
0.0.0.0export FLASK_APP=main.py python -m flask run --host=0.0.0.0 - Now your server is up and running. To view the badgeyay page go to localhost:8001
Badgeyay can be easily deployed on a variety of platforms. Currently it can be deployed in following ways.
One-click Heroku deployment is also available:
generate_badges.py creates svg files from the csv, png and
badges/8BadgesOnA3.svg.
merge_badges.py converts them into pdf files and merges them together into one.

