Node Assessment
Setup
- Run
npm installto install dependencies. - Create a file called
server.js. All of your server code and endpoints will be in this file. - Create a file called
usersCtrl.js. In this file you will write all of the functions for your endpoints.- Require the
userData.jsonfile in theusersCtrl.jsfile. - Don't forget to export the functions that you create in the
usersCtrl.jsfile.
- Require the
- Look at the
userData.jsonfile to get familiar with the data you will be using.
NOTE: You must use port 3000 during this assessment.
Import Postman tests
A file named node_assessment.postman_collection.json is inside the postman_testing folder. We will import this file in postman.
-
Open Postman.
-
In the top left corner, click on the
Importbutton. -
Make sure that
Import Fileis selected / underlined, then click onChoose Files.- You will need to select the
node_assessment.postman_collection.jsonfile (located in thepostman_testingfolder of this repo).
- You will need to select the
Running individual tests
-
As you create each endpoint, you can (and should) test the endpoint.
- Click on
Collectionson the left panel. - Expand the collection of tests by clicking on the
node_assessmentcollection.
NOTE: Each test name has a number after it that corresponds to a specific endpoint, which are numbered in the instructions. Most of the endpoints have multiple corresponding tests.
-
Click on the test you want to run. Click on the blue
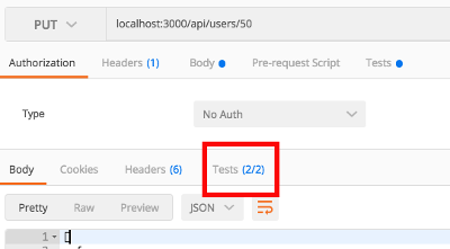
Sendbutton. The tests will automatically run when you send the request. -
Select
Teststo see what tests passed/failed.
NOTE: You need to be running
nodemonin order to successfully run the Postman tests.IMPORTANT: The Postman tests manipulate some of the user data. Before you run the Postman tests, you should restart nodemon. You can do this in the terminal while nodemon is running by typing
rsand then pressingenter. - Click on
Endpoints
Reminder: You must use port 3000 for this assessment.
Write your endpoints in server.js.
-
'GET' /api/usersRespond with the entire users array, with status 200.
This endpoint can be called with one of these queries, which you should be prepared to address:
-
age: Return all users who have an age less than this age.
-
lastname: Return all users whose last name matches.
-
email: Return all users whose email matches.
-
favorites: Return all users who have this favorite in their array of favorites.
- Example request URL:
localhost:3000/api/users?favorites=angular
- Example request URL:
-
-
'GET' /api/users/+ userIdThe tests will send a GET request with the userId as a parameter to this endpoint. Remember, request params will come as strings. If the user is found, respond with status 200 and send that user's object.
If no user was found, respond with a status of
404andnull.NOTE: You will need to use
.json()instead of.send()when sending justnull. -
'GET' /api/adminsRespond with status 200, and an array of all users who are admins.
-
'GET' /api/nonadminsRespond with status 200, and an array of all non-admin users.
-
'GET' /api/user_type/+ userTypeRespond with status 200, and an array of all users that match the
userTypeparameter. -
'PUT' /api/users/+ userIdA user's information will be sent in the request body. It will contain the same type of user information container in the other user objects. You should update the user object that has an ID matching the
userIdparameter.Return with status 200, and the entire array of user objects after you have updated the correct user object.
-
'POST' /api/usersA user's information will be sent in the request body. It will contain the same type of user information contained in the other user objects, except for the ID. You will need to add an ID to this user object before adding it to the users array.
The user IDs are sequential. If the last user object had an ID of 100, the new user object should have an ID of 101 and the next user object added should have an ID of 102, etc. The Postman tests will add multiple user objects and check the IDs.
You should return status 200 along with the entire array of user objects after the new user object has been added.
-
'DELETE' /api/users/+ userIdYou should remove the user with an ID matching the
userIdparameter. Return status 200 and the array of user objects after the correct user object has been removed from the array.
Running the test collection
To pass the assessment, you need to run the collection and have all tests pass
-
Select
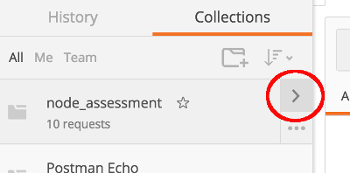
Collectionson the left panel of Postman (next to History). -
Next to the
node_assessmentcollection, click on the right arrow. -
Select the blue
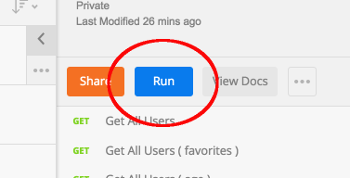
Runbutton. This will open up the collection runner. -
When you are ready to run the tests, select the blue
Start Testbutton at the bottom. When all tests have passed, show your mentor.NOTE: You need to be running
nodemonin order to successfully run the Postman tests.IMPORTANT: The Postman tests manipulate some of the user data. Before you run the Postman tests, you should restart nodemon. You can do this in the terminal while nodemon is running by typing
rsand then pressingenter.


