SQL-Assessment
Setup
- Run
npm installto install dependencies. - Look over the files included in this assessment.
- You should notice that you already have a node server set up for you.
- NOTE: Do not change the port. The Postman tests will only work on port
3000. - Create a database called
assessboxon your postgres server. - In
server.js, connect to theassessboxdatabase usingmassive.js(seeserver.js, line 13).
Users
Complete the unfinished create table statement in the user_create_seed.sql file. You need to add the datatype and/or constraints for each column.
Columns for users table:

id      should be an auto-incrementing number, primary key
name    should be a string
email   should be a string
The following data needs to be inserted into the users table. Complete the unfinished insert statement in user_create_seed.sql.
John Smith   -   Email: john@smith.com
Dave Davis   -   Email: dave@davis.com
Jan Janis    -   Email: jane@janis.com
Vehicles
Complete the unfinished create table statement in the vehicle_create_seed.sql file. You need to add the datatype and/or constraints for each column.
Columns for vehicles table:

id        should be an auto-incrementing number, primary key
make      should be a string
model     should be a string
year      should be a number
owner_id  should be a number, foreign key
The following data needs to be inserted into the vehicles table. Complete the unfinished insert statement in vehicle_create_seed.sql.
1991 Toyota Camry  -   Owner: John Smith
1995 Honda Civic   -   Owner: John Smith
2005 Ford Focus    -   Owner: John Smith
2003 Ford Taurus   -   Owner: Dave Davis
2010 VW Bug        -   Owner: Dave Davis
2013 Mini Cooper   -   Owner: Jane Janis
Import Postman tests
A file named sql_assessment.postman_collection.json is inside the postman_testing folder. We will import this file in postman.
-
Open Postman.
-
In the top left corner, click on the
Importbutton. -
Make sure that
Import Fileis selected / underlined, then click onChoose Files.- You will need to select the
sql_assessment.postman_collection.jsonfile (located in thepostman_testingfolder of this repo).
- You will need to select the
Running individual tests
-
As you create each endpoint, you can (and should) test the endpoint.
- Click on
Collectionson the left panel. - Expand the collection of tests by clicking on the
sql_assessmentcollection.
NOTE: Each test name has a number after it that corresponds to a specific endpoint, which are numbered in the instructions. The endpoints may have multiple corresponding tests.
-
Click on the test you want to run. Click on the blue
Sendbutton. The tests will automatically run when you send the request. -
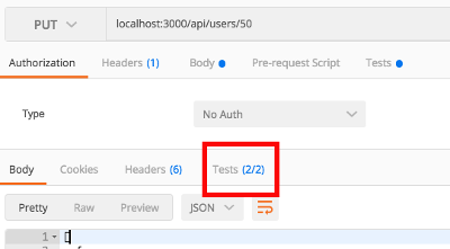
Select
Teststo see what tests passed/failed.
NOTE: You need to be running
nodemonin order to successfully run the Postman tests.IMPORTANT: The Postman tests manipulate some of the user/vehicle data. Before you run the Postman tests, you should restart nodemon. You can do this in the terminal while nodemon is running by typing
rsand then pressingenter. - Click on
Endpoints & Queries
GOTCHA: It's important to know that express converts values passed into and accessed off of 'params' into strings. This might not match the data types you set in your schema and will result in errors if they don't.
HINT: You may need to use the RETURNING clause, which causes an INSERT, UPDATE, or DELETE statement to compute and return a value based on what was inserted, updated, or deleted. Example:
DELETE FROM cookies_table
WHERE cookie_name = 'raisin'
RETURNING *;
-
Create an endpoint at
GET '/api/users'that will query the database and get all users. -
Create an endpoint at
GET '/api/vehicles'that will query the database and get all vehicles. -
Create an endpoint at
POST '/api/users'that will take a user from the body and add them to the database.- Use the
RETURNINGclause to return the added user information.
- Use the
-
Create an endpoint at
POST '/api/vehicles'that will take a vehicle from the body and add it to the database.- Use the
RETURNINGclause to return the added vehicle information.
- Use the
-
Create an endpoint at
GET '/api/user/:userId/vehiclecount'that will return a count of how many vehicles belong to the given user.- Response should be an object with a count property, ie:
{ count: 1 }
- Response should be an object with a count property, ie:
-
Create an endpoint at
GET '/api/user/:userId/vehicle'that will find all vehicles that belong to the user with the provided users id. -
Create an endpoint at
GET '/api/vehicle'that will find all vehicles that belong to the user with the provided user's email.- The users email will be send on the request url as a query. Example:
?userEmail=[user email]
- The users email will be send on the request url as a query. Example:
-
Use the above endpoint to also handle the query
?userFirstStart=[letters]to get all vehicles for any user whose first name starts with the provided letters. -
Create an endpoint at
GET '/api/newervehiclesbyyear'that gets all vehicles newer than 2000 and sorted by year with the newest car first. Include the owner's name from the users table. -
Create an endpoint at
PUT '/api/vehicle/:vehicleId/user/:userId'that changes the ownership of the provided vehicle using the new owner's user id (userId param).- Use the
RETURNINGclause to return the updated vehicle information.
- Use the
-
Create an endpoint at
DELETE '/api/user/:userId/vehicle/:vehicleId'that removes ownership of that vehicle from the provided user, but does not delete the vehicle.- Use the
RETURNINGclause to return the updated vehicle information.
- Use the
-
Create an endpoint at
DELETE '/api/vehicle/:vehicleId'that deletes the specified vehicle.- Use the
RETURNINGclause to return the removed vehicle information.
- Use the
Running the test collection
To pass the assessment, you need to run the collection and have all tests pass.
-
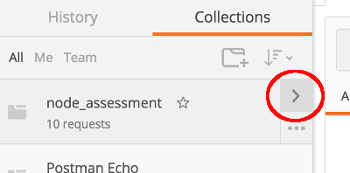
Select
Collectionson the left panel of Postman (next to History). -
Next to the
sql_assessmentcollection, click on the right arrow. -
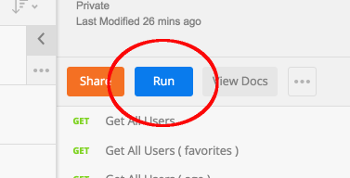
Select the blue
Runbutton. This will open up the collection runner. -
When you are ready to run the tests, select the blue
Start Testbutton at the bottom. When all tests have passed, show your mentor.NOTE: You need to be running
nodemonin order to successfully run the Postman tests.IMPORTANT: The Postman tests manipulate some of the user data. Before you run the Postman tests, you should restart nodemon. You can do this in the terminal while nodemon is running by typing
rsand then pressingenter.


