An Expenditure Accountability App
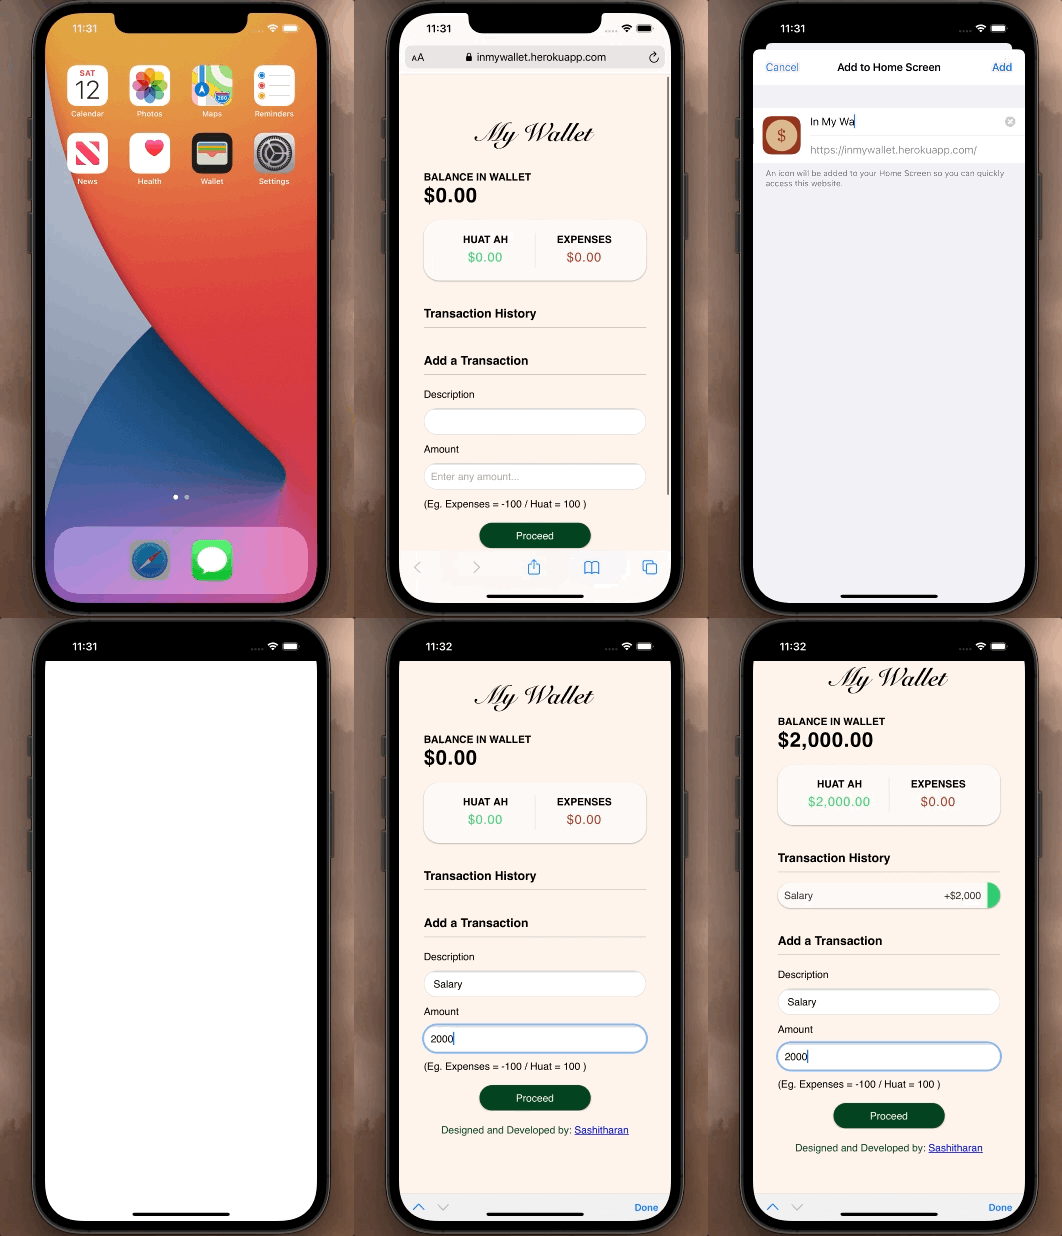
React Web App (Heroku)
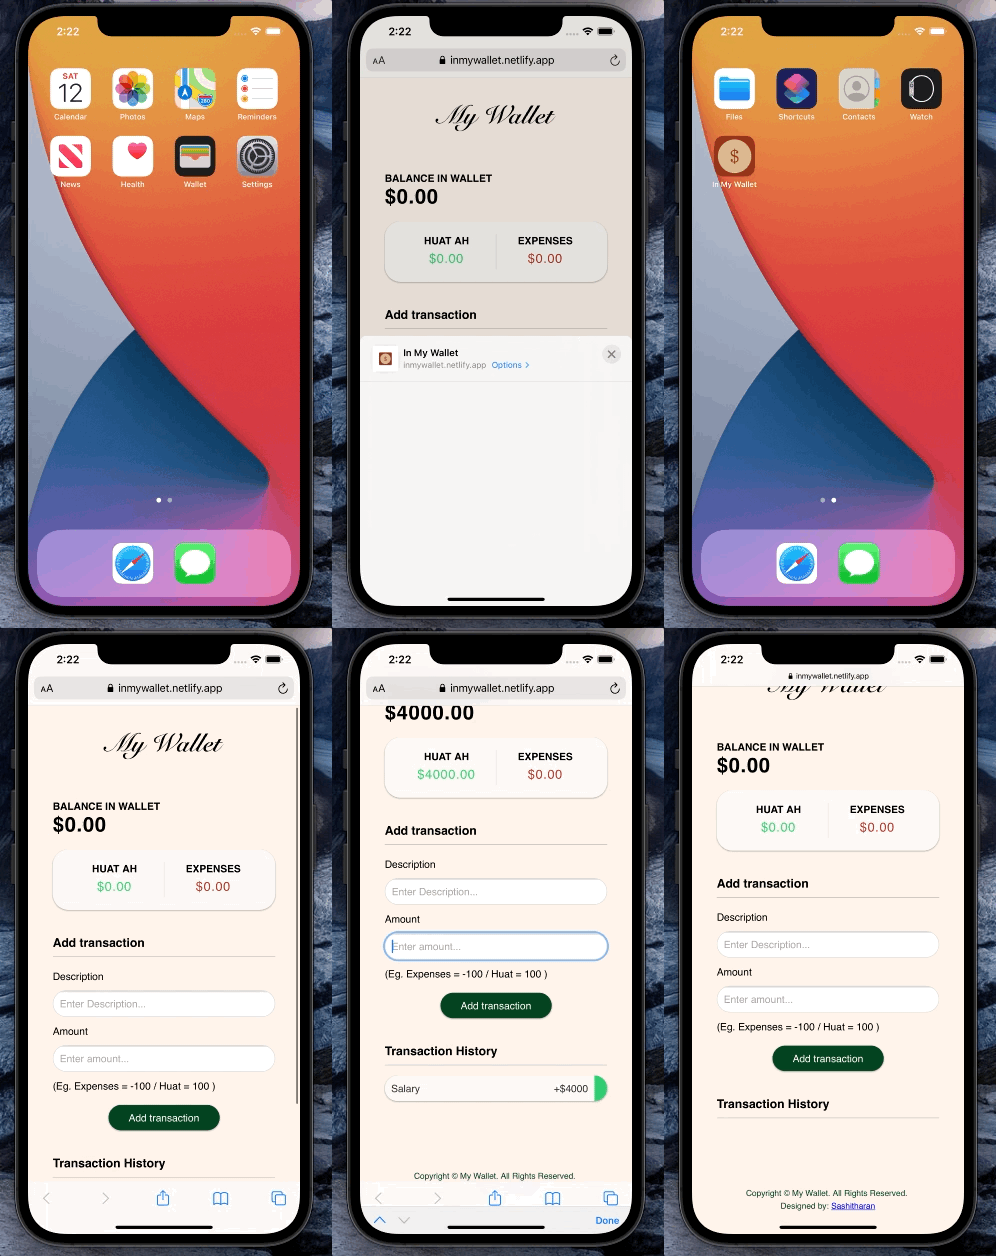
Static Web App (Netlify)
Table of Contents
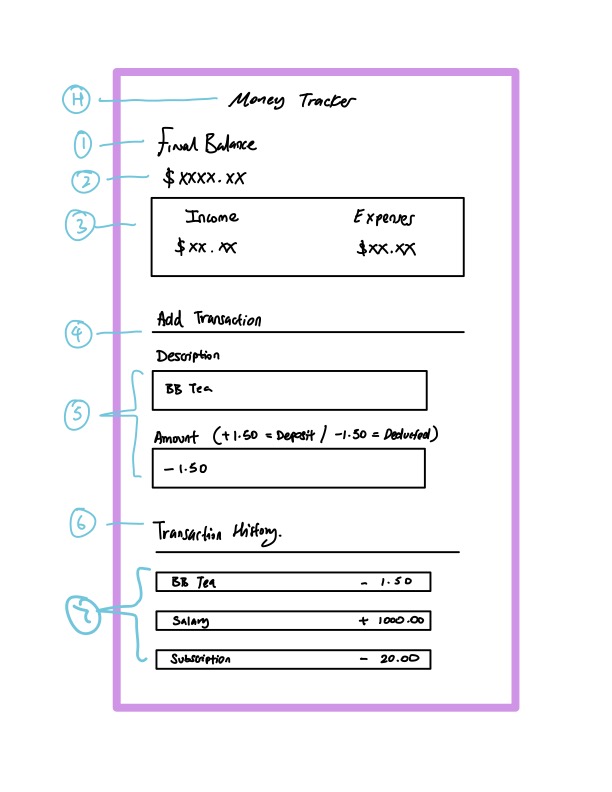
I decided to create a simple tracker to track my expenses as i'm starting to lose track of my spendings. This app is straightforward, nothing fancy and serves it deep purpose of being a tracker.
My idea behind this:
- Your time should be focused on creating something amazing. A project that solves a problem and helps others (including myself)
- Simple minimalistic UI design to be straightforward as possible.
- Utilised a Web application in order to serve people who are not familiar with utilising an App store (Older Gen) to download applications.
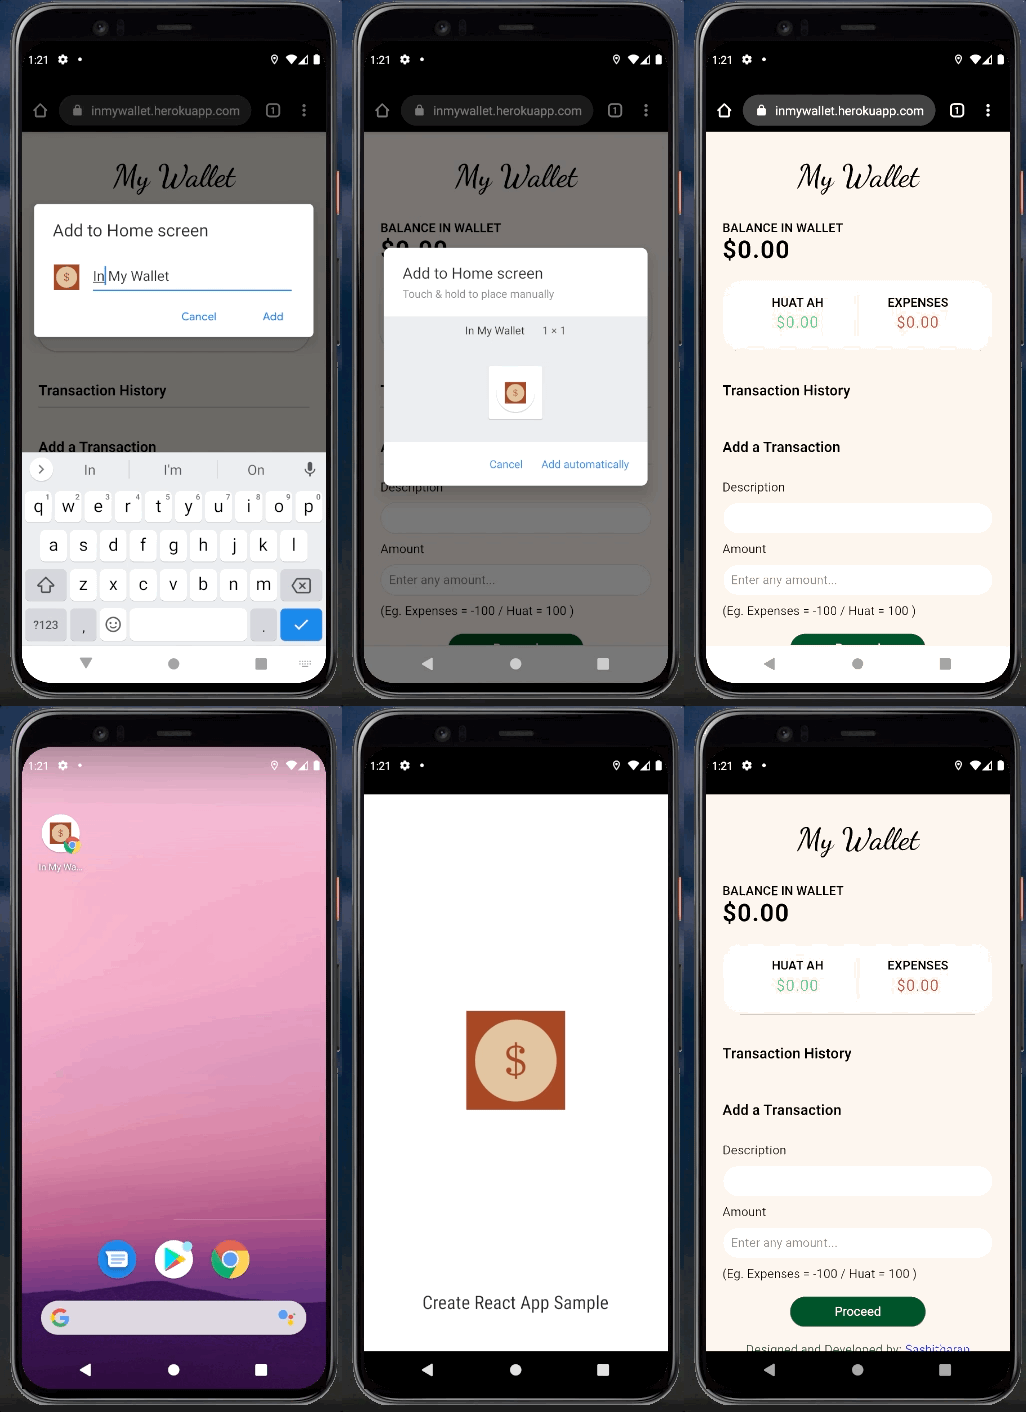
- Can be used on all mobile platforms including the common Android OS and iOS
Netlify Version: Try me!
The webapp comes with a backend server and a database to store the data. However, the web app has no authentication features to identify the individual who is using the app. This means that anyone can see your data being uploaded into the wallet app. Hence, if you are planning to use this app subjectively, do use the static web uploaded onto netlify ((click here!)) as the data will be stored in your own browser storage and can be used personally.
The react web app was made to enhance the static web app into a react web app. Just for experience purposes.
Some of the technologies used in the development of this web application are as follow:
- HTML - A markup language to display material retrieved over the net.
- CSS - Style sheets used to format the layout of Web page.
- React Js - React.js: A JavaScript library for building user interfaces.
- Node Js - A runtime environment to help build fast server applications using JS.
- Express Js - A popular Node.js framework to build scalable server-side for web applications.
- MongoDB - It provides a free cloud service to store MongoDB collections.
- Heroku - A platform(PaaS) to deploy full stack web applications for free.
- Mongoose: An ODM(Object Data Modelling)library for MongoDB and Node.js
- JSON Web Tokens or JWTs: A standard to securely authenticate HTTP requests
- Bootstrap 4: A popular framework for building responsive, mobile-first sites.
To get a local copy up and running follow these simple example steps.
- npm
npm install npm@latest -g
- Clone the repo
git clone https://github.com/sashitharan/expenditure-accountability-app.git
- Install NPM packages
npm install
- Change config.env file in config folder in
config.envMONGO_URI = 'ENTER YOUR URI';
cd frontend
npm install
cd .. (Go back to root)

# Run frontend and backend concurrently
npm run dev

# Backend only
npm run server

# Frontend only
npm run client
Remember to do this whenever you make changes in the frontend as i did not incorporate the server to npm run build
cd frontend
npm run build
To make the server run the build command:
cd .. (go to root)
Go to package.json
edit heroku postbuild to:
"heroku-postbuild": "npm run install-client && npm run build",Remember to change environment variable in config.env fileto 'production' or 'development'
NODE_ENV = production;Once in Production
npm start
Distributed under the MIT License. See LICENSE for more information.
Lets Connect - @Sashitharan - sarsheyy@gmail.com
Project Link: https://github.com/sashitharan/expenditure-accountability-app
Web Application Link: https://inmywallet.herokuapp.com/


