IVR stands for Interactive Voice Response. It is a technology that enables a computer system to interact with callers through voice and DTMF (Dual-Tone Multi-Frequency) keypad inputs. IVR systems are widely used for automating telephony services, allowing customers to access information or navigate through menus without the need for a human operator.
With this integration you will be able to run your Voiceflow Assistant with Twilio Voice service. The main feature covered in the code are:
- Interaction with Voiceflow Dialog API
- SMS (Send an SMS to the user using {user_id})
- Call (HandOff)
- Twilio account
- Voiceflow Assistant project
- Replit account (not required if you run the code locally)
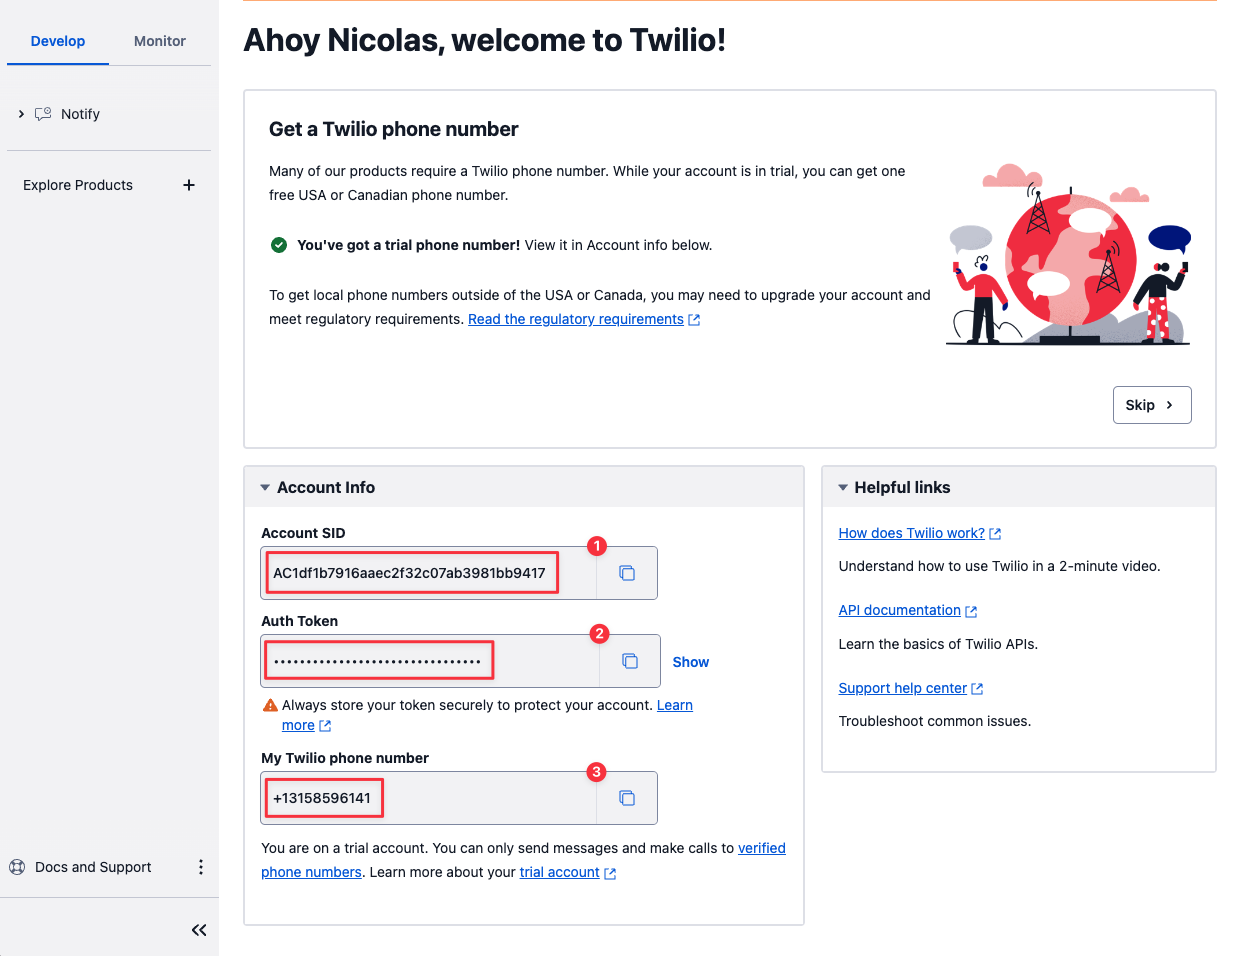
Go to to https://console.twilio.com to create your account You will be granted with a trial you can use for this demo
If you haven’t done already or if you’ve just created your account you will need to get a Twilio phone number. On the console page, click on Get a Twilio phone number button.
When done, you will need to copy and save for later your Account SID, your Auth Token and your Twilio phone number.
You should now have: an Account SID an Auth Token a Twilio phone number
Go to Voiceflow Creator and open the Assistant project you want to use.
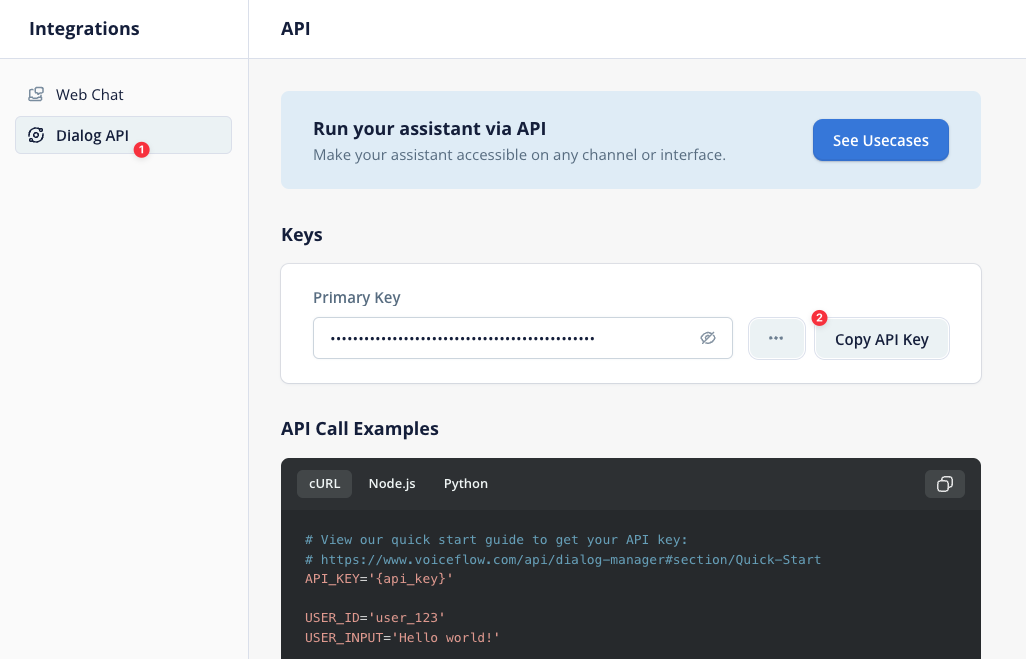
On your Assistant, click on Integration from the left sidebar (or press the 6 key)
Click Copy API Key to copy your Voiceflow Dialog API Key and save it for later.
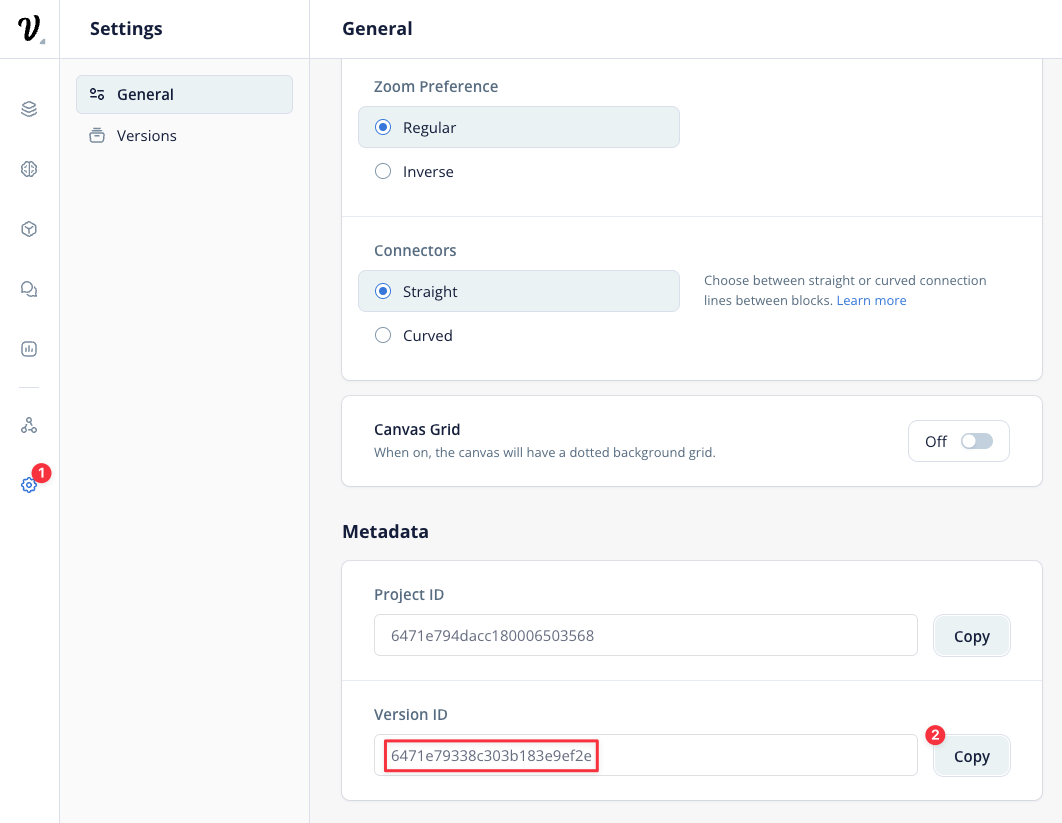
If you want to save Transcripts, you will also need your Assistant version ID. You can find it in your Assistant settings:
You should now have: an API Key a Version ID
Start by forking the project form this link: Fork on Replit
https://replit.com/@niko-voiceflow/voiceflow-twilio-ivr?v=1
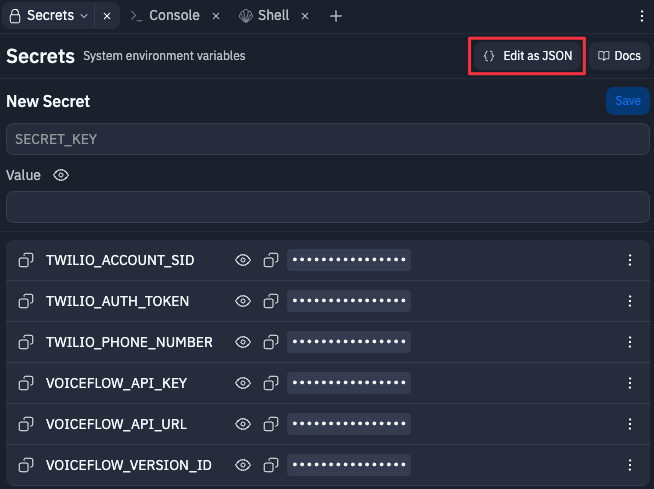
Set new Secrets with the following info
TWILIO_ACCOUNT_SID
Your Twilio Account SID
TWILIO_AUTH_TOKEN
Your Twilio Auth Token
TWILIO_PHONE_NUMBER
Your Twilio phone number
VOICEFLOW_API_URL Voiceflow Dialog API endpoint (default to general runtime)
VOICEFLOW_API_KEY Voiceflow project API key (from the Integration section)
VOICEFLOW_VERSION_ID Voiceflow project version ID (only for transcripts, default to 'production')
VOICEFLOW_PROJECT_ID Voiceflow project ID (only for transcripts, default to null)
RESET_STATE Set this to TRUE if you want to reset state after each call.
In the Secrets tab, you can click on Edit as JSON button and paste the following JSON (do not forget to update the keys values):
{
	"TWILIO_ACCOUNT_SID": "XXX",
	"TWILIO_AUTH_TOKEN": "XXX",
	"TWILIO_PHONE_NUMBER": "+13158596141",
	"VOICEFLOW_API_URL": "https://general-runtime.voiceflow.com",
	"VOICEFLOW_API_KEY": "VF.DM.XXX",
	"VOICEFLOW_VERSION_ID": "XXX",
	"VOICEFLOW_PROJECT_ID": "XXX",
	"RESET_STATE": "FALSE"
}
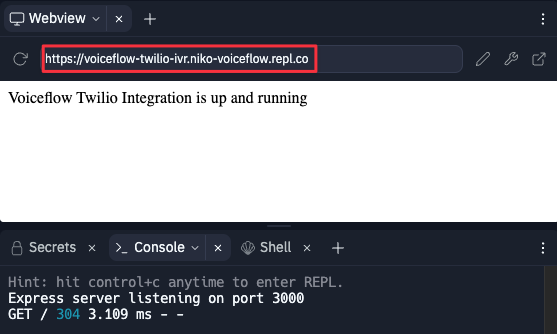
Once forked and updated with the Secrets, run your app and check the Console
The Webview tab should be visible with a confirmation telling you that the integration is running. You need to copy the URL of your endpoint to setup your webhook in Twilio.
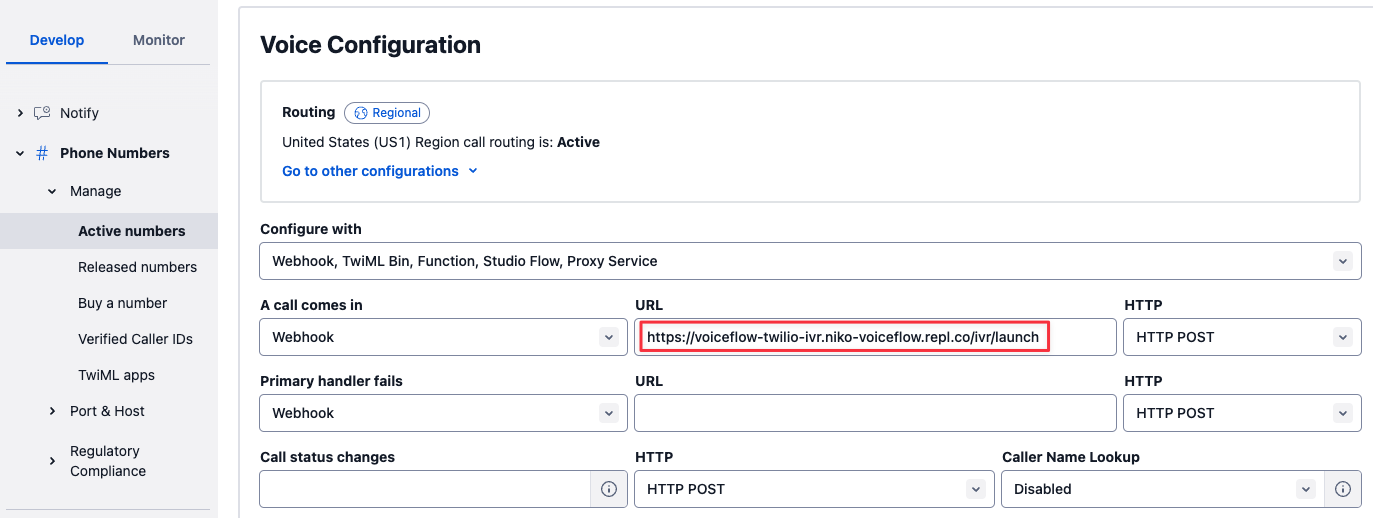
Back on Twilio, in the Phone Numbers service > Active numbers, paste your repl endpoint in the webhook URL field and add the /ivr/launch path to it.
As an example, mine looks like this:
https://voiceflow-twilio-ivr.niko-voiceflow.repl.co/ivr/launchDo not forget to save your configuration
You’re now ready! You can import the Twilio_IVR_Demo-2024-05-31_11-10.vf file in Voiceflow to test it. Simply call your Twilio number and start interacting with your Assistant.
We’ve also made a video to explain how to created, setup and use the Custom Action steps in your Assistant to handle DTMF, make a call or send an SMS.
SOON


