Generate server certificates in certs folder for fuf.me server using mkcert, this domain will point to 127.0.0.1
$> chmod +x k3d-cluster
$> ./k3d-cluster
This will install all software needed if is not present on your system and guide you in cluster creation.
Software instaled if not exist:
- Docker
- k3d
- kubectl
- helm
The cluster will created using k3d with the following features:
- Kubernetes cluster with n Server and m Agents
- Host directory mounted as PersistentVolume (k3d-pv)
- Ingress Nginx with custom certificates [optional]
- Kubernetes Dashboard [optional]
- Prometheus and Grafana [optional]
All passwords and info needed will be displayed in terminal.
Enjoy Kubernetes!
$> ./k3d-cluster
Cluster Name [k3d-cluster]:
Cluster Domain [fuf.me]:
API Port [6443]:
Servers (Masters) [1]:
Agents (Workers) [1]: 2
LoadBalancer HTTP Port [80]:
LoadBalancer HTTPS Port [443]:


Deleting Previous Cluster
-------------------------------------
INFO[0000] No clusters found
-------------------------------------


Creating K3D cluster
-------------------------------------
INFO[0000] Using config file tmp-k3d-k3d-cluster.yaml
INFO[0000] Prep: Network
INFO[0000] Created network 'k3d-k3d-cluster'
INFO[0000] Created volume 'k3d-k3d-cluster-images'
INFO[0001] Creating node 'k3d-k3d-cluster-server-0'
INFO[0001] Creating node 'k3d-k3d-cluster-agent-0'
INFO[0001] Creating node 'k3d-k3d-cluster-agent-1'
INFO[0001] Creating LoadBalancer 'k3d-k3d-cluster-serverlb'
INFO[0001] Starting cluster 'k3d-cluster'
INFO[0001] Starting servers...
INFO[0001] Starting Node 'k3d-k3d-cluster-server-0'
INFO[0007] Starting agents...
INFO[0007] Starting Node 'k3d-k3d-cluster-agent-0'
INFO[0015] Starting Node 'k3d-k3d-cluster-agent-1'
INFO[0023] Starting helpers...
INFO[0023] Starting Node 'k3d-k3d-cluster-serverlb'
INFO[0025] (Optional) Trying to get IP of the docker host and inject it into the cluster as 'host.k3d.internal' for easy access
INFO[0030] Successfully added host record to /etc/hosts in 4/4 nodes and to the CoreDNS ConfigMap
INFO[0030] Cluster 'k3d-cluster' created successfully!
INFO[0030] --kubeconfig-update-default=false --> sets --kubeconfig-switch-context=false
INFO[0030] You can now use it like this:
kubectl config use-context k3d-k3d-cluster
kubectl cluster-info
Switched to context "k3d-k3d-cluster".
Kubernetes control plane is running at https://0.0.0.0:6443
CoreDNS is running at https://0.0.0.0:6443/api/v1/namespaces/kube-system/services/kube-dns:dns/proxy
Metrics-server is running at https://0.0.0.0:6443/api/v1/namespaces/kube-system/services/https:metrics-server:/proxy

To further debug and diagnose cluster problems, use 'kubectl cluster-info dump'.
-------------------------------------


Provisioning Persistent Volume
-------------------------------------
persistentvolume/k3d-pv created
Name:            k3d-pv
Labels:          type=local
Annotations:     <none>
Finalizers:      [kubernetes.io/pv-protection]
StorageClass:    manual
Status:          Available
Claim:
Reclaim Policy:  Retain
Access Modes:    RWO
VolumeMode:      Filesystem
Capacity:        50Gi
Node Affinity:   <none>
Message:
Source:
    Type:          HostPath (bare host directory volume)
    Path:          /tmp/k3dvol
    HostPathType:
Events:            <none>
-------------------------------------
Install Ingress? (Yes/No) [Yes]:


Instaling Ingress
-------------------------------------
namespace/ingress created
secret/nginx-server-certs created
NAME: ingress
LAST DEPLOYED: Tue Mar  9 19:30:47 2021
NAMESPACE: ingress
STATUS: deployed
REVISION: 1
TEST SUITE: None
NOTES:
** Please be patient while the chart is being deployed **

The nginx-ingress controller has been installed.

Get the application URL by running these commands:

 NOTE: It may take a few minutes for the LoadBalancer IP to be available.
        You can watch its status by running 'kubectl get --namespace ingress svc -w ingress-nginx-ingress-controller'

    export SERVICE_IP=$(kubectl get svc --namespace ingress ingress-nginx-ingress-controller -o jsonpath='{.status.loadBalancer.ingress[0].ip}')
    echo "Visit http://${SERVICE_IP} to access your application via HTTP."
    echo "Visit https://${SERVICE_IP} to access your application via HTTPS."

An example Ingress that makes use of the controller:

  apiVersion: extensions/v1beta1
  kind: Ingress
  metadata:
    annotations:
      kubernetes.io/ingress.class: nginx
    name: example
    namespace: foo
  spec:
    rules:
      - host: www.example.com
        http:
          paths:
            - backend:
                serviceName: exampleService
                port: 80
              path: /
    # This section is only required if TLS is to be enabled for the Ingress
    tls:
        - hosts:
            - www.example.com
          secretName: example-tls

If TLS is enabled for the Ingress, a Secret containing the certificate and key must also be provided:

  apiVersion: v1
  kind: Secret
  metadata:
    name: example-tls
    namespace: foo
  data:
    tls.crt: <base64 encoded cert>
    tls.key: <base64 encoded key>
  type: kubernetes.io/tls
-------------------------------------


LoadBalancer info:
-------------------------------------
NAME                                               TYPE           CLUSTER-IP     EXTERNAL-IP   PORT(S)                      AGE
ingress-nginx-ingress-controller                   LoadBalancer   10.43.22.225   <pending>     80:31286/TCP,443:31747/TCP   5s
-------------------------------------
Install Dashbard? (Yes/No) [No]:
Install Prometheus? (Yes/No) [No]:$ curl -L -o ./install-docker.sh "https://get.docker.com"
$ chmod +x ./install-docker.sh
$ ./install-docker.sh
$ sudo usermod -aG docker $USERFirs install k3d on your system with:
$ curl -s https://raw.githubusercontent.com/rancher/k3d/main/install.sh | bashAlso need install kubernetes client in order to manage cluster
$ curl -LO "https://storage.googleapis.com/kubernetes-release/release/$(curl -s https://storage.googleapis.com/kubernetes-release/release/stable.txt)/bin/linux/amd64/kubectl"
$ chmod +x ./kubectl
$ sudo mv ./kubectl /usr/local/bin/kubectl
$ kubectl version --clientDue we will use helm for some deploymens is recomended you also install it.
$ curl -fsSL -o get_helm.sh https://raw.githubusercontent.com/helm/helm/master/scripts/get-helm-3
$ chmod +x ./get_helm.sh
$ ./get_helm.shThis tool is not mandatory, but helps to inspect cluster without install kubernetes dashboard
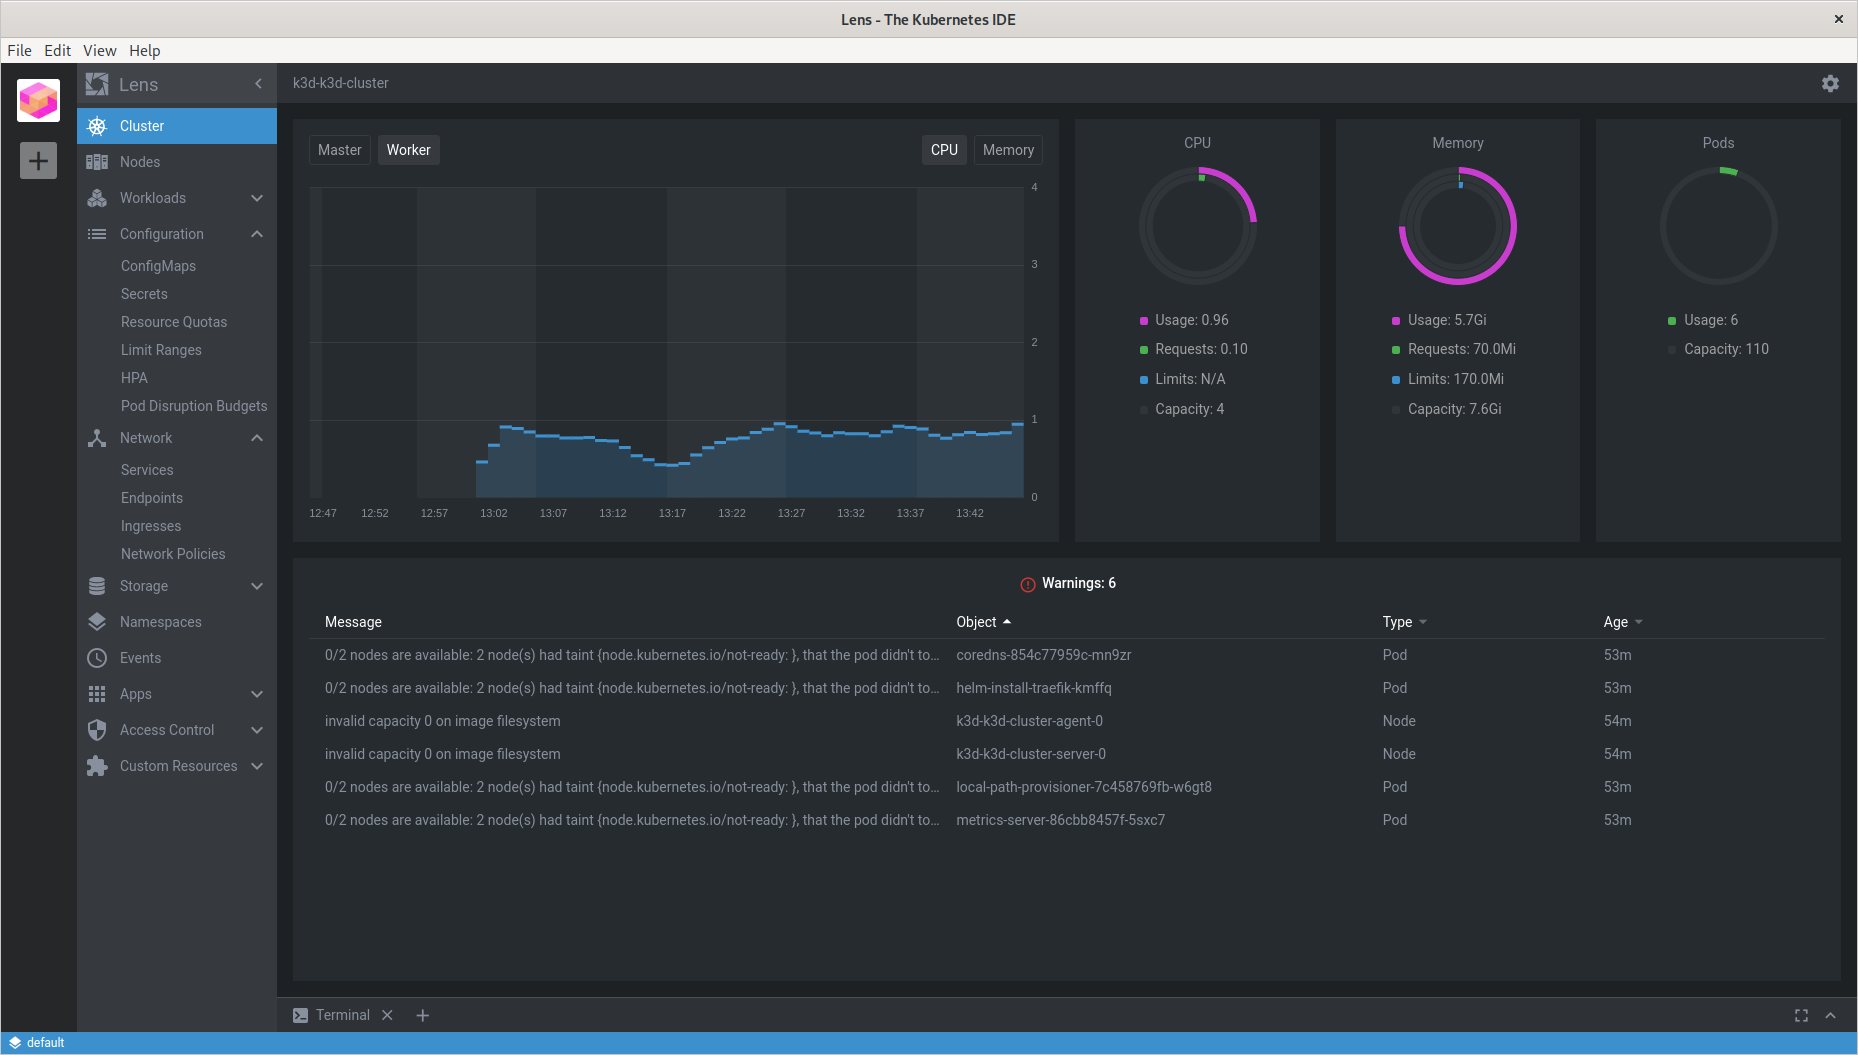
just go to https://k8slens.dev/ and download it for your system
This tool make use of Prometheus if is avaliable in cluster for it's metris.
You can install Prometheus using k3d-cluster, by your own (see below) or using Lens if you skip this step before.
Just do right click in cluster icon on left, and choose Settings in popup menu. This will lead to Settings Page. In Settings Page in Features, Metrics Stack, click on Install button. This will start prometheus deployment in cluster
Crete a directory in your host where Kubernetes cluster will be persist data
k3d-cluster will be mount the directory ./k3dvol for all cluster nodes in /tmp/k3dvol directory. This means all nodes share it as persistence volume where you can store your persitent data.
Once cluster is created, you can create PersitentVolume pointing the volumen mounted with
apiVersion: v1
kind: PersistentVolume
metadata:
  name: k3d-pv
  labels:
    type: local
spec:
  storageClassName: manual
  capacity:
    storage: 50Gi
  accessModes:
    - ReadWriteOnce
  hostPath:
path: "/tmp/k3dvol"$> kubectl apply -f ./examples/pv/k3d-pv.yamland use it in PersitentVolumeClaim
NOTE: Master and Workers nodes are renamed to Server and Agents resp.
Create a Kubernetes Cluster. For this sample will keep cluster simple but you can set "any number" of agents and workers, the limits is comon sense and your memory.
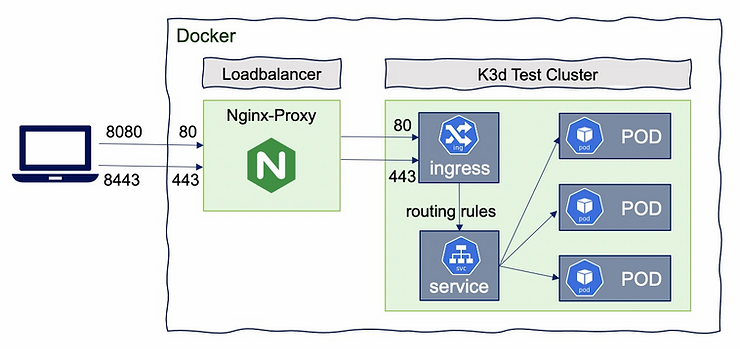
Note that we are pointing port 443 on host to Cluster Load Balancer's 443 port. If you want use http you can use port 80.
$ k3d cluster create dev-cluster \
--api-port 6443 \
--port 8443:443@loadbalancer  \
--port 8080:80@loadbalancer \
--volume $(pwd)/k3dvol:/tmp/k3dvol \
--servers 1 --agents 1-
--port 8080:80@loadbalancerwill add a mapping of local host port 8080 to loadbalancer port 80, which will proxy requests to port 80 on all agent nodes -
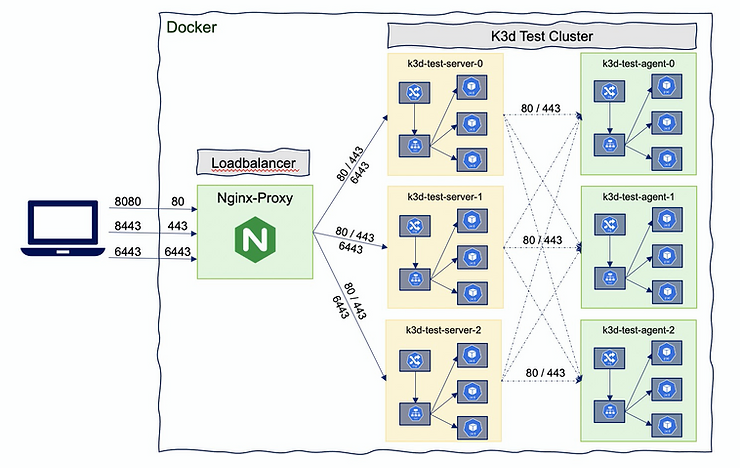
--api-port 6443: by default, no API-Port is exposed (no host port mapping). It’s used to have k3s‘s API-Server listening on port 6553 with that port mapped to the host system. So that the load balancer will be the access point to the Kubernetes API, so even for multi-server clusters, you only need to expose a single api port. The load balancer will then take care of proxying your requests to the appropriate server node -
--port "32000-32767:32000-32767@loadbalancer"You may as well expose a NodePort range (if you want to avoid the Ingress Controller). Warning: Map a wide range of ports can take a certain amount of time, and your computer can freeze for some time in this process.
K3D allow create cluster using configuration files
k3d cluster create --config cluster-configuration.yamlwhere cluster-configuration.yaml
apiVersion: k3d.io/v1alpha2
kind: Simple
name: test-cluster
servers: 3
agents: 2
kubeAPI:
  hostIP: "0.0.0.0"
  hostPort: "6446"
image: rancher/k3s:latest
volumes:
  - volume: /my/path:/some/path
    nodeFilters:
      - all
ports:
  - port: 80:80
    nodeFilters:
      - loadbalancer
  - port: 0.0.0.0:443:443
    nodeFilters:
      - loadbalancer
env:
  - envVar: bar=baz
    nodeFilters:
      - all
labels:
  - label: foo=bar
    nodeFilters:
      - server[0]
      - loadbalancer
registries:
  create: true
  use: []
  config: |
    mirrors:
      "my.company.registry":
        endpoint:
          - http://my.company.registry:5000

options:
  k3d:
    wait: true
    timeout: "360s" # should be pretty high for multi-server clusters to allow for a proper startup routine
    disableLoadbalancer: false
    disableImageVolume: false
  k3s:
    extraServerArgs:
      - --tls-san=127.0.0.1
#      - --no-deploy=traefik
#      - --flannel-backend=none
    extraAgentArgs: []
  kubeconfig:
    updateDefaultKubeconfig: true
switchCurrentContext: trueOnce cluster is created we can start, stop or even delete them
$ k3d cluster start <cluster-name>
$ k3d cluster stop <cluster-name>
$ k3d cluster delete <cluster-name>`$ k3d node ls
NAME ROLE CLUSTER STATUS
k3d-k3d-cluster-agent-0 agent k3d-cluster running
k3d-k3d-cluster-agent-1 agent k3d-cluster running
k3d-k3d-cluster-server-0 server k3d-cluster running
k3d-k3d-cluster-serverlb loadbalancer k3d-cluster runningCreate new nodes (and add them to existing clusters)
$ k3d node create <nodename$ --cluster <cluster-name$ --role <agent/server>To delete nodes just use:
$ k3d node delete <nodename>Example
$ k3d node ls
NAME                       ROLE           CLUSTER       STATUS
k3d-k3d-cluster-agent-0    agent          k3d-cluster   running
k3d-k3d-cluster-agent-1    agent          k3d-cluster   running
k3d-k3d-cluster-server-0   server         k3d-cluster   running
k3d-k3d-cluster-serverlb   loadbalancer   k3d-cluster   running
$ k3d node create my-new-agent-node --cluster k3d-cluster --role agent
INFO[0000] Starting Node 'k3d-my-new-agent-node-0'
$ k3d node ls
NAME ROLE CLUSTER STATUS
k3d-k3d-cluster-agent-0 agent k3d-cluster running
k3d-k3d-cluster-agent-1 agent k3d-cluster running
k3d-k3d-cluster-server-0 server k3d-cluster running
k3d-k3d-cluster-serverlb loadbalancer k3d-cluster running
k3d-my-new-agent-node-0 agent k3d-cluster running
$ k3d node delete k3d-my-new-agent-node-0
INFO[0000] Deleted k3d-my-new-agent-node-0
$ k3d node ls
NAME ROLE CLUSTER STATUS
k3d-k3d-cluster-agent-0 agent k3d-cluster running
k3d-k3d-cluster-agent-1 agent k3d-cluster running
k3d-k3d-cluster-server-0 server k3d-cluster running
k3d-k3d-cluster-serverlb loadbalancer k3d-cluster running
Also can just stop or start nodes previously created with
$ k3d node start <nodename>
$ k3d node stop <nodename>
k3d create/start/stop/delete node mynode
Create or delete a local kubernetes internal registry
$ k3d registry create REGISTRY_NAME
$ k3d registry delete REGISTRY_NAMEK3D uses Traefik 1.x versios as Ingress controler, due Traefik 2.x is enough mature and provide more functionalities we need do some extra work to use Traefik.
First we create a new file helm-ingress-traefik.yaml
# see https://rancher.com/docs/k3s/latest/en/helm/
# see https://github.com/traefik/traefik-helm-chart
apiVersion: helm.cattle.io/v1
kind: HelmChart
metadata:
  name: ingress-controller-traefik
  namespace: kube-system
spec:
  repo: https://helm.traefik.io/traefik
  chart: traefik
  version: 9.8.0
  targetNamespace: kube-system
Now we can create a new cluster telling to k3d not deploy traefik with
--k3s-server-arg '--no-deploy=traefik' and use previous helm chart defined to deploy new Traefik Ingress Controler
--volume "$(pwd)/helm-ingress-traefik.yaml:/var/lib/rancher/k3s/server/manifests/helm-ingress-traefik.yaml"
$ k3d cluster create traefik --k3s-server-arg '--no-deploy=traefik' --volume "$(pwd)/helm-ingress-traefik.yaml:/var/lib/rancher/k3s/server/manifests/helm-ingress-traefik.yaml"This instalation script k3d-cluster, not install ingress by default, but provide an option (enabled by default) to install bitnami/ingress-nginx chart and set default ingress certificates.
Those certificates are provided in certs folder.
Use mkcert to create your own CA and generate your own certificates
Create your own CA
$> mkcert -installCreate a signed certificate for your cluster
$> cd certs
$> mkcert fuf.me "*.fuf.me" fuf.me
Create a signed certificate for multiple domains
$> mkcert fuf.me "*.fuf.me" fuf.me "*.vcap.me" vcap.me \
"*.localtest.me" localtest.me "*.yoogle.com" yoogle.com \
"*.lvh.me" lvh.me "*.bret.lol" bret.lol
All these domains points to 127.0.0.1
With mkcert you can create certificates for multiple wildcard domains.
You always can add new domain certificates to ingress to override default cluster
create a new cert for your cluster
$> mkcert 192.168.1.10.xip.io "*.192.168.1.10.xip.io" 192.168.1.10.xip.ioCreate a secret in namespace where deploy ingress to store certificate
$> $> kubectl create secret tls xip-server-certs --key 192.168.1.10.xip.io.key --cert 192.168.1.10.xip.io.pemUse the certificate at Ingress deployment
apiVersion: networking.k8s.io/v1
kind: Ingress
metadata:
  name: nginx
  annotations:
    ingress.kubernetes.io/ssl-redirect: "true"
spec:
  tls:
    - hosts:
      - "nginx.192.168.1.10.xip.io.pem"
    - secretName: xip-server-certs
  rules:
    - host: "nginx.192.168.1.10.xip.io.pem"
      http:
        paths:
          - path: /
            pathType: Prefix
            backend:
              service:
                name: nginx
                port:
number: 80Use cert-manager to manage your cluster certificates in a more eficient way and manage diferent issuers to generete certifcates.
By default k3d add cluster to ~/.kube/config file.
We can choose default cluster with
$ kubectl config use-context k3d-<cluster-name>or setting KUBECONFIG enviroment
$ export KUBECONFIG=$(k3d kubeconfig write <cluster-name>)K3D provide some commands to manage kubeconfig
get kubeconfig from cluster dev
$ k3d kubeconfig get <cluster-name>create a kubeconfile file in $HOME/.k3d/kubeconfig-dev.yaml
$ kubeconfig write <cluster-name>get kubeconfig from cluster(s) and merge it/them into a file in $HOME/.k3d or another file
$ k3d kubeconfig merge ...Deploy kuebernetes dashboard with
$ kubectl config use-context k3d-<cluster-name>
$ kubectl apply -f https://raw.githubusercontent.com/kubernetes/dashboard/v2.0.0/aio/deploy/recommended.yaml
Now we need create a dashboard acount and bind this acount to cluster-admin-role
$ kubectl create serviceaccount dashboard-admin-sa
$ kubectl kubectl create clusterrolebinding dashboard-admin-sa --clusterrole=cluster-admin --serviceaccount=default:dashboard-admin-sa
after create this user get user token with
$ kubectl describe secret $(kubectl get secrets | grep ashboard-admin-sa | awk '{ print $1 }')
Name:         dashboard-admin-sa-token-bcf79
Namespace:    default
Labels:       <none>
Annotations:  kubernetes.io/service-account.name: dashboard-admin-sa
              kubernetes.io/service-account.uid: 96418a0c-60bd-4eab-aff9-4df4c6c46408

Type:  kubernetes.io/service-account-token

Data
====
ca.crt:     570 bytes
namespace:  7 bytes
token:      eyJhbGciOiJSUzI1NiIsImtpZCI6IjNDVFdKdVBZNndaVk5RWkh6dUxCcVRJVGo4RlQwUjFpWHg4emltTXlxRGsifQ.eyJpc3MiOiJrdWJlcm5ldGVzL3NlcnZpY2VhY2NvdW50Iiwia3ViZXJuZXRlcy5pby9zZXJ2aWNlYWNjb3VudC9uYW1lc3BhY2UiOiJkZWZhdWx0Iiwia3ViZXJuZXRlcy5pby9zZXJ2aWNlYWNjb3VudC9zZWNyZXQubmFtZSI6ImRhc2hib2FyZC1hZG1pbi1zYS10b2tlbi1iY2Y3OSIsImt1YmVybmV0ZXMuaW8vc2VydmljZWFjY291bnQvc2VydmljZS1hY2NvdW50Lm5hbWUiOiJkYXNoYm9hcmQtYWRtaW4tc2EiLCJrdWJlcm5ldGVzLmlvL3NlcnZpY2VhY2NvdW50L3NlcnZpY2UtYWNjb3VudC51aWQiOiI5NjQxOGEwYy02MGJkLTRlYWItYWZmOS00ZGY0YzZjNDY0MDgiLCJzdWIiOiJzeXN0ZW06c2VydmljZWFjY291bnQ6ZGVmYXVsdDpkYXNoYm9hcmQtYWRtaW4tc2EifQ.sfnBn4BWTpMK8_jd7EL-G2HvWSE7unW1lqsQ27DMT1D0WpuOQ-o1cEkrEqXFvXIYW8b7ciVcuNHhtQuWswmPbfQ6C8X_d1vbdpXoopVLPvkuHpFTbNMKtagBWJQlY1IepnCP_n4Q6neO82tjJ4uD_zC86RZ9-MebrVYNU5mjGtJ7XygH3c577wqBeIh1YgOvhY_K62QY3FJOHsX1_nTdKF4vphnzQjdIXhkpdCbzYuhvAmg1S7KOS6XFLOH9ytc_elY8k4T7w1UnmxmNPUIQo2fD4hQI-VqT42LruE5CXsrqPxml1aFz-FOID3049m7ZpQez70Ro3n73eHnKSLrDdA
Now execute
$ kubectl proxy
Starting to serve on 127.0.0.1:8001
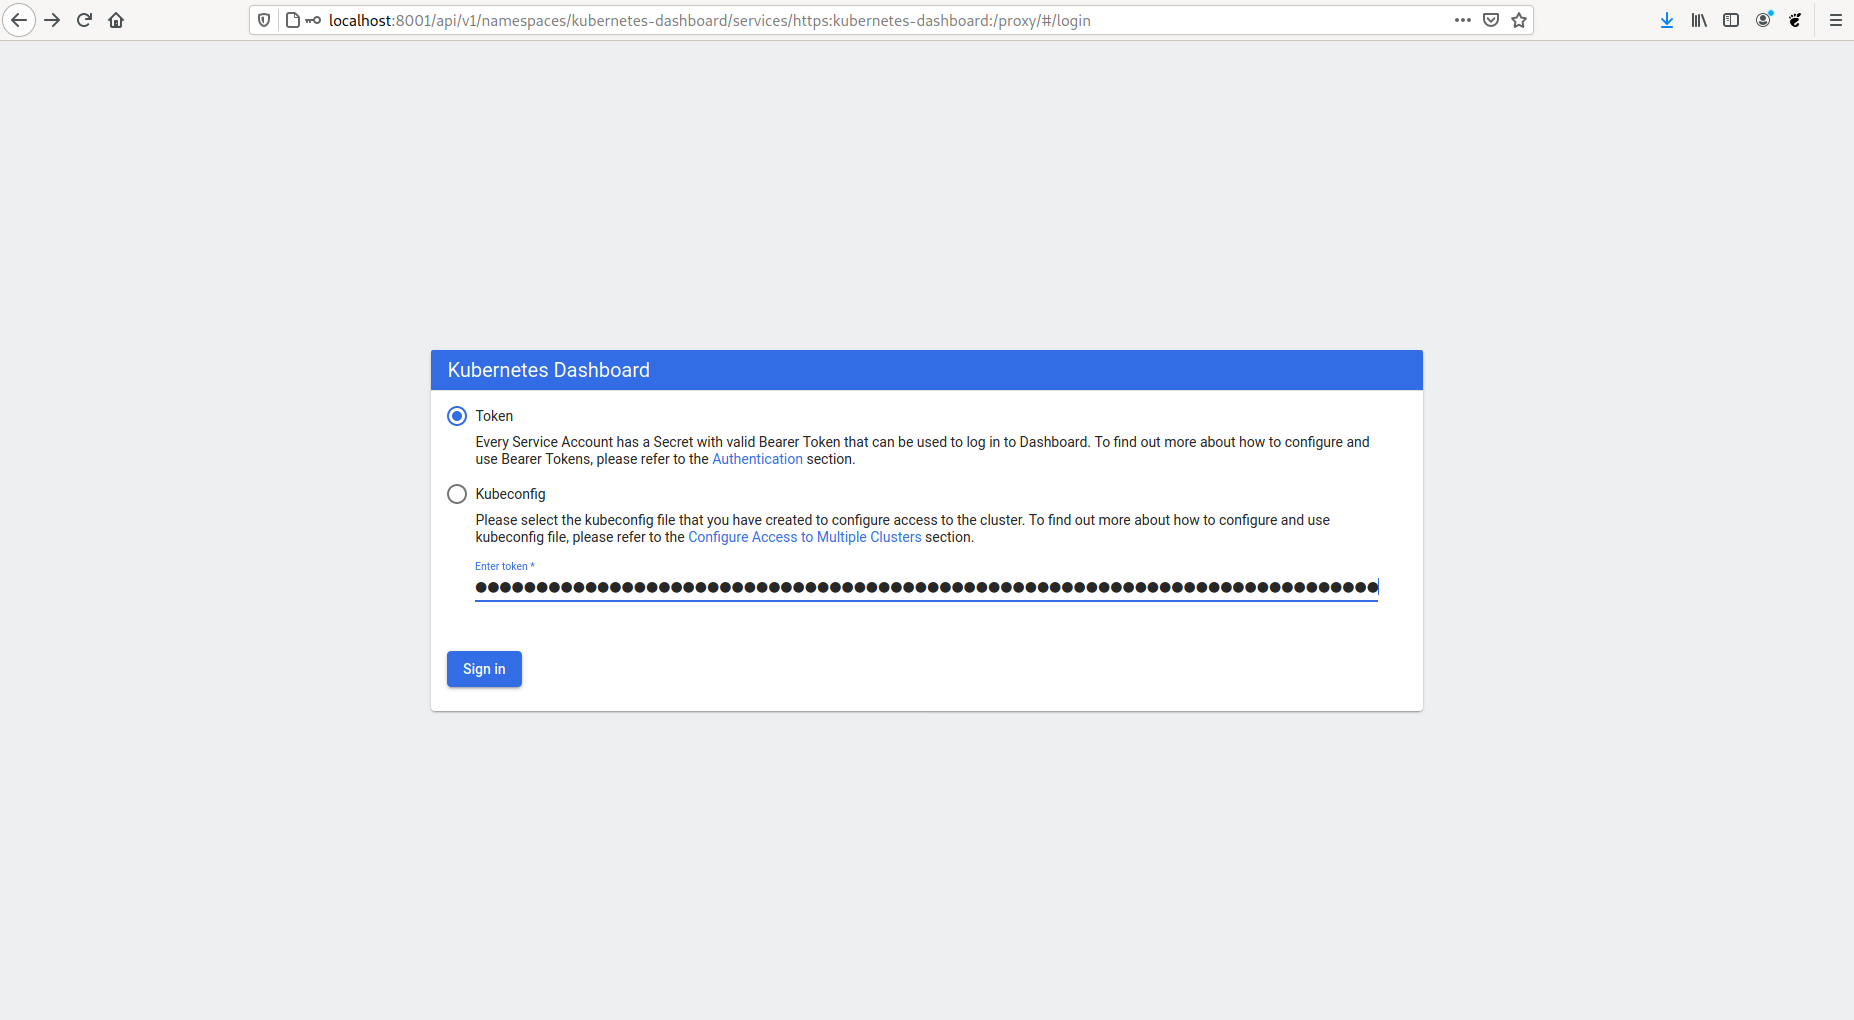
now open URL: <http://localhost:8001/api/v1/namespaces/kubernetes-dashboard/services/https:kubernetes-dashboard:/proxy/#/login$
and use Token to login
First deploy Prometheus & Grafana and create an ingress entry for Grafana, You can also create another ingress for Prometheus if you need
$ helm repo add prometheus-community https://prometheus-community.github.io/helm-charts
$ helm repo add stable https://charts.helm.sh/stable
$ helm repo update
$ helm install --namespace prometheus --create-namespace prometheus prometheus-community/prometheus
$ helm install --namespace prometheus --create-namespace grafana stable/grafana --set sidecar.datasources.enabled=true --set sidecar.dashboards.enabled=true --set sidecar.datasources.label=grafana_datasource --set sidecar.dashboards.label=grafana_dashboard
$ cat <<EOF | kubectl create -f -
apiVersion: networking.k8s.io/v1
kind: Ingress
metadata:
  name: nginx
  namespace: prometheus
  annotations:
    ingress.kubernetes.io/ssl-redirect: "false"
spec:
  rules:
    - host: grafana.fuf.me
      http:
        paths:
          - path: /
            pathType: Prefix
            backend:
              service:
                name: grafana
                port:
                  number: 80
EOF
Once all is installed we can retrieve Grafana credentials to login with admin user.
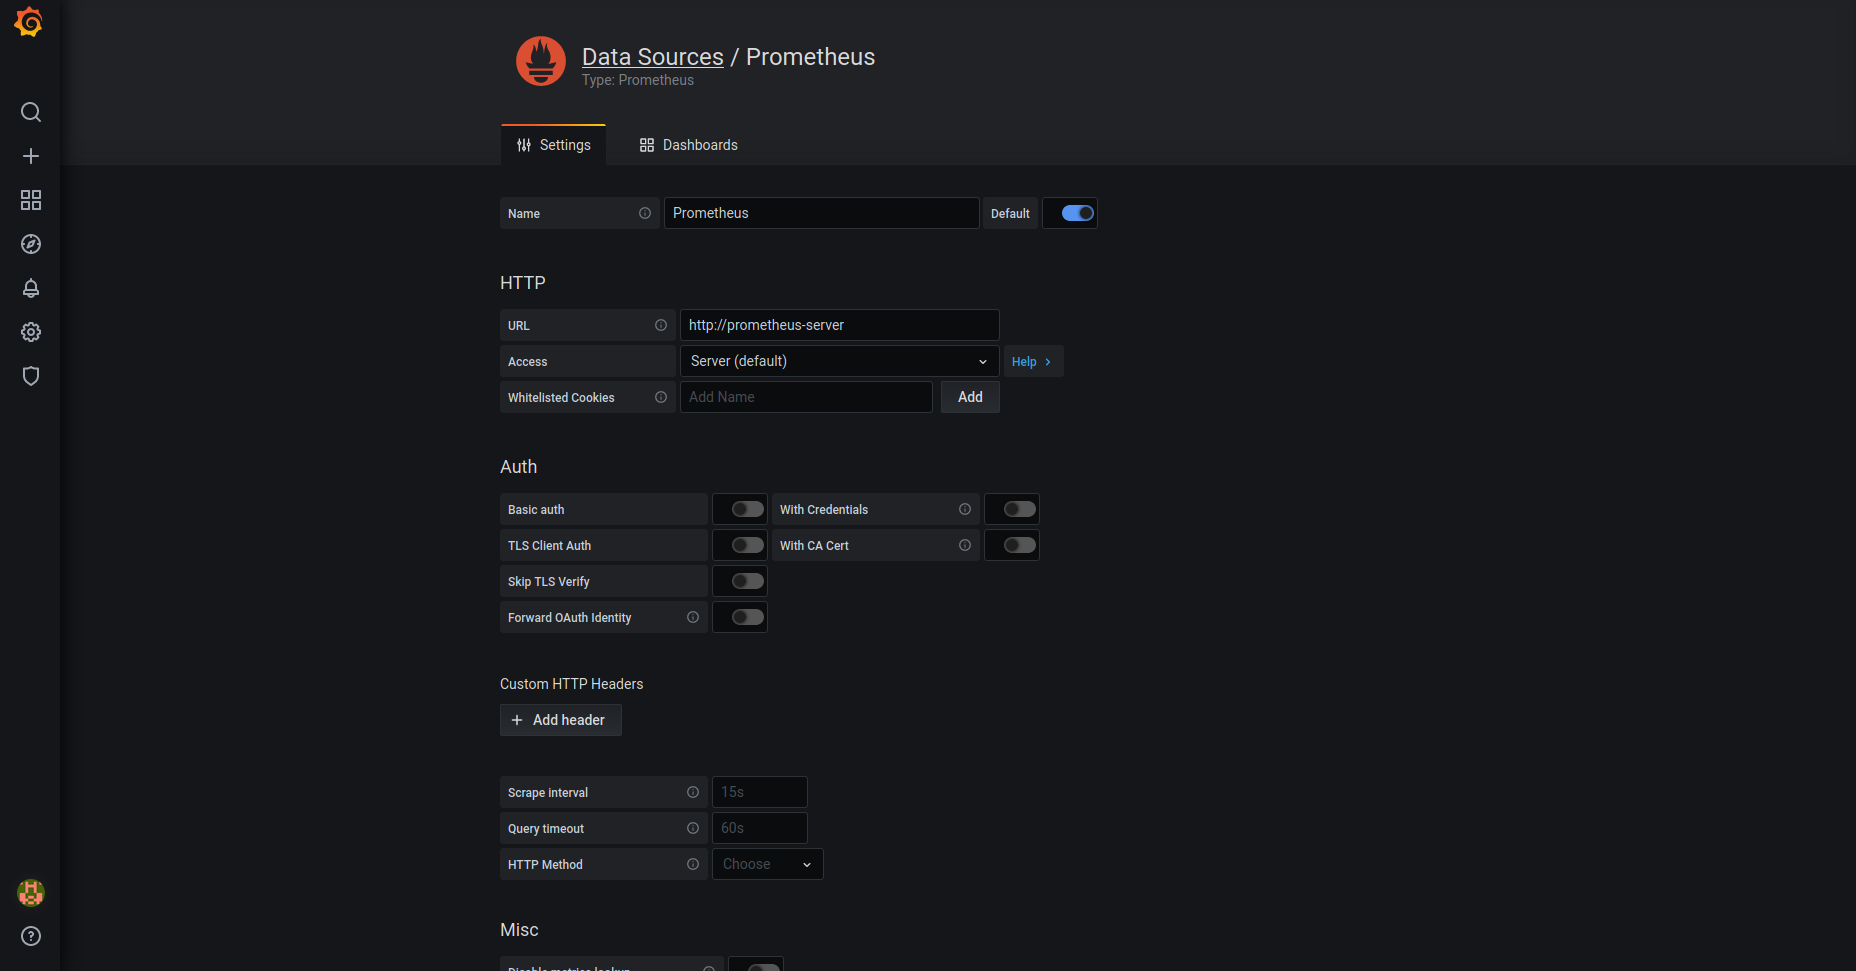
$ kubectl get secret --namespace prometheus grafana -o jsonpath="{.data.admin-password}" | base64 --decode ; echoNow we can access Grafana and configure prometheus as datasource for cluster metrics
Once installed Grafana you can importa lots of dashboards avaliable at: https://grafana.com/grafana/dashboards?
A nice dashboards cluster could be: https://grafana.com/grafana/dashboards/11802 https://grafana.com/grafana/dashboards/1860 https://grafana.com/grafana/dashboards/5219 https://grafana.com/grafana/dashboards/7249 https://grafana.com/grafana/dashboards/13770
$ kubectl apply -f https://raw.githubusercontent.com/portainer/portainer-k8s/master/portainer.yamlOnce portainer is deployed you can access thought loadbalancer
$ kubectl -n portainer get svc
NAME        TYPE           CLUSTER-IP      EXTERNAL-IP    PORT(S)                         AGE
portainer LoadBalancer 10.43.243.166 192.168.96.2 9000:31563/TCP,8000:30316/TCP 9m7s$ kubectl config use-context k3d-k3d-cluster
$ kubectl create deployment nginx --image=nginx
$ kubectl create service clusterip nginx --tcp=80:80
$ kubectl apply -f nginx-ingress.yml# apiVersion: networking.k8s.io/v1beta1 # for k3s < v1.19
apiVersion: networking.k8s.io/v1
kind: Ingress
metadata:
name: nginx
annotations:
ingress.kubernetes.io/ssl-redirect: "false"
spec:
rules:
- http:
paths:
- path: /
pathType: Prefix
backend:
service:
name: nginx
port:
number: 80Testing deployments:
$ curl localhost
$ curl -k https://localhost
$ kubectl get po --all-namespaces -o wide
NAMESPACE     NAME                                      READY   STATUS      RESTARTS   AGE    IP          NODE                       NOMINATED NODE   READINESS GATES
kube-system   metrics-server-86cbb8457f-5bpzr           1/1     Running     0          78m    10.42.0.3   k3d-dev-cluster-server-0   <none$           <none>
kube-system   local-path-provisioner-7c458769fb-hd2cc   1/1     Running     0          78m    10.42.1.3   k3d-dev-cluster-agent-0    <none$           <none>
kube-system   helm-install-traefik-4qh5z                0/1     Completed   0          78m    10.42.0.2   k3d-dev-cluster-server-0   <none$           <none>
kube-system   coredns-854c77959c-jmp94                  1/1     Running     0          78m    10.42.1.2   k3d-dev-cluster-agent-0    <none$           <none>
kube-system   svclb-traefik-6ch8f                       2/2     Running     0          78m    10.42.0.4   k3d-dev-cluster-server-0   <none$           <none>
kube-system   svclb-traefik-9tmk4                       2/2     Running     0          78m    10.42.1.4   k3d-dev-cluster-agent-0    <none$           <none>
kube-system   svclb-traefik-h8vgj                       2/2     Running     0          78m    10.42.2.3   k3d-dev-cluster-agent-1    <none$           <none>
kube-system   traefik-6f9cbd9bd4-6bjp4                  1/1     Running     0          78m    10.42.2.2   k3d-dev-cluster-agent-1    <none$           <none>
default       nginx-6799fc88d8-vcjp5                    1/1     Running     0          29m    10.42.2.4   k3d-dev-cluster-agent-1    <none$           <none>
$ kubectl scale deployment nginx --replicas 4
$ kubectl get po --all-namespaces -o widepersistence-app.yml
apiVersion: v1
kind: PersistentVolume
metadata:
  name: task-pv-volume
  labels:
    type: local
spec:
  storageClassName: manual
  capacity:
    storage: 1Gi
  accessModes:
    - ReadWriteOnce
  hostPath:
    path: "/tmp/k3dvol"
---
apiVersion: v1
kind: PersistentVolumeClaim
metadata:
  name: task-pv-claim
spec:
  storageClassName: manual
  accessModes:
    - ReadWriteOnce
  resources:
    requests:
      storage: 1Gi
---
apiVersion: apps/v1
kind: Deployment
metadata:
  name: echo
spec:
  selector:
    matchLabels:
      app: echo
  strategy:
    type: Recreate
  template:
    metadata:
      labels:
        app: echo
    spec:
      volumes:
        - name: task-pv-storage
          persistentVolumeClaim:
            claimName: task-pv-claim
      containers:
      - image: busybox
        name: echo
        volumeMounts:
          - mountPath: "/data"
            name: task-pv-storage
        command: ["ping", "127.0.0.1"]
$ kubectl apply -f persistence-app.yml
$ kubectl get pv
NAME CAPACITY ACCESS MODES RECLAIM POLICY STATUS CLAIM STORAGECLASS REASON AGE
task-pv-volume 1Gi RWO Retain Bound default/task-pv-claim manual 2m54s
$ kubectl get pvc
NAME STATUS VOLUME CAPACITY ACCESS MODES STORAGECLASS AGE
task-pv-claim Bound task-pv-volume 1Gi RWO manual 11s
$ kubectl get pods
NAME READY STATUS RESTARTS AGE
echo-58fd7d9b6-x4rxj 1/1 Running 0 16sReferences <https://github.com/rancher/k3d$ <https://k3s.io/$ <https://github.com/k3s-io/k3s$ <https://en.sokube.ch/post/k3s-k3d-k8s-a-new-perfect-match-for-dev-and-test$ <https://dev.to/sosan/k3s-y-k3d-buena-combinacion-para-el-desarrollo-en-local-y-tests-locales-a48$ https://sysdig.com/blog/kubernetes-monitoring-prometheus-operator-part3/ <https://sysdig.com/blog/kubernetes-monitoring-prometheus/$ https://sysdig.com/blog/kubernetes-monitoring-with-prometheus-alertmanager-grafana-pushgateway-part-2/ https://sysdig.com/blog/kubernetes-monitoring-prometheus-operator-part3/
