Syslog for Obihai phone device
What is it?
SYSLOG application for Obitalk Obihai device.
This Python project listens for data from Obihai on the configured IP:Port and analyze the data and store
incoming and outgoing calls.
Why is it needed?
Used to monitor incoming and outgoing calls and provide update to
Home Assistant (https://www.home-assistant.io/) for automation.
What are the requirements?
1. Obihai device
2. Home Assistant application
3. By default locally web access to the device is not enabled so you will have to logon to your obitalk
   online account and then enable it. (https://www.obitalk.com/info/faq/OBi202-sec/Howto-Access-Web-from-WAN)
4. Some knowledge to configure obihai device to send SYSLOG to this application as per documented by Obitalk:
   http://www.obihai.com/OBiDeviceAdminGuide
   I have tested and verified with following settings:
        Hardware: OBi202
        Software: 3.2.2 (Build: 5859EX)
        System log level: 7 (default)
Config file:
There is a default config.yaml file which must be configured as per your environment setup.
There are four sections:
    syslog, home-assistant, obihai and opencnam in the config.yaml.

syslog section has the details of IP:Port, log files and logging levels.
    IP:Port:
        This is IP address of the device you going to run this application and same IP will go into Obihai device.
        SYSLOG configuration mentioned above. This application will keep connection open to listen the information
        provided by the Obihai device.
    keep_history: 10 # store how many last call history in the file phone_history.json
    Note: This application will create two json files:
        phone_book.json: This is a your phone book where you can provide name if you want to then
                         Home Assistant will use that name instead of the number.
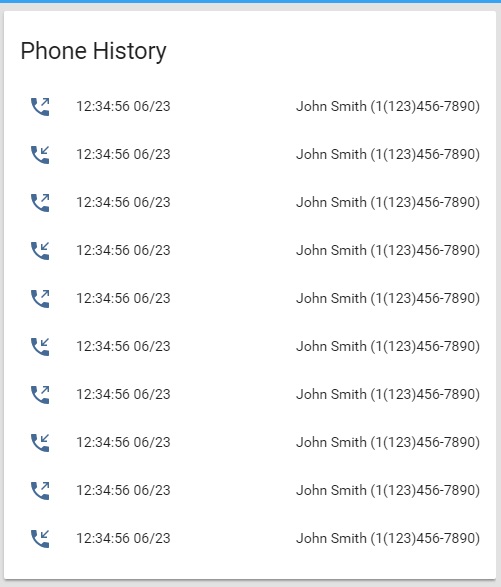
        phone_history.json: This is kind of log book of all incoming and outgoing phone history.

    logs: Notes following all files will be created under the logs folder.
        syslog_log: This is RAW data received from the Obihai and will be stored in daily log file.
                    Default file name will be obi_syslog unless you have changed it.
                    As of now older files will NOT be automatically deleted but in future version it may.
        monitor_log: This is log information of this application such as any error or useful details like
                    incomming/outgoing call details.

home-assistant section has the details of your running Home Assistant to send the device tracking information.
    url: http://192.168.1.77:8123 # This is your Home Assistant URL/IP without slash (/) at the end
    password: home # This is your Home Assistant password
    show_history: 10 # show how many last calls history in HA
    Home Assistant Entity Names:
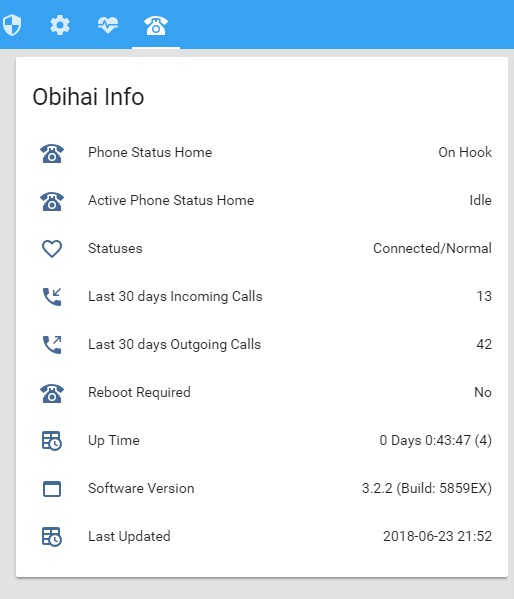
        sensor.obihai_reboot_required
        sensor.obihai_up_time
        sensor.obihai_software_version
        sensor.obihai_statuses
        sensor.obihai_last_updated
        sensor.phone_status_port1(2)
        sensor.active_call_direction_port1(2)
        sensor.phone_details_port1(2)
Obihai Common
Obihai Details
Obihai section has the details of your Obihai device.
    IP:Port: IP address and port of your Obihai device to poll the device the specified interval
    username: admin # user name of the obihai device, default is admin unless you have changed it
    password: admin # password of the obihai device, default is admin unless you have changed it
    poll_interval: 900 # in seconds, 0: disable
    monitor: # Specify how many telephones are connected to this device
      port1: Home # Specify the phone name connected to obihai port1 otherwise delete/comment this line
      port2: Office # Specify the phone name connected to obihai port2 otherwise delete/comment this line

Following section is optional and configure only if you have account created with opencnam.
opencnam: # Web service www.opencnam.com details if you want to get the caller name from the phone number
    base_url: "https://api.opencnam.com/v3/phone/" # This is the url for API call
    # Once you register you will have to replace xxxx with yours account sid
    sid: "?account_sid=xxxxxxxxxxxxxxxxxxxxxxxxxxxxxxxxxx"
    # Once you register you will have to replace xxxx with yours auth token
    token: "&auth_token=xxxxxxxxxxxxxxxxxxxxxxxxxxxxxxxxxx&format=json&casing=title"
What about Docker?
This project includes two docker files: dockerfile to build the image and docker-compose.yaml for compose.
In future version I may have docker-image which can directly be deployed from docker hub!
How to use it?
In few simple steps you can get it working.
1. Clone the repository (Basically get all the files to your computer from github)
2. Modify the config.yaml file as mentioned above in the Config section
3. Modify configuration of Obihai device to send syslog information to this application as mentioned above in
   the requirements section #3 and #4
4. There are 2 different ways to run it.
    a. Run using python command from the folder you have all files
        python3 main_obihai.py .
    b. Use docker-compose command
        Modify two lines in the file docker-compose.yaml to point your current folder like shown below
          Line #6 to
            context: . # Folder name where you have cloned files
          Line #12 to
            - .:/config # Folder name where you have config file
        And then run the command (you may have to run with sudo)
          docker-compose up -d


