Source code of the paper Deep learning for precipitation nowcasting: A benchmark and a new model
If you use the code or find it helpful, please cite the following paper:
@inproceedings{xingjian2017deep,
    title={Deep learning for precipitation nowcasting: a benchmark and a new model},
    author={Shi, Xingjian and Gao, Zhihan and Lausen, Leonard and Wang, Hao and Yeung, Dit-Yan and Wong, Wai-kin and Woo, Wang-chun},
    booktitle={Advances in Neural Information Processing Systems},
    year={2017}
}
Requires Python 3.5 or newer!
Both Windows and Linux are supported.
Install the package
pip3 install develop
# Use --user if you have no privilege
pip3 install develop --user
You will also need the python plugin of opencv:
pip3 install opencv-contrib-pythonIn addition, you will need to install FFMpeg + X264 (See FAQ).
For windows users it may be difficult to install some required packages like
numba, ffmpeg or opencv-python. We strongly recommend you to use
Anaconda and install them by commands like
conda install numba. To install opencv-python on windows, you can download the
wheel file from https://www.lfd.uci.edu/~gohlke/pythonlibs/.
If you want to run the deep models in the paper, e.g., TrajGRU, you will need to install MXNet. We've tested our code under MXNet v0.12.0. Also, in order to run the ROVER algorithm, install the python wrapper of VarFlow by following the guide in VarFlow.
IMPORTANT! You are able to run the HKO-7 benchmark environment without MXNet or VarFlow. You can proceed to use the HKOIterator and HKOBenchmarkEnv after you have installed the python package + Opencv-Python + FFMpeg with X264 encoding enabled and have downloaded the data. (See sections below for more reference).
Run the following script to draw a sample from the MovingMNIST++ dataset
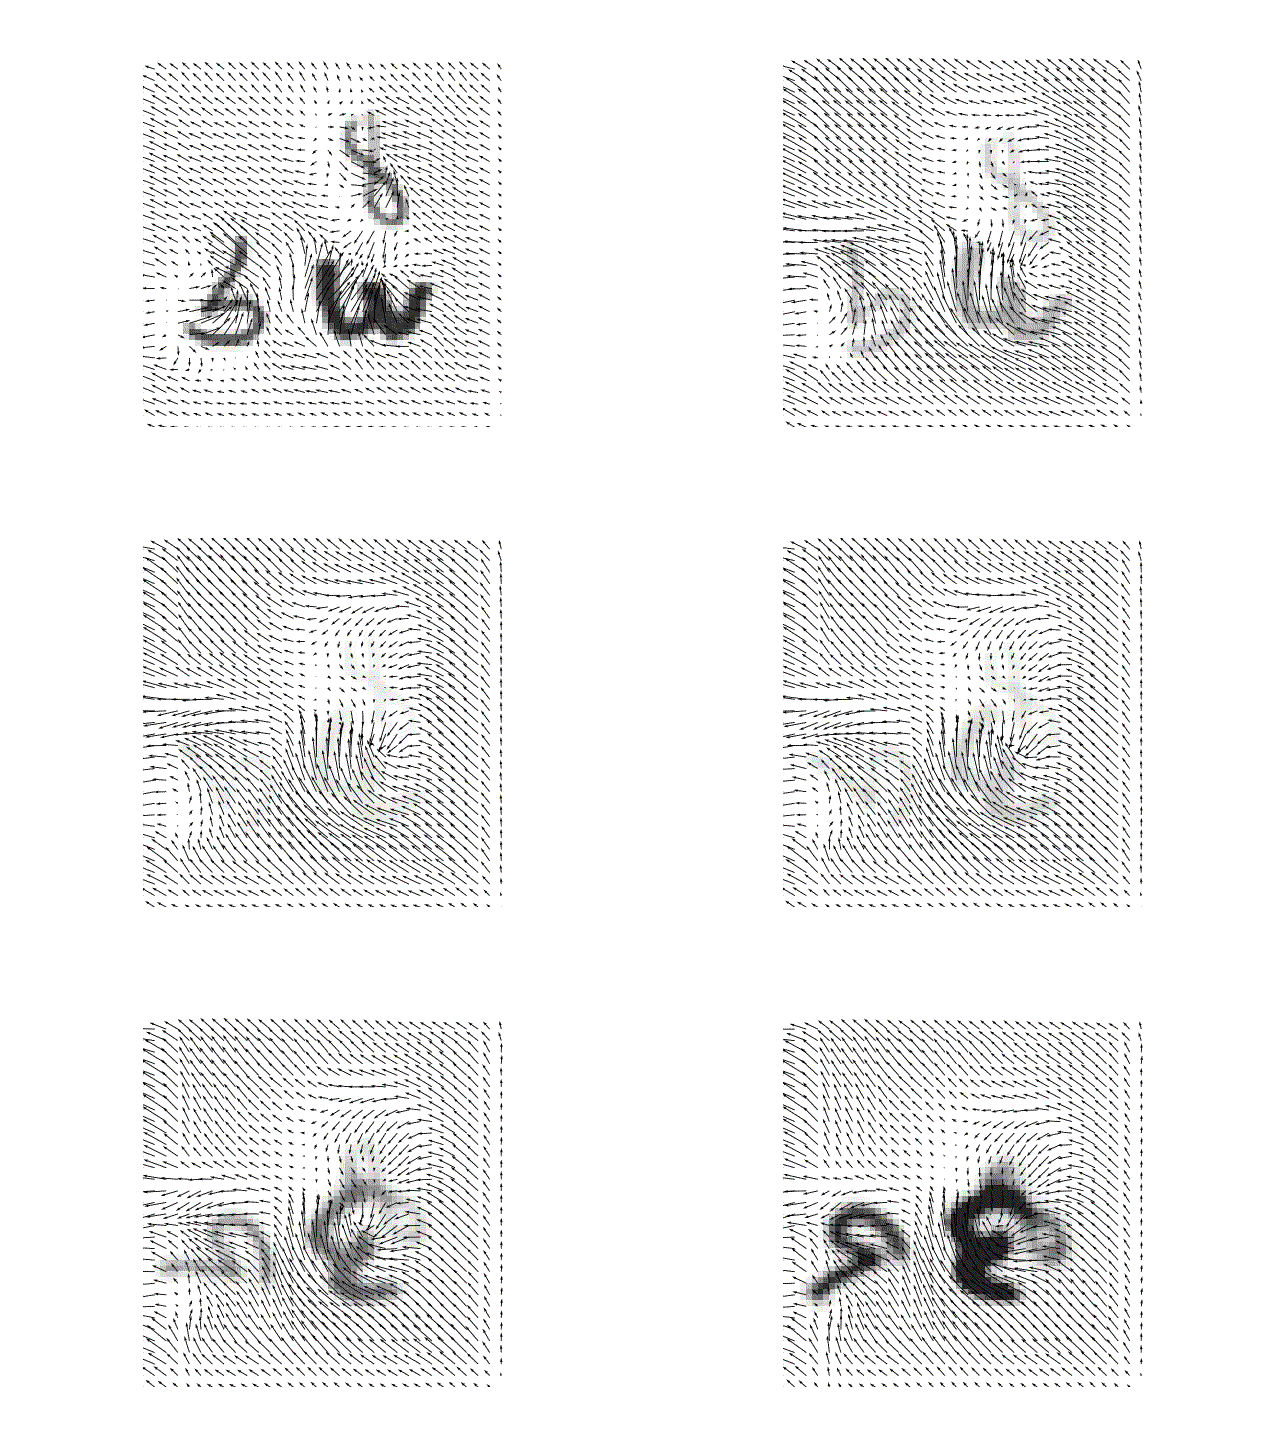
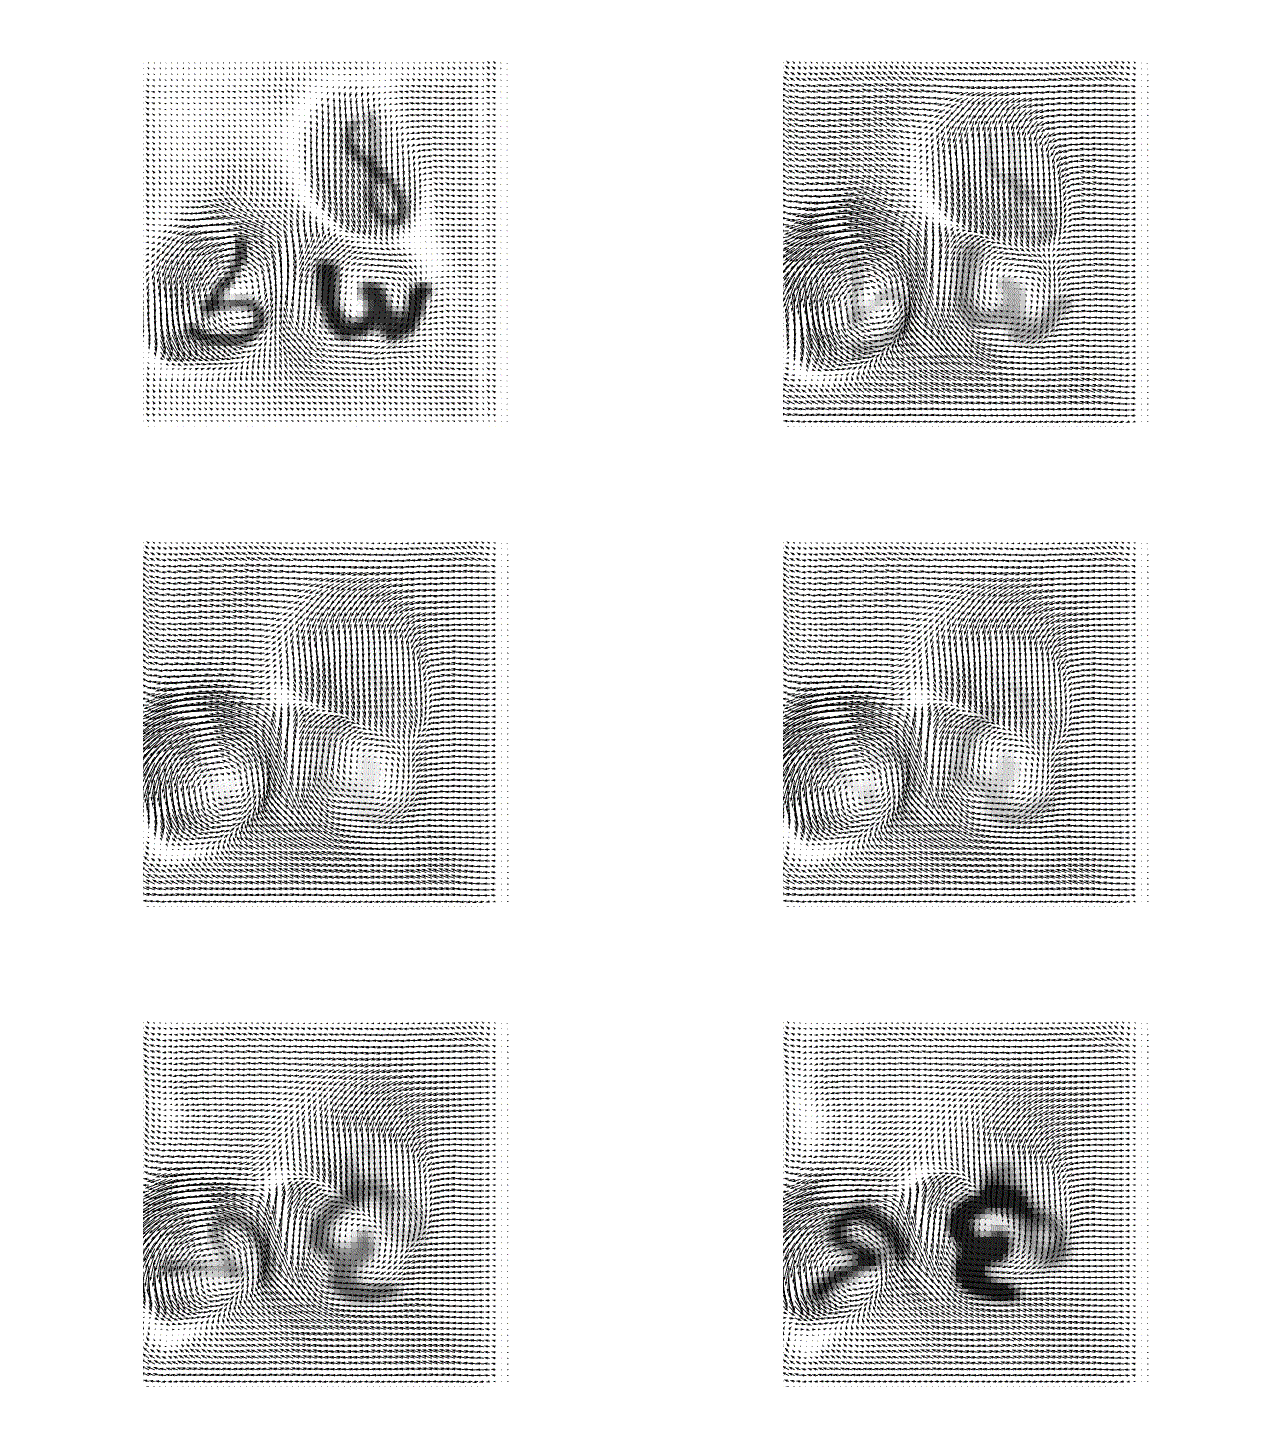
python3 nowcasting/movingmnist_iterator.pyAlso, you can view samples of the learned connection structure of different layers in the TrajGRU-L13 model:
-
For the encoder, lower-layers will capture lower-level motion features and higher layer will capture some more general motion features. We show one of the learned links for layer1, layer2 and layer3 (from left to right).
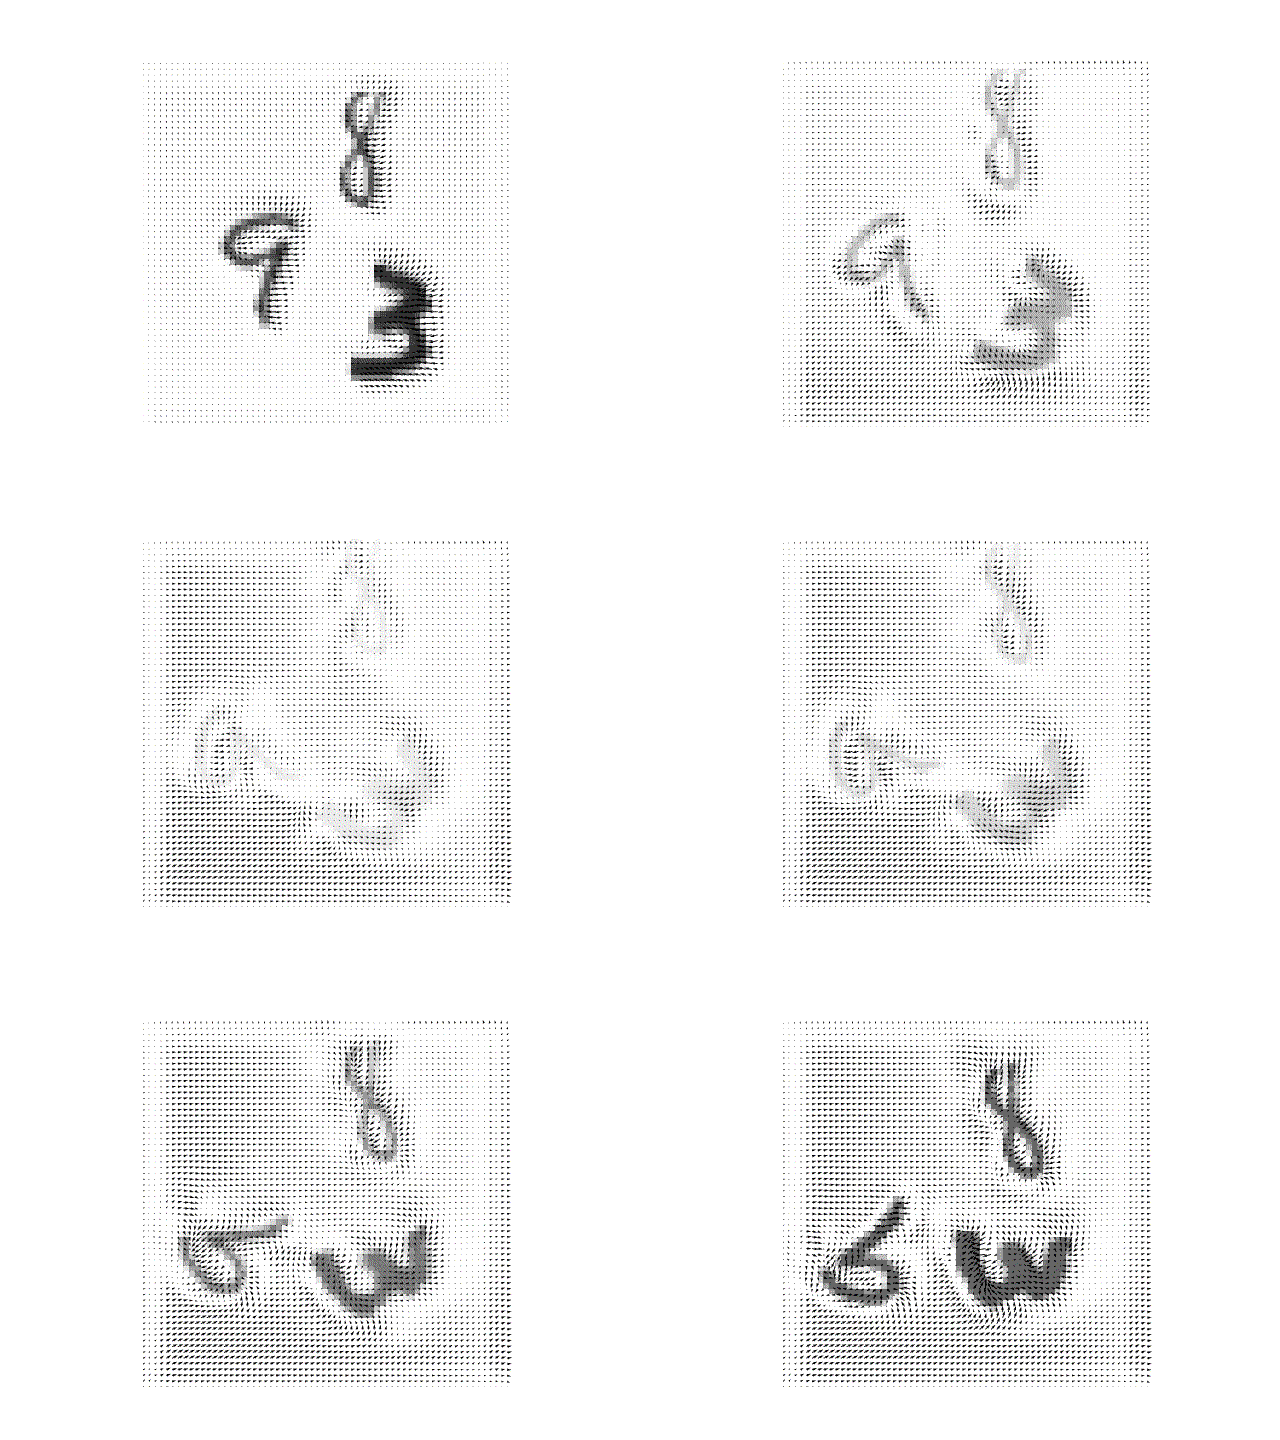
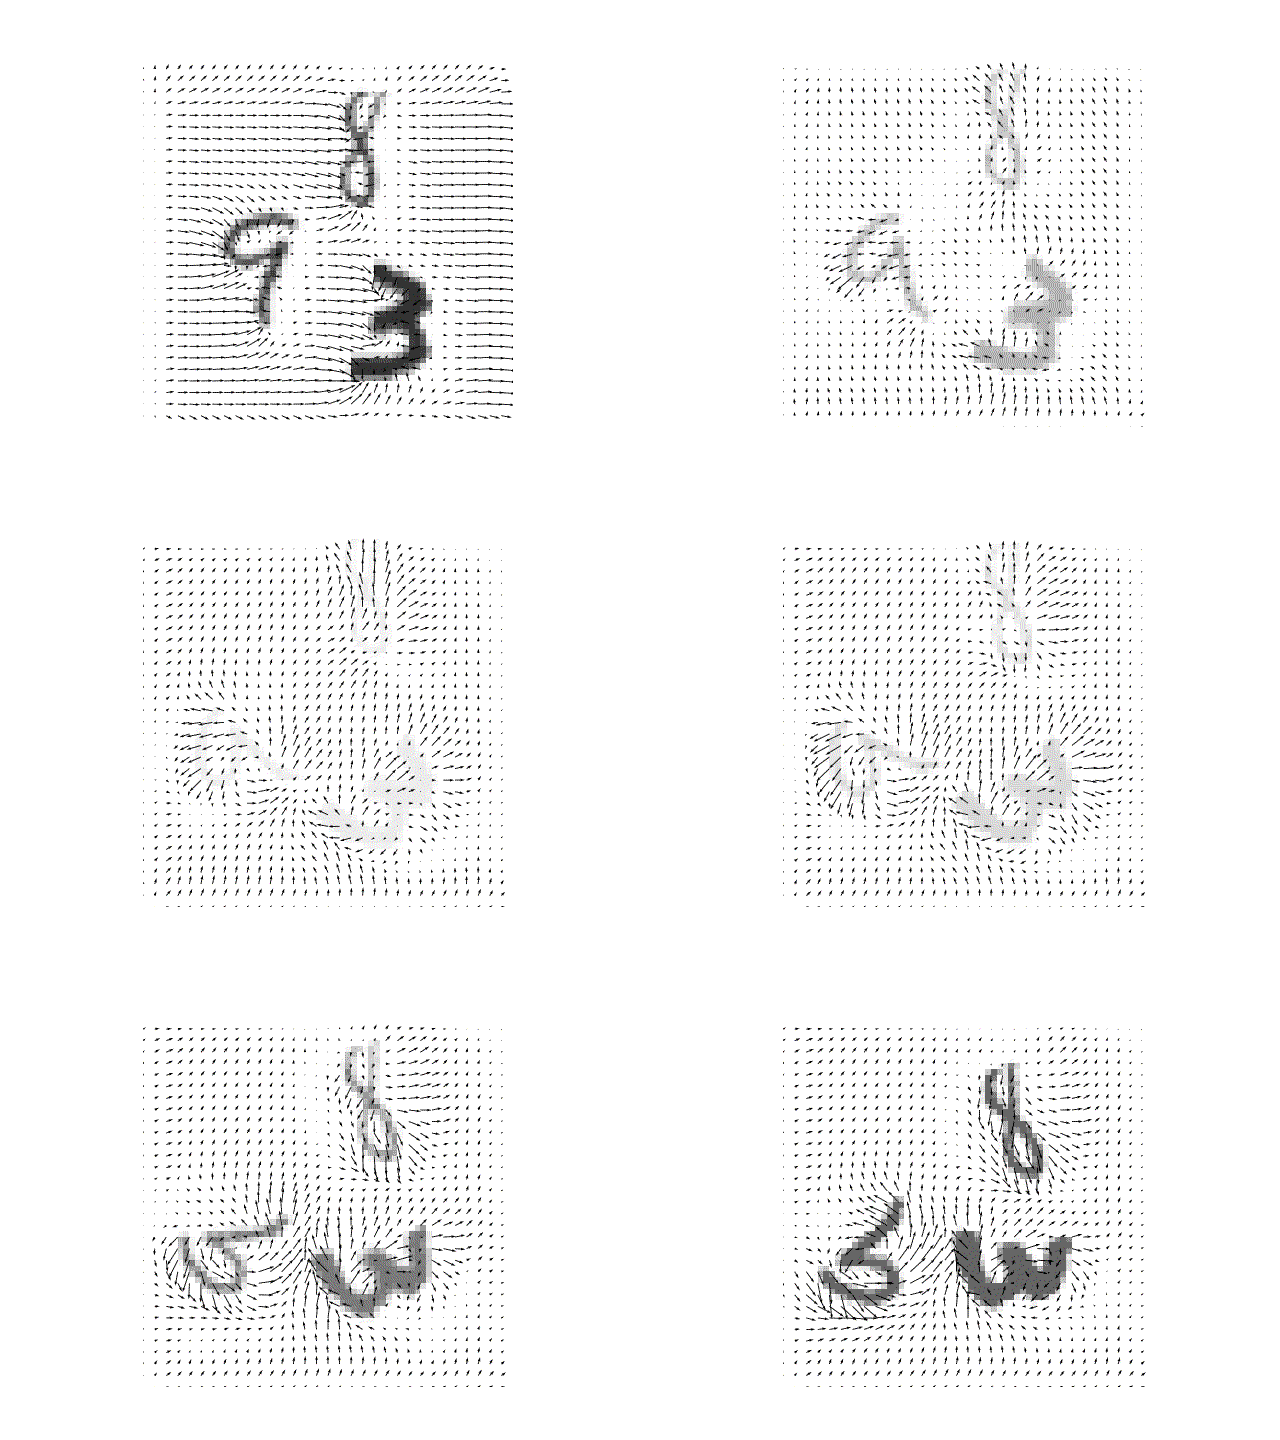
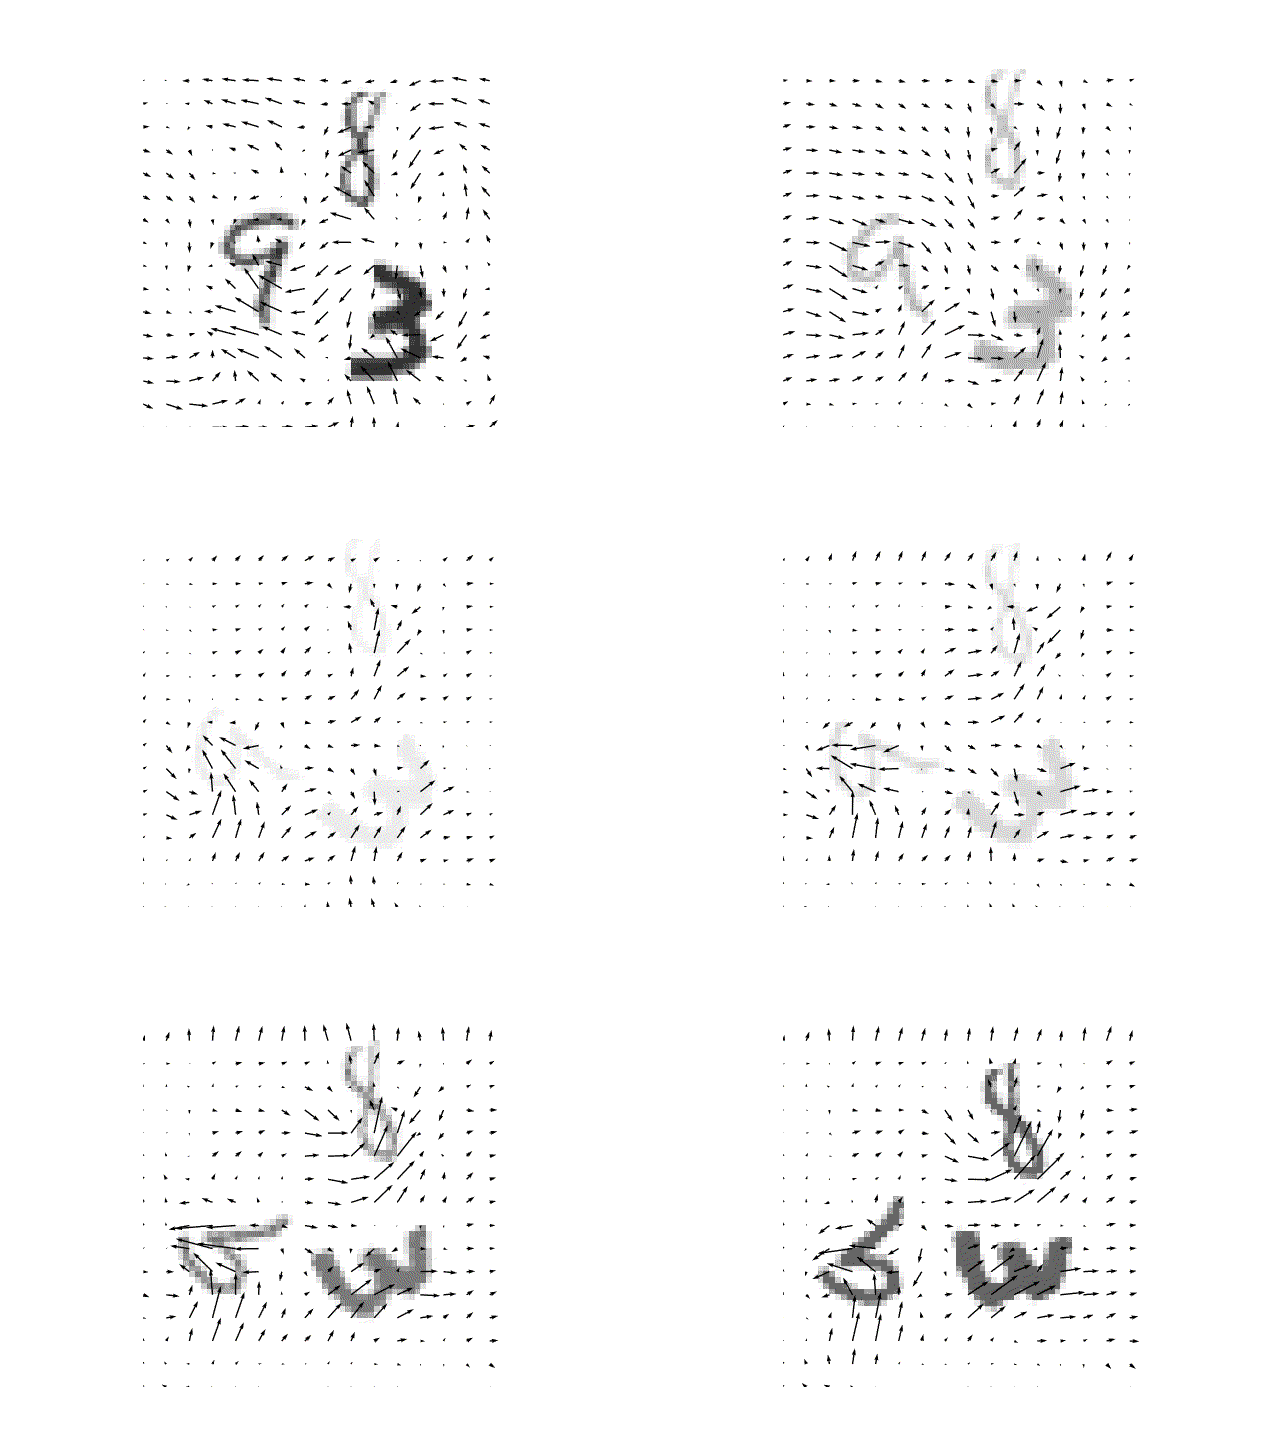
-
For the forecaster, higher-layers will generate more global movements and lower layer will generate motions with finer details. We show one of the learned links for layer3, layer2 and layer1 (from left to right).
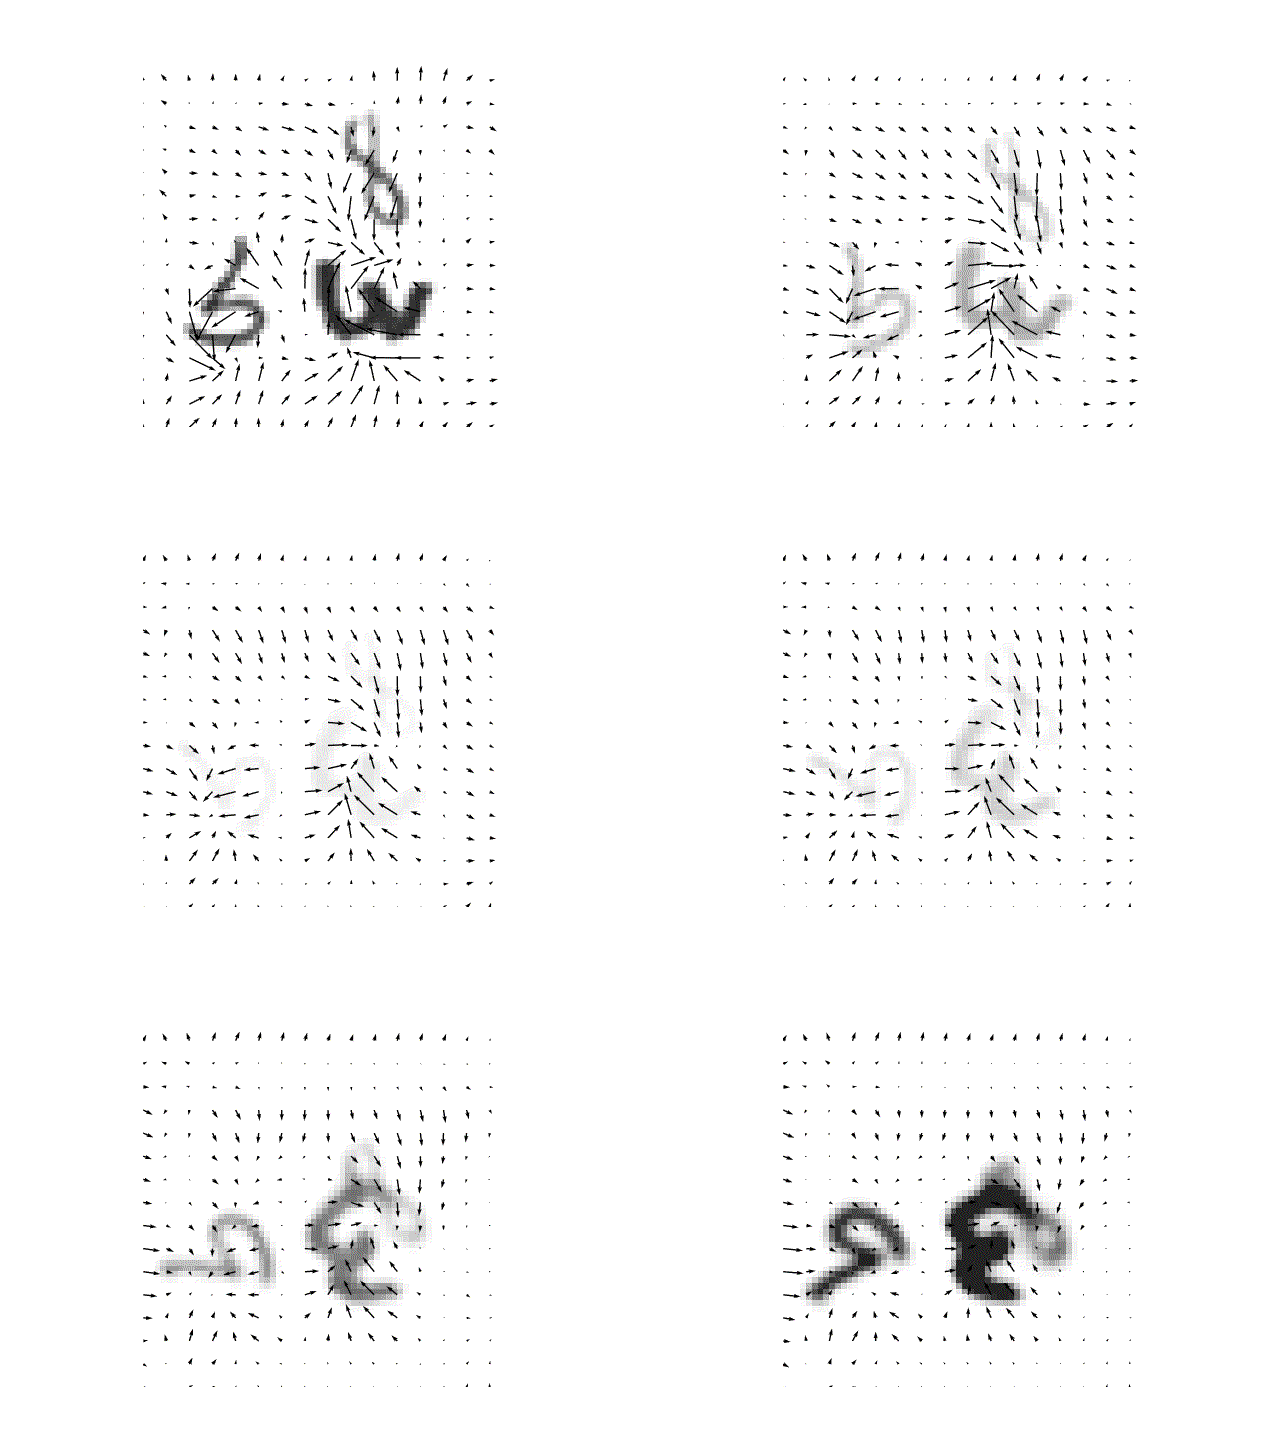
Please note that our source code does not require HKO-7 Dataset to perform the computation and the dataset may be available only for academic research upon request. To obtain the HKO-7 dataset (images + masks), please e-mail the following template with the subject "Request for HKO-7 Dataset". Your request will be duly reviewed based on your provided information on the usages of dataset, and a link to download the dataset will be provided once the application is approved.
Subject: Request for HKO-7 Dataset
----------------------------------
Name: YOUR NAME
Institution: YOUR INSTITUTION
Usage:
    Briefly explain your usage of the dataset
Other Information:
    You can include other information if you want.
Preferred email addresses:(You can also contact anyone in our NIPS2017 paper)
Mr Wang-chun Woo:  wcwoo AT hko DOT gov DOT hk
Mr Wai-kin Wong:  wkwong AT hko DOT gov DOT hk
After you've downloaded the datasets, extract and put the radarPNG or radarPNG_mask folders under the hko_data folder. To use your own path of radarPNG or radarPNG_mask, append your paths into the possible_hko_png_paths and possible_hko_mask_paths in https://github.com/sxjscience/HKO-7/blob/master/nowcasting/config.py.
possible_hko_png_paths = [os.path.join('E:\\datasets\\HKO-data\\radarPNG\\radarPNG'),
                          os.path.join(__C.HKO_DATA_BASE_PATH, 'radarPNG'),
                          YOUR_PNG_PATH]
possible_hko_mask_paths = [os.path.join('E:\\datasets\\HKO-data\\radarPNG\\radarPNG_mask'),
                           os.path.join(__C.HKO_DATA_BASE_PATH, 'radarPNG_mask'),
                           YOUR_MASK_PATH]
Also, download the necessary files via
python3 download_all.py
# You can also force to redownload the dataset:
python3 download_all.py --overwrite
You can then try to run the following script to test the FPS of hko iterator. Check whether all the mp4 files are generated successfully. If they are all empty, try to reinstall ffmpeg with x264 encoding enabled (See FAQ below).
python3 nowcasting/hko_iterator.pyYou can use the iterator to sample a random minibatch of radar echo sequence. There is also the sequent setting and you can refer to the examples in the hko_iterator.py
from nowcasting.hko_iterator import HKOIterator
from nowcasting.config import cfg
from nowcasting.

train_hko_iter = HKOIterator(pd_path=cfg.HKO_PD.RAINY_TRAIN,
                             sample_mode="random",
                             seq_len=25)
sample_sequence, sample_mask, sample_datetime_clips, new_start =\
            train_hko_iter.sample(batch_size=8)
If you have not obtained the HKO-7 dataset and just want to run the TrajGRU model, you can comment out the lines in https://github.com/sxjscience/HKO-7/blob/master/nowcasting/config.py#L39-L41 and https://github.com/sxjscience/HKO-7/blob/master/nowcasting/config.py#L49-L51 and run the MovingMNIST++ experiments.
The general workflow of the benchmark environment is given in the following:
from nowcasting.config import cfg
model = INITIALIZE_YOUR_MODEL
mode = "fixed" # Can also be "online"
env = HKOBenchmarkEnv(pd_path=cfg.HKO_PD.RAINTY_TEST, mode=mode)
while not env.done:
    # Get the observation
    in_frame_dat, in_mask_dat, in_datetime_clips, out_datetime_clips, begin_new_episode, need_upload_prediction =\
     env.get_observation(batch_size=1)
    # You can update your model if you are using the online setting
    if mode == "online":
        # Just an example, need not to be exactly like this
        model.update(frames=in_frame_dat, masks=in_mask_dat)
        model.store(frames=in_frame_dat, masks=in_mask_dat)
    # Running your algorithm to get the prediction
    if need_upload_predictoin:
        prediction = model.predict(frames=in_frame_dat, masks=in_mask_dat)
        # Upload prediction to the environment
        env.upload_prediction(prediction)
# Save the evaluation result
env.save_eval()
You can refer to the CSI, HSS, B-MSE, B-MAE scores in the saved evaluation file to have an overall understanding of your performance.
Refer to the MovingMNIST++ Experiment README and HKO-7 Experiment README
-
Install FFMpeg with X264 encoding
# Install libx264
git clone git://git.videolan.org/x264.git
cd x264
./configure --enable-static --enable-shared --enable-mp4 --prefix=YOUR_INSTALL_LOCATION --extra-ldflags="-lswresample -lm -lz -llzma"
make -j64
make install

cd ..

# Install ffmpeg
git clone http://source.ffmpeg.org/git/ffmpeg.git
cd ffmpeg
./configure --enable-gpl --enable-libx264 --prefix=YOUR_INSTALL_LOCATION
make -j64
make install
Above commands were sufficient to install FFMpeg with X264 encoding on our servers. Please refer to the official guide https://trac.ffmpeg.org/wiki/CompilationGuide/Ubuntu in case of any issues.