export SCONECTL_REPO=registry.scontain.com/cicd # default is registry.scontain.com/sconectl
export VERSION=5.8.0  # default version is "latest".
export CAS="cas" # set the name of the CAS instance that we should used; default is "cas"
export CAS_NAMESPACE="default" # set the Kubernetes namespace of the CAS instance that we should used; default is "default"
# if you want to use the latest stable release, ensure that these variables are not set:
unset SCONECTL_REPO
unset VERSION
# cleanup the last state
rm -rf release.sh target
# define REPO to which you are # define REPO to which you are permitted to push container images
REPO="<YOUR-REPO>"
# execute all steps of this tutorial
./run.sh -i "$REPO" --release secure-doc-management -vThis application demo is a confidential document web application. This service enables users to upload and download documents and ensures that the documents are always encrypted. Users can create accounts. We use a simple password-based authentication. For production, one should add a two-factor authentication. The application consists of the following components:
- a Python FastAPI service serving as the application's REST API,
- a MariaDB service stores the documents and user authentication data,
- a memcached service, serving as a rate limiter for the application, and
- an nginx instance serves as a proxy server for the application, ensuring termination and forwarding with TLS.
All of these components run securely inside of enclaves using the SCONE framework. These services are also integrity protected, and attest each other transparently using TLS in conjunction with a SCONE Configuration and Attestation Service (CAS). Furthermore, the application protects the confidentiality and integrity of all data it receives. We deploy this application using helm.
In case you want to run this demo in an Azure cluster, you may consider the following commands to set up a cluster, using the Azure CLI.
# Export cluster configs
export NUMBER_OF_CONFIDENTIAL_NODES=1
export CLUSTER_NAME="aks-scone-cluster"
export NODE_POOL_NAME="aksnodepool"
export RESOURCE_GROUP="<RESOURCE_GROUP_NAME>"
export NODE_FLAVOR="Standard_DC4s_v3"

# Create cluster
az aks create --name $CLUSTER_NAME --generate-ssh-keys --enable-addons confcom -c $NUMBER_OF_CONFIDENTIAL_NODES --node-vm-size $NODE_FLAVOR -g $RESOURCE_GROUP

# Get kubeconfig
az aks get-credentials --name $CLUSTER_NAME --resource-group $RESOURCE_GROUP -f $CLUSTER_NAMENo time to read all the steps? We put the sconectl and helm steps in script run.sh. Just execute ./run.sh and have a happy sconification!
You can get this program to run with the following steps.
If you have a clean K8s cluster, you need to install the SCONE operator. CAS is also needed for attesting the SecureDocumentApp components. To install everything, assuming you are in the default k8s namespace, do:
- Install operator, LAS, and SGXPlugin
curl -fsSL https://raw.githubusercontent.com/scontain/SH/master/operator_controller | bash -s - --set-version 5.8.0 --plugin --reconcile --update --secret-operator --verbose --username $REGISTRY_USERNAME --access-token $REGISTRY_ACCESS_TOKEN --email $REGISTRY_EMAILoperator_controllerwill create thescone-systemnamespace. Check the pods inscone-systemwith
kubectl get pods -n scone-system- Once everything in
scone-systemis running and ready (check output of previous command), we can install CAS and provision using thekubectl-provisionscript.
kubectl provision cas cas --set-version 5.8.0 --verbose- Check that CAS is HEALTHY before you continue to next steps.
kubectl get cas.services.scone.cloud casOnce CAS is HEALTHY, you're ready to go.
- Export APP_IMAGE_REPO to point to some registry you have read and write access permissions.
export APP_IMAGE_REPO=example.registry.com- Set the
sconectlversion to the5.8.0stable version.
export VERSION=5.8.0- Run the
check_prerequisites.shscript. It will check things like the SCONE CRDs in your K8s cluster and your access to the SCONE registry.
./check_prerequisites.sh- Create
service.yamlusing theservice.yaml.templatetemplate. This YAML will describe your confidential FastAPI service. Do the same thing with theclientService.yaml.templatetemplate to create theclientService.yamldescribing the client.
SCONE="\$SCONE" envsubst < service.yaml.template > service.yaml
SCONE="\$SCONE" envsubst < clientService.yaml.template > clientService.yaml- Run
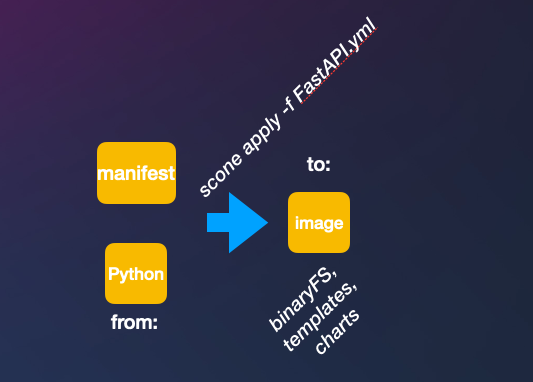
sconectlwithservice.yamlandclientService.yamlto create the confidential services (also known as SCONE elements in the context of SCONE meshes).
sconectl apply -f service.yaml
sconectl apply -f clientService.yaml
- Get the information about the CAS deployed in your K8s cluster using the SCONE plugin for
kubectl. Check if$CAS_SERVICEand$CAS_NAMESPACEare not empty. If these variables are empty after the following commands, then your CAS is not healthy and you cannot continue. The CAS installation needs to be fixed in this case.
export CAS_SERVICE=`kubectl get cas --all-namespaces | grep HEALTHY | awk '{print $2}'`
export CAS_NAMESPACE=`kubectl get cas --all-namespaces | grep HEALTHY | awk '{print $1}'`
source <(kubectl provision cas $CAS_SERVICE -n $CAS_NAMESPACE --print-public-keys)- Create a meshfile using the
mesh.yaml.templatefile. Thismesh.yamlwill describe the SCONE mesh that deploys the SecureDocumentApp application with all of its confidential components.
export RELEASE=secure-doc-management
export APP_NAMESPACE="$RELEASE-$RANDOM-$RANDOM"
export CAS_URL="$CAS_SERVICE.$CAS_NAMESPACE"
SCONE="\$SCONE" envsubst < mesh.yaml.template > mesh.yaml- Use
sconectlagain to create the SCONE mesh. The following command will upload the security policies for the SecureDocumentApp. It also creates the Helm chart that we use to deploy the application. Besides that, define the release name for the Helm installation.
sconectl apply -f mesh.yaml --release "$RELEASE"- Deploy the app with the Helm chart generated by
sconectl.
helm install "$RELEASE" target/helm/You can uninstall the application with the following command:
helm uninstall "$RELEASE"
