This guide assumes some familarity with AWS and limited familiarity with Terraform. I wrote it to get better at Terraform.
- A domain that you control and can update the DNS records to point to AWS Route53
- A valid license for Foundry VTT
- A free account on terraform.io
- An AWS account, with an IAM user with admin acces, access key and secret access key.
This setup requires two tools - packer to create the AMI with the base foundry install, and terraform to create the infrastructure such as ec2 instances and security groups.
- Fork this repo
- Make sure you can run packer locally (
brew install packer) on your computer and your AWS Access Keys are configured, e.g.aws configure - cd to packer
- Download the latest version of foundry vtt to this directory. It should be the linux version and it will be named something like
foundryvtt-0.8.8.zip - create a var file
www.auto.pkrvars.hclwith the following variable settingsname = "www" domain = "yourdomain.com" region = "your preferred region" foundryvtt = "path-to-your-zip" - If running for the very first time, then run packer with the var file. e.g.
packer build --var-file www.auto.pkrvars.hcl foundry.pkr.hcl - If you already have a Foundry Data volume and are just making a new AMI for a new release, then run packer with
packer build -only FoundryAMI\* --var-file iwww.auto.pkrvars.hcl foundry.pkr.hcl
You now have a base AMI which has foundry installed on it, but no SSL certificates. You should also have a Foundry Data volume
- Create a Terraform workspace and point it to your new fork
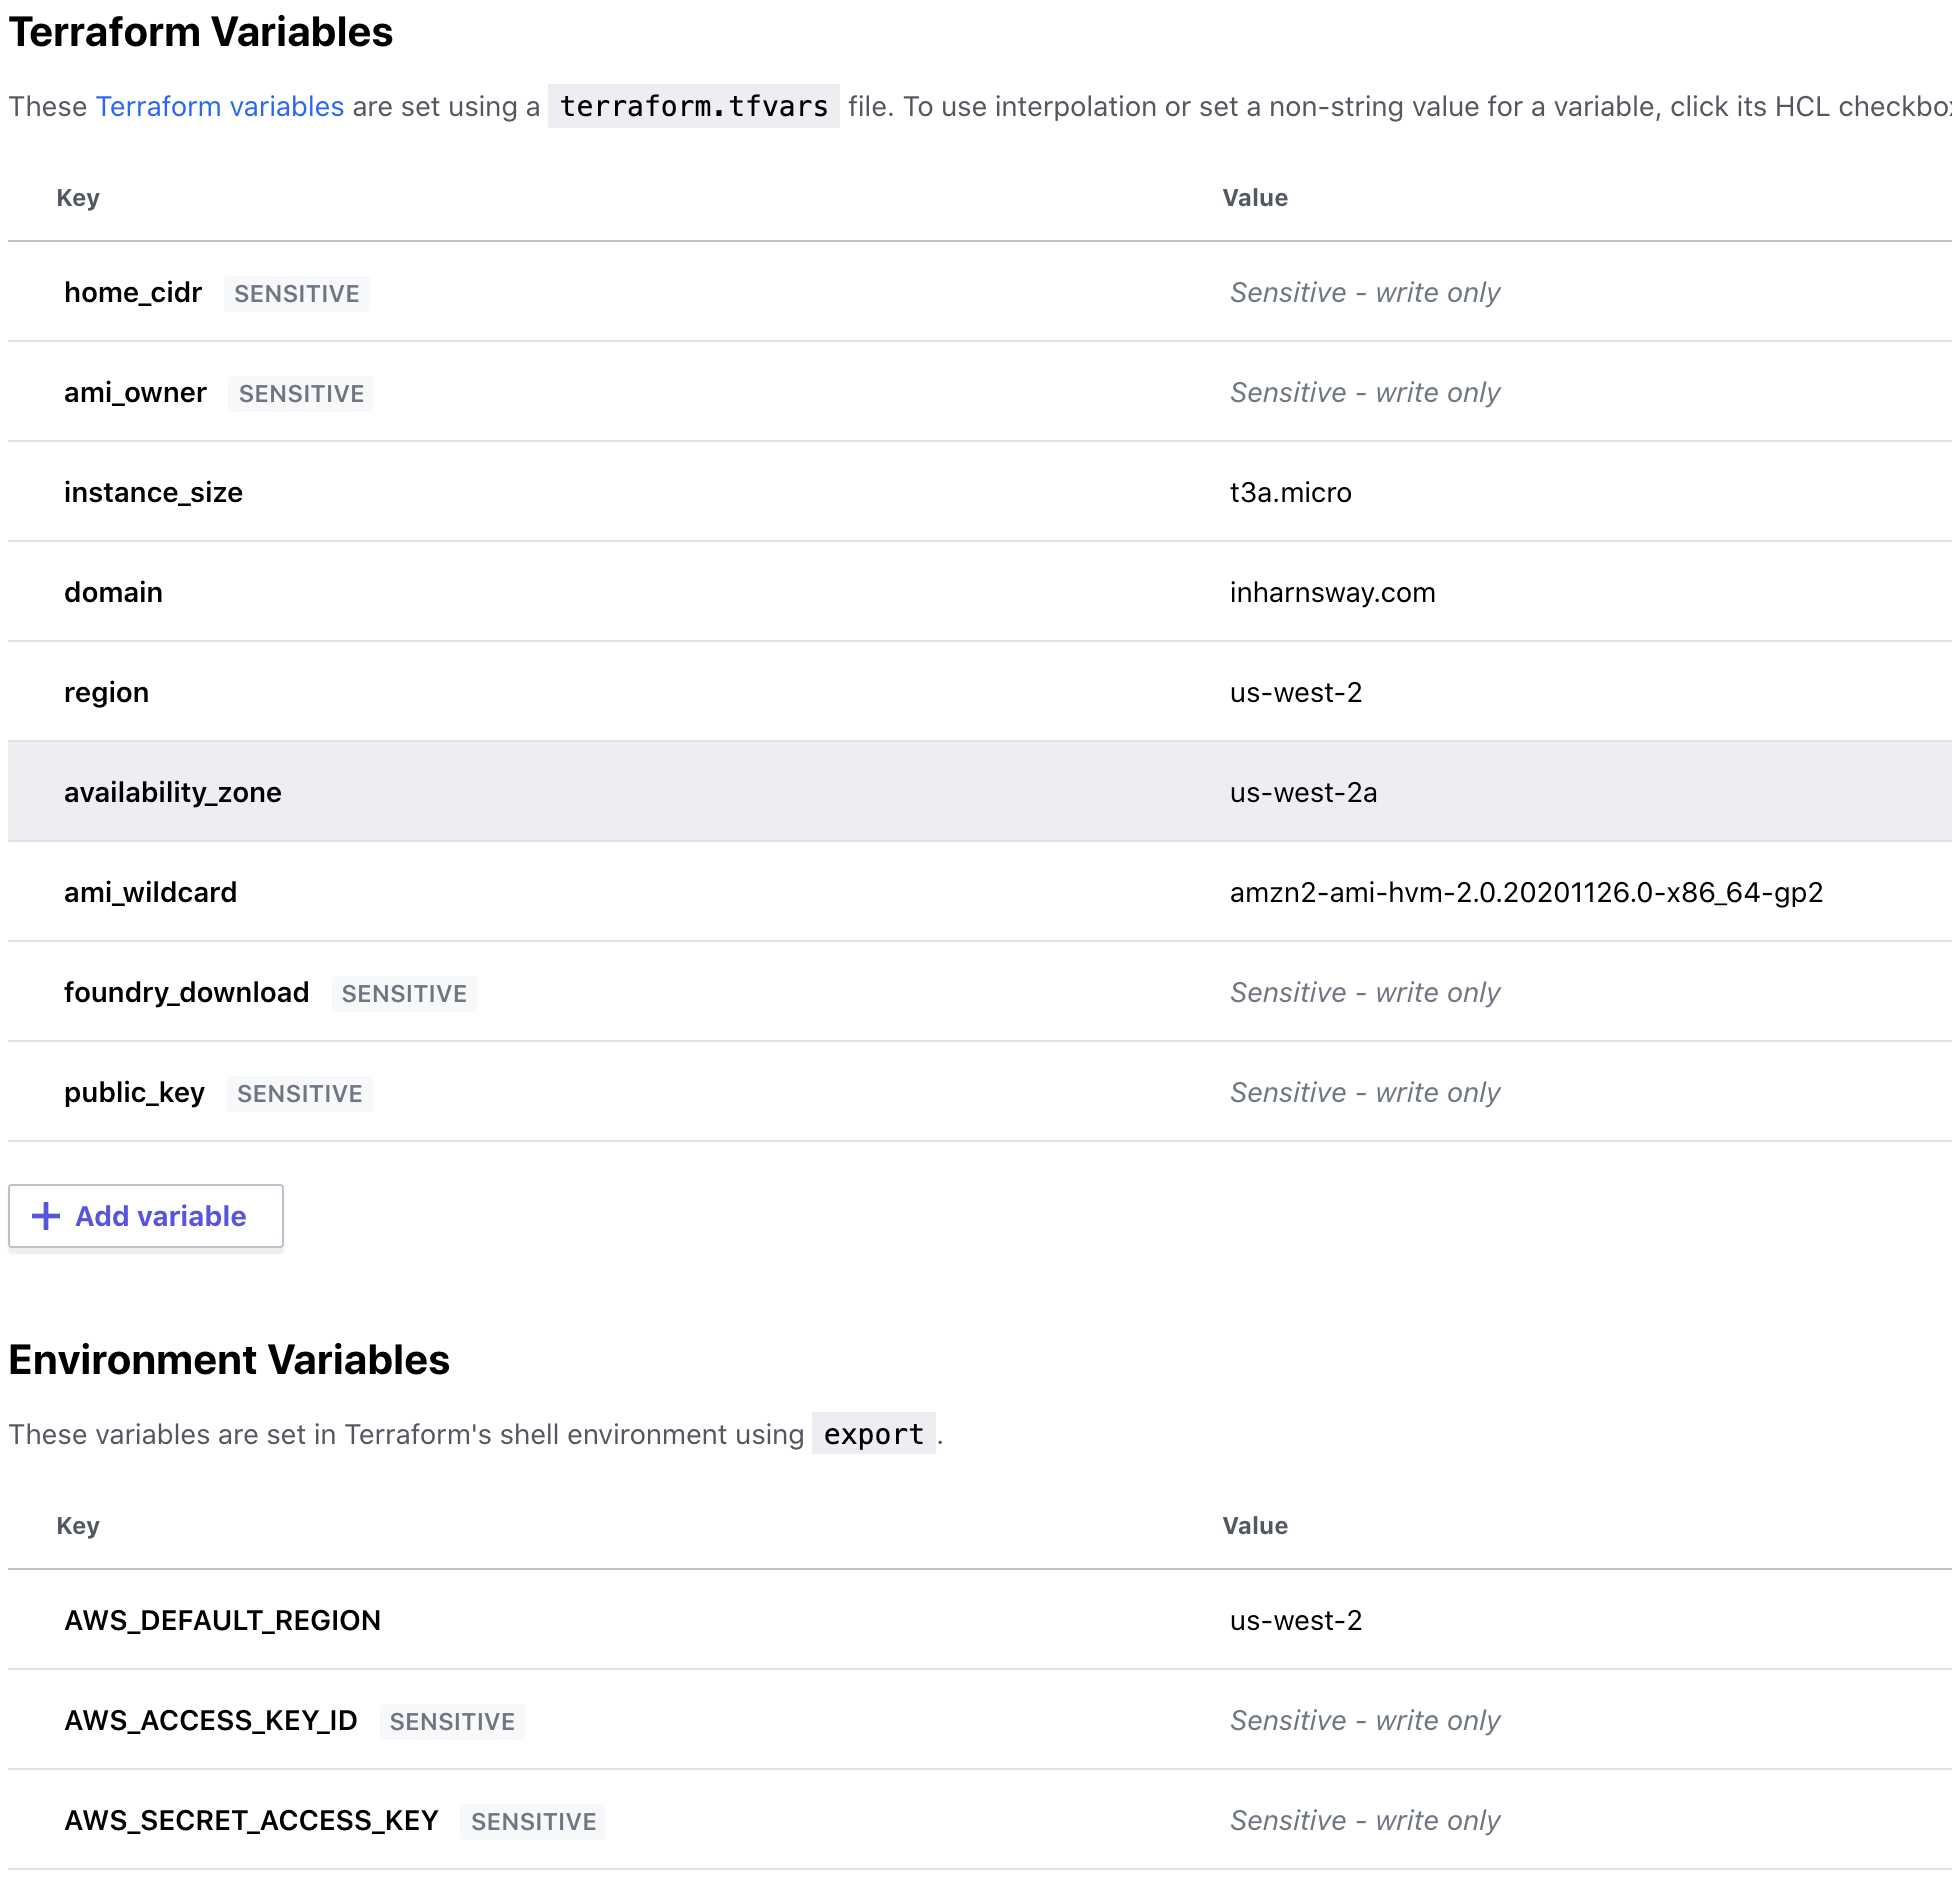
- In the Variables section of your Terraform workspace, specify the following variables
- home_cidr - required - your IP address to the word, followed by a /32. This will allow you to SSH to your server, and no one else. E.g. 34.56.78.90/32
- domain - required - the domain you bought. Foundry will register itself as https://www.```${domain}```
- public_key - required - the public key you use for ssh. On a mac or linux system it's located in ~/.ssh/id_rsa.pub. On Windows it varies based on what ssh program you use.
- instance_size - optional - The EC2 instance type you want to use. t3a.micro works just fine.
- region - optional - The region to deploy to. Pick one close to you and your players.
- Still in the Variables section, under environment variables, create/set the following variables (set to sensitive!) - AWS_ACCESS_KEY_ID - AWS_SECRET_ACCESS_KEY - AWS_DEFAULT_REGION (doesn't have to be set to sensitive)
- Here's what your variables screen should look like when done, if you specify all optional values:
-
- Queue the running of the plan.
- Apply the plan.
- The plan may not succeed the very first time (if nothing else, it will fail to get the SSL cert), but now you have Route53 set-up.
- In the AWS console, go to Route53, go to your hosted zone, and for your domain get the
value/route traffic tovalues for your name servers. - Wherever your registered your domain, update its DNS records to point to the values from the previous step. This may take some 10-30 minutes to propogate to the wider internet. - This will move all domain control away from your registrar and over to Route53 and Terraform.
- Terminate your ec2 instance if it's running.
- re-run your plan.
- Log in to your FoundryVTT instance. You should be able to ssh to ec2-user@www.yourdomain.
- Edit the file foundrydata/Config/options.json and add the following
"upnp": false, "hostname": "www.<yourdomain>", "dataPath": "/home/ec2-user/foundrydata", "proxySSL": true, "proxyPort": 443, - Restart your foundry by executing
sudo systemctl restart foundryvtt - Your foundry should be available at https://www.${domain}.
- Once you validate that your foundry is working, you will want to make an AMI of it so you don't have to get new 5-minute URLs all the time.
- After you make your AMI, update the variables to point to to the AMI name and owner.
