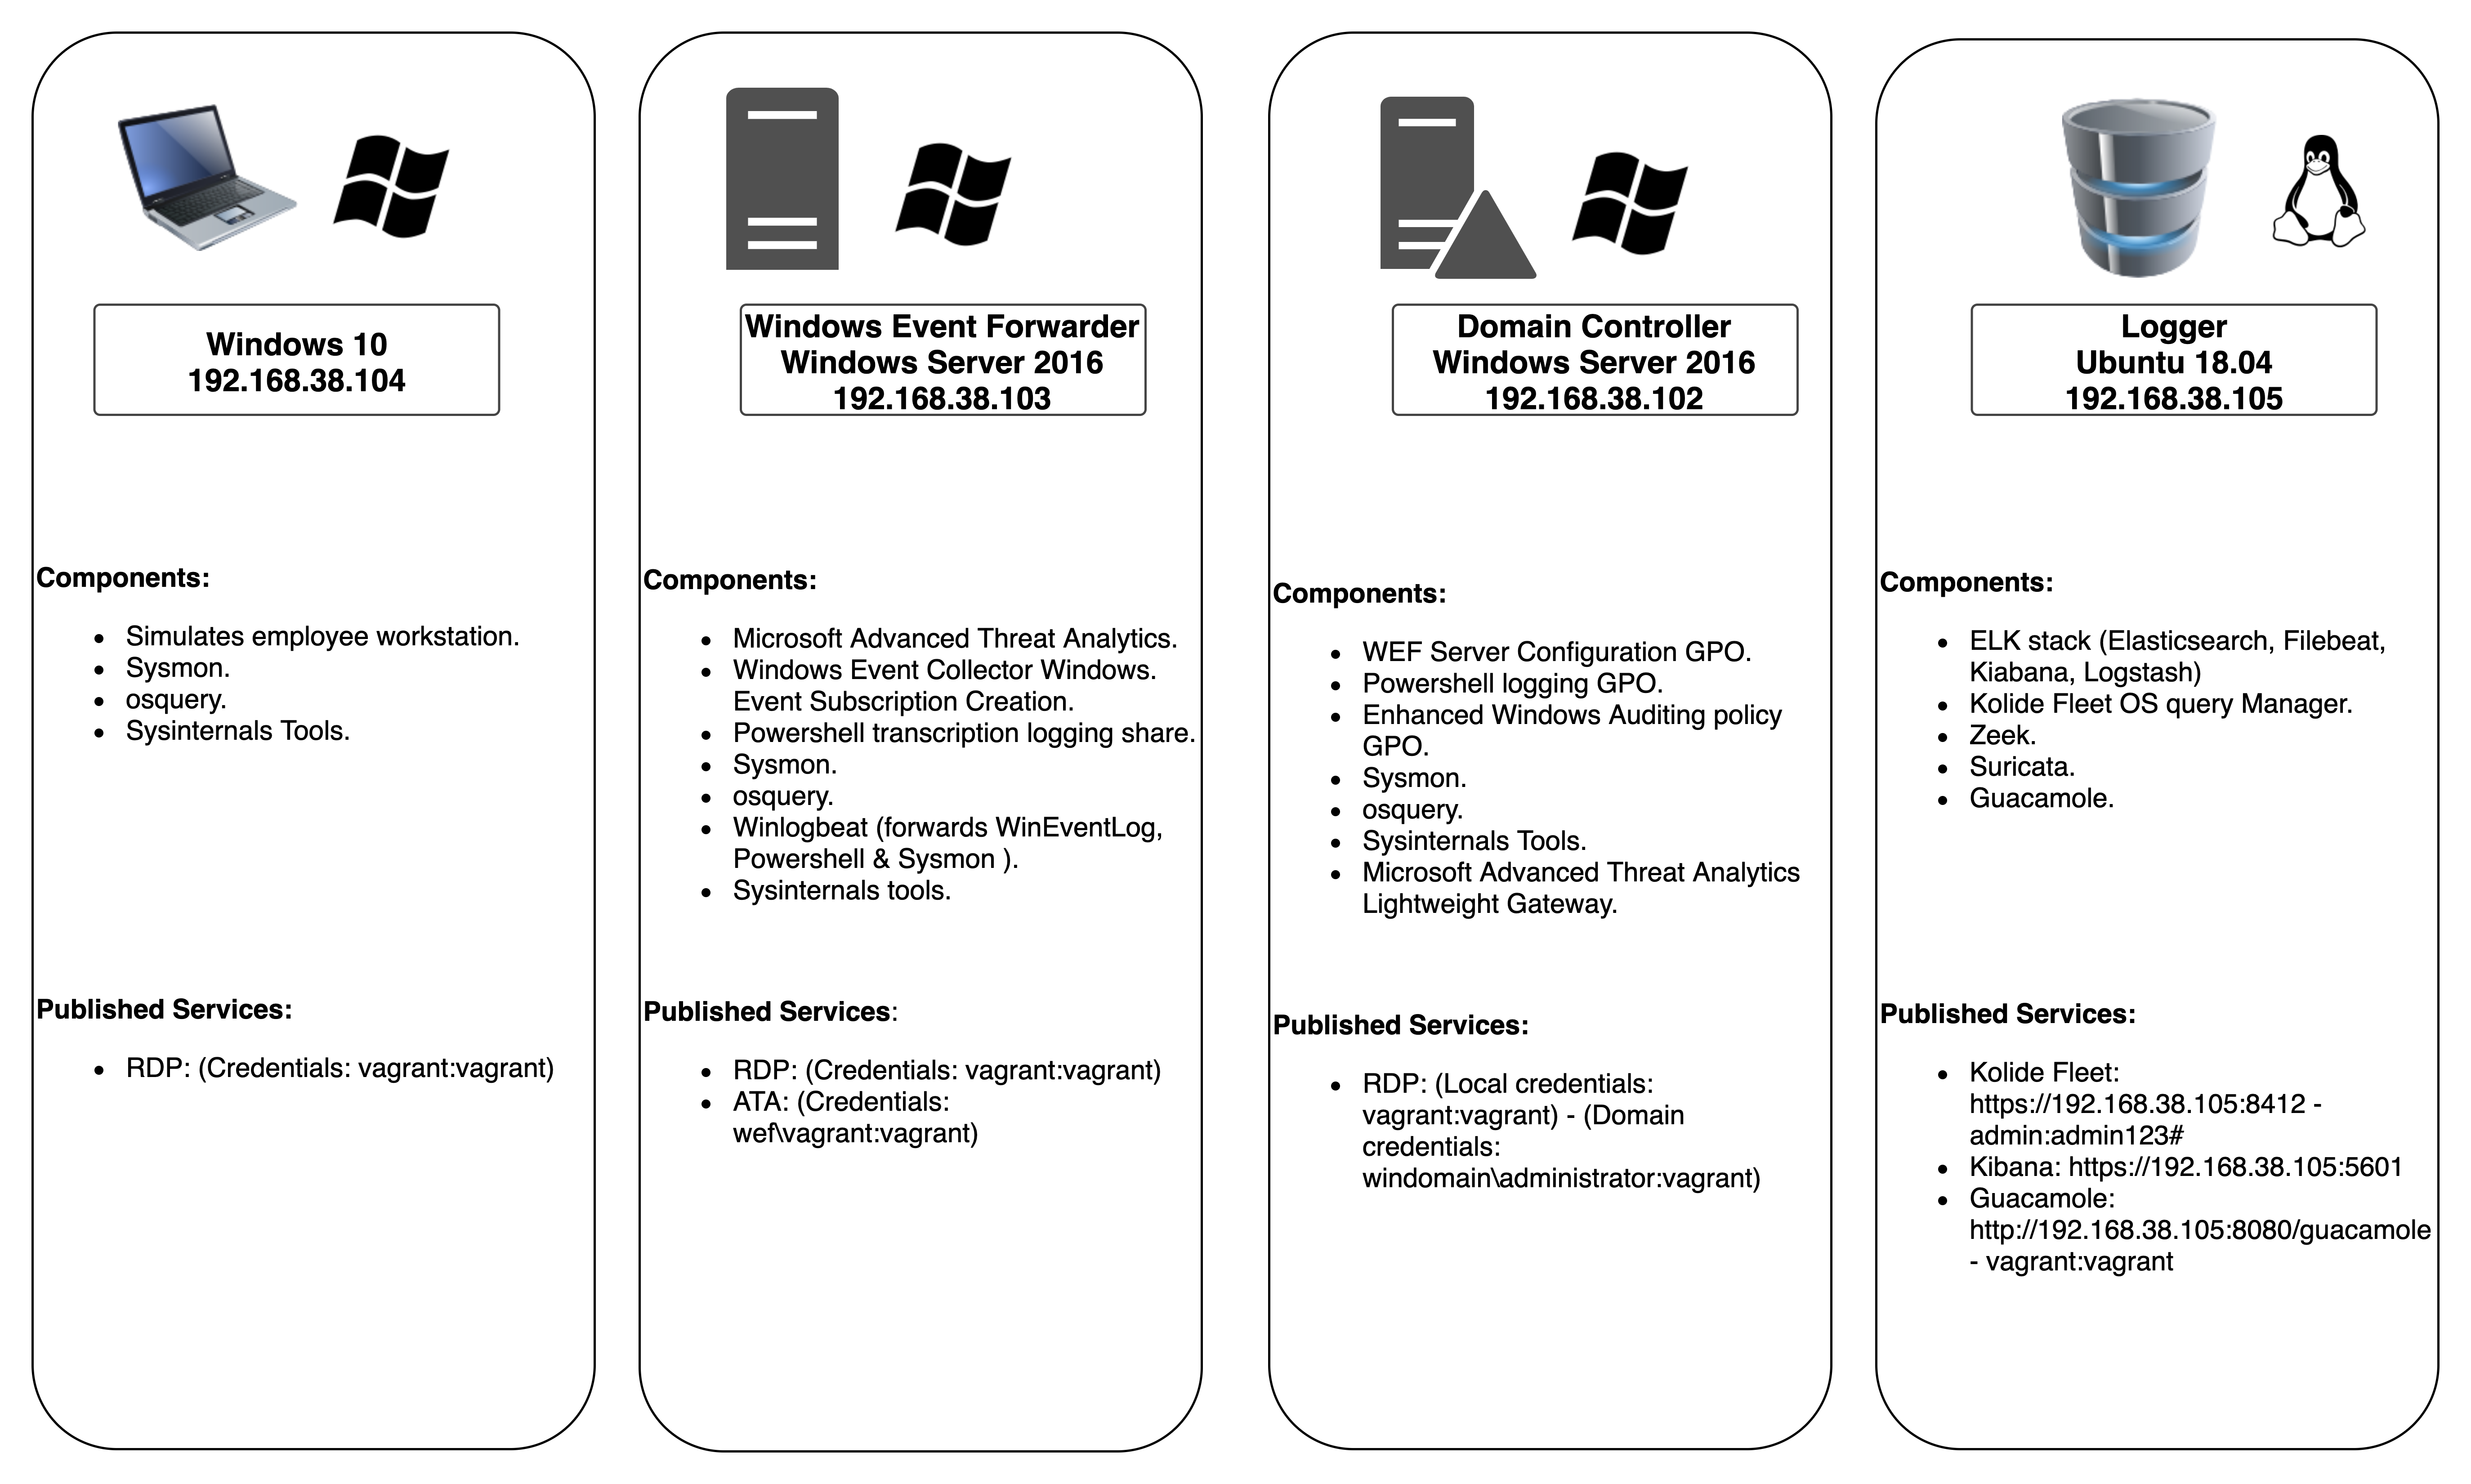
DetectionLabELK is a fork from Chris Long's DetectionLab with ELK stack instead of Splunk.
- Domain Name: windomain.local
- Windows Admininstrator login: vagrant:vagrant
- Fleet login: https://192.168.38.105:8412 - admin:admin123#
- Kibana login: http://192.168.38.105:5601
- Microsoft ATA login: https://192.168.38.103 - wef\vagrant:vagrant
- Guacamole login: http://192.168.38.105:8080/guacamole - vagrant:vagrant
- Microsoft Advanced Threat Analytics is installed on the WEF machine, with the lightweight ATA gateway installed on the DC
- Windoes Evenet forwarder along with Winlogbeat are pre-installed and all indexes are pre-created on ELK. Technology add-ons for Windows are also preconfigured.
- A custom Windows auditing configuration is set via GPO to include command line process auditing and additional OS-level logging
- Palantir's Windows Event Forwarding subscriptions and custom channels are implemented
- Powershell transcript logging is enabled. All logs are saved to
\\wef\pslogs - osquery comes installed on each host and is pre-configured to connect to a Fleet server via TLS. Fleet is preconfigured with the configuration from Palantir's osquery Configuration
- Sysmon is installed and configured using SwiftOnSecurity’s open-sourced configuration
- All autostart items are logged to Windows Event Logs via AutorunsToWinEventLog
- SMBv1 Auditing is enabled
- 55GB+ of free disk space
- 16GB+ of RAM
- Vagrant 2.2.2 or newer
- Virtualbox
-
Use Vagrant Cloud Boxes - ETA ~2 hours.
- Install Vagrant on your system.
- Install Packer on your system.
- Install the Vagrant-Reload plugin by running the following command:
vagrant plugin install vagrant-reload. - Download DetectionLabELK to your local machine by running
git clone https://github.com/cyberdefenders/DetectionLabELK.gitfrom command line OR download it directly via this link. cdto "DetectionLabELK/Vagrant" and executevagrant up.
-
Build Boxes From Scratch - ETA ~5 hours.
- Install Vagrant on your system.
- Install Packer on your system.
- Install "Vagrant-Reload" plugin by running the following command:
vagrant plugin install vagrant-reload. - Download DetectionLabELK to your local machine by running
git clone https://github.com/cyberdefenders/DetectionLabELK.gitfrom command line OR download it directly via this link. cdto "DetectionLabELK" base directory and build the lab by executing./build.sh virtualbox(Mac & Linux) or./build.ps1 virtualbox(Windows).
- To verify that building process completed successfully, ensure you are in
DetectionLabELK/Vagrantdirectory and runvagrant status. The four machines (wef,dc,logger and win10) should be running. if one of the machines was not running, executevagrant reload <host>. If you would like to pause the whole lab, executevagrant suspendand resume it usingvagrant resume. - Deployment logs will be present in the
Vagrantfolder asvagrant_up_<host>.log
- Navigate to https://192.168.38.105:8080/guacamole in a browser to access Guacamole. Default credentials are vagrant:vagrant.
- Navigate to https://192.168.38.105:5601 in a browser to access the Kibana dashboard on logger.
- Navigate to https://192.168.38.105:8412 in a browser to access the Fleet server on logger. Default credentials are admin:admin123#.
- Navigate to https://192.168.38.103 in a browser to access Microsoft ATA. Default credentials are wef\vagrant:vagrant.
Support: If you face any problem, please open a new issue and provide relevant log file.


