A Logseq Starter. Read the blog post. Visit the demo.
- Optional custom CSS themes.1
Here's a step-by-step guide to publish your Logseq graph to GitHub Pages. We recommend using the workflow provided with the project to publish your graph to GitHub Pages. To do so, follow the steps below.
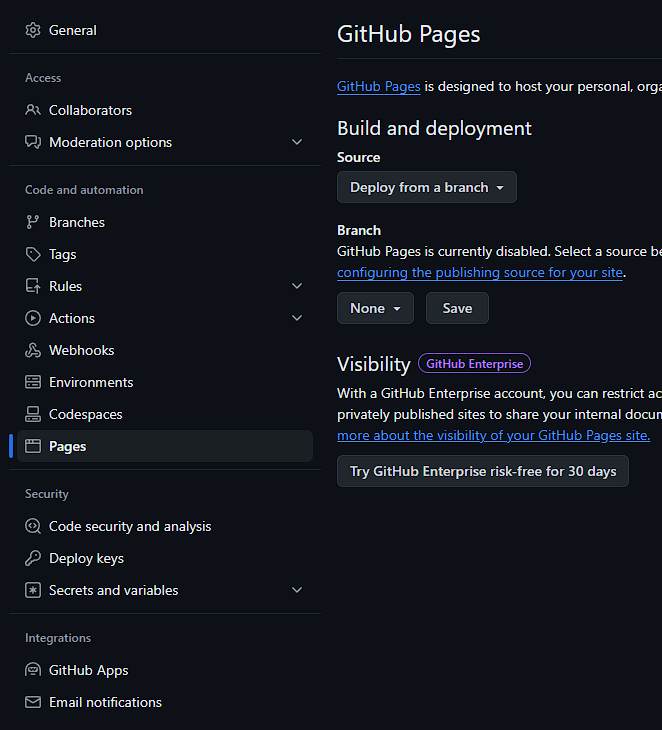
At the top of the repository, click Settings.
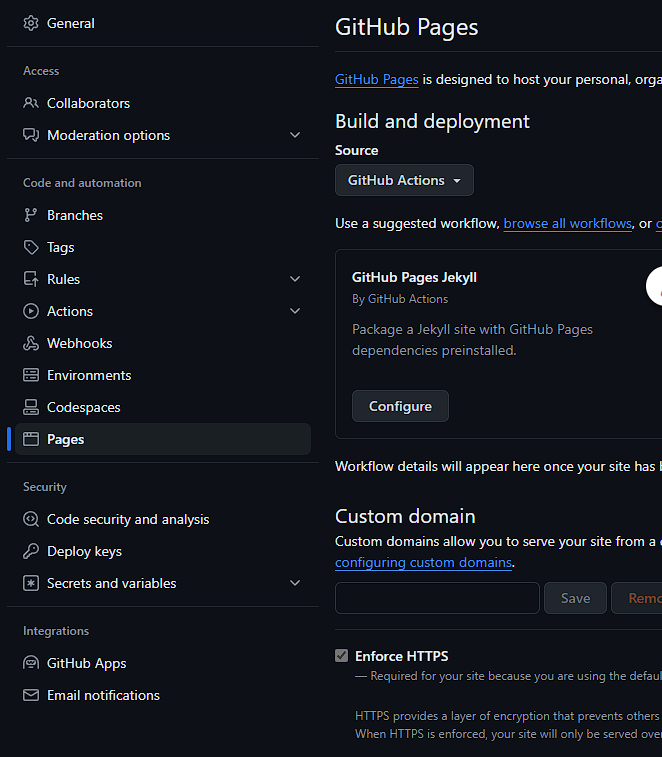
On the left sidebar, click Pages under Code and automation.
Under the Build and deployment section, under Source, change it from Deploy from a branch to GitHub Actions.
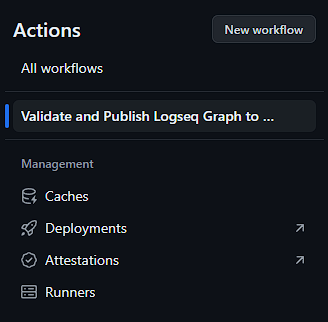
At the top of the repository, click Actions.
On the left sidebar, click the workflow name (Validate and Publish Logseq Graph to GitHub Pages).
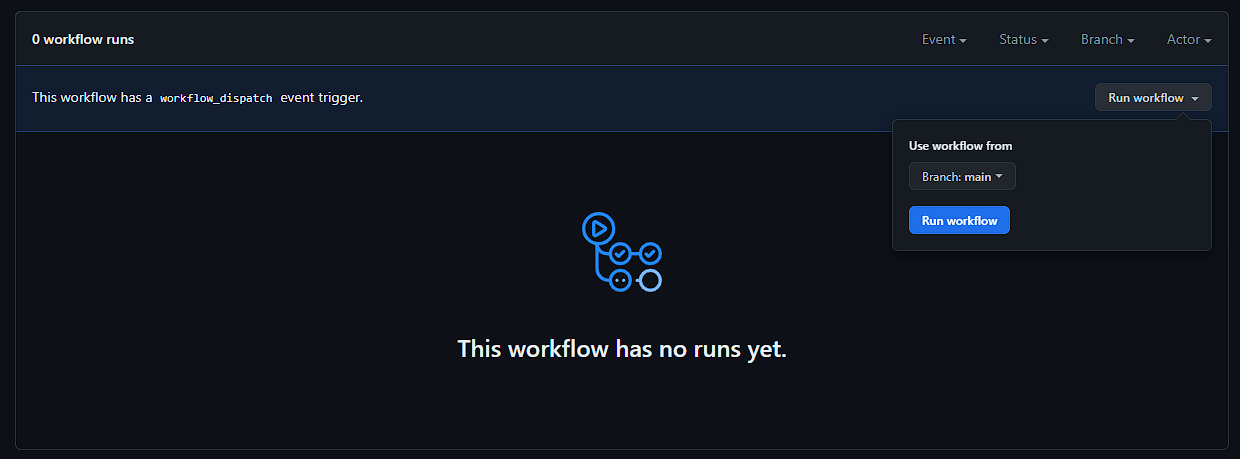
On the right, click Run workflow, then click on the new Run workflow (blue) button.
⚠ Please be patient.The first time you run the workflow, it will take several minutes to complete. Subsequent runs will be faster.
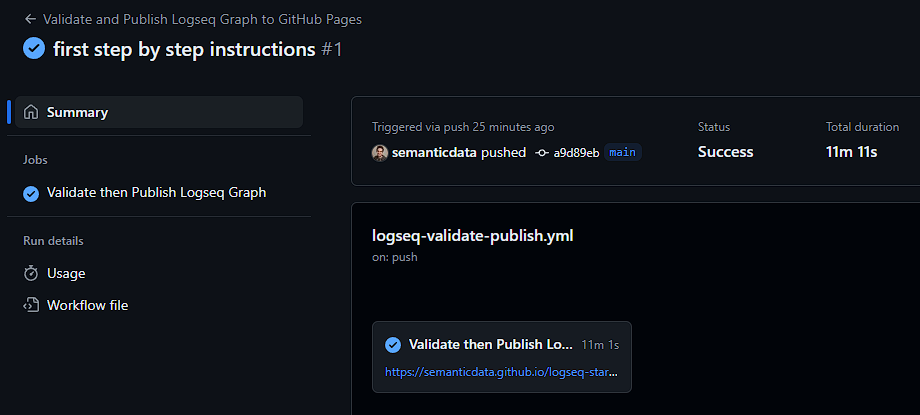
Take a look at the first run for this repository:
Over 11 minutes!
But as you can see in the next screenshot, the next time you run the workflow, it will be much faster.
Just over 1 minute!
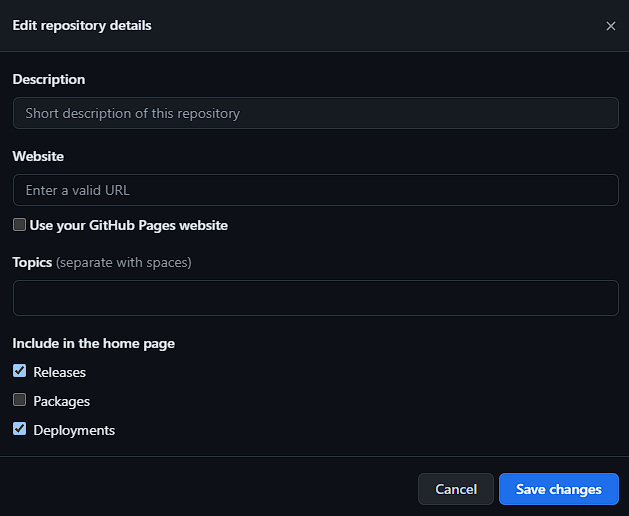
Back at the repository landing page, click the ⚙ (Gear) icon to edit the repository details.
Under Website, click Use your GitHub Pages website.
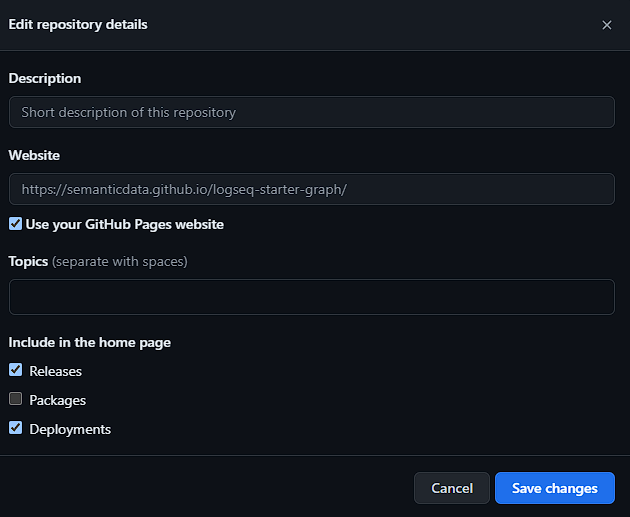
It will populate the URL field with your own GitHub Pages website address. It should look like https://your-username.github.io/logseq-starter-graph/.
Note: This is a good time to add a description to your project.
Save your changes and take a look at your repository details.
Enjoy using the Logseq Starter Graph!
A breakdown of the workflows used in this project.
The validate workflow runs tests on the graph to identify any errors using logseq/graph-validator.
name: Validate Logseq Graph
steps:
  - name: Checkout code
    uses: actions/checkout@v4
  - name: Run graph-validator tests
uses: logseq/graph-validator@mainThe publish workflow builds and deploys the graph to GitHub Pages using logseq/publish-spa.
name: Publish Logseq Graph
steps:
  - name: Checkout code
    uses: actions/checkout@v4
  - name: Build Logseq graph
    uses: logseq/publish-spa@main
    with:
      output-directory: build # must match path below
  - name: Configure for GitHub Pages
    uses: actions/configure-pages@v5
  - name: Upload artifact
    uses: actions/upload-pages-artifact@v3
    with:
      path: build # must match output-directory above
  - name: Deploy to GitHub Pages
    id: deployment
uses: actions/deploy-pages@v4A workflow that both validates and deploys to GitHub Pages (only after validation passes) is used for this project and looks like this:
name: Validate then Publish Logseq Graph
steps:
  - name: Checkout
    uses: actions/checkout@v4
  - name: Run graph-validator tests
    uses: logseq/graph-validator@main
  - name: Build Logseq graph
    uses: logseq/publish-spa@main
    with:
      output-directory: build # must match path below
      accent-color: indigo
  - name: Configure for GitHub Pages
    uses: actions/configure-pages@v5
  - name: Upload artifact
    uses: actions/upload-pages-artifact@v3
    with:
      path: build # must match output-directory above
  - name: Deploy to GitHub Pages
    id: deployment
uses: actions/deploy-pages@v4Source code in this repository is available under the MIT License.
Footnotes
-
Optional custom CSS themes can be adjusted in logseq/config.edn. It includes links to popular themes like: dracula, catppuccin, logseq-bear, logseq-paper, logseq-quattro, logseq-allday and logseq-dev. ↩


