Quick Intro
This is an implementation of Image Captioning model in PyTorch.
For training Flickr 8k dataset was used. Dataset was acquired by following instructions from the machinelearningmastery blog. You can find some dataset files on this repo (maintained by jbrownlee i.e. machinelearningmastery).
Table of Contents:
Image captioning is a machine learning problem where at the input we receive an image and we should generate some reasonable caption for it. Of course caption needs to be related to the picture and syntactically correct.
Flickr8K dataset consists out of 8000+ images. Each image has five captions associated with it. A pre-defined train-validation-test split is 6000:1000:1000 images.
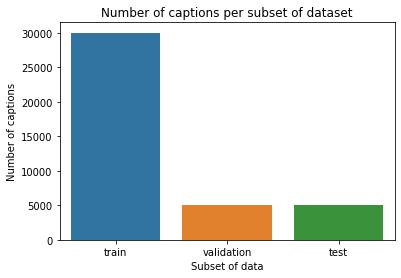
Below we can see number of captions based on the original dataset split.
Since Transformer Decoder was used for the decoding part we need to take special care when it comes to feeding data into the model. Transformer blocks (Vaswani et al.) rely on leveraging attention layers which try to determine how much attention we should pay on other tokens in a sequence, while trying to encode the current one.
This approach is extremely powerful but it can lead to some problems. As illustrated below, the model receives each token up until the final one as input and uses all tokens except the first one as target labels. In different words: We wish to predict the next word of a caption given the previously generated words.
In the previous figure we can notice few things.
- Each sequence has
<start>and<end>tokens appended to the beginning and end of a caption. These tokens are crucial for any text generation problem.<start>token serves as a initial state when we need to generate the first word of a caption<end>token is important because it serves as a signal to the decoder that the caption has ended. Usage of this token prevents the decoder from trying to learn (and generate) infinite captions.
As indicated in previously the problem lies in the fact that the decoder can attend to the word that it's trying to predict since entire input sequence is fed at once. In order to solve that problem we need to mask out all of the tokens after the one which we are trying to further encode. This process is illustrated below.
Each image was passed through the CNN encoder. Output from one of the intermediate CNN layers is extracted. That output has a shape of (N, M, C).
(N, M)represents shape of a downsampled feature mapCis a number of feature channels- This tensor is then reshaped into
(N * M, C)tensor. This new tensor is now treated as a sequence of tokens where each token is a pixel from the mentioned feature map. Each of those tokens/pixels is represented with a vector of sizeC.
Model architecture consists out of encoder and decoder.
- Encoder is a ResNet Convolutional Neural Network. Concretely, a pretrained ResNet50 was used. Pretrained model was acquired from PyTorch's torchvision model hub
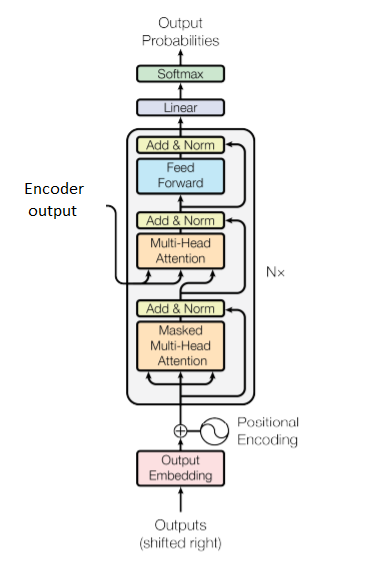
- Decoder was a classical Transformer Decoder from "Attention is All You Need" paper. Image below is an edited image of the transformer architecture from "Attention is All You Need". Decoder has 6 blocks.
Model forward pass:
-
The image is passed through the encoder which downsamples the image and generates some descriptive features. We remove the last two layers from the ResNet50 since we wish to only extract feature maps, and discard the features which were used to perform classification on the ImageNet. These feature maps are reshaped as previously described here.
-
Decoder takes in two inputs:
- Previously generated words. These are fed as tokens in a sequence manner
- Image features. Downsampled image is flattened in such way that each pixel represents a single input token from a sequence (analogous to the word tokens). Each pixel is described by N feature channels
-
As we can see in the previous image there are two attention layers in each decoder block.
- First, we try to further encode each token in the input sequence by using self-attention mechanism, which calculates how much attention we should pay to other words in the input sequence. Of course, here we need to take special care to make sure we mask tokens to which we are not allowed to attend as described here
- Second decoder attention layers tries to match input word tokens to input image features. By
input word tokenswe mean the output of the first "masked self-attention" layer
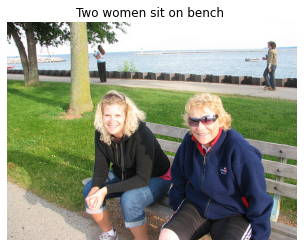
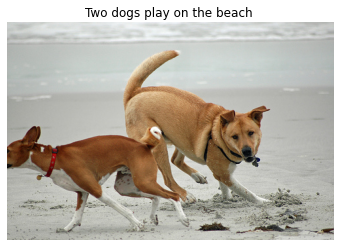
Model performance was evaluated using BLEU score. These results (quantitative and qualitative) were acquired by leveraging greedy decoding. Results of higher quality can be obtained by using beam search which isn't implemented in this repo.
Below we can see the model perfomance on all of the subsets. We can notice that the model has high generalization performance.
Based on quantitative results we can see that the BLEU-4 score is not extremely high. This model was trained on a local GPU: GTX 1650Ti so there were limitations in the hardware compute power. If we train this model for long enough we could be able to achieve better results. Besides that, using beam search would also improve results, but beam search can add a significant computational overhead.
 |
 |
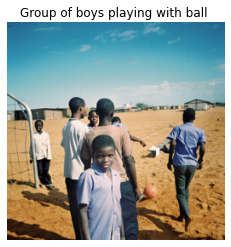 |
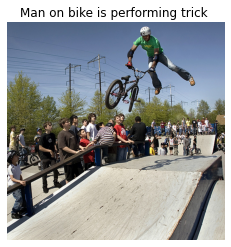 |
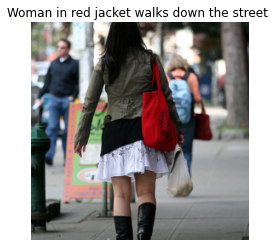 |
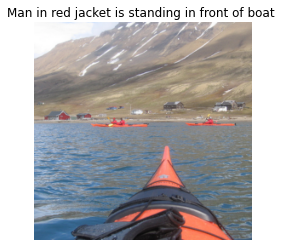 |
- Acquire Flickr8K dataset from the repository or by following instructions from machinelearningmastery blog
- Download GloVe embeddings from the following link. Choose the one marked as "glove.6B.zip"
- Open Anaconda Prompt and navigate to the directory of this repo by using:
cd PATH_TO_THIS_REPO - Execute
conda env create -f environment.ymlThis will set up an environment with all necessary dependencies. - Activate previously created environment by executing:
conda activate pytorch-image-captioning - In the configuration file modify the
glove_direntry and change it to the path to directory where you have previoulsy downloaded the GloVe embeddings. - Run
python prepare_dataset.py. This will perform the following steps:- Load the raw captions for images
- Perform preprocessing of the captions
- Generate the vocabulary of words that appear in the caption corpus
- Extract GloVe embeddings for tokens present in previously created vocabulary
- Further tune the vocabulary (discard words for which embeddings aren't present)
- Dataset split: Separate image-caption mappings based on predefined split
- Run
python main.pyto initiate the training of the model
These resources were very helpful for me:
