Inspired by the replaceable USB-rechargeable LiPo batteries inside the Ring doorbells/cameras, I wanted something similar for my original gameboy. There's plenty of LiPo mods that require cutting up the Gameboy and/or soldering to the boards inside, but I wanted to leave the console all-original.
It's a very simple build, and most of the effort was in iterating (and iterating, and iterating) the case/chassis design until it fit perfectly inside the battery compartment. I wanted it to utilise the existing battery springs to hold it stable enough to play on the go, and also use the original battery contact points so there was no modification required to the Gameboy itself.
- Polymer Lithium Ion Battery (LiPo) 3.7V 1100mAh
- Adafruit Micro Lipo w/MicroUSB Jack
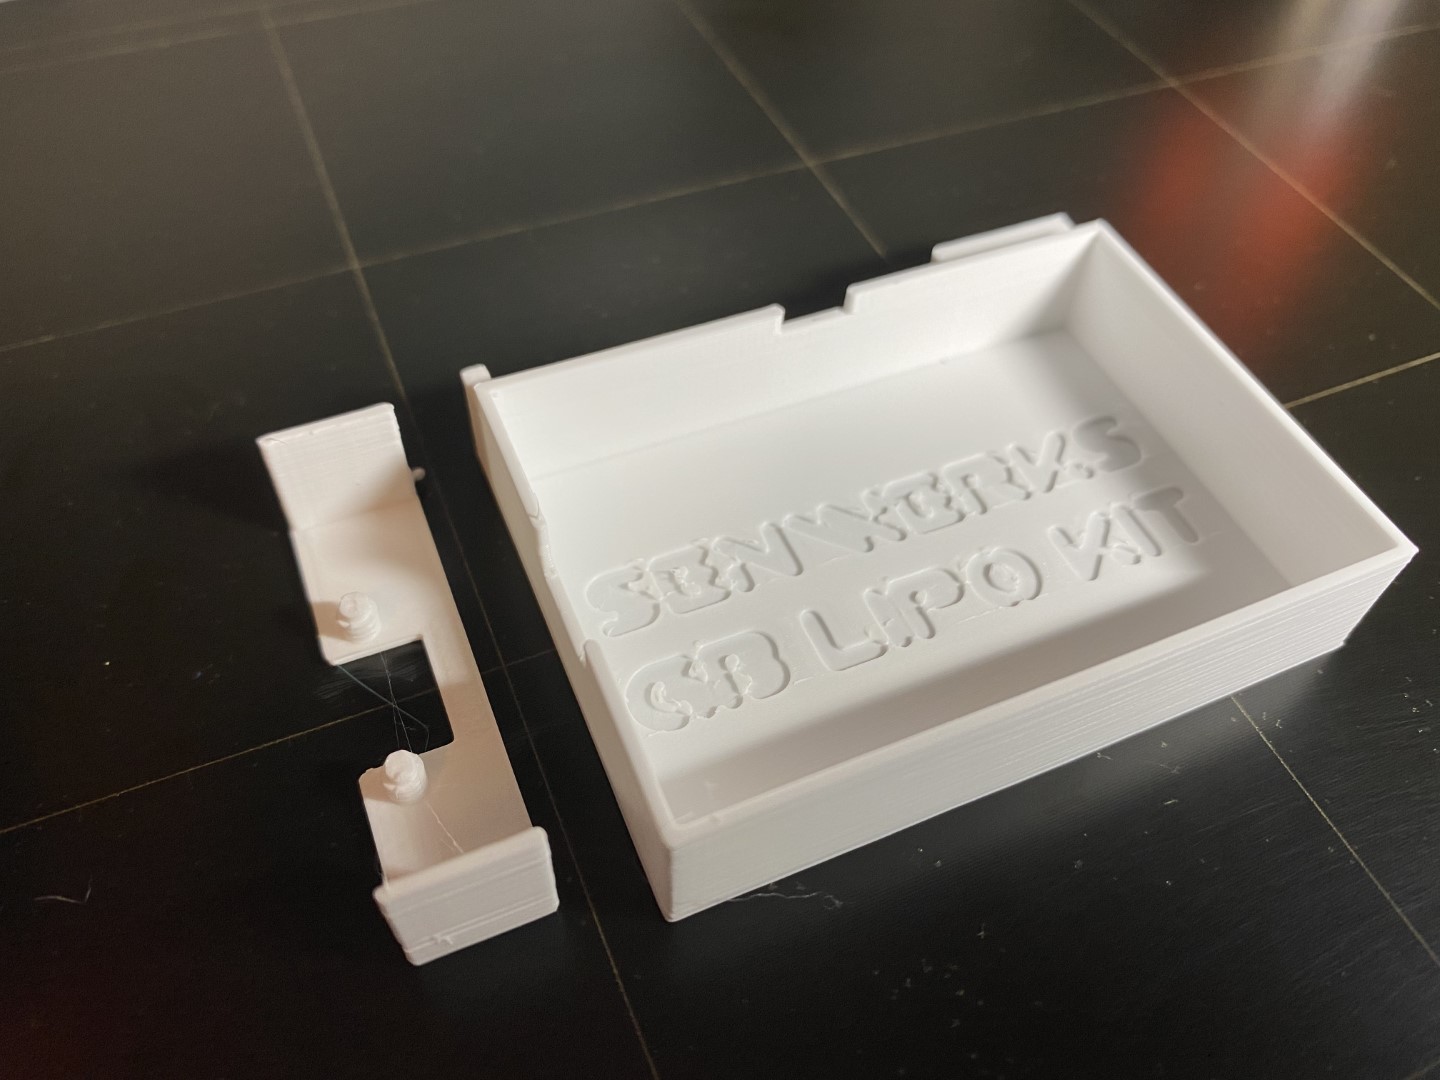
- 3D printed chassis/case
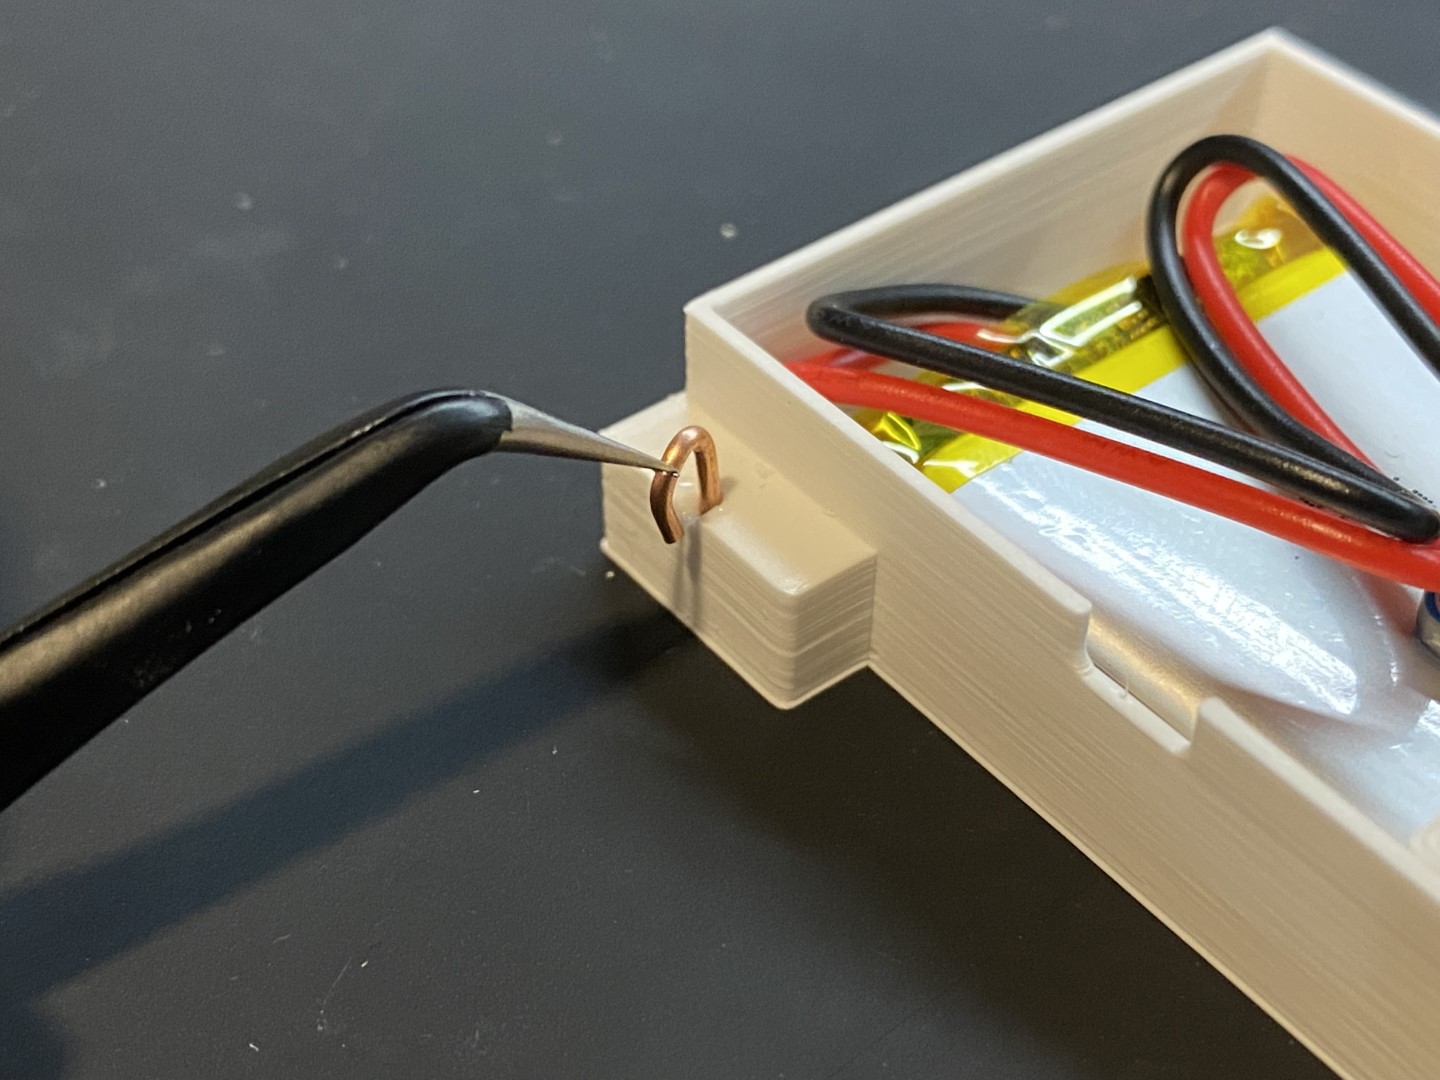
- 1mm brass wire
- 22AWG wire
Print the 2 STL files (I've also included gcode files for Prusa i3's, and a project file).
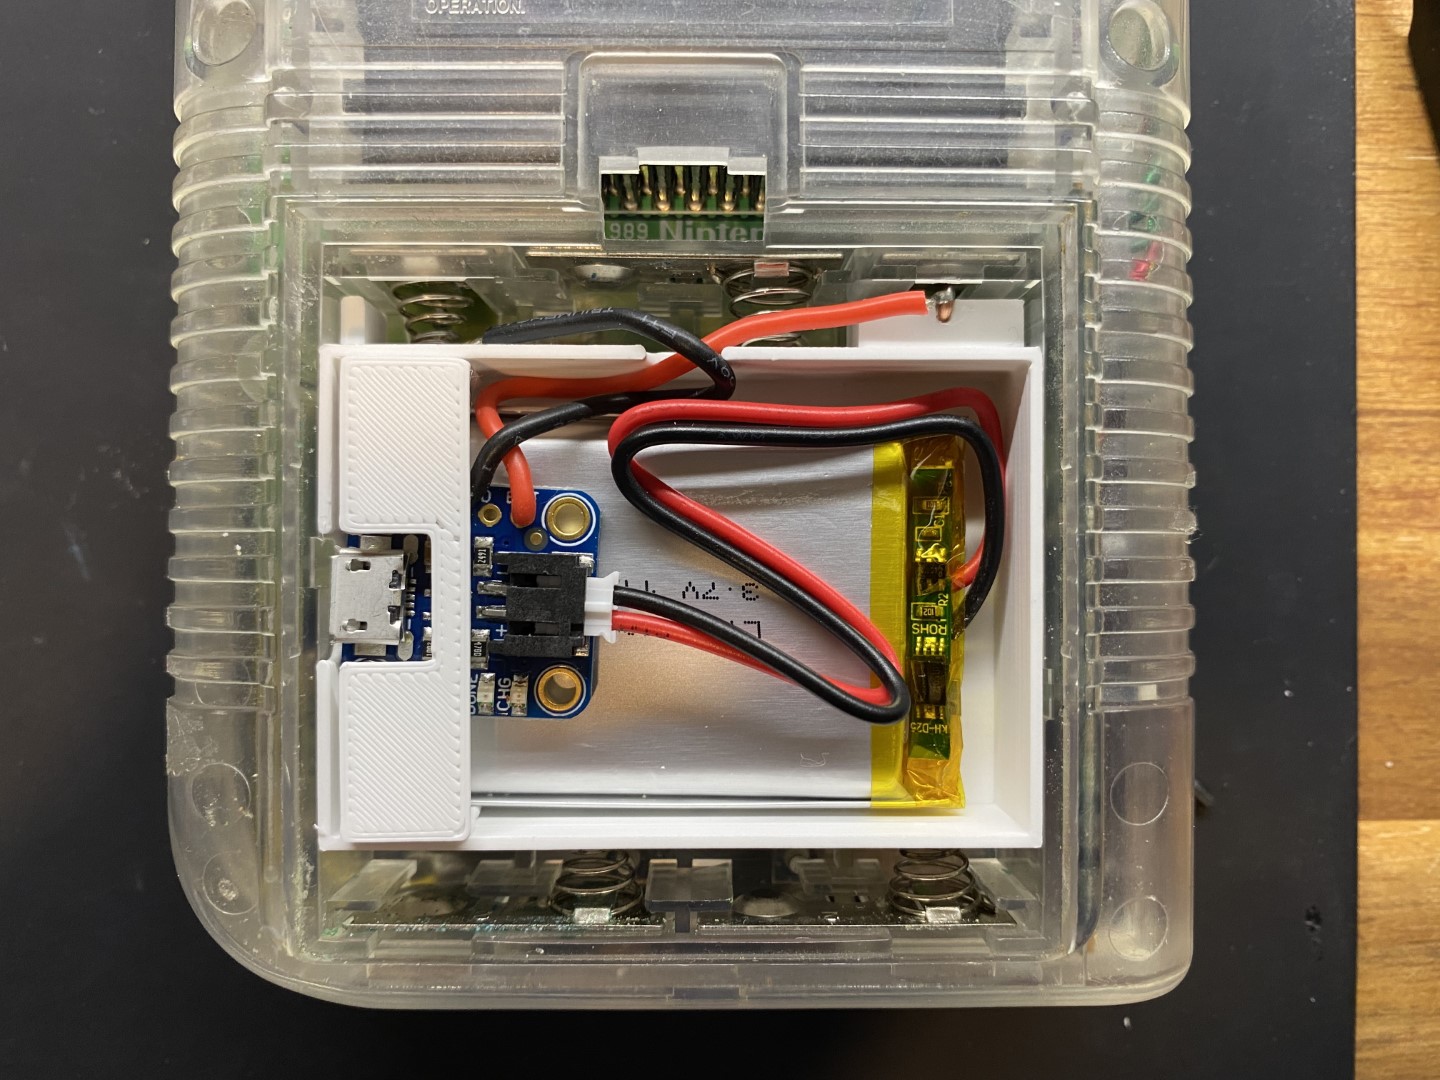
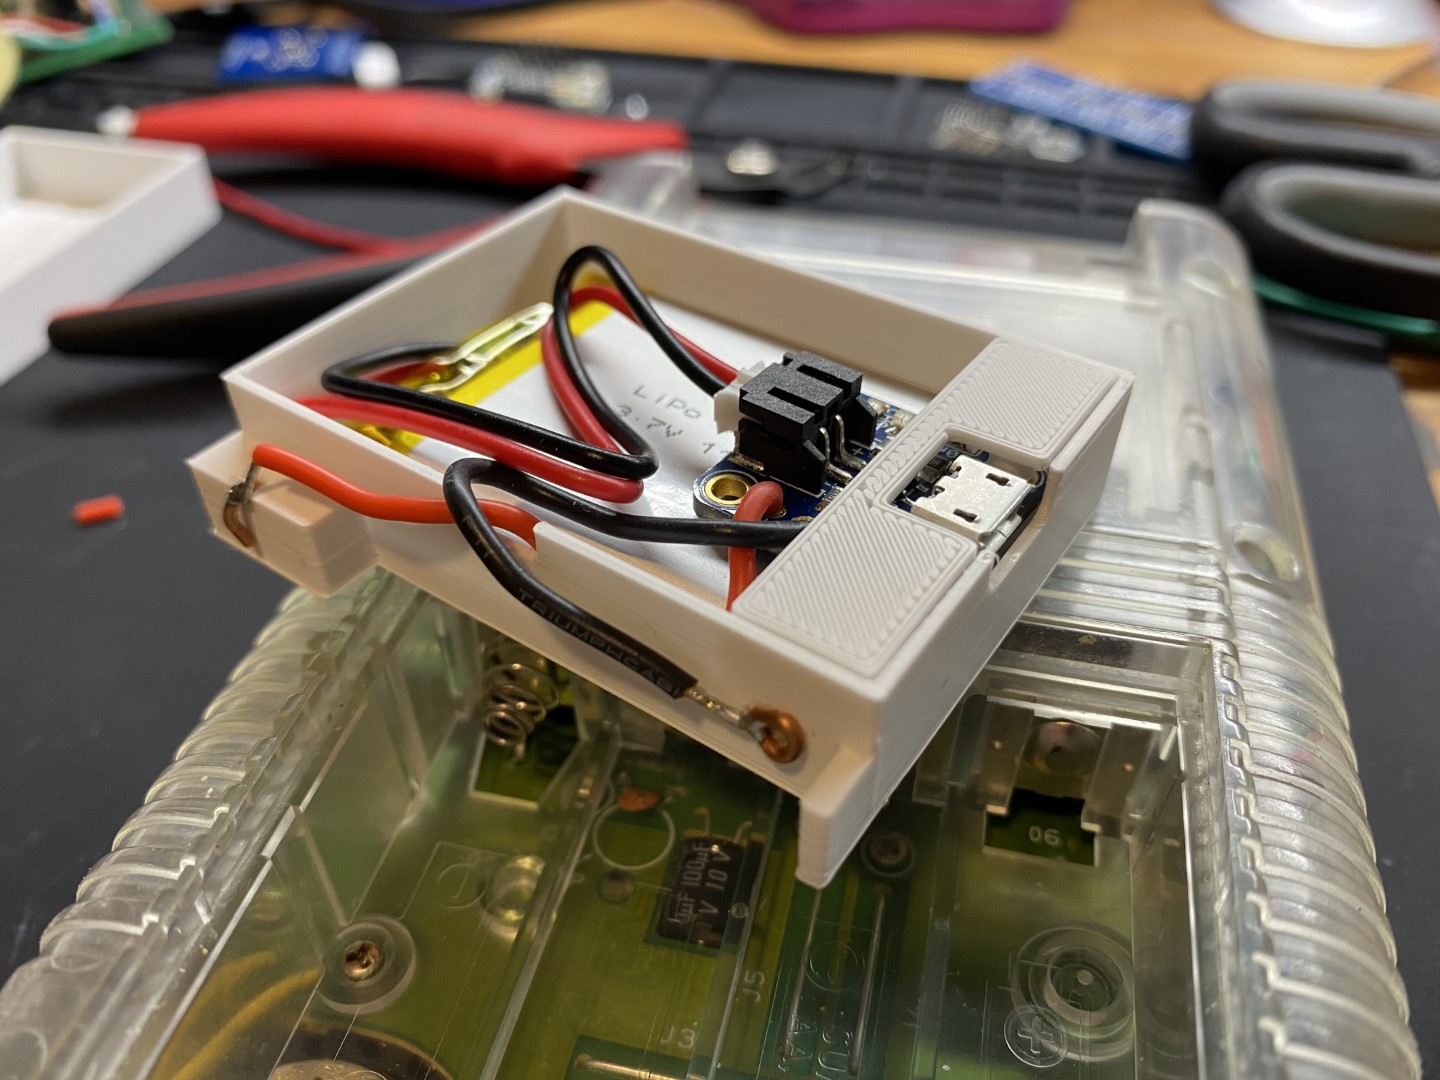
Bend some small pieces of the 1mm brass wire and glue them into place as per the photos. Solder wires from the the positive brass wire piece (right side, check battery compartment markings to be sure) to the BAT point on the LiPo breakout, and the negative side (left side) to the GND point.
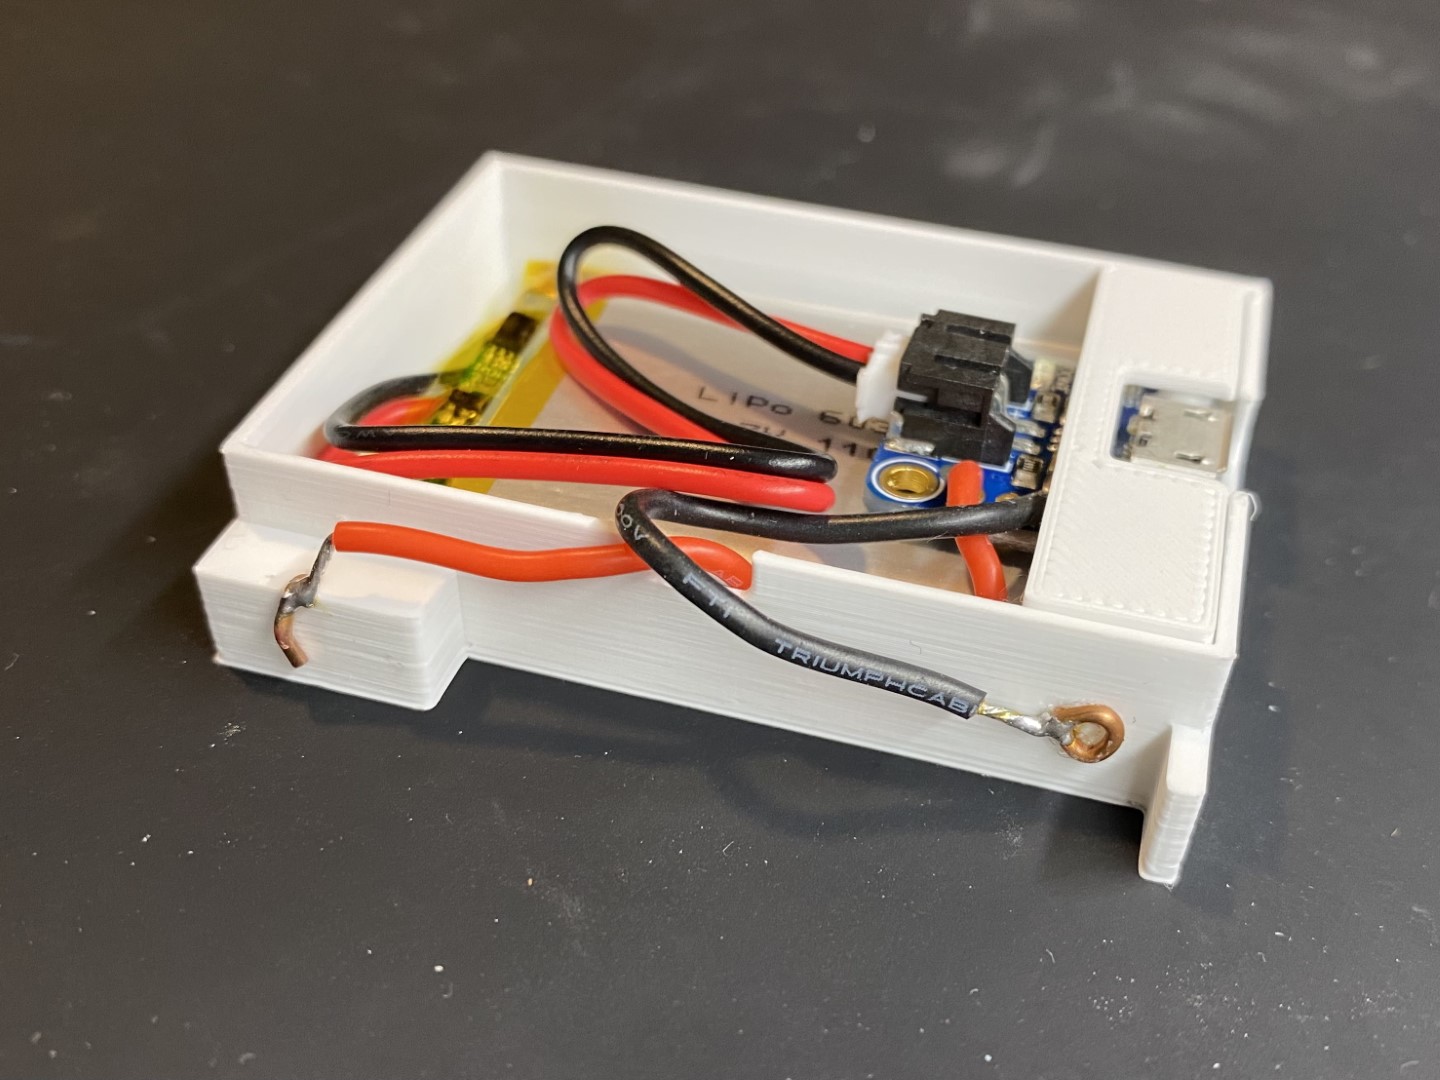
The photos should sum it up, it's not a very complex build.
When you're putting the new battery pack into the Gameboy, you want to lower the bottom edge in first and push it against the lower springs to compress them, then the top part with the brass contacts should lower down in without scraping anything. When you let go, the lower springs push the new battery up against the contacts at the top, holding it in place.
Voila, USB-rechargeable LiPo battery pack without modifying the console.