리포지토리 클론 후
cd client
npm install
npm start
로 실행할 수 있습니다.
배포 URL
https://seongeun-balloons.netlify.app/
1. Task 1
2. Task 2
3. Task 3
4. Task 4
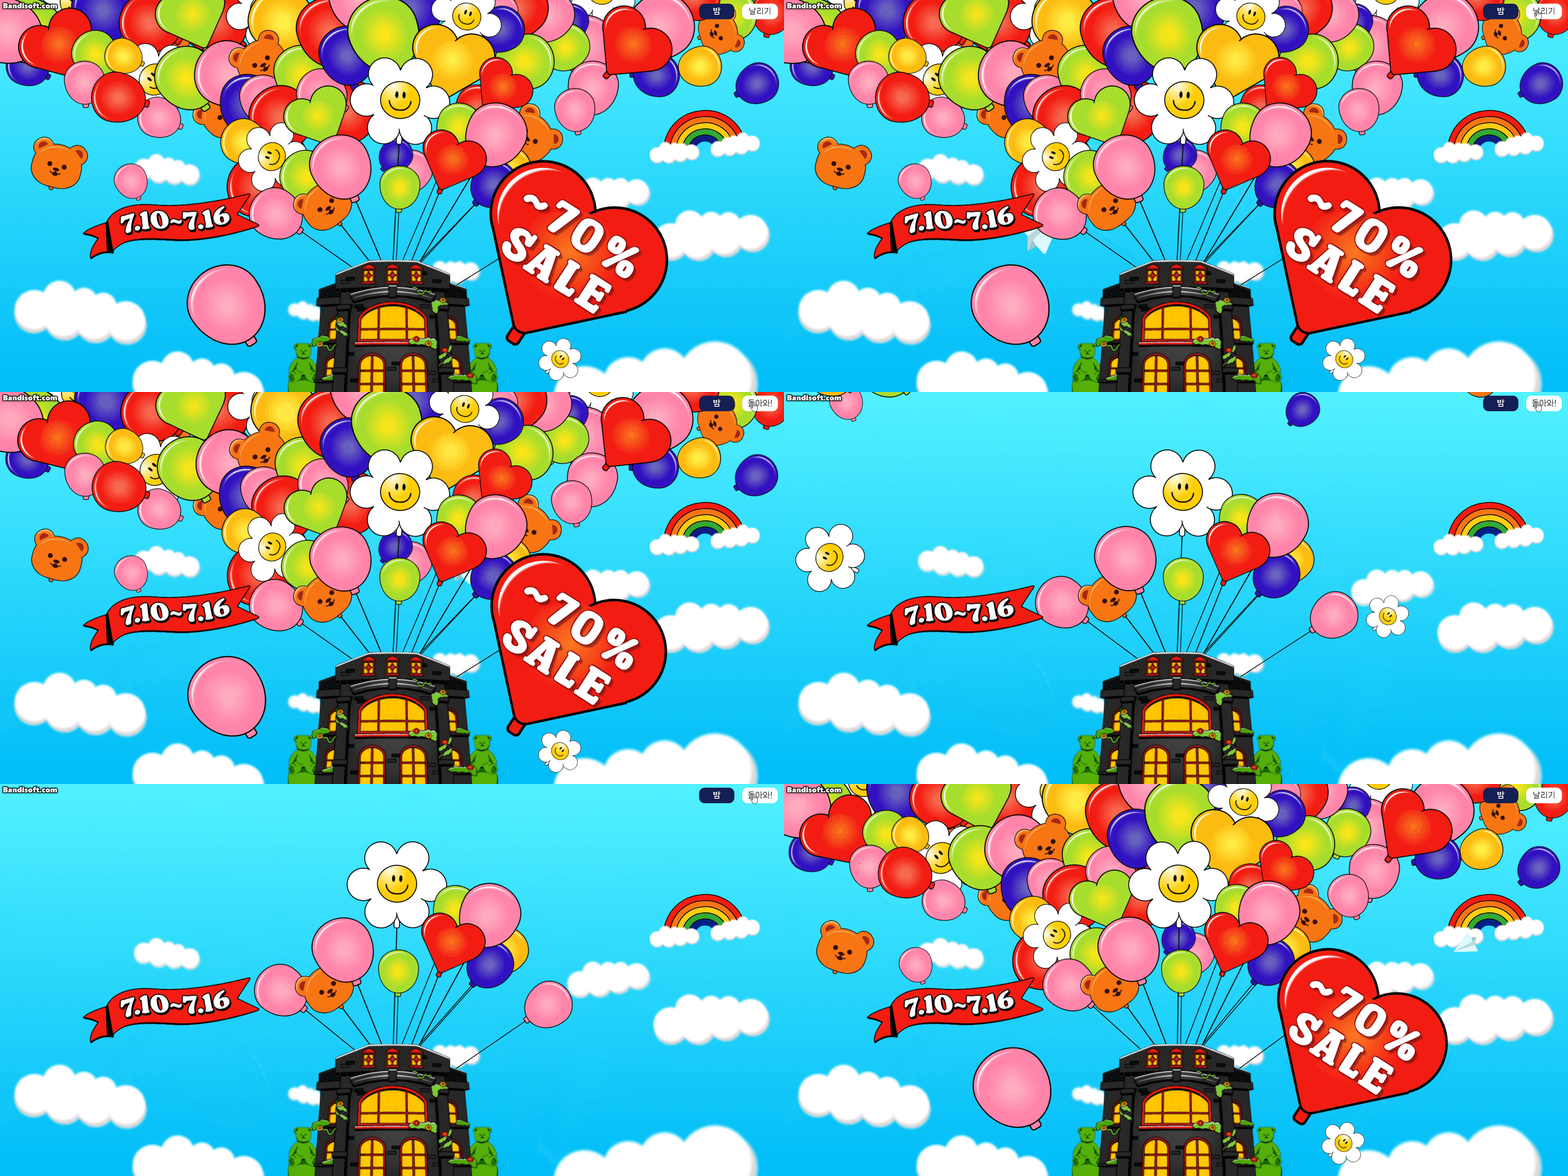
깃발과 집 모양을 제외한 모든 모양은 css로 구현하고 Keyframe 애니메이션을 적용해 움직이게 만들었습니다.
각 풍선은 하나의 object로 위치와 모양, 색깔 등 정보를 포함해 Redux store의 positions array에 저장합니다.
풍선은 모양별로 component로 나누어 재사용하고 모든 풍선은 BalloonsContainer에서 호출합니다.
풍선마다 가진 크기와 기울어진 각도가 애니메이션에 적용될 수 있게 style property로 지정하고 애니메이션에서 그 값을 반영합니다.
    <div
      key={props.mode}
      className="balloonLeft"
      style={{
        '--initial-rotation': props.rotate.toString() + 'deg',
        top: props.top.toString() + 'vh',
        left: props.left.toString() + 'vw',
        '--initial-scale': props.scale.toString(),
        ...}}
    ...

    @keyframes shake-bottom-less {
        0% {
            -webkit-transform: rotate(var(--initial-rotation)) scale(var(--initial-scale));
                    transform: rotate(var(--initial-rotation)) scale(var(--initial-scale));
            -webkit-transform-origin: 50% 0%;
                    transform-origin: 50% 0%;
        }
    ...
가운데 끈이 달린 풍선은 화면 사이즈가 바뀌더라도 항상 중앙에 올 수 있게 별도 container로 나누어 display: flex를 적용했습니다.
  display: flex;
  flex-direction: row;
  align-items: flex-end;
  justify-content: center;
풍선을 클릭하면 펑 효과음을 재생하고 redux store의 positions array에서 해당 id를 가진 object의 show property를 바꿔 보이지 않게 합니다.
    export default function positions(state = initialState, action) {
      switch (action.type) {
        case POP_BALLOON:
          return state.map((balloon) =>
            balloon.id === action.id ? { ...balloon, show: !balloon.show } : balloon
          );
        ...
집 모양을 누르면 기존에 터트린 풍선이 있는지 확인하고, 있다면 다시 그 풍선을 생성하고, 터트린 풍선이 없다면 랜덤한 property의 풍선을 생성합니다.
- 기존에 터트린 풍선이 있을 때
집 모양을 누르면 먼저 positions array에서 show property가 false인 풍선을 가져와서 show: true 설정해 다시 보이게 만듭니다.
    const onAdd = () => {
        const balloon = positions.find((balloon) => balloon.show === false);
        if (balloon) {
          audioControls.play('pop');
          onPop(balloon.id);
        } else {
          if (positions.length < 111) {
            audioControls.play('pop');
            dispatch(addBalloon(generateBallon()));
          }
        }
    };
- 아직 터트린 풍선이 없을 때
새로운 풍선을 생성하는 generateBalloon() 함수를 실행합니다.
기본으로 화면에 나타나는 풍선 갯수는 81개이며 positions.length < 111 조건을 달아 생성할 수 있는 풍선 갯수에 제한을 두었습니다. Math.random 함수를 활용해서 색깔, 기울어진 각도, 모양, 위치를 랜덤으로 지정합니다.
통일감을 주기 위해 각 모양마다 확률을 적용해 새로 생성된 풍선은 둥근 기본 모양일 확률이 50%로 가장 높게 설정했습니다.
    const shapes = ['bear', 'round', 'heart', 'daisy'];
    const chances = [0.1, 0.5, 0.3, 0.1];
    const randomValue = Math.random() * 1;
    let sum = 0;
    let index = 0;
    for (let i = 0; i < shapes.length; i++) {
      sum += chances[i];
      if (randomValue < sum) {
        index = i;
        break;
      }
    }
    ...
    shape: shapes[index],
상단 우측 버튼을 만들어 모드를 선택할 수 있게 만들었습니다. 현재 모드는 Redux store에 저장합니다.
클릭시 현재 모드를 default에서 fly로 설정해 끈이 없는 모든 풍선을 날려보냅니다. 이동할 Y 값은 style property로 기본은 0이며 mode가 fly일 시 값을 지정해서 애니메이션에서 적용합니다.
        ...
        '--move-up': props.mode === 'fly' ? '210vh' : '0',
            animation:
            props.mode === 'fly'
                ? `${props.type} 5s ease-in-out 1 both`
                : `${props.type} 2s ease-in-out infinite both`,
            WebkitAnimation:
            props.mode === 'fly'
                ? `${props.type} 5s ease-in-out 1 both`
                : `${props.type} 2s ease-in-out infinite both`,
        ...

    @keyframes shake-bottom-noTip {
        ...
          100% {
            -webkit-transform: rotate(var(--initial-rotation)) scale(var(--initial-scale)) translateY(var(--move-up, 0));
                    transform: rotate(var(--initial-rotation)) scale(var(--initial-scale)) translateY(var(--move-up, 0));
            -webkit-transform-origin: 50% 0%;
                    transform-origin: 50% 0%;
        }
    }
모드가 fly 상태일 땐 날리기 버튼이 돌아와!로 바뀌고 클릭시 모든 풍선이 제자리로 돌아옵니다.
날리기 모드 중 생성한 풍선도 일정 시간 뒤 화면 밖으로 날아갑니다.
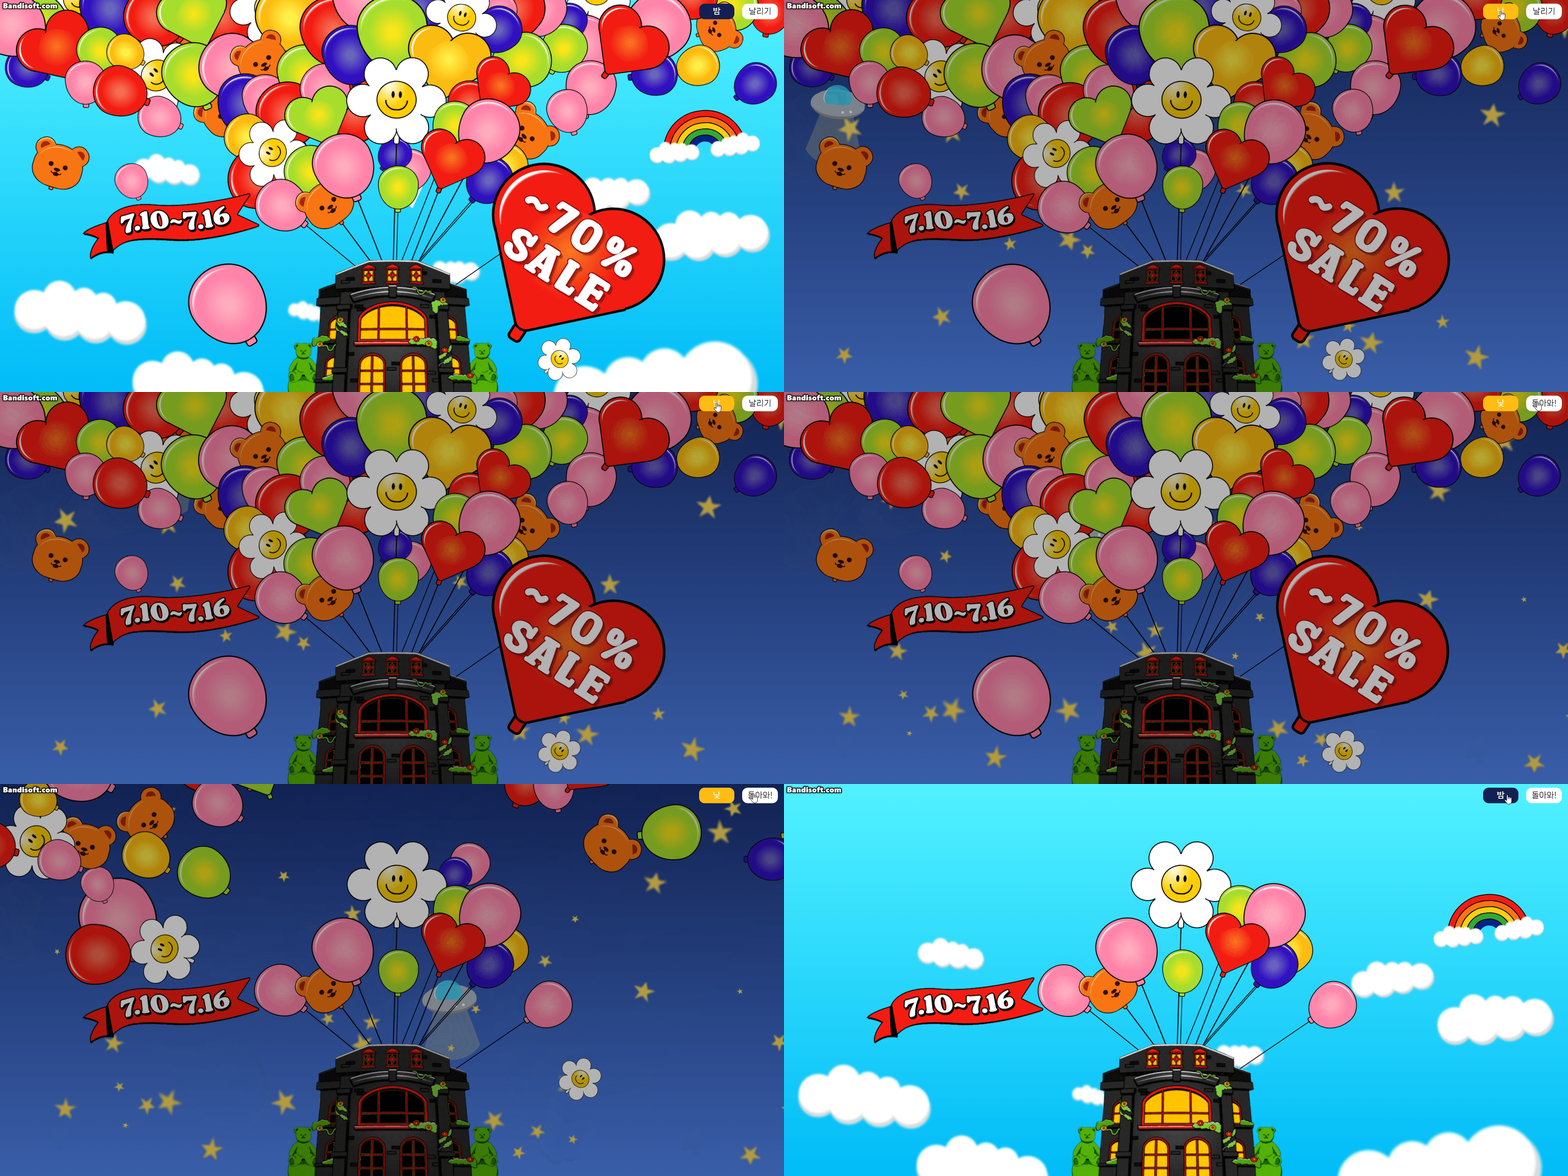
밤 버튼 클릭시 전체 화면을 어둡게 만들고, 하늘 색깔을 바꾸고, 구름 대신 별을 생성합니다. 별은 총 40개를 생성하고 Math.random 함수를 사용해서 매번 랜덤한 위치, 크기, 각도를 갖게 만들었습니다.
    <div className="nightSky">
          {Array.from({ length: 40 }, (_, index) => (
            <div
              key={index}
              className="star"
              style={{
                '--initial-scale': 0.2 + Math.floor(Math.random() * 11) * 0.1,
                top: Math.random() * (98 - 0) + 2 + 'vh',
                left: Math.random() * (98 - 0) + 2 + 'vw',
                '--initial-rotation': Math.random() * (360 - 0) + 10 + 'deg',
                '--move-up': '0',
                animation: 'enlarge 2s ease-in-out infinite both',
                WebkitAnimation: 'enlarge 2s ease-in-out infinite both',
              }}
            />
          ))}
          ...
Time reducer를 통해 현재 time을 night으로 설정하고 main div에 불투명한 검정 색을 적용해서 화면을 어둡게 합니다. pointer-events: none을 설정해 풍선 클릭을 방해하지 않게 만들었습니다.
    const handleNightTime = () => {
        onNight();
        const mainDiv = document.getElementById('main');
        mainDiv.classList.toggle('dark');
    };

    ...

    .main.dark::before {
        content: "";
        position: fixed;
        top: 0;
        left: 0;
        width: 100%;
        height: 100%;
        background-color: rgba(0, 0, 0, 0.3);
        pointer-events: none;
        z-index: 6;
    }
다시 한번 클릭하면 낮으로 전환합니다. 밤 모드일 때도 똑같이 풍선 날리기 모드를 실행할 수 있습니다.
주변 분위기에 맞춰 낮 모드일 때는 하늘에 종이 비행기가 날아다니고, 밤 모드는 ufo가 날아다니게 만들었습니다.
두 가지 모양 다 css로 만든 뒤 애니메이션을 적용했습니다. 다양한 rotate 값을 적용해 움직임과 멀어짐 표현을 좀 더 디테일하게 만들었습니다
transform: rotate(55deg) rotateY(45deg) rotateX(-10deg) scale(4);
Sound Effect from Pixabay


