Template intended to serve as a starting point if you want to bootstrap a Figma Plugin in TypeScript.
Take a look, play and have fun with this.
Stars are welcome 😊
The purpose of this repository is to leave it with the bare minimum dependencies and tools needed to build Figma Plugins but based on software development best practices such as SOLID principles, testing, and tooling already configured 🤟
- Install the dependencies:
npm install - Execute the tests:
npm run test - Check linter errors:
npm run lint - Fix linter errors:
npm run lint:fix - Make a build unifying everything in the same
dist/figmaEntrypoint.jsfile:npm run build - Run a watcher on your plugin files and make the build on every change:
npm run dev
- Click on the "Use this template" button in order to create your own repository based on this one
- Clone your repository
- Replace the skeleton branding by your own:
- Modify the
nameproperty of yourmanifest.jsonfile, and set theidvalue following the next steps in order to obtain it from Figma:- Generate a plugin in the Figma App:
Figma menu>Plugins>Development>New Plugin… - Give it a random name and choose any kind of plugin
- Save the Figma plugin files locally
- Open the saved
manifest.jsonand copy theidproperty value
- Generate a plugin in the Figma App:
- Modify the following
package.jsonproperties:name,description,repository.url,bugs.url, andhomepage
- Install all the plugin dependencies running:
npm install - Develop in a continuos feedback loop with the watcher:
npm run dev - Install your plugin in your Figma App:
Figma menu>Plugins>Development>Import plugin from manifest… - Remove the unnecessary code
- Add your new use case Command
- Now you can call to the
handleCommandfunction passing in the created command
ℹ️ And remember to star this repository in order to promote the work behind it 🌟😊
You will find the entrypoint that Figma will execute once the plugin is executed in
the src/figma-entrypoint.ts file, which is intended to represent the interaction with the
Figma UI, leaving the logic of your plugin to the different commands that will be executed in the Browser or in the
Figma Scene Sandbox.
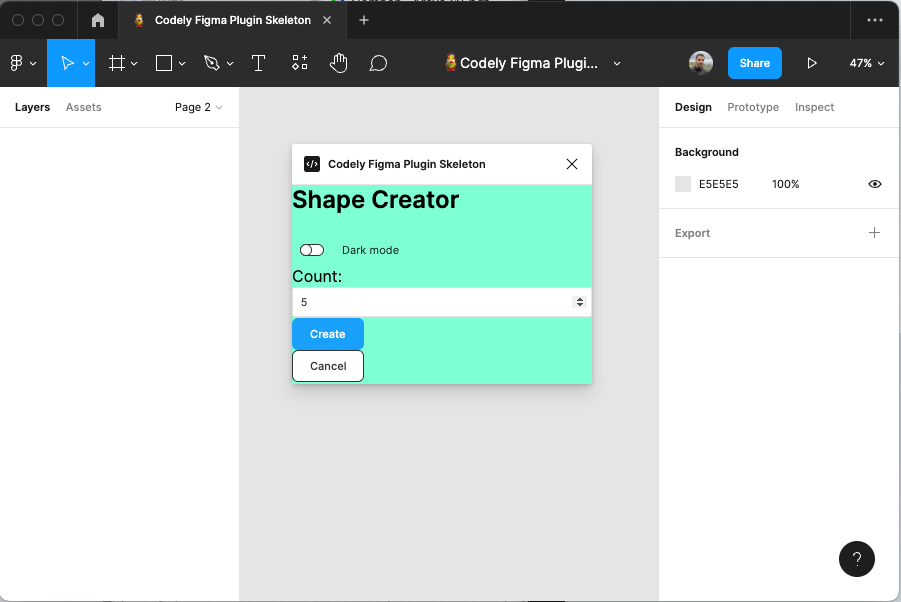
In the src/ui folder you will find the HTML, CSS, and TS files corresponding to the plugin user interface.
We have decided to split them up in order to allow better code modularization, and leaving Webpack to transpile the
TypeScript code into JavaScript and inline it into the HTML due to Figma restrictions 😊
Commands are the different actions an end user can perform from the plugin UI. In the src/ui/ui.ts you
will see that we are adding event listeners to the plugin UI in order to execute these Commands such as the following
one:
import { executeCommand } from "./commands-setup/executeCommand";

document.addEventListener("click", function(event: MouseEvent) {
  const target = event.target as HTMLElement;

  switch (target.id) {
    case "cancel":
      executeCommand(new CancelCommand());
      break;
    // […]
  }
});
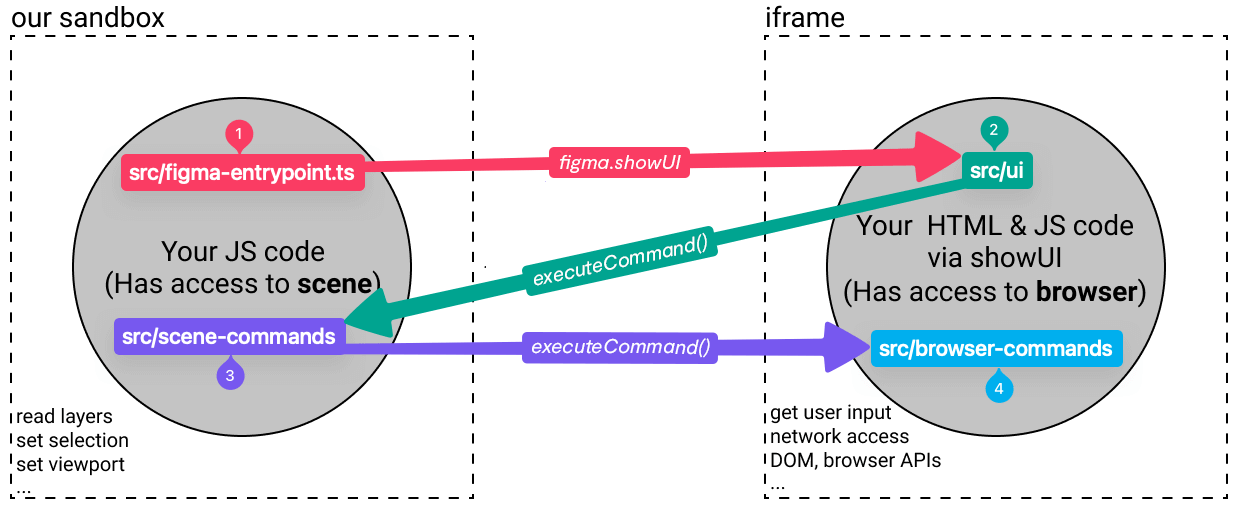
This executeCommand(new CancelCommand()); function call is needed due to how Figma Plugins run, that is, communicating
ourselves between the following types of elements:
- The
src/figma-entrypoint.ts: As described before, in general this is the file that Figma will execute once the user runs your plugin. However, there are multiple scenarios depending on the type of plugin:
-
Plugins with a single use case:
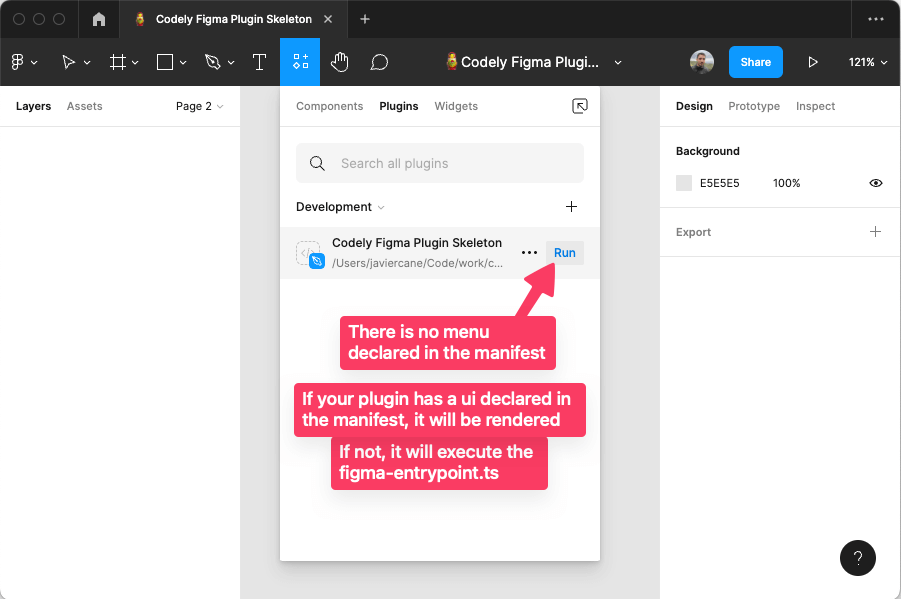
- Plugins with UI: If you do not have a
"menu"key declared in themanifest.json, but a"ui"one, Figma will render thesrc/ui/ui.htmlwhich is bundled together with thesrc/ui/ui.tsandsrc/ui/ui.css. That UI will run inside the Figma Browser iframe, and you will be able to execute Commands as in the previous example, that is, using theexecuteCommandmethod from theui.ts. These commands will arribe to thisfigma-entrypoint.tsin order to be executed. You have an example for the "Cancel" button of the plugin UI mentioned before:CancelCommandmapped in theCommandsMappingto theCancelCommandHandlerand tested out in theCancelCommandHandler.test. - Plugins without UI: If you do not have either a
"menu"key declared in themanifest.json, nor a"ui"one, Figma will render thesrc/figma-entrypoint.tsand you will be able to execute Commands directly from there with thehandleCommandmethod. These commands will arribe to thisfigma-entrypoint.tsin order to be executed.
- Plugins with UI: If you do not have a
-
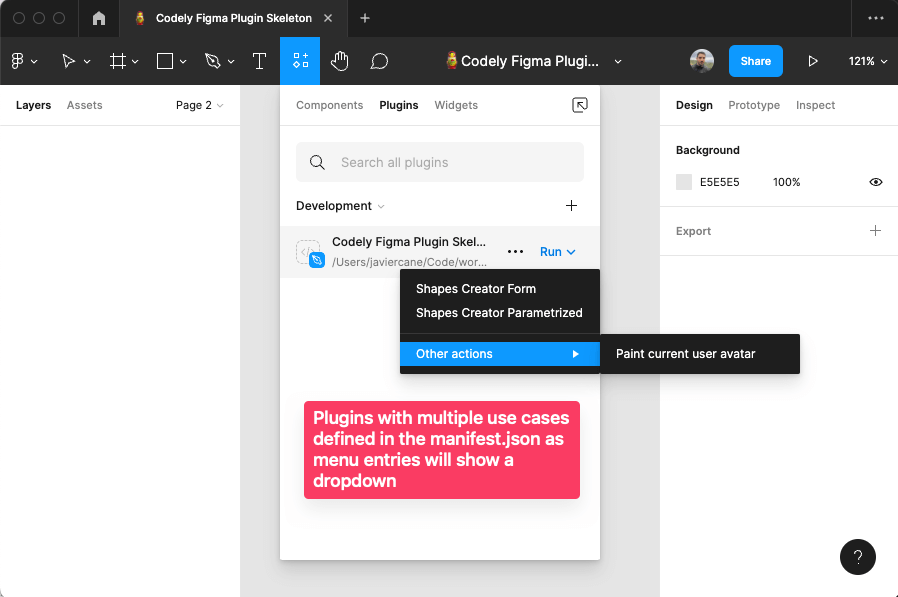
Plugins with multiple use cases:
You can define several use cases will be defined as
menuitems declared in themanifest.json. In this case, this entrypoint will directly execute the Command Handler mapped in thesrc/commands-setup/CommandsMapping.tsthat corresponds to themenu.[].commandkey. You have an example for instance for thecreateShapesCommand which is mapped to thesrc/scene-commands/create-shapes/CreateShapesCommandHandler.ts. One of this use cases can actually be to show the UI. You can see it declared with theshowUicommand name and handled as a particular case.
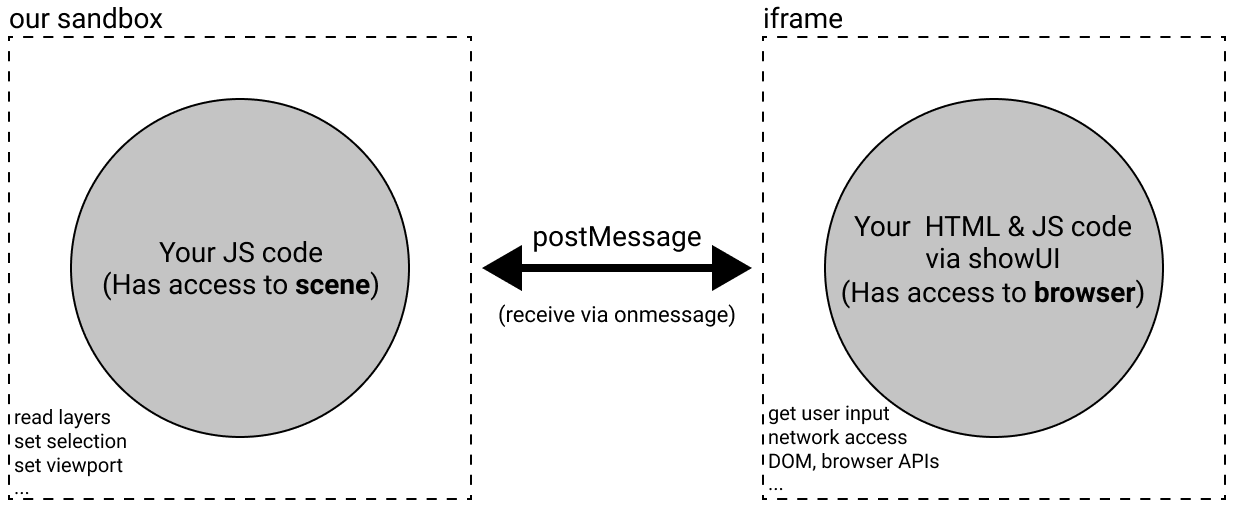
- The Browser iframe Figma creates for us in order to run the plugin UI. This iframe is needed in order to gain access to the browser APIs in order to perform HTTP requests for instance.
- The Figma scene exposed in order to create elements or access to the different layers from
the
src/scene-commandswhich runs inside the Figma sandbox. - The previous commands could need some information from the external world, so they must send out a command to be
handled inside the iframe. You can see an example of this in
the
PaintCurrentUserAvatarCommandHandler. All you have to do to perform the request is executing aNetworkRequestCommand:And listen for the response:executeCommand( new NetworkRequestCommand("https://example.com/some/api/endpoint", "text") );
return new Promise((resolve) => {
  this.figma.ui.onmessage = async (message) => {
    await this.doThingsWith(message.payload);
    resolve();
  };
});
If you want to add new capabilities to your plugin, we have intended to allow you to do so without having to worry about all the TypeScript stuff behind the Commands concept. It is as simple as:
- Create a folder giving a name to your Command. Example:
src/scene-commands/cancel - Create the class that will represent your Command.
- Example of the simplest Command you can think of (only provides
semantics):
src/scene-commands/cancel/CancelCommand.ts - Example of a Command needing
parameters:
src/scene-commands/create-shapes/CreateShapesCommand.ts
- Create the CommandHandler that will receive your Command and will represent the business logic behind it. Following the previous examples:
src/scene-commands/cancel/CancelCommandHandler.tssrc/scene-commands/create-shapes/CreateShapesCommandHandler.ts
- Link your Command to your CommandHandler adding it to
the
src/commands-setup/CommandsMapping.ts - Send the command from one of the following places depending on your plugin type:
- Plugins with UI: From
src/ui/ui.tswithexecuteCommand(new CancelCommand()); - Plugins without UI: From the
src/figma-entrypoint.tswithawait handleCommand(new CancelCommand());
In order to show the potential Figma Plugins have, we have developed several use cases:
Demonstrative purposes:
- Render a UI allowing it to be modular and scalable (Webpack bundling working in Figma thanks to JS inline)
- How to communicate from the Figma Browser iframe where the UI lives to the Figma Scene Sandbox in order to execute
commands like the
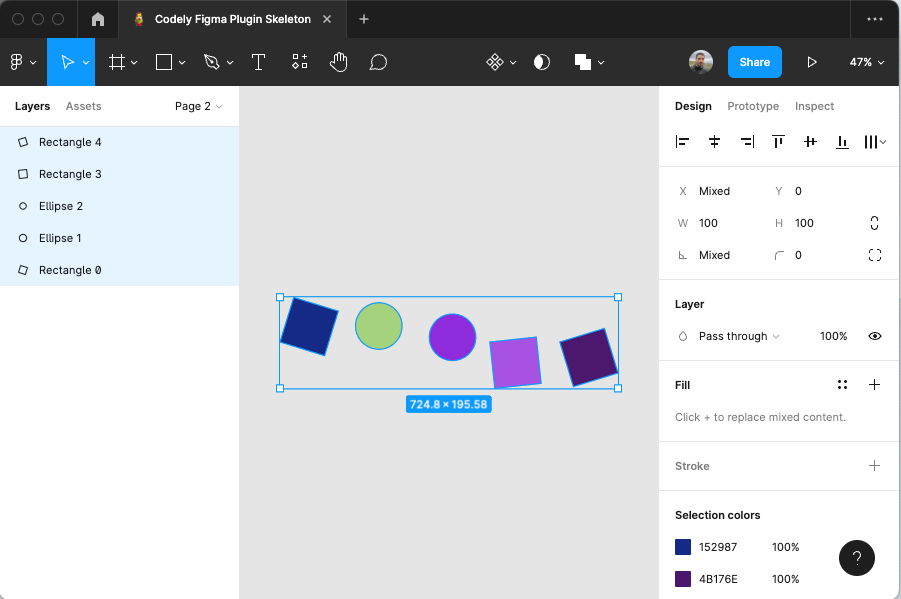
createShapesone which require to modify the viewport, create and select objects, and so on - Work with the Figma Plugins API randomizing multiple variables to make it a little more playful:
- The shapes to create (rectangles and ellipses)
- The rotation of each shape
- The color of the shapes
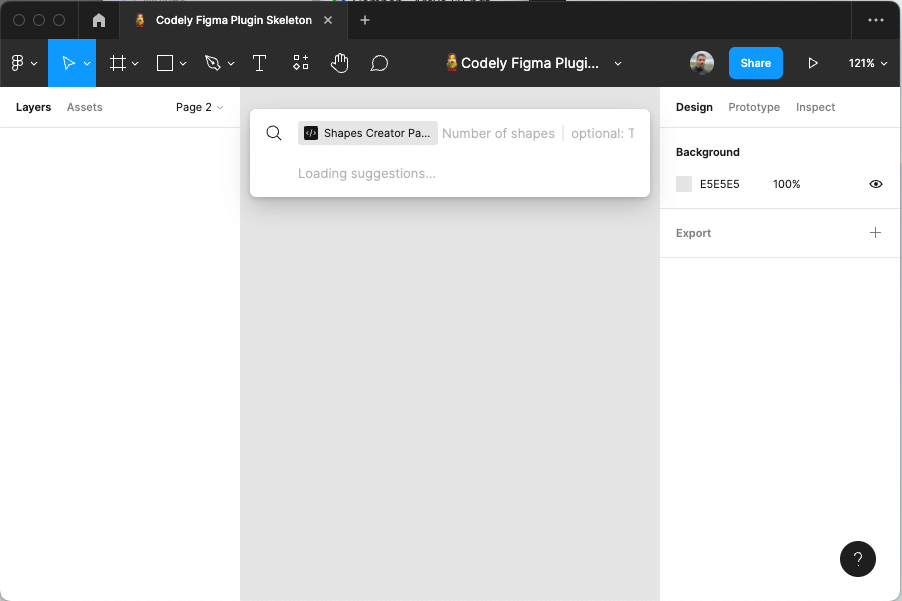
You can launch parametrized menu commands from the Figma Quick Actions search bar:
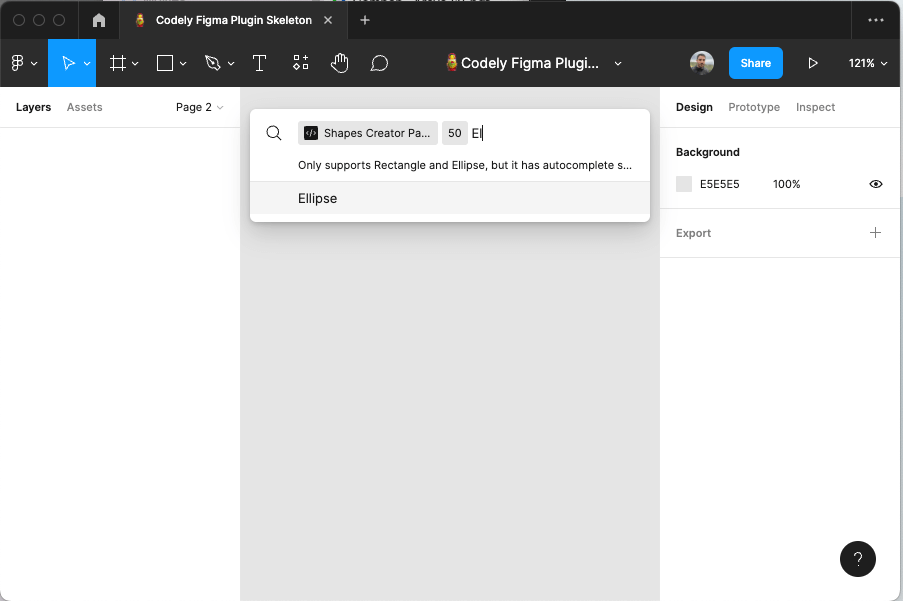
It even allows you to configure optional parameters and suggestions for them:
Demonstrative purposes:
- Take advantage of the Parametrized Figma Plugins in order to offer a simple UI integrated with the Figma ecosystem without having to implement any HTML or CSS
- Reuse the very same use
case (
CreateShapesCommandHandler) from multiple entry-points. That, is we are using that very same business logic class:- Calling it from the
ui.tsonce the user clicks on thecreatebutton because we are executing the command withexecuteCommand(new CreateShapesCommand(count)); - Configuring the parametrized menu entry in the
manifest.jsonwith the very samecommandname as mapped in theCommandsMapping, and the same parameterskeyas defined in the command constructor
- Calling it from the
- Configure optional parameters and how they map to nullable TypeScript arguments
- Specify suggestions for some parameter values that can be programmatically set. Example
in the
figma-entrypointfor thetypeOfShapesparameter.
Demonstrative purposes:
- Communicate back from the Figma Scene Sandbox to the Figma Browser iframe in order to perform the HTTP request in
order to get the actual user avatar image based on its URL due to not having access to browser APIs inside
the
src/scene-commandsworld - Define the architecture in order to have that HTTP request response handler defined in a cohesive way inside the
actual use case which fires it. Example in
the
PaintCurrentUserAvatarCommandHandler. - Paint an image inside the Figma scene based on its binary information
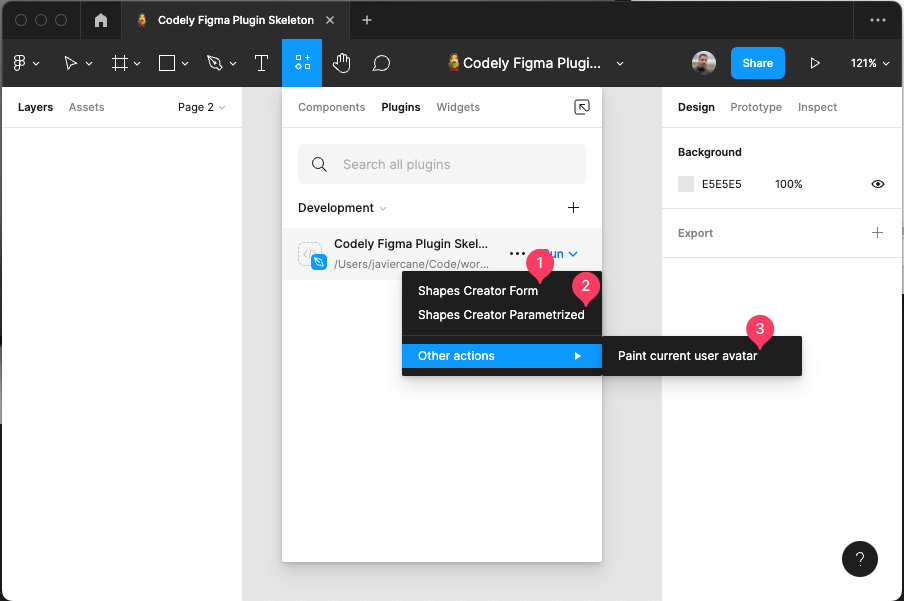
- Declare a more complex menu structure containing separators and sub-menu items
- Loading the text font needed in order to create a text layer and position it relative to the image size
If you take a look at the official documentation
on how Figma Plugins run, you will see that there is
a postMessage function in order to communicate between the two Figma Plugin worlds previously described:
However, that postMessage function is different depending on where you are executing it:
- From the Figma Scene sandbox to the UI iframe:
figma.ui.postMessage(message) - From the UI iframe to the Figma Scene sandbox:
window.parent.postMessage({ pluginMessage: command }, "*")
We have simplified this with an abstraction that also provides semantics and type constraints making it easier to use.
You only have to use the executeCommand function without worrying about
anything else:
import { executeCommand } from "./commands-setup/executeCommand";

executeCommand(new CancelCommand());
This is why you will see it on the Codely Figma Plugin Architecture diagram while communicating on both ways:
Focus of all the decisions made in the development of this skeleton: Let you, the developer of the plugin that end users will install, focus on implementing your actual use cases instead of all the surrounding boilerplate ⚡
We have followed an approach for developing this Codely Figma Plugin Skeleton based on the SOLID Software Principles, specially the Open/Closed Principle in order to make it easy for you to extend the capabilities of your plugin with just adding little pieces of code in a very structured way 😊
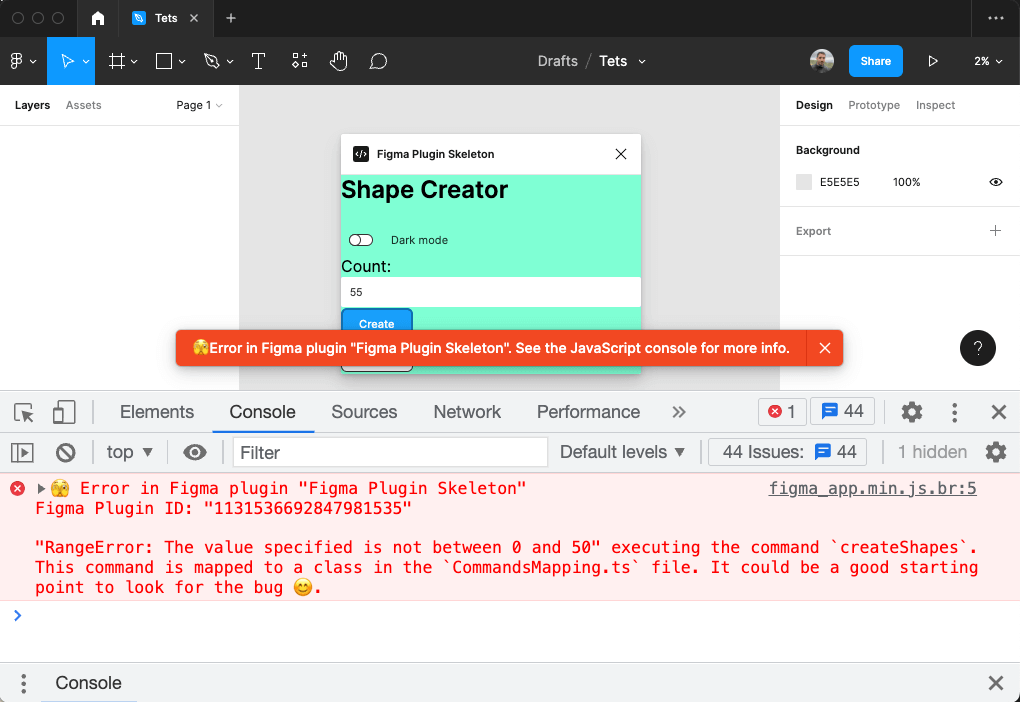
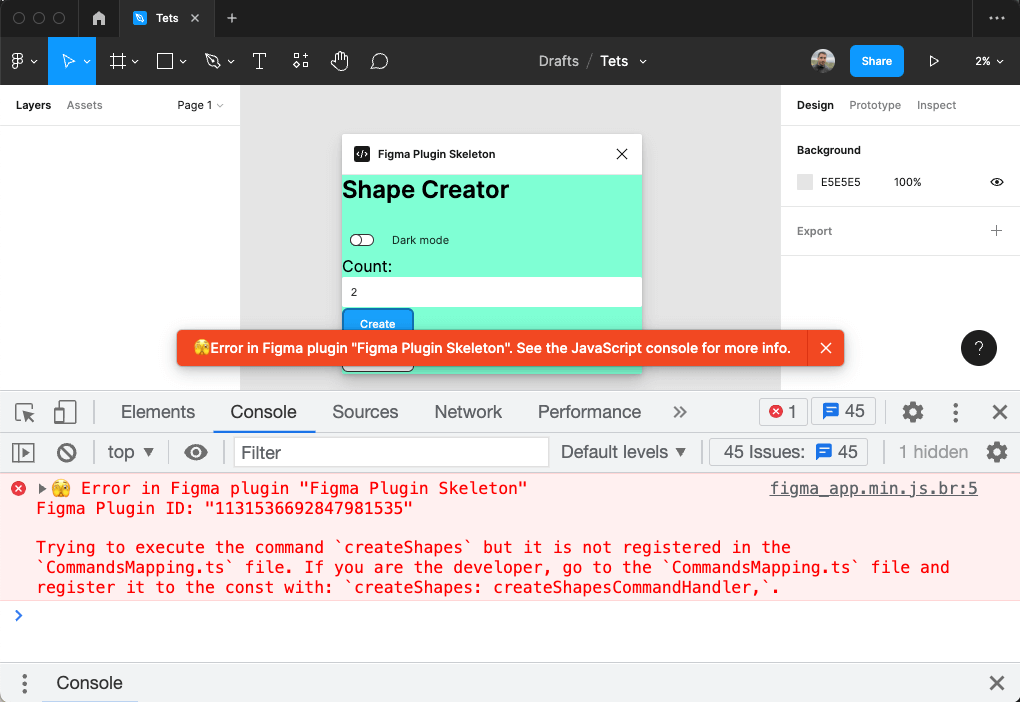
This skeleton already provides a friendly way to handle error produced by the plugins built with it.
If your plugin makes use of the executeCommand method in order to execute commands, we already have you covered in
case you have not registered them yet. It would be visible in the actual Figma interface, and specify all the details in
the JavaScript console, ¡even suggesting a fix! 🌈:
In case you already registered your command, but it throws an unhandled by you error for whatever reason, we propagate it to the end user in a very friendly way 😇:
- TypeScript (v4)
- Prettier
- Webpack
- ESLint with:
- Simple Import Sort
- Import plugin
- And a few other ES2015+ related rules
- Jest with DOM Testing Library
- GitHub Action workflows set up to run tests and linting on push
- SWC: Execute your tests in less than 200ms
- Specify proper dependencies version restriction (no wild wildcards
*) - Encapsulate all the transpiled code into the
distfolder - Encapsulate all the Plugin source code into the
srcfolder - Configure TypeScript through the
tsconfig.jsonin order to promote safety and robust contracts (no moreanyparadise) - Add code style checker with Prettier and ESLint
- Add test suite runner with Jest
- Add Continuous Integration Workflow with GitHub Actions
Depending on your plugin type you will find unnecessary code in this template. However, here you have the instructions on how to delete it with a few commands 😊
☝️ Attention: We will not remove the ui key from the manifest.json and some JS code such as
the registerUiCommandHandlers function call because we still need them even if we do not have a UI. The reason why is
that this code is used as an invisible UI while communicating from the Scene Sandbox to the UI iframe in order to access
browser APIs. These browser APIs are used for instance while performing network requests from our plugin. See more on
the "⚡ Commands" software architecture section.
- Remove unneeded dependencies:
npm remove style-loader css-loader figma-plugin-ds webpack.config.js: Remove the css and static assets rules frommodule.exports.module.rulesonly leaving out the ts files one- Remove the visual parts of the UI:
rm src/ui/register-ui-command-handlers.tsecho -n "" >| src/ui/ui.htmlecho "import { registerUiCommandHandlers } from \"./register-ui-command-handlers\";\n\nregisterUiCommandHandlers();" >| src/ui/ui.ts
manifest.json: Remove themenuproperty- Modify the
src/figma-entrypoint.tsremoving the support for menu commands and directly executing your use case command keeping the support for the invisible UI. Example for a plugin which only would execute thepaintCurrentUserAvatarcommand:import { handleCommand } from "./commands-setup/handleCommand"; import { PaintCurrentUserAvatarCommand } from "./scene-commands/paint-current-user-avatar/PaintCurrentUserAvatarCommand"; createInvisibleUiForBrowserApiAccess(); await handleCommand(new PaintCurrentUserAvatarCommand()); function createInvisibleUiForBrowserApiAccess() { figma.showUI(__html__, { visible: false }); }
manifest.json: Remove the figjam value from the editorType property, leaving the property as an
array but only containing the figma value.
- Remove the
✅ Run testsstep from the Continuous Integration pipeline rm -rf testsrm -rf jest.config.jsnpm remove jest @types/jest jest-mock-extended @swc/jest @swc/core- Remove the
scripts.testproperty from thepackage.json
Remove the permissions key from your manifest.json.
Other Figma plugins repositories where we found inspiration to create this one:
Publishing this package we are committing ourselves to the following code quality standards:
- 🤝 Respect Semantic Versioning: No breaking changes in patch or minor versions
- 🤏 No surprises in transitive dependencies: Use the bare minimum dependencies needed to meet the purpose
- 🎯 One specific purpose to meet without having to carry a bunch of unnecessary other utilities
- ✅ Tests as documentation and usage examples
- 📖 Well documented ReadMe showing how to install and use
- ⚖️ License favoring Open Source and collaboration
Opinionated TypeScript skeletons ready for different purposes:
- 🔷🌱 TypeScript Basic Skeleton
- 🔷🕸️ TypeScript Web Skeleton
- 🔷🌍 TypeScript API Skeleton
- 🔷✨ TypeScript DDD Skeleton
This very same basic skeleton philosophy implemented in other programming languages:


