i2r-rmf-fleet-adapter package
This is a RMF full control fleet adapter for the i2r nav-stack. Using RMF's full control fleet adapter API.
Environment
- ros2 Foxy
- Ubuntu 20.04
Installation
For the RMF adapter to work, you will need RMF. Please follow the installation for rmf here: https://github.com/open-rmf/rmf.
But because RMF's main branch is in continuous development, please refer to the rmf.repos file in the resources folder for the exact git SHA commit to pull. The rest of the steps to install rmf should be followed from open-rmf/rmf README.md.
Dependencies
Of course, you will need RMF for the fleet adapter API.
sudo apt-get install -y libasio-dev
Cloning your own workspace
cd ~/
mkdir -p i2r-rmf-fleet-adapter_ws/src
cd ~/i2r-rmf-fleet-adapter_ws/src
git clone https://github.com/sharp-rmf/i2r-rmf-fleet-adapter
Building the workspace
Check that your open-rmf is working before this step. You can try it out by running rmf-demos, office.launch.xml
source ~/rmf_ws/install/setup.bash
cd ~/i2r-rmf-fleet-adapter_ws
colcon build
Running Axololt
# Before running this step, make sure to generate your own map. Taking reference from ~/rmf_ws/demonstrations/rmf_demos/rmf_demos
ros2 launch i2r-rmf-fleet-adapter i2r_demo.launch.xml
RMF panel
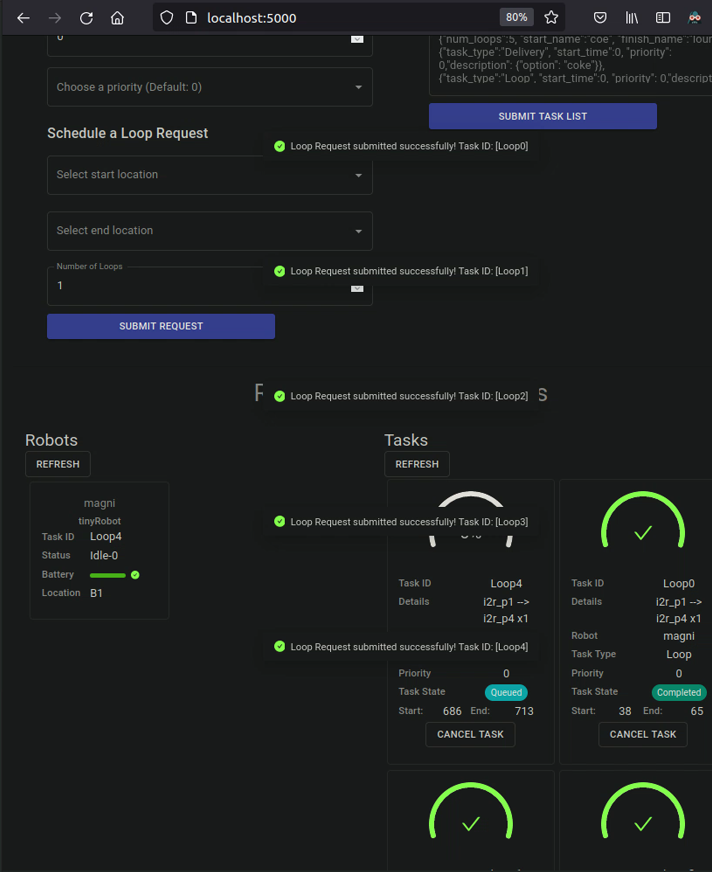
To send loop requests from the RMF panel, open firefox and type in:
localhost:5000
From the rmf panel, you can send loop requsts by using the drop down to indicate the start and stop location as well as the number of loops
The panel should look something like this:
Configuring RMF panel to display your own places on the rmf panel
Edit the configuration file dashboard_config.json and add your places to the list, in this example there are four points to be added to the rmf panel (i2r_p1 to i2r_p2). Then refer to https://github.com/open-rmf/rmf_demos/tree/main/rmf_demos_panel to compile your points. :
{
  "world_name" : "Chart World",
  "valid_task": ["Delivery", "Loop"],
  "task": {
    "Delivery": {
        ...
    },
    "Loop": {
      "places": [
        "i2r_p1",
        "i2r_p2",
        "i2r_p3",
        "i2r_p4"
      ]
    },
    ...
  }
}
Including server/ client's ip in hostname mapping
Add the ip address of your server into your host's ~/etc/hosts file, and the ip address of your host into your server's ~/etc/hosts file
# I.e. in your favourite editor (assuming a linux env):
vim ~/etc/hosts

# My computer's ip addressess
127.0.1.1       jh-P95-96-97Ex-Rx
# ...other stuff in between...
192.168.50.92   mrccc.chart.com.sg #<!-- Insert this line!

# My MRCCC's ip addressess
127.0.1.1       mrccc.chart.com.sg
# ...other stuff in between...
192.168.50.107   jh-P95-96-97Ex-Rx #<!-- Insert this line!
Secured Websocket
In this packge, the websocketpp header library is used to setup the secured websocket connection. Credits to Peter Thorson - websocketpp@zaphoyd.com. The author provided a few meaningful examples here:
cd /i2r-rmf-fleet-adapter/src/i2r-rmf-fleet-adapter/include/websocketpp/tutorials/utility_client
cd /i2r-rmf-fleet-adapter/src/i2r-rmf-fleet-adapter/include/websocketpp/tutorials/utility_client/utility_server
