EvalAI is an open source web application that helps researchers, students and data-scientists to create, collaborate and participate in various AI challenges organized round the globe.
In recent years, it has become increasingly difficult to compare an algorithm solving a given task with other existing approaches. These comparisons suffer from minor differences in algorithm implementation, use of non-standard dataset splits and different evaluation metrics. By providing a central leaderboard and submission interface, we make it easier for researchers to reproduce the results mentioned in the paper and perform reliable & accurate quantitative analysis. By providing swift and robust backends based on map-reduce frameworks that speed up evaluation on the fly, EvalAI aims to make it easier for researchers to reproduce results from technical papers and perform reliable and accurate analyses.
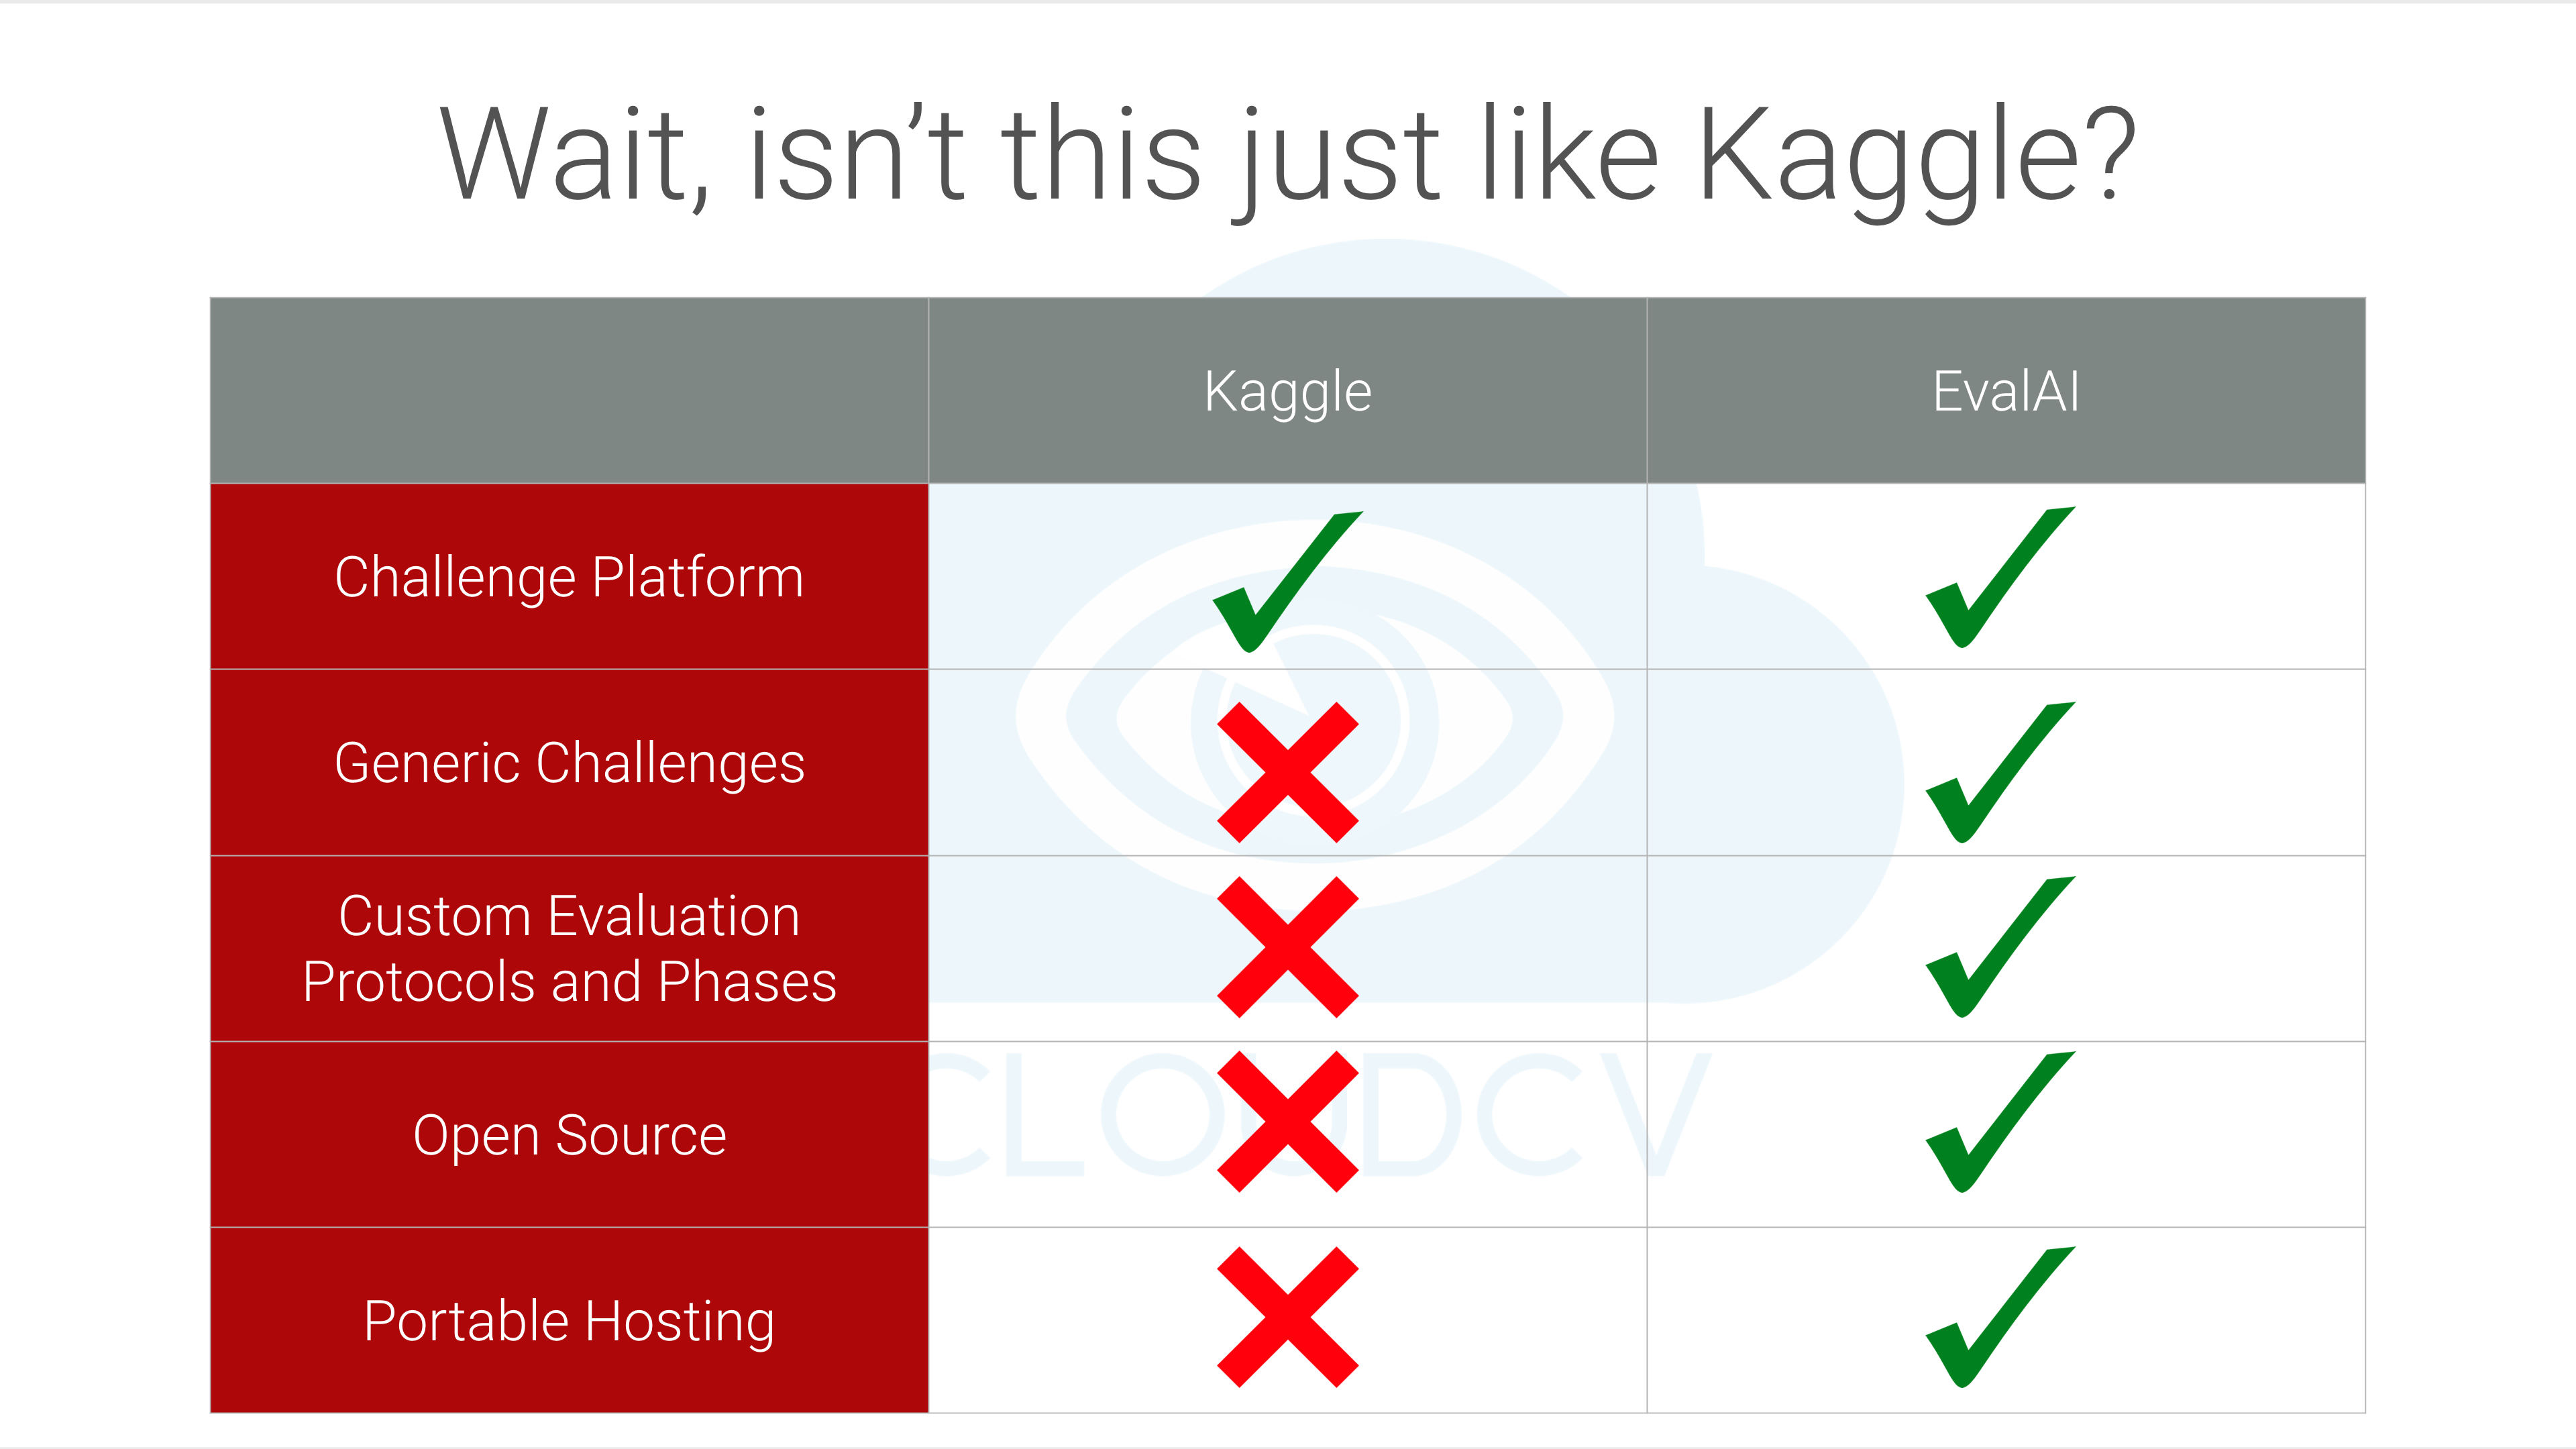
A question we’re often asked is: Doesn’t Kaggle already do this? The central differences are:
-
Custom Evaluation Protocols and Phases: We have designed versatile backend framework that can support user-defined evaluation metrics, various evaluation phases, private and public leaderboard.
-
Faster Evaluation: The backend evaluation pipeline is engineered so that submissions can be evaluated parallelly using multiple cores on multiple machines via mapreduce frameworks offering a significant performance boost over similar web AI-challenge platforms.
-
Portability: Since the platform is open-source, users have the freedom to host challenges on their own private servers rather than having to explicitly depend on Cloud Services such as AWS, Azure, etc.
-
Easy Hosting: Hosting a challenge is streamlined. One can create the challenge on EvalAI using the intuitive UI (work-in-progress) or using zip configuration file.
-
Centralized Leaderboard: Challenge Organizers whether host their challenge on EvalAI or forked version of EvalAI, they can send the results to main EvalAI server. This helps to build a centralized platform to keep track of different challenges.
Our ultimate goal is to build a centralized platform to host, participate and collaborate in AI challenges organized around the globe and we hope to help in benchmarking progress in AI.
Some background: Last year, the Visual Question Answering Challenge (VQA, 2016 was hosted on some other platform, and on average evaluation would take ~10 minutes. EvalAI hosted this year's VQA Challenge 2017. This year, the dataset for the VQA Challenge 2017 is twice as large. Despite this, we’ve found that our parallelized backend only takes ~130 seconds to evaluate on the whole test set VQA 2.0 dataset.
Setting up EvalAI on your local machine is really easy. Follow this guide to setup your development machine.
-
Install python 2.x (EvalAI only supports python2.x for now.), git, postgresql version >= 9.4, RabbitMQ and virtualenv, in your computer, if you don't have it already. If you are having trouble with postgresql on Windows check this link postgresqlhelp.
-
Get the source code on your machine via git.
git clone https://github.com/Cloud-CV/EvalAI.git evalai
-
Create a python virtual environment and install python dependencies.
cd evalai
virtualenv venv
source venv/bin/activate  # run this command everytime before working on project
pip install -r requirements/dev.txt
-
Rename
settings/dev.sample.pyasdev.pyand change credential insettings/dev.pycp settings/dev.sample.py settings/dev.pyUse your postgres username and password for fields
USERandPASSWORDindev.pyfile. -
Create an empty postgres database and run database migration.
sudo -i -u (username) createdb evalai python manage.py migrate --settings=settings.dev -
Seed the database with some fake data to work with.
python manage.py seed --settings=settings.devThis command also creates a
superuser(admin), ahost userand aparticipant userwith following credentials.SUPERUSER- username:
adminpassword:password
HOST USER- username:hostpassword:password
PARTICIPANT USER- username:participantpassword:password -
That's it. Now you can run development server at http://127.0.0.1:8000 (for serving backend)
python manage.py runserver --settings=settings.dev -
Open a new terminal window with node(6.9.2) and ruby(gem) installed on your machine and type
npm install
bower install
If you running npm install behind a proxy server, use
npm config set proxy http://proxy:port -
Now to connect to dev server at http://127.0.0.1:8888 (for serving frontend)
gulp dev:runserver -
That's it, Open web browser and hit the url http://127.0.0.1:8888.
-
(Optional) If you want to see the whole game into play, then start the RabbitMQ worker in a new terminal window using the following command that consumes the submissions done for every challenge:
python scripts/workers/submission_worker.py
You can also use Docker Compose to run all the components of EvalAI together. The steps are:
-
Get the source code on to your machine via git.
git clone https://github.com/Cloud-CV/EvalAI.git evalai && cd evalai
-
Rename
settings/dev.sample.pyasdev.pyand change credential insettings/dev.pycp settings/dev.sample.py settings/dev.pyUse your postgres username and password for fields
USERandPASSWORDindev.pyfile. -
Build and run the Docker containers. This might take a while. You should be able to access EvalAI at
localhost:8888.docker-compose -f docker-compose.dev.yml up -d --build
EvalAI is currently maintained by Deshraj Yadav, Akash Jain, Taranjeet Singh, Shiv Baran Singh and Rishabh Jain. A non-exhaustive list of other major contributors includes: Harsh Agarwal, Prithvijit Chattopadhyay, Devi Parikh and Dhruv Batra.
If you are interested in contributing to EvalAI, follow our contribution guidelines.

