![]()


Homepoint is a screen-based interface for MQTT & HomeKit-connected Smarthome devices that runs on the ESP32 Chipset.
- Features
- Demo
- Installation
- Build
- Configuration
- Roadmap
- Known bugs & issues
- Contributing
- Buy me a coffee
- License
-
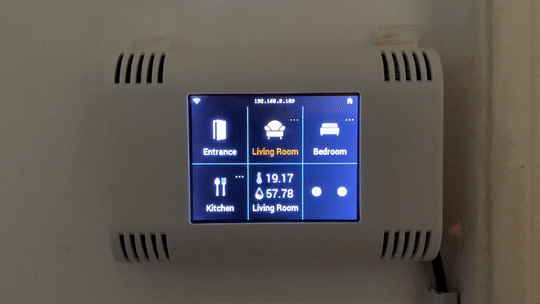
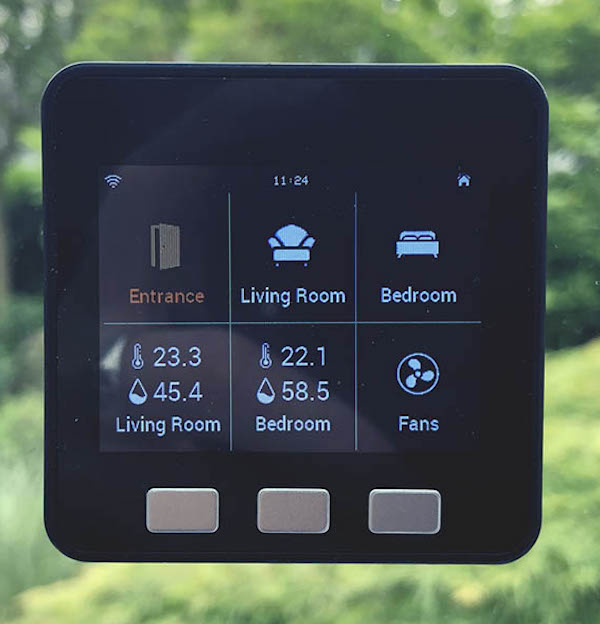
See and trigger scenes (groups of devices) on the front screen.
-
Trigger individual devices by diving into scenes (by tapping the indicator or long pressing a button).
-
See partially switched on scenes with multiple devices at a glance.
-
Support for temperature, humidity, air quality sensors & Tasmota energy readings.
-
Remote Configuration: Configure and reboot HomePoint through a web interface. No need to reflash.
-
Over-The-Air Updates (Beta): Flash new versions of HomePoint wirelessly over the air.
-
HomeKit Switch Support (Setup Automations in Home App to toggle from Homepoint)*
-
Supports both Touch Screen or Button based navigation.
-
Reactive: Screen updates whenever devices are triggered from elsewhere.
-
Easy configuration through a JSON file, no additional code required.
-
Screensaver saves power by switching off screen after 10 minutes.
-
Statusbar shows connectivity for WiFi and MQTT as well as time.
-
Failsafe Mode: In case of corrupt configuration, failsafe mode for remote access is provided.
-
Pre-compiled binaries: Just flash HomePoint on your ESP32 device without compiling.
*currently on experimental branch.

HomePoint comes in 2 pre-compiled .bin files ready to be flashed on either a generic ESP32 Module or M5Stack. More details on the hardware setup are available in the Wiki.
Steps to install:
- Download ESPTools from https://github.com/espressif/esptool/releases
- Install ESPTools with
python setup.py install - Run
esptool.py -b 921600 write_flash -fs 4MB -fm dout 0x0 homepoint_espgeneric.bin(or homepoint_m5stack.bin for M5Stack)
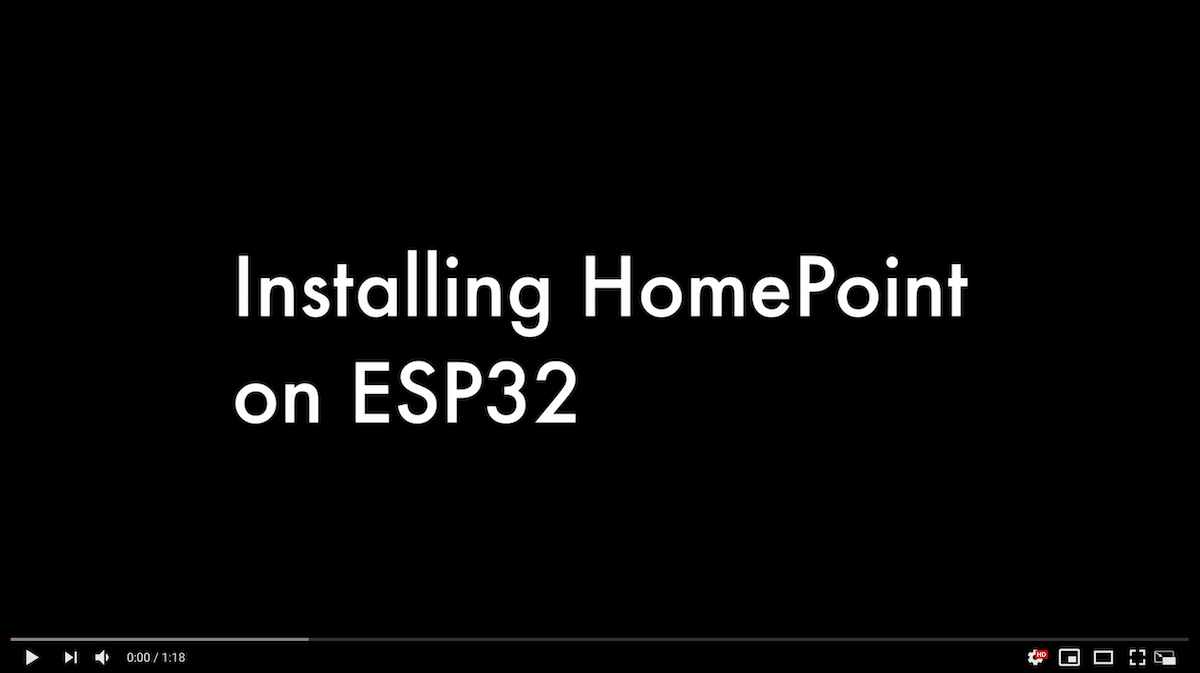
Alternatively, watch the installation video below:
Homepoint was created using the ESP-IDF SDK.
Detailed build instructions are available in the Wiki.
The configuration lives in data/config.json.
HomePoint supports two types of Scenes with a selection of devices each:
| SCENE Types | DEVICE Types |
|---|---|
| Light, Switch | (none, all devices expected to be switches) |
| Sensor | display one or two values at once with customizable icons (singleValue / combinedValues) |
Grouped Sensors support up to two devices (due to screen space).
Lights & Switches support an infinite number of devices in a group.
Some Sensors use JSON as a data-format, in which case a key can be defined. These can be on any level of the sensor json payload, for Tasmota smart plugs the key value "Power" can be used to display the current power consumption.
WiFi and MQTT credentials are to be defined on the top level.
In order to set the correct timezone, copy & paste your NTP TZ Setting to the timezone key.
Some of the IL9341 Display units seem to differ in e.g. how the touch-screen coordinates correspond to the display or how the LED backlight is controlled. Therefore we offer some options to override the defaults in the configuration file.
| Key | Type | Value |
|---|---|---|
| "ledPinPullup" | Boolean | true or false - control backlight power which can be pull-up/down depending on unit |
| "screenRotationAngle" | Int | The rotation parameter can be 0, 1, 2 or 3 - incrementing in 90deg angles |
| "screenSaverMinutes" | Int | Minutes until display is switched off (default 10) |
| "touchXAxisInverted" | Bool | default: false, invert the X Axis of the touch screen in case it is misaligned |
| "touchYAxisInverted" | Bool | default: true, invert the Y Axis of the touch screen in case it is misaligned |
| "displayColorInverted" | Bool | default: false, invert the colorspace (ie. for ILI9342C Displays) |
MQTT Topics are case-sensitive as per MQTT specification.
{
  "wifi": "MyWifiSSID",
  "password": "My Wifi Password",
  "hostname": "optionalhostname",
  "login": "admin",
  "webpass": "admin",
  "mqttbroker": "mqtt://192.168.1.2",
  "mqttusername": "mqttusername",
  "mqttpasswd": "mymqttpassword",
  "timezone": "CET-1CEST-2,M3.5.0/02:00:00,M10.5.0/03:00:00",
  "scenes": [{
    "name": "Living Room",
    "type": "Light",
    "icon": "livingroom",
    "devices": [{
      "name": "Some Light",
      "setTopic": "lights/hue/00:17:88:01:02:3c:2a:6d-0b/set/on",
      "getTopic": "hue/status/lights/Hue color lamp 1",
      "onValue": "true",
      "offValue": "false"
    },
    {
      "name": "Door Light",
      "setTopic": "lights/hue/00:17:88:01:02:3c:2a:6d-0b/set/on",
      "getTopic": "hue/status/lights/Hue color lamp 1",
      "onValue": "true",
      "offValue": "false",
      "icon": "door"
    },
    ]
  },
  {
    "name": "Bedroom",
    "type": "Sensor",
    "icon": "door",
    "devices": [{
      "name": "Temperature DHT Sensor",
      "type": "singleValue",
      "jsondata": true,
      "firstIcon": "temperature_small",
      "firstKey": "temperature",
      "getTopic": "bedroom/esptemp"
    },
    {
      "name": "Tasmota Smart Plug",
      "type": "singleValue",
      "jsondata": true,
      "firstKey": "Power",
      "firstIcon":"wattage_small",
      "getTopic": "tele/DVES_2F73BE/SENSOR"
    }]
  }]
}
A more fully-configured example is available here.
- Documentation for integrating with Homebridge-Hue and HomeAssistant / ZigBee2MQTT
- HomeKit Support
- Testing
If you find any bugs or need assistance, don't hesitate and open an issue :)
Contributions are welcome! Just hack away and open a Pull Request. But please follow the style of the code that's already there (ie. no tabs, spacing).
I have developed HomePoint in my free time because I wanted to learn more about C++ on ESP32
and to solve a concrete problem in my smarthome.
As development kept on going, I thought about ways to make this project open source and more accessible and user-friendly for the maker-community.
If you enjoy using HomePoint or this work, consider a small donation. But don't worry, I'll continue working on this anyway ;-).

MIT © Matthias Frick