Make sure you have Jupyter Notebook or Jupyter Lab installed.
Then, install the package with:
npm install -g typescript-jupyter-kernelOnce npm has finished, run the following command:
ts-kernel install
You can now check if the installation succeeded:
jupyter kernelspec list

# Available kernels:
# typescript ~/.local/share/jupyter/kernels/typescriptCode completion: using the TAB key, driven by the official Typescript LSP Server (same used by VSCode)
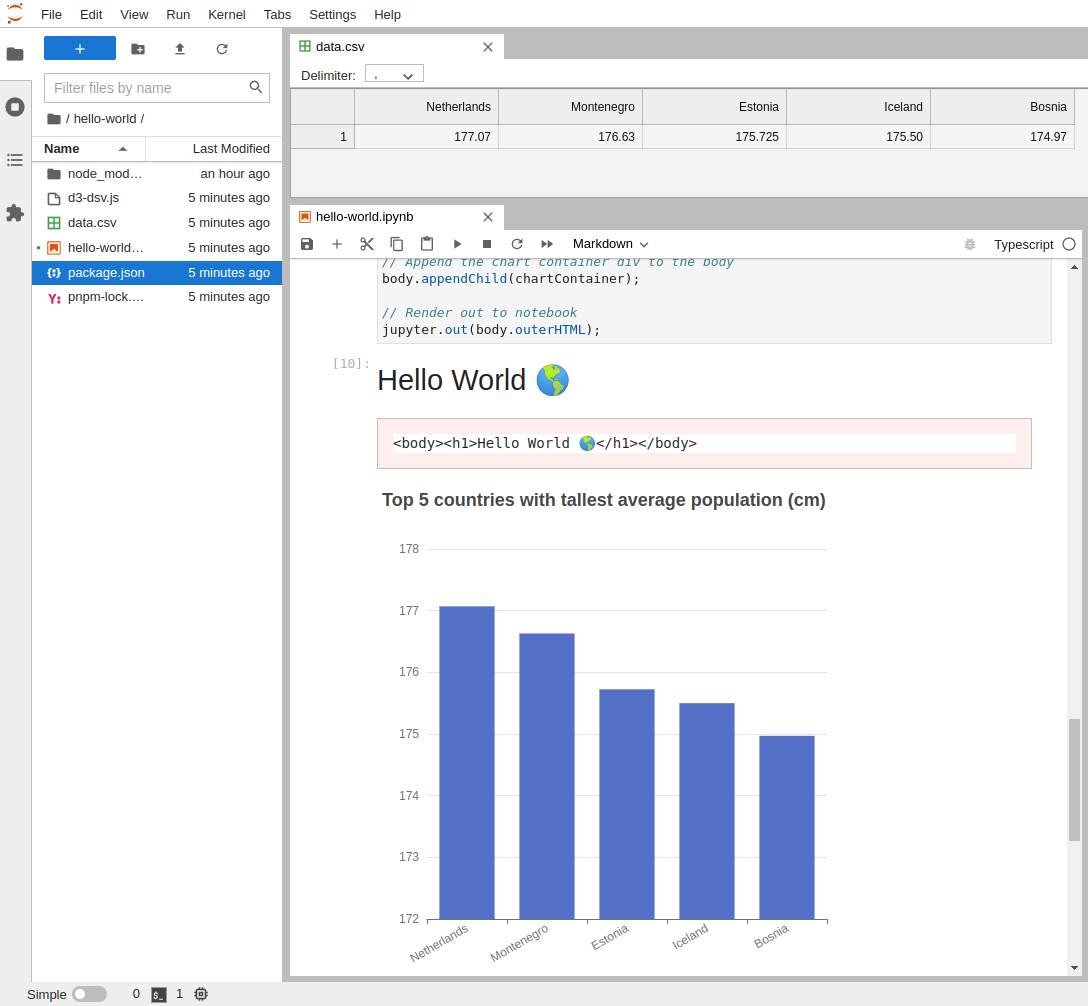
Use NPM dependencies: simply navigate to your notebook's directory and add a package.json file
cd /path/to/notebook
npm init
npm install --save short-unique-id
Fully written in Typescript: the kernel is written entirely in Typescript 🦾
SWC Optimized: the kernel compiles your code with SWC, making it blazing fast!
Able to render HTML: the kernel can render HTML in the notebook
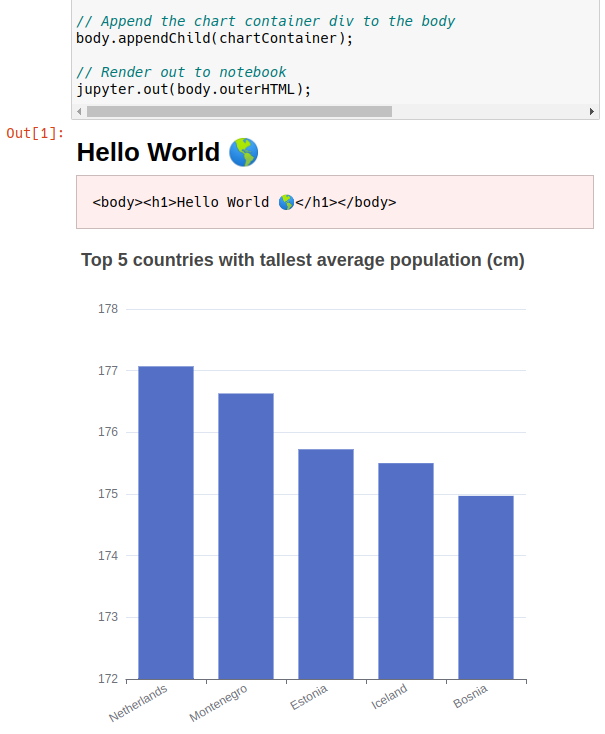
Custom output command: the kernel includes a handy jupyter.out function so your notebooks
aren't riddled with unsightly console.log calls
Fully compatible: works both in JupyterLab and Jupyter Notebook
We have implemented a handy jupyter object containing several useful functions:
-
domThis is a virtual dom (JSDOM) which allows you to build html in the notebook.
-
htmlThis is an alias for the included D3 Selection library which allows powerful HTML manipulation.
-
renderThis is a function that renders the html in the notebook.
-
outThis is a function that prints a given string to the notebook between
<pre>tags, useful for printing the raw output of a function or process. -
escapeThis is a function that escapes the given string so it can be safely printed in the notebook.
-
dataThis is an alias for the included D3 DSV library which allows to read data from/to CSV, TSV or JSON files/strings.
-
tableThis is a function that renders a table in the notebook from data using one of the
datafunctions. -
loadYou can use the
loadhelper to load either ajsorcssfile into the notebook.