Collection of Mendix widgets that allows to show any IFC or GLTF models. Combine the widgets with Mendix business logic to create various applications, for example maintenance or building information systems.
To load a IFC or GLTF model file. It has to be converted to a optimalized format that can load quickly within the browser. Converting can be done easily through our converter service. For more information about the converter service, check out the documentation here.
For examples, navigate to the Demo application. Login with:
- Username:
WidgetUser - Password:
Simplylogic.2022
The widgets are based on the opensource library from Xeokit, which is licensed under the Affero GPL V3 license.
| Widget | Description |
| Viewer container | The container widget where every other widget should be placed within which is mandatory |
| Viewer | The widget which holds the reference to the object that represents the 3D-model. |
| Highlight Objects | Used to highlight objects in the 3D-model when selecting through hovering/clicking |
| Xray Objects | A component widget which allows you to toggle partial visibility of the 3D-model |
| Measurement | Allows a user to measure dimensions or angles of the 3D-model |
| Explode | Used to explode the model to interact with inner objects |
| Reset Viewer | Used reset the viewer to how it was initialized on page load |
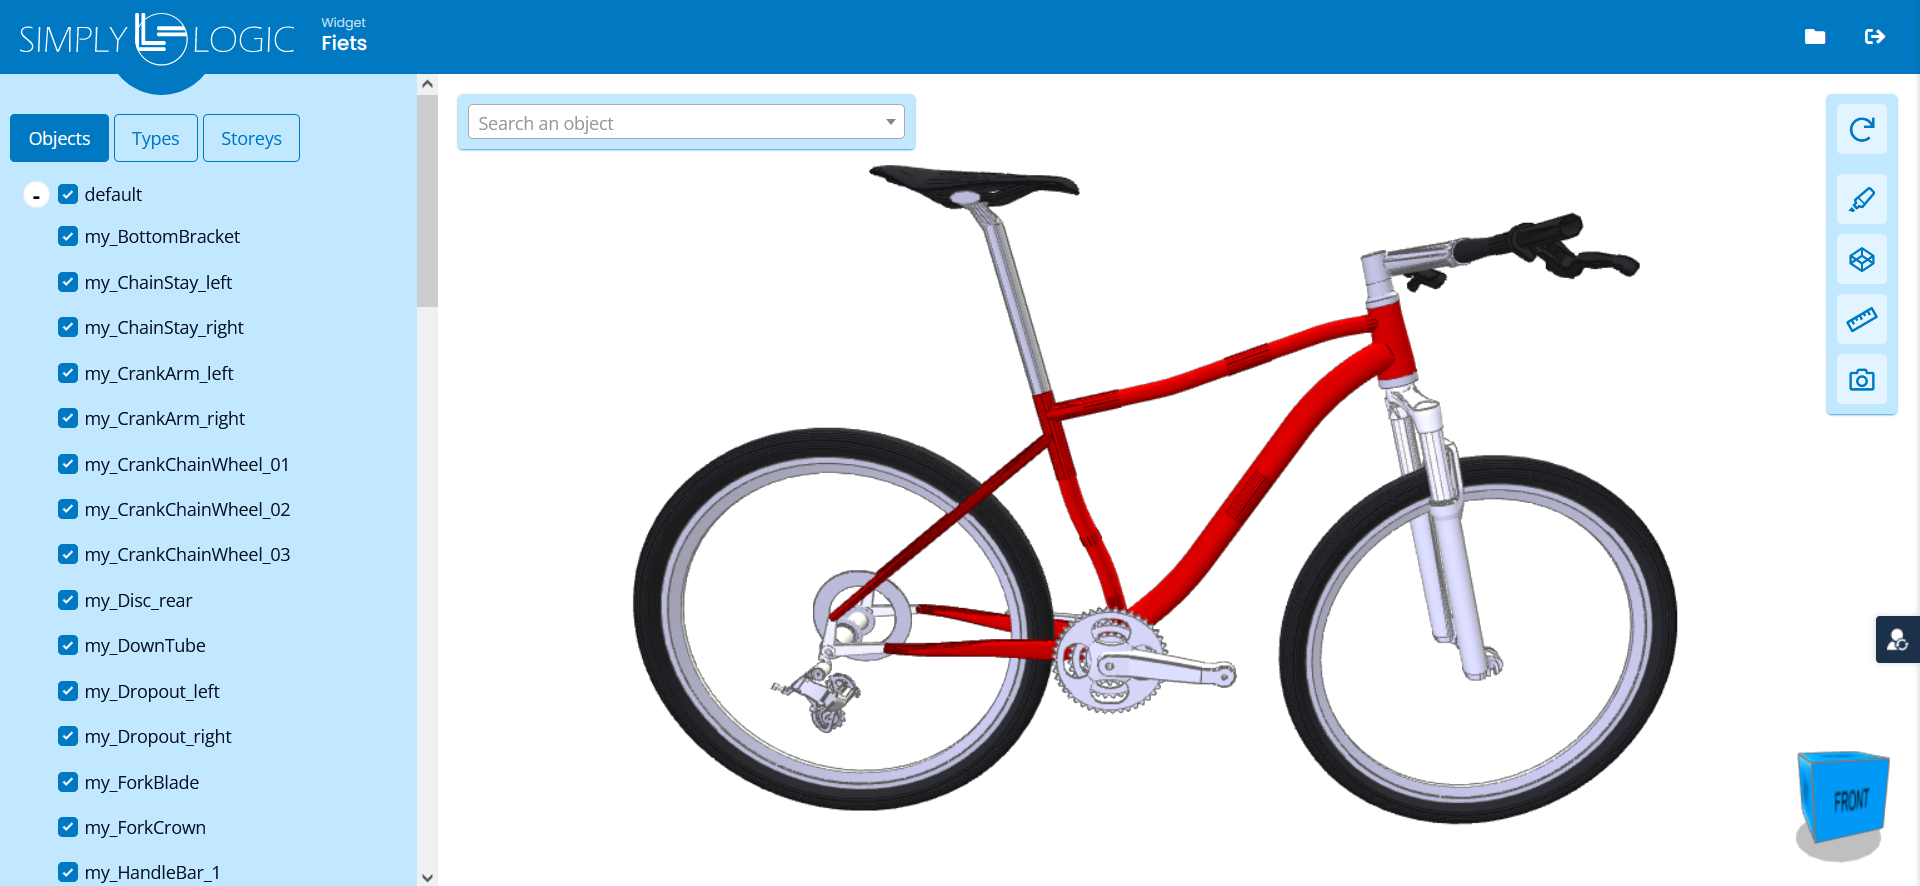
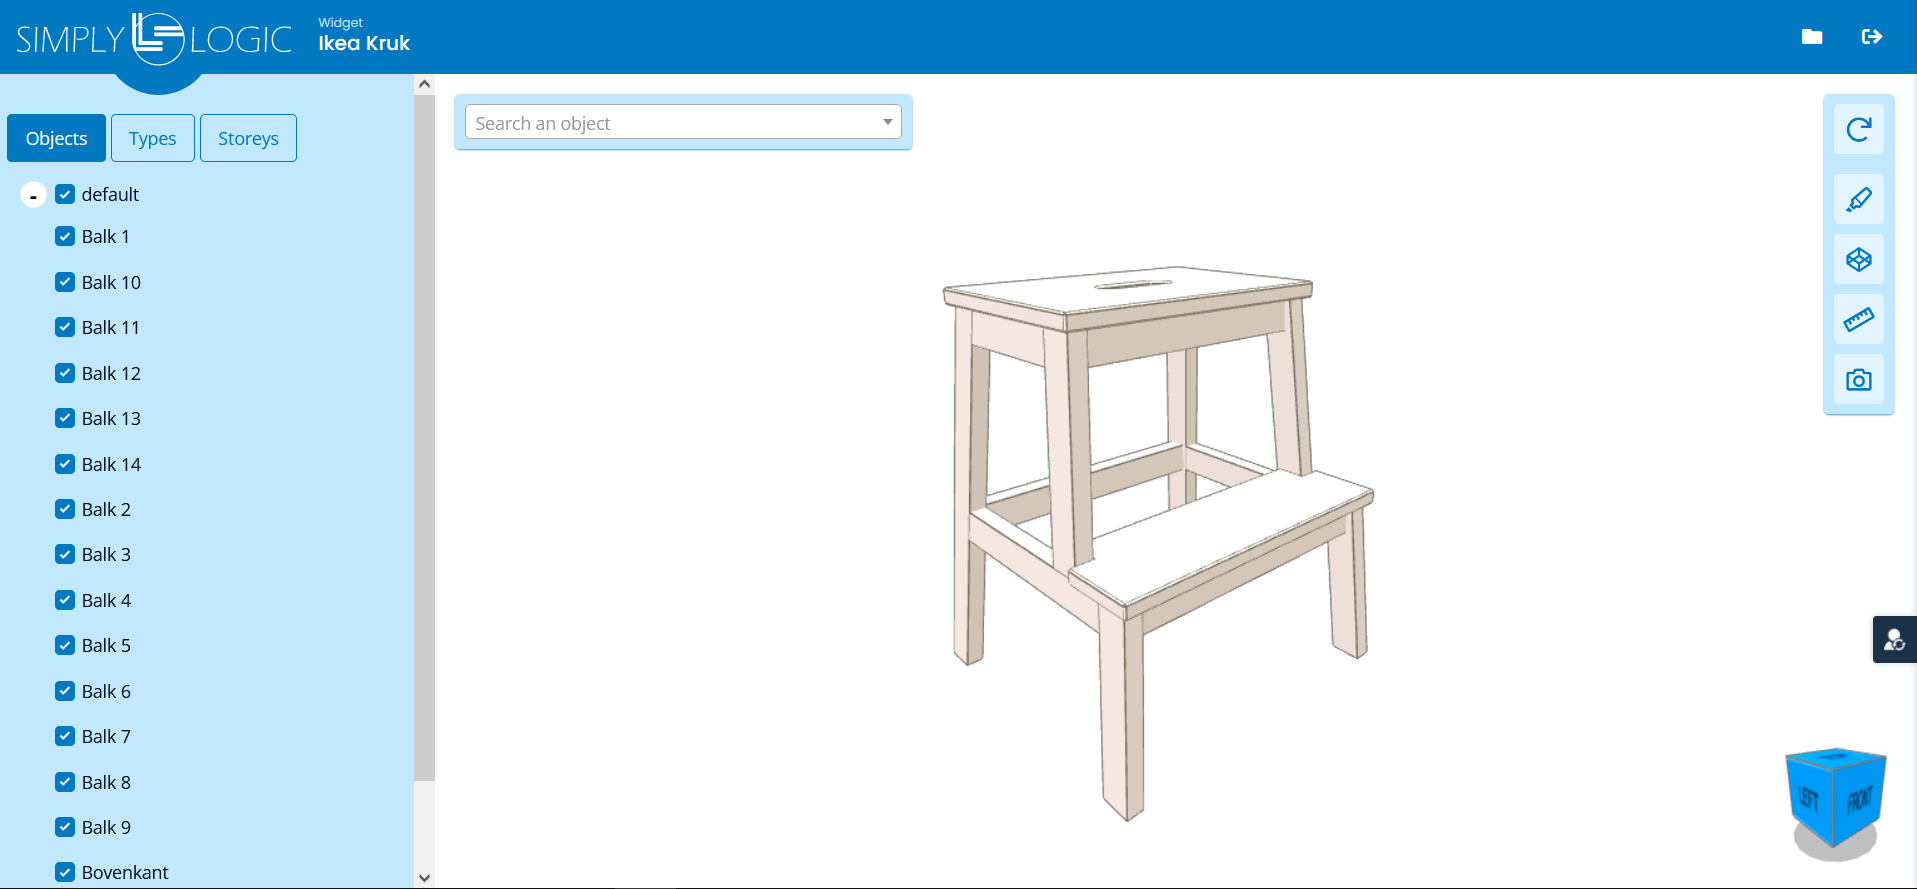
| Treeview | Used to display elements from the 3D-model in a treeview and toggle visibility |
| Treeview Hierarchy | Used to display a treeview hierarchy which indicates the treeview order |
| Camera Navigation | Allows you to customize how the user interacts with the camera of the viewer. |
| Camera Control | Allows you to customize camera settings of the viewer. |
| Annotations | A component widget which allows you to show annotations |
| Navigation cube | A navigation cube which can be interacted with by dragging which allows for rotation of the 3D-model and snapping |
| Example 1 | Example 2 | Example 3 |
 |  |  |
- Place a viewer container in a dataview that contains a 3D-model with an .xkt extension.
- If you want to use the 3d viewer locally you don't need an licence key. For running under a Mendix licensed application. You will need to subscribe at the Mendix marketplace to obtain a license key.
- Place the viewer widget inside the viewer container.
- Select an entity that holds the model file (which you provide to the dataview the Viewer Container is nested in).
- Add any widget component to the viewer container to customize to your likings.

- The viewer needs to be nested inside the viewer container.
- The viewer requires a dataview object.
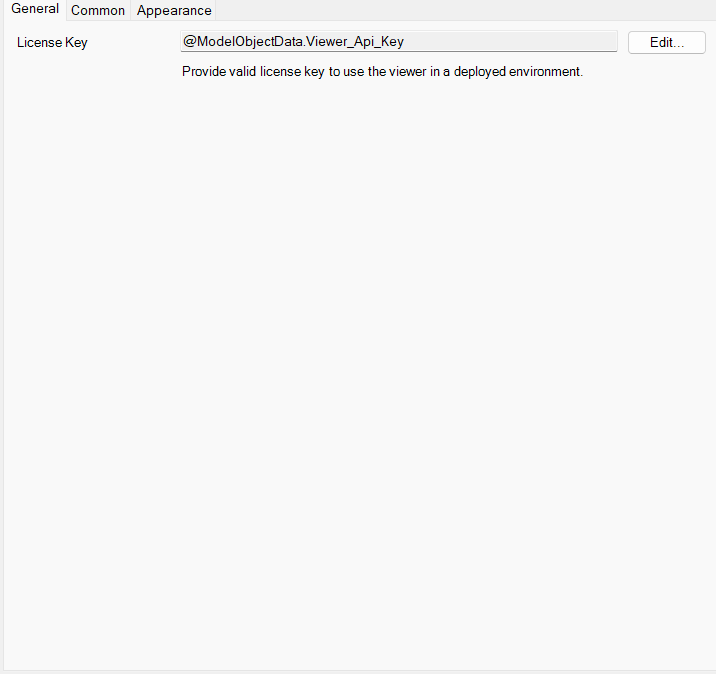
- Configure the licence key, if you want to test the widget locally provide any string.
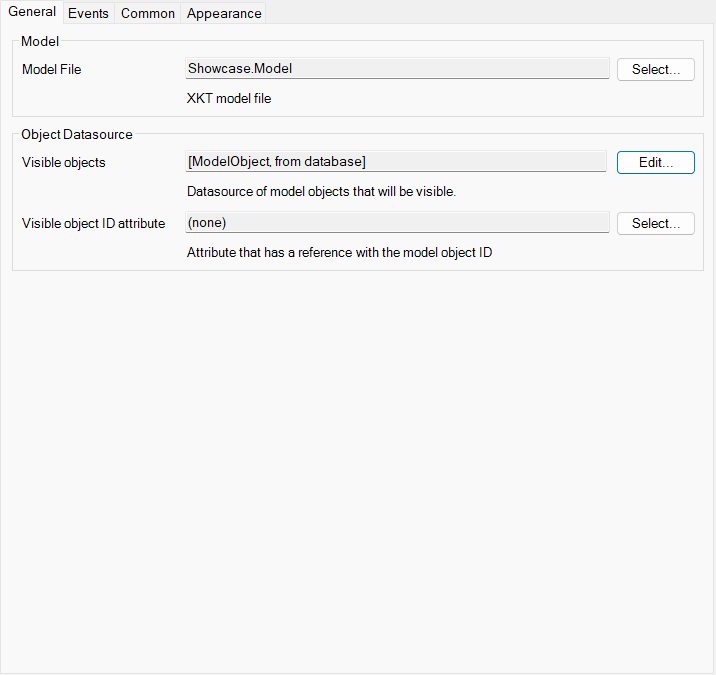
- Select the entity that holds the model file
- You can optionally specify the visible objects. This can be used if you only want to show a part of a 3D-model. If you use this you will have to specify a reference to an attribute that stores the object model-id.
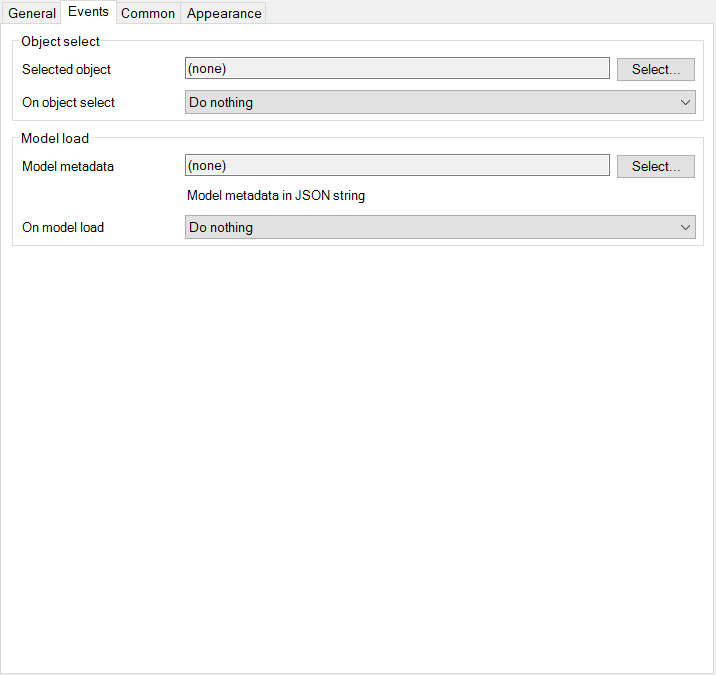
- You can assign a Mendix-action when a user selects an object inside of the model.
- You can specify from which string in JSON-format the model objects is constructed from.
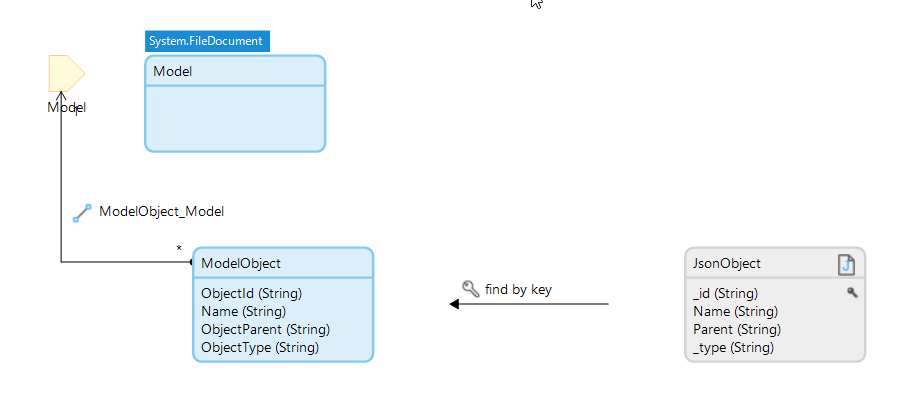
- You can assign a Mendix-action when model is loaded. Normally this will be a microflow where you import your model objects from the string with for example an import mapping shown below.
- Make product design processes insightfull to non-technical employees.
- Check on the availability of a part from a model and manage your supply.
- Usage in inspection apps to manage the status of an asset or object.
The following widgets can be used to control the viewer. Requirement is to place the widgets inside a viewer container. This to connect the widgets together with the viewer.
Used to highlight objects in the 3D-model when selecting through hovering/clicking

- Place the Highlight Objects inside the Viewer Container
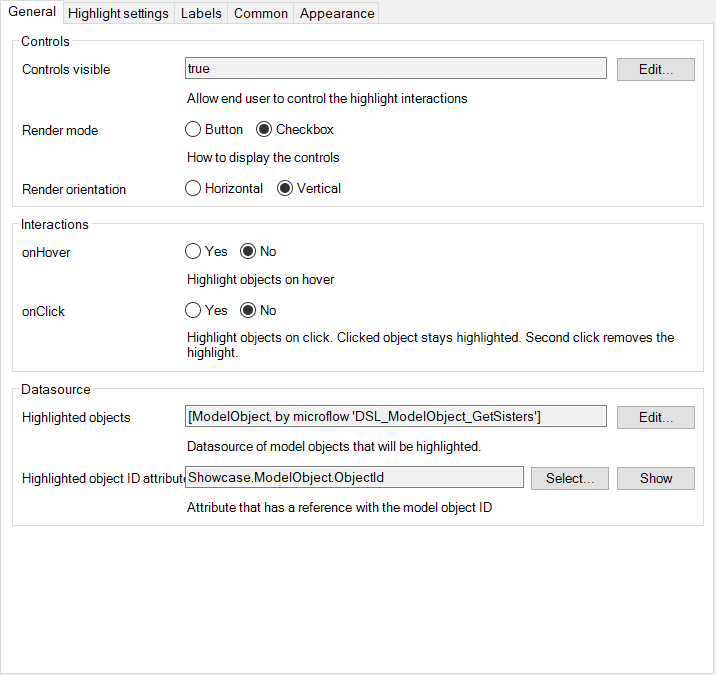
- The controls indicate whether or not the controls are visible to the user and how these are displayed
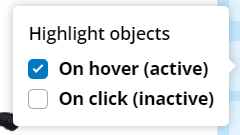
- The interactions indicate which highlight mode is selected.
- You can also provide a datasource of model objects to this widget that will be highlighted, this can be used to highlight a list of items.
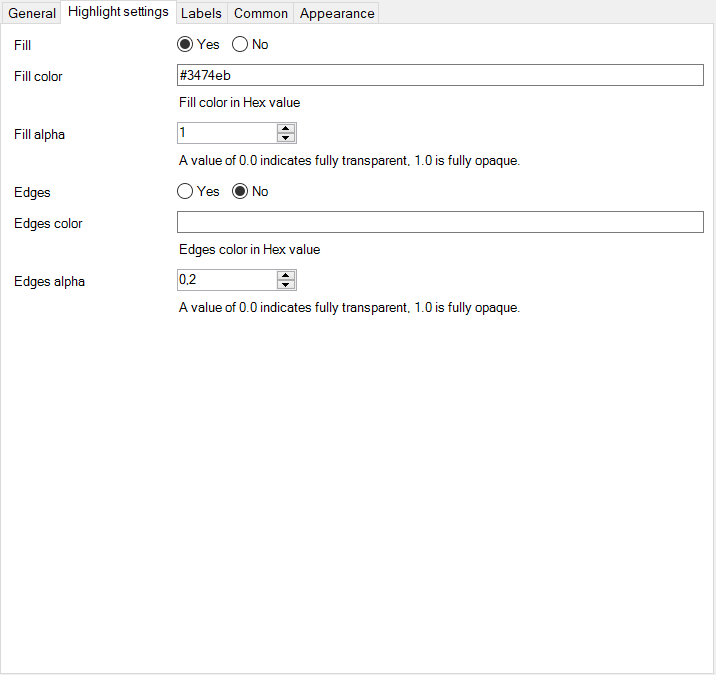
- Customize how an object is higlighted
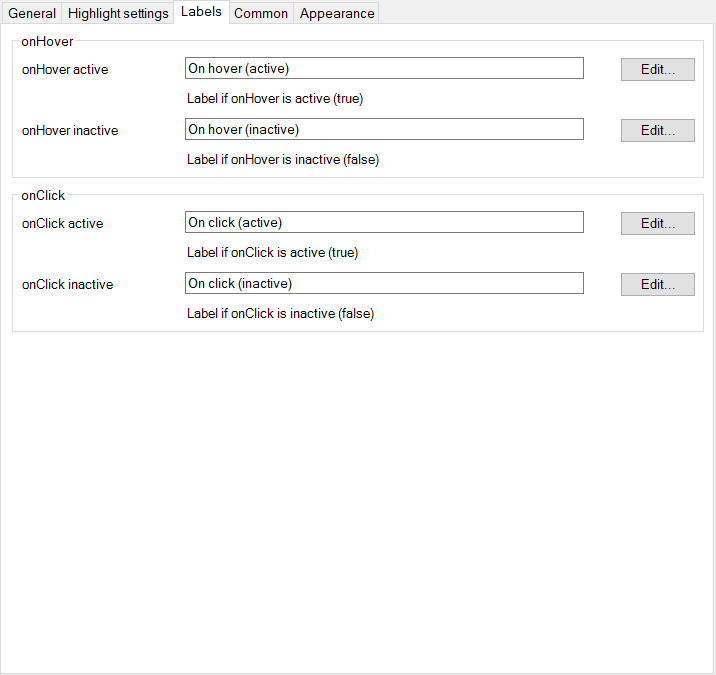
- Customize how the labels in the UI are displayed for the user.
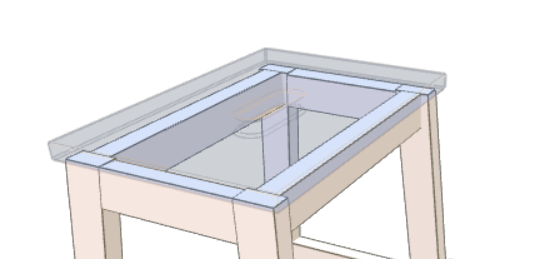
This widget allows you to toggle parts of the 3D-model transparent which allows you to see the objects behind.

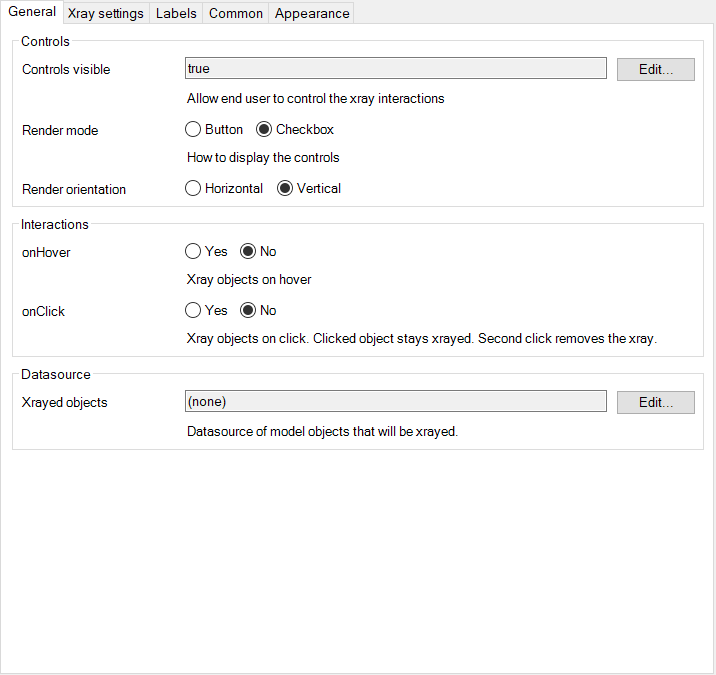
- Place the Xray Objects widget inside the Viewer Container
- Specify whether or not the controls are visible for the user.
- Specify when objects will be displayed x-rayed.
- Xray objects: You can specify a datasource that will recieve the Object from the parent datasource as input parameter and expects a list of Objects as a return. You will have to specify the object ID attribute if you use this. This can be used if you want to X-ray an entire model.
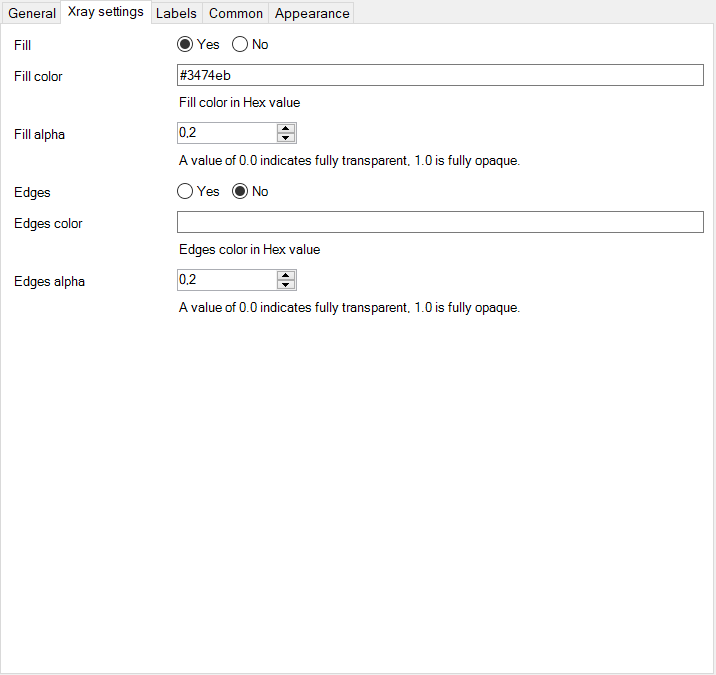
- This tab specifies how the Xrayed item is rendered in the browser
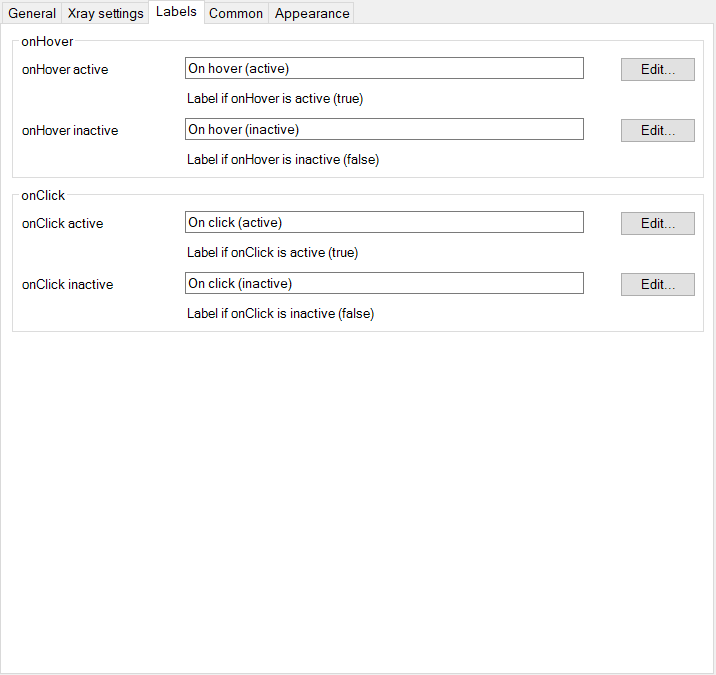
- This tab allows you to customize the UI component shown to the user, here you can translate the labels into a language of your liking.
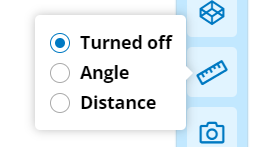
This widget allows you to measure parts of the 3D-model. It allows you to measure lengths and angles. Uses Metric system.
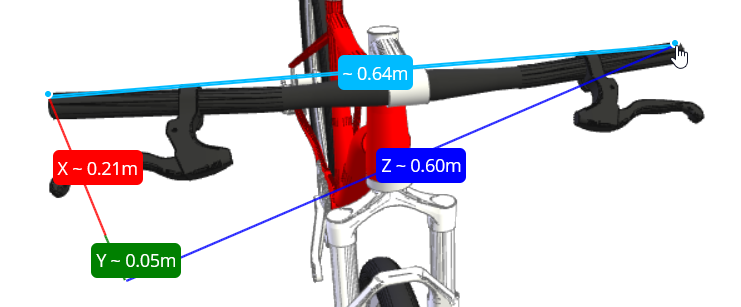

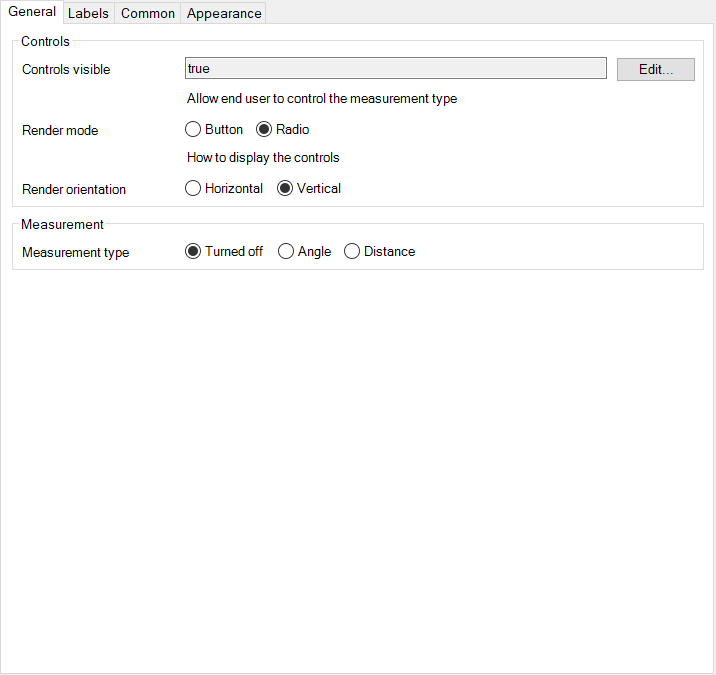
- Place the Measurement widget inside the Viewer Container
- Specify whether or not the controls are visible for the user and how it renders for the user.
- Specify the default measurement mode.
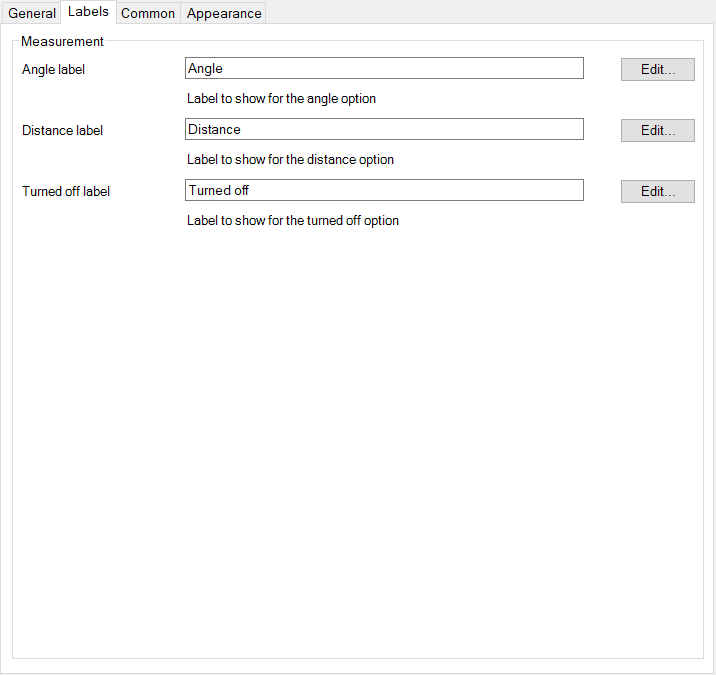
- This specifies the labels for the UI component that is shown to the user.
Used to explode the model to interact with inner model-objects.


- Place the Explode widget inside the Viewer Container
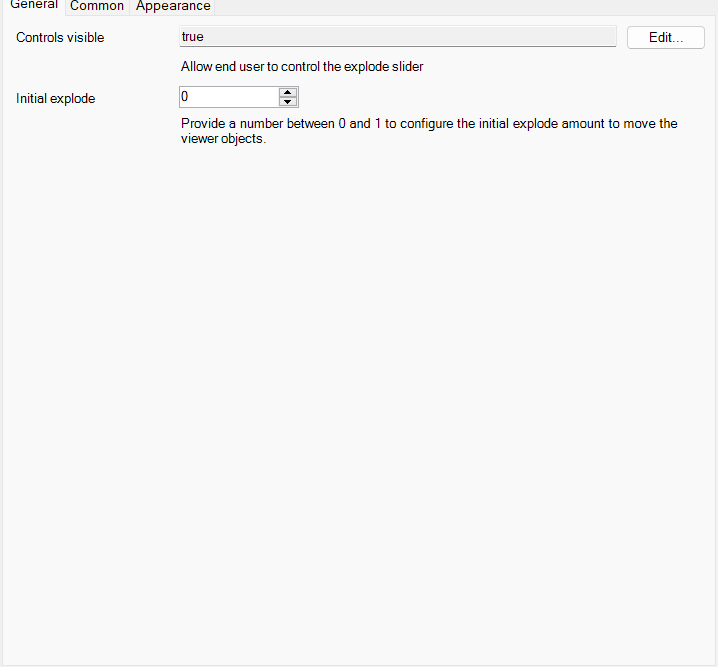
- Controls visible: Configure whether the controls are visible for the user.
- Initial explode: allows you to set an initial explode value for the viewer objects.
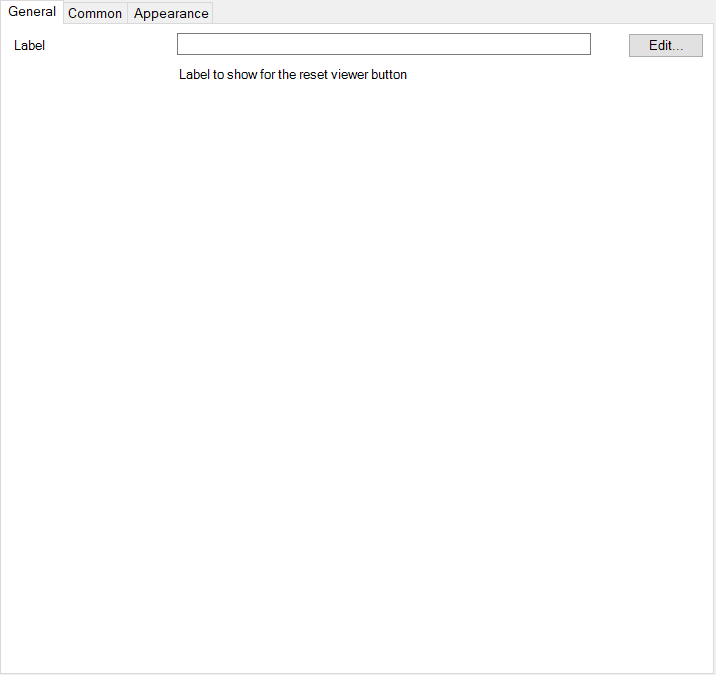
Used reset the viewer to how it was initialized on page load, including highlighted items, x-rayed items, measurements and the camera position.


 \
\
- Place the Reset Viewer inside the Viewer Container
- Customize the label according to your preferences
Used to display a treeview of containment/types/storey's depending on how the Treeview Hierarchy is configured. Gives the user an overview of the available containment/types/storey's. Allows you to toggle objects as visible/invisible in the 3D-Model.
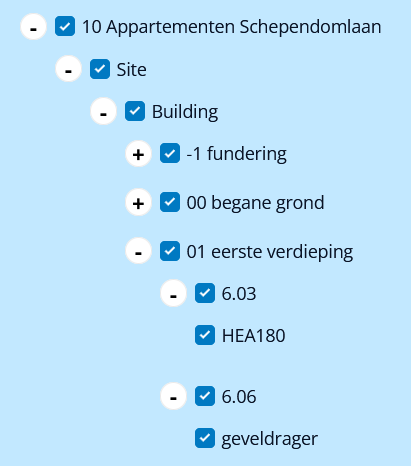

- Place the Treeview Hierarchy inside the Viewer Container
- Place the Treeview inside the Viewer Container
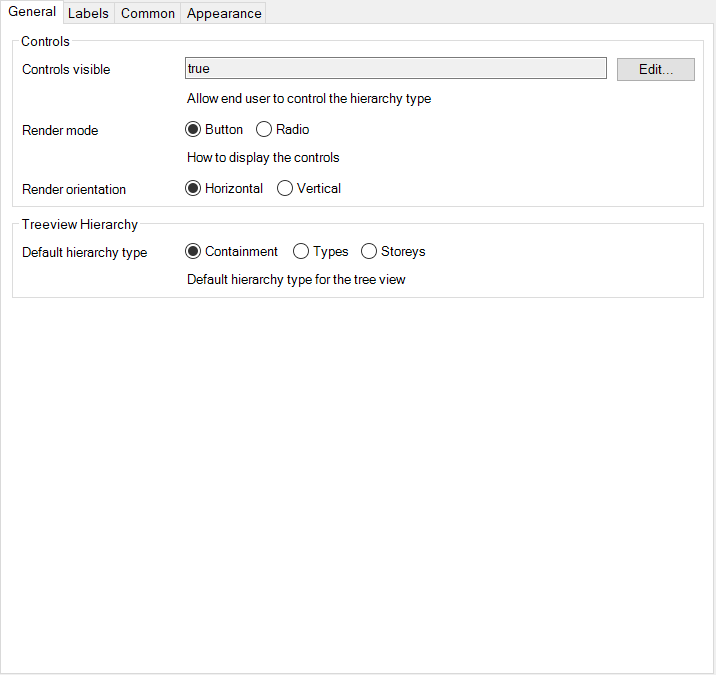
Used to display a treeview hierarchy which indicates how the treeview component is displayed


- Place the Treeview Hierarchy inside the Viewer Container
- Place the Treeview inside the Viewer Container
- Customize how the treeview hierarchy is viewed and what the default display mode for the treeview will be.
- Containement means that the treenodes are organized based on the object they are contained in.
- Types means that the treenodes are organized based on object-type (this is usefull for models converted from .ifc)
- Storeys means that the treenodes are organized based on the storeys and then on type. Usefull for multi-storey buildings
Allows you to influence how the user interacts with the camera of the viewer
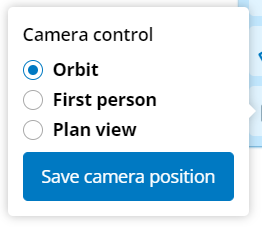

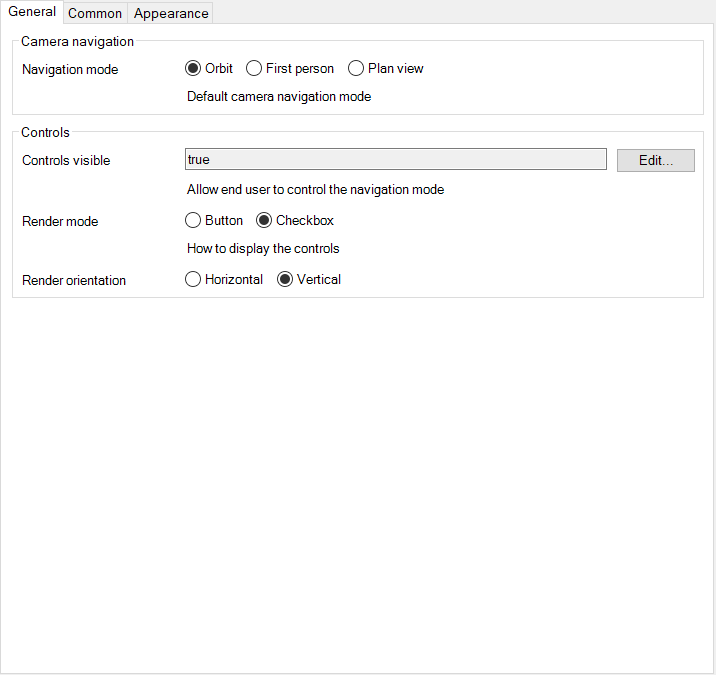
- Place the Camera Navigation inside the Viewer Container
- Allows you to configure the navigation mode of the camera.
- This specifies how the camera navigation is shown to the user.
Allows you to save the camera position


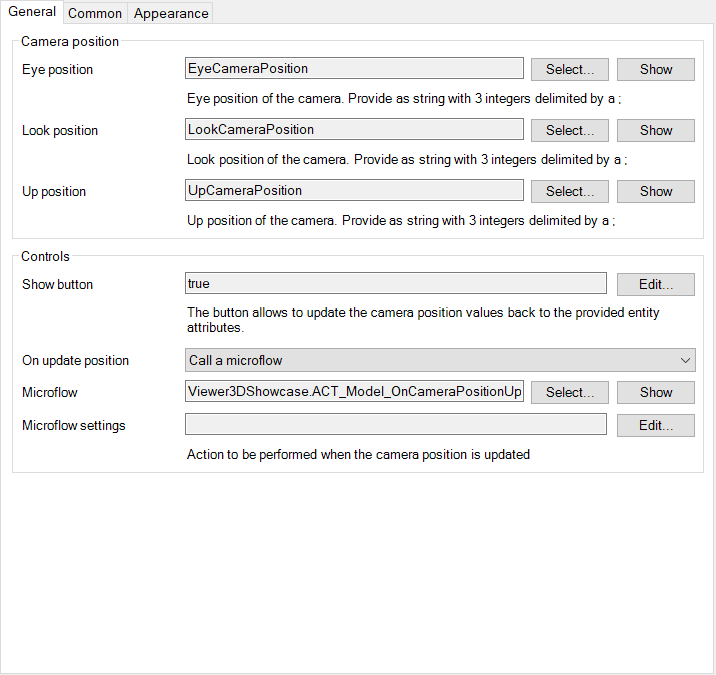
- Place the Camera Navigation inside the Viewer Container
- Shows a button which passes the model object to a microflow so you can save the camera position to an object.
- Read the positions from the strings provided
- position is a string formatted as:
int;int;int
A widget which allows you to show annotations on objects of a model. To accopmlish this you will need a list of model objects. The model objects will need an ObjectID

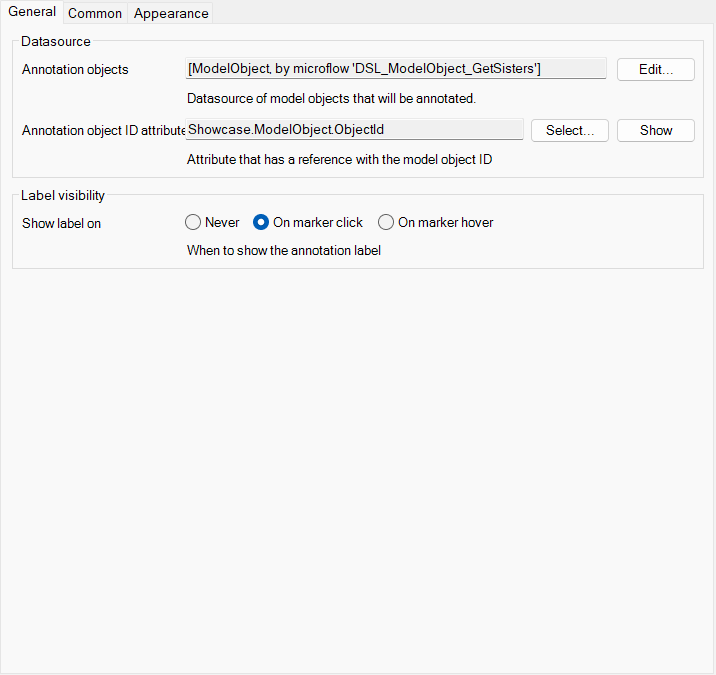
- Place the Annotations widget inside the Viewer Container
- Specify the datasource that returns the model objects that you want to show in the annotation
- The container will receive the context of the model-object.
- You can specify when the label is shown.
A navigation cube which can be interacted with by dragging which allows for rotation of the 3D-model. You can also click one of the sides/edges to snap to that side of the 3D-model.
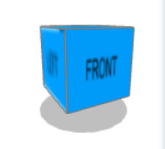

- Place the Navigation Cube inside the Viewer Container
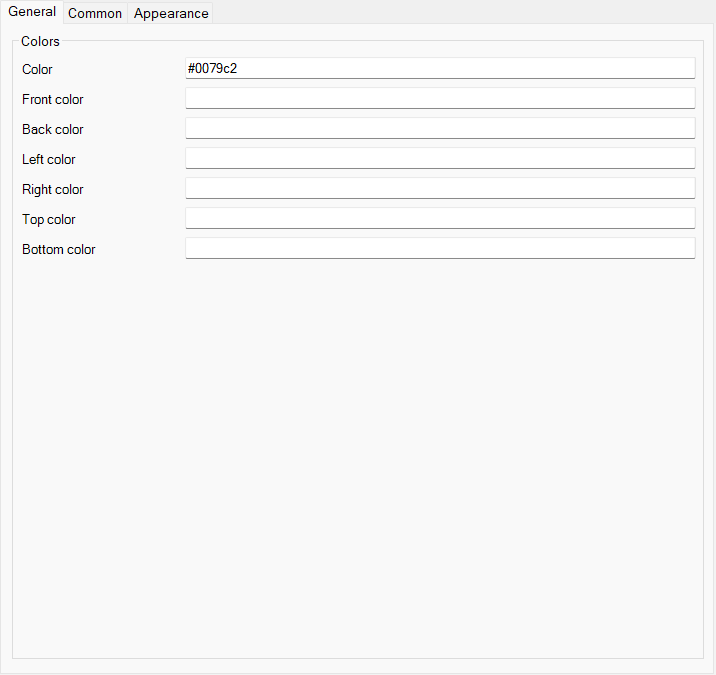
- You can specify the colors of the cube by using hexadecimal color notation.