This repository contains all scripts and instructions needed to deploy the ACM Sockshop demo to OpenShift (3.11).
- jq (https://stedolan.github.io/jq/) has to be installed to run the setup script.
- A GitHub Organization to fork the Sockshop application to
- A GitHub Personal Access Token
- OpenShift command line util (oc), and logged in to your cluster
- Git CLI & Hub CLI
- A Dynatrace Tenant - you will need the Dynatrace Tenant ID, a Dynatrace API Token and Dynatrace PaaS Token to complete the setup.
-
Execute the
~/forkGitHubRepositories.shscript in your home directory. This script takes the name of the GitHub organization you have created earlier.$ ./scripts/forkGitHubRepositories.sh <GitHubOrg>This script
clones all needed repositories and the uses thehubcommand (hub) to fork those repositories to the passed GitHub organization. After that, the script deletes all repositories andclones them again from the new URL. -
Insert information in ./scripts/creds.json by executing ./scripts/creds.sh - This script will prompt you for all information needed to complete the setup, and populate the file scripts/creds.json with them. (If for some reason there are problems with this script, you can of course also directly enter the values into creds.json).
$ ./scripts/creds.sh -
Execute ./scripts/setup-infrastructure.sh - This will deploy a Jenkins service within your OpenShift Cluster, as well as an initial deployment of the sockshop application in the dev, staging and production namespaces. NOTE: If you use a Mac, you can use the script setup-infrastructure-macos.sh. Note that the script will run for some time (~5 mins), since it will wait for Jenkins to boot and set up some credentials via the Jenkins REST API.
$ ./scripts/setup-infrastructure.sh -
Afterwards, you can login using the default Jenkins credentials (admin/AiTx4u8VyUV8tCKk). It's recommended to change these credentials right after the first login. You can get the URL of Jenkins by executing
$ oc get route jenkins -n cicd
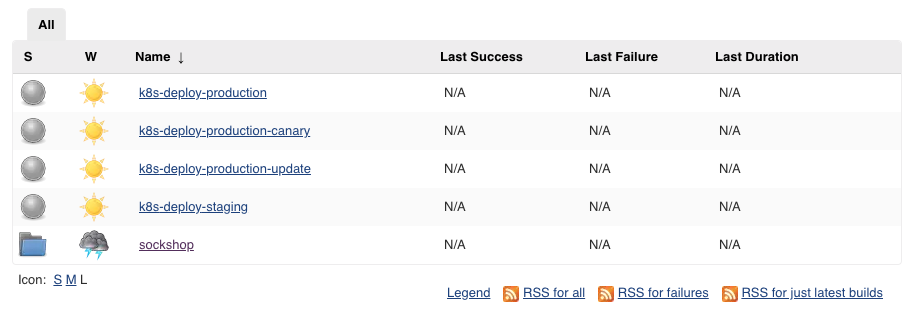
- Verify the installation: In the Jenkins dashboard, you should see the following pipelines:
- k8s-deploy-production
- k8s-deploy-production-canary
- k8s-deploy-production-update
- k8s-deploy-staging
- A folder called sockshop
Further, navigate to Jenkins > Manage Jenkins > Configure System, and see if the Environment Variables used by the build pipelines have been set correctly (Note that the value for the parameter DT_TENANT_URL should start with 'https://'):
- Verify your deployment of the Sockshop service: Execute the following commands to retrieve the URLs of your front-end in the dev, staging and production environments:
$ oc get route front-end -n dev
$ oc get route front-end -n staging
$ oc get route front-end -n production
This allows you to query service-level metrics (e.g.: Response Time, Failure Rate, or Throughput) automatically based on meta-data that you have passed during a deployment, e.g.: Service Type (frontend, backend), Deployment Stage (dev, staging, production). Besides, this lab creates tagging rules based on Kubernetes namespace and Pod name.
In order to tag services, Dynatrace provides Automated Service Tag Rules. In this lab you want Dynatrace to create a new service-level tag with the name SERVICE_TYPE. It should only apply the tag if the underlying Process Group has the custom meta-data property SERVICE_TYPE. If that is the case, you also want to take this value and apply it as the tag value for Service_Type.
- Go to Settings, Process groups, and click on Process group naming.
- Create a new process group naming rule with Add new rule.
- Edit that rule:
- Rule name:
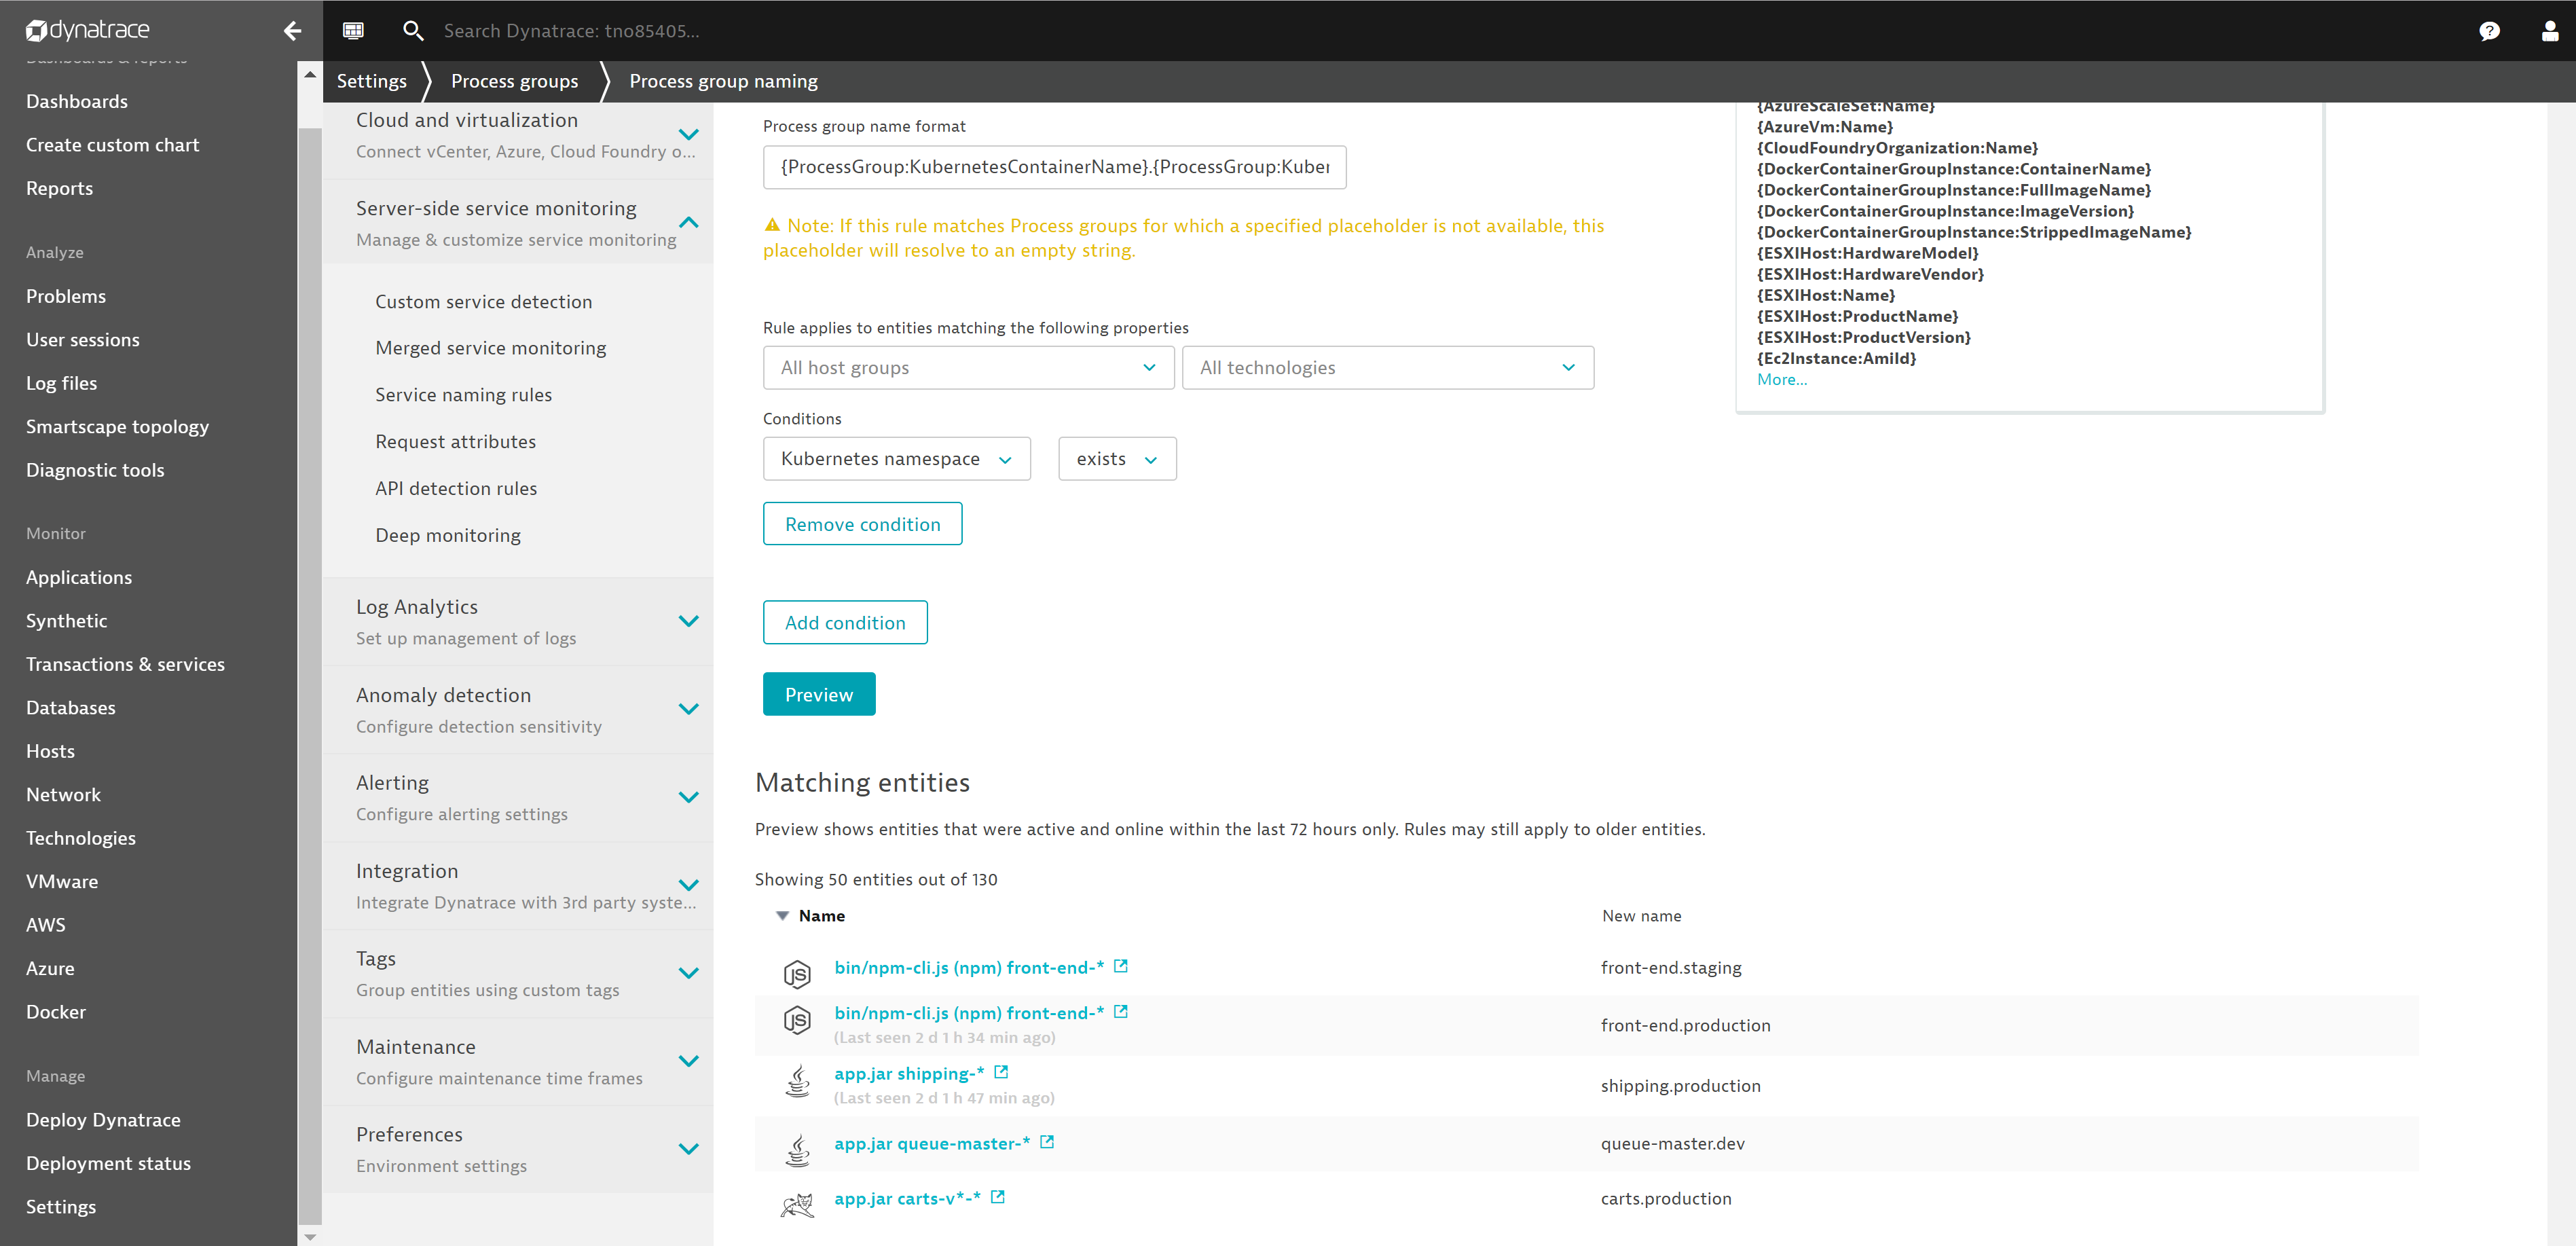
Container.Namespace - Process group name format:
{ProcessGroup:KubernetesContainerName}.{ProcessGroup:KubernetesNamespace} - Condition:
Kubernetes namespace>exits
- Rule name:
- Click on Preview and Save.
Screenshot shows this rule definition.

- Go to Settings, Tags, and click on Automatically applied tags.
- Create a new custom tag with the name
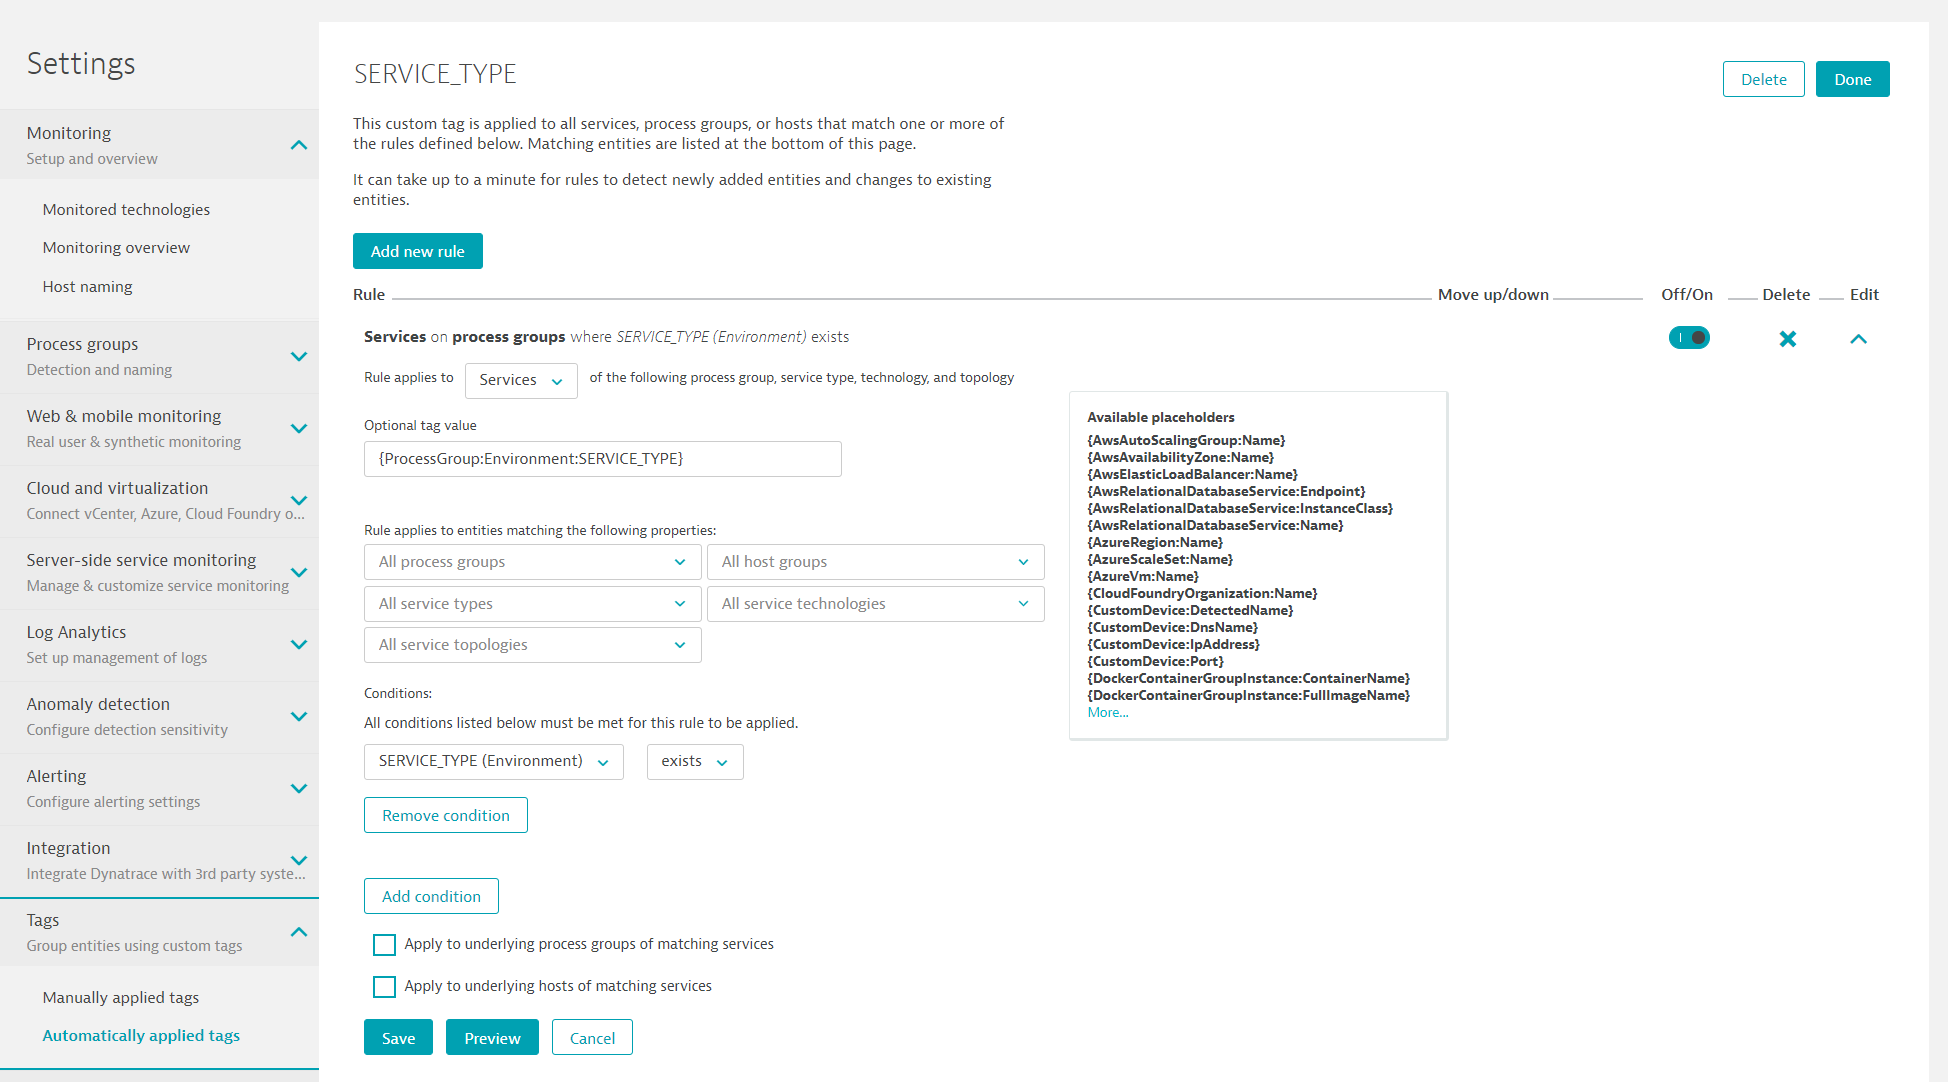
SERVICE_TYPE. - Edit that tag and Add new rule.
- Rule applies to:
Services - Optional tag value:
{ProcessGroup:Environment:SERVICE_TYPE} - Condition on
Process group properties -> SERVICE_TYPEifexists
- Rule applies to:
- Click on Preview to validate rule works.
- Click on Save for the rule and then Done.
Screenshot shows this rule definition.

It will take about 30 seconds until the tags are automatically applied to the services.
- Go to Transaction & services.
- Click in Filtered by edit field.
- Select
SERVICE_TYPEand selectFRONTEND. - You should see the service
front-end. Open it up.
- Go to Settings, Tags, and click on Automatically applied tags.
- Create a new custom tag with the name
app. - Edit that tag and Add new rule.
- Rule applies to:
Services - Optional tag value:
{ProcessGroup:KubernetesContainerName} - Condition on
Kubernetes container nameifexists
- Rule applies to:
- Click on Preview to validate rule works.
- Click on Save for the rule and then Done.
- Go to Settings, Tags, and click on Automatically applied tags.
- Create a new custom tag with the name
environment. - Edit that tag and Add new rule.
- Rule applies to:
Services - Optional tag value:
{ProcessGroup:KubernetesNamespace} - Condition on
Kubernetes namespaceifexists
- Rule applies to:
- Click on Preview to validate rule works.
- Click on Save for the rule and then Done.
-
To deploy updates you made to your services to the development environment, you can follow the instructions at this location: (Deploy to dev)[https://github.com/dynatrace-innovationlab/acl-docs/tree/master/workshop/05_Developing_Microservices/02_Deploy_Microservice_to_Dev].
-
To deploy your changes to the staging environment, please refer to the instructions at this location: (Deploy to Staging)[https://github.com/dynatrace-innovationlab/acl-docs/tree/master/workshop/05_Developing_Microservices/03_Deploy_Microservice_to_Staging].

