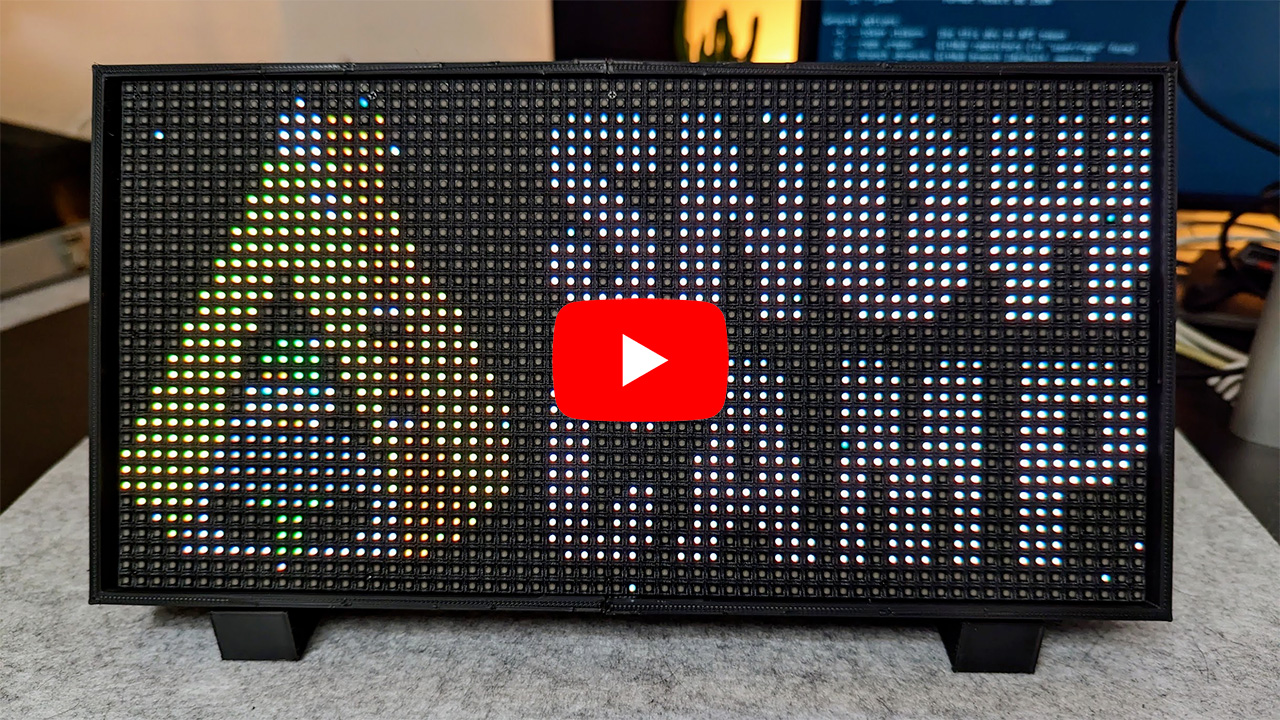
64x32 led matrix timer for conferences with remote WiFi control, based on ESP8266/ESP32.
Note: time countdown is accelerated x100 in the video.
You can find a detailed step-by-step assembly guide here.
- 64x32 P4 LED Panel aliexpress
- ESP32 CH340 Type-C aliexpress, make sure to pick the right one
- 2m USB-C cable aliexpress, make sure to pick the right one
- 20W USB-C Charger aliexpress
- 10cm M-F Dupont Cable 40pin aliexpress, make sure to pick the right one
- 10cm F-F Dupont Cable 40pin aliexpress, make sure to pick the right one
- 20cm F-F Dupont Cable 40pin aliexpress, make sure to pick the right one
- Push button kit aliexpress
Total: about 30 euros

Connect panel input (PI) and and panel output (PO) like this:
| PI | PO |
|---|---|
| R1 | R0 |
| G0 | R1 |
| G1 | G0 |
| B0 | G1 |
| B1 | B0 |
Connect panel input (PI) to the ESP8266 or ESP32 like this:
| PI | ESP8266 GPIO | ESP32 GPIO |
|---|---|---|
| A | 05 - (D1) | 19 |
| B | 04 - (D2) | 23 |
| C | 15 - (D8) | 18 |
| D | 12 - (D6) | 5 |
| STB/LAT | 16 - (D0) | 22 |
| P_OE | 02 - (D4) | 16 |
| CLK | 14 - (D5) | 14 |
| R0 | 13 - (D7) | 13 |
Connect push button pins to the ESP8266 or ESP32 like this:
| BUTTON | ESP8266 GPIO | ESP32 GPIO |
|---|---|---|
| L | RX - (D9) | RX0 |
| R | GND | GND |

You'll find a parameterized case model in case/case.scad.
You can customize and compile this file into an STL using OpenSCAD.
I recommend to set test_print to true in the customizer ("Other" tab) and first print these test models to test and adapt the tolerance value for your printer (higher = more loose fit, smaller = tighter fit).
This model makes use of the BOSL2 library, see instructions here for how to install it.
This project is built using VS Code and PlatformIO.
Once loaded, Platform IO will download the platform SDK and dependencies automatically, then you'll be able to build and upload the project to your ESP.
You update the
platformio.inifile to change the board type and platform, this project is compatible with both ESP8266 and ESP32 boards.
- Push button: start/stop timer
- Long press (1s): reset timer
- Double press: next mode
- Triple press: change brightness
Modes cycles between the logo/screensaver and the differents timers.
When the timer is not running, the logo/screensaver will be automatically activated after 5 minutes without touching any button.
- Hold button for 5s: enable/disable WiFi AP
- Hold button for 10s: reset all settings and reboot
- 5x press: toggle x100 time acceleration (for demo/testing purposes)
When WiFi is enabled, the device will create an access point with the name "Timer" by default. Connect to it, and you should be presented with a captive portal to control and configure the device.
To generate the bitmap arrays for images, I used image2cpp.
Make sure to set RGB565 format and change the type to uint16_t static instead of const uint16_t, otherwise the app will crash.
The bitmaps are located in src/bitmaps.h.
For drawing the bitmaps I used PixiArt.