Welcome to the OpenShift Pipelines tutorial!
OpenShift Pipelines is a cloud-native, continuous integration and delivery (CI/CD) solution for building pipelines using Tekton. Tekton is a flexible, Kubernetes-native, open-source CI/CD framework that enables automating deployments across multiple platforms (Kubernetes, serverless, VMs, etc) by abstracting away the underlying details.
OpenShift Pipelines features:
- Standard CI/CD pipeline definition based on Tekton
- Build images with Kubernetes tools such as S2I, Buildah, Buildpacks, Kaniko, etc
- Deploy applications to multiple platforms such as Kubernetes, serverless and VMs
- Easy to extend and integrate with existing tools
- Scale pipelines on-demand
- Portable across any Kubernetes platform
- Designed for microservices and decentralized teams
- Integrated with the OpenShift Developer Console
This tutorial walks you through pipeline concepts and how to create and run a simple pipeline for building and deploying a containerized app on OpenShift, and in this tutorial, we will use Triggers to handle a real GitHub webhook request to kickoff a PipelineRun.
In this tutorial you will:
- Learn about Tekton concepts
- Install OpenShift Pipelines
- Deploy a Sample Application
- Install Tasks
- Create a Pipeline
- Trigger a Pipeline
You need an OpenShift 4 cluster in order to complete this tutorial. If you don't have an existing cluster, go to http://try.openshift.com and register for free in order to get an OpenShift 4 cluster up and running on AWS within minutes.
You will also use the Tekton CLI (tkn) through out this tutorial. Download the Tekton CLI by following instructions available on the CLI GitHub repository.
Tekton defines a number of Kubernetes custom resources as building blocks in order to standardize pipeline concepts and provide a terminology that is consistent across CI/CD solutions. These custom resources are an extension of the Kubernetes API that let users create and interact with these objects using kubectl and other Kubernetes tools.
The custom resources needed to define a pipeline are listed below:
Task: a reusable, loosely coupled number of steps that perform a specific task (e.g. building a container image)Pipeline: the definition of the pipeline and theTasksthat it should performPipelineResource: inputs (e.g. git repository) and outputs (e.g. image registry) to and out of a pipeline or taskTaskRun: the execution and result of running an instance of taskPipelineRun: the execution and result of running an instance of pipeline, which includes a number ofTaskRuns
In short, in order to create a pipeline, one does the following:
- Create custom or install existing reusable
Tasks - Create a
PipelineandPipelineResourcesto define your application's delivery pipeline - Create a
PipelineRunto instantiate and invoke the pipeline
For further details on pipeline concepts, refer to the Tekton documentation that provides an excellent guide for understanding various parameters and attributes available for defining pipelines.
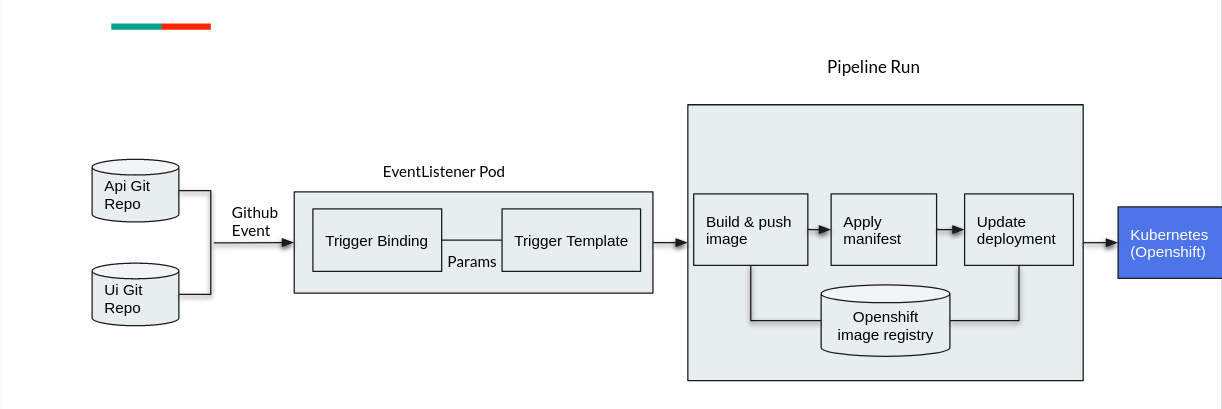
The Tekton API enables functionality to be separated from configuration (e.g. Pipelines vs PipelineRuns) such that steps can be reusable, but it does not provide a mechanism to generate the resources (notably, PipelineRuns and PipelineResources) that encapsulate these configurations dynamically. Triggers extends the Tekton architecture with the following CRDs:
TriggerTemplate- Templates resources to be created (e.g. Create PipelineResources and PipelineRun that uses them)TriggerBinding- Validates events and extracts payload fieldsEventListener- ConnectsTriggerBindingsandTriggerTemplatesinto an addressable endpoint (the event sink). It uses the extracted event parameters from eachTriggerBinding(and any supplied static parameters) to create the resources specified in the correspondingTriggerTemplate. It also optionally allows an external service to pre-process the event payload via theinterceptorfield.ClusterTriggerBinding- A cluster-scoped TriggerBinding
Using tektoncd/triggers in conjunction with tektoncd/pipeline enables you to
easily create full-fledged CI/CD systems where the execution is defined
entirely through Kubernetes resources.
You can learn more about triggers by checking out the docs
In the following sections, you will go through each of the above steps to define and invoke a pipeline.
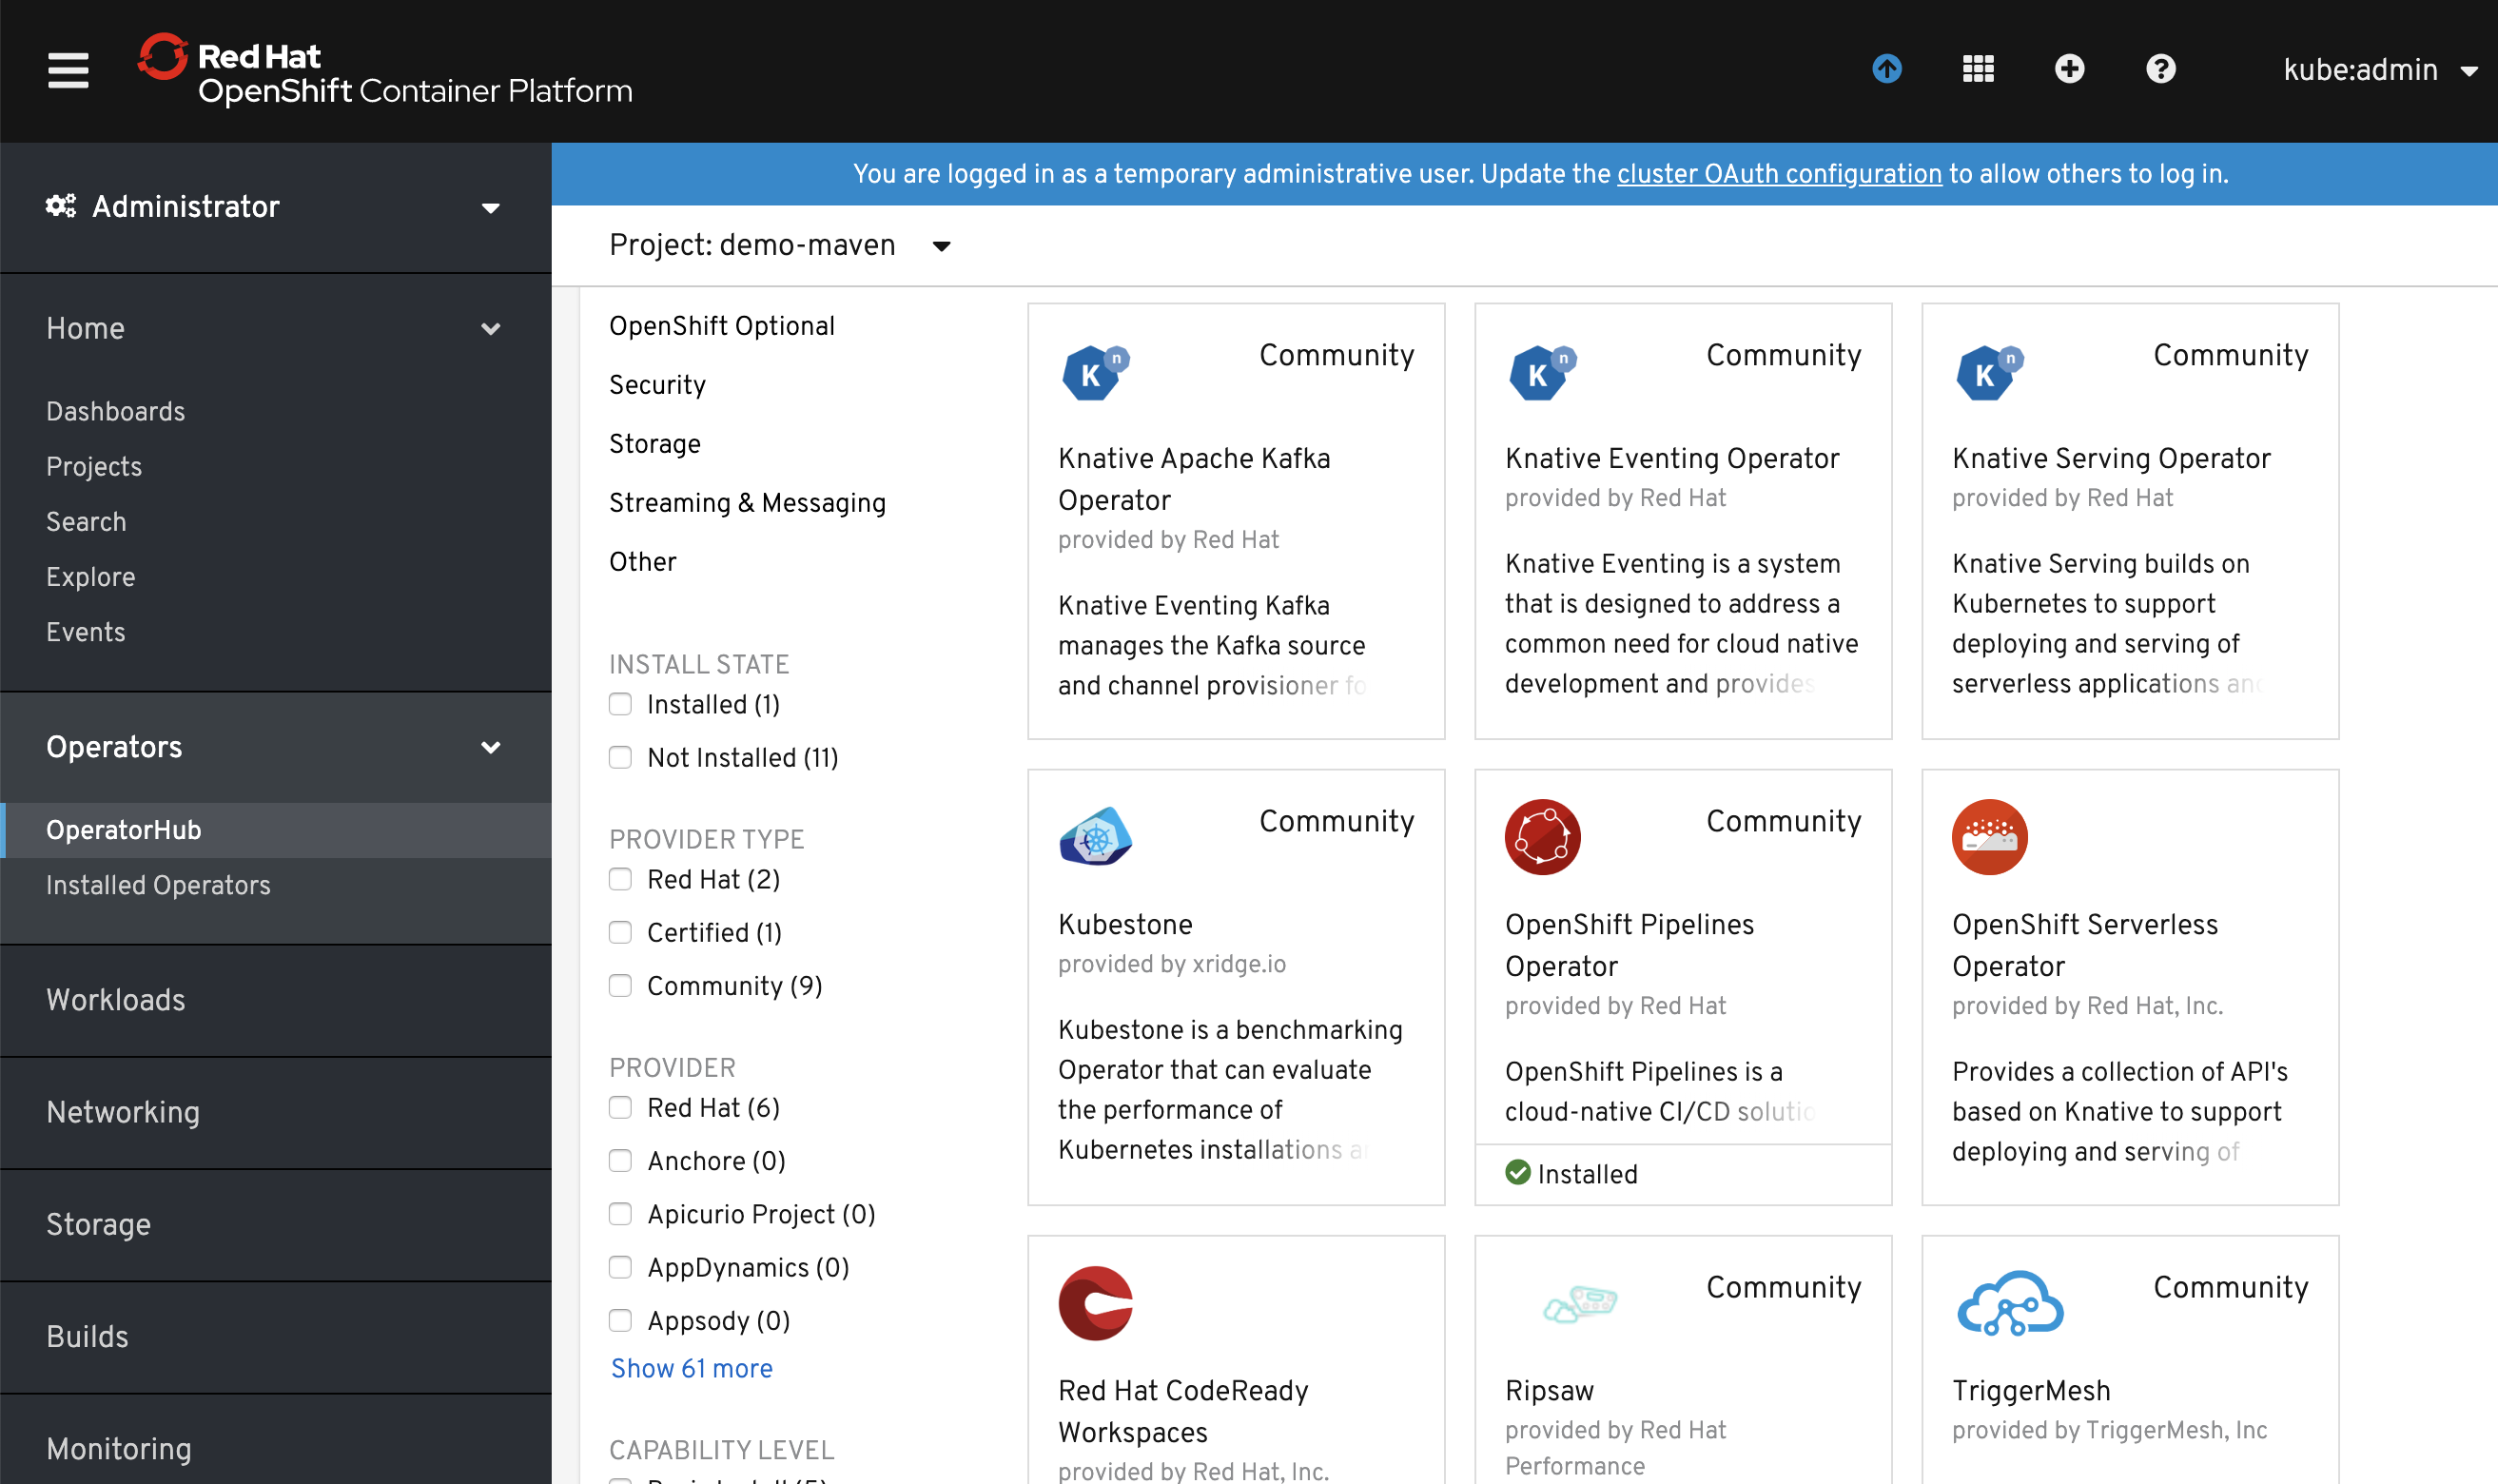
OpenShift Pipelines is provided as an add-on on top of OpenShift that can be installed via an operator available in the OpenShift OperatorHub. Follow these instructions in order to install OpenShift Pipelines on OpenShift via the OperatorHub.
Create a project for the sample application that you will be using in this tutorial:
$ oc new-project pipelines-tutorialOpenShift Pipelines automatically adds and configures a ServiceAccount named pipeline that has sufficient permissions to build and push an image. This
service account will be used later in the tutorial.
Run the following command to see the pipeline service account:
$ oc get serviceaccount pipelineYou will use the simple application during this tutorial, which has a frontend and backend
You can also deploy the same applications by applying the artifacts available in k8s directory of the respective repo
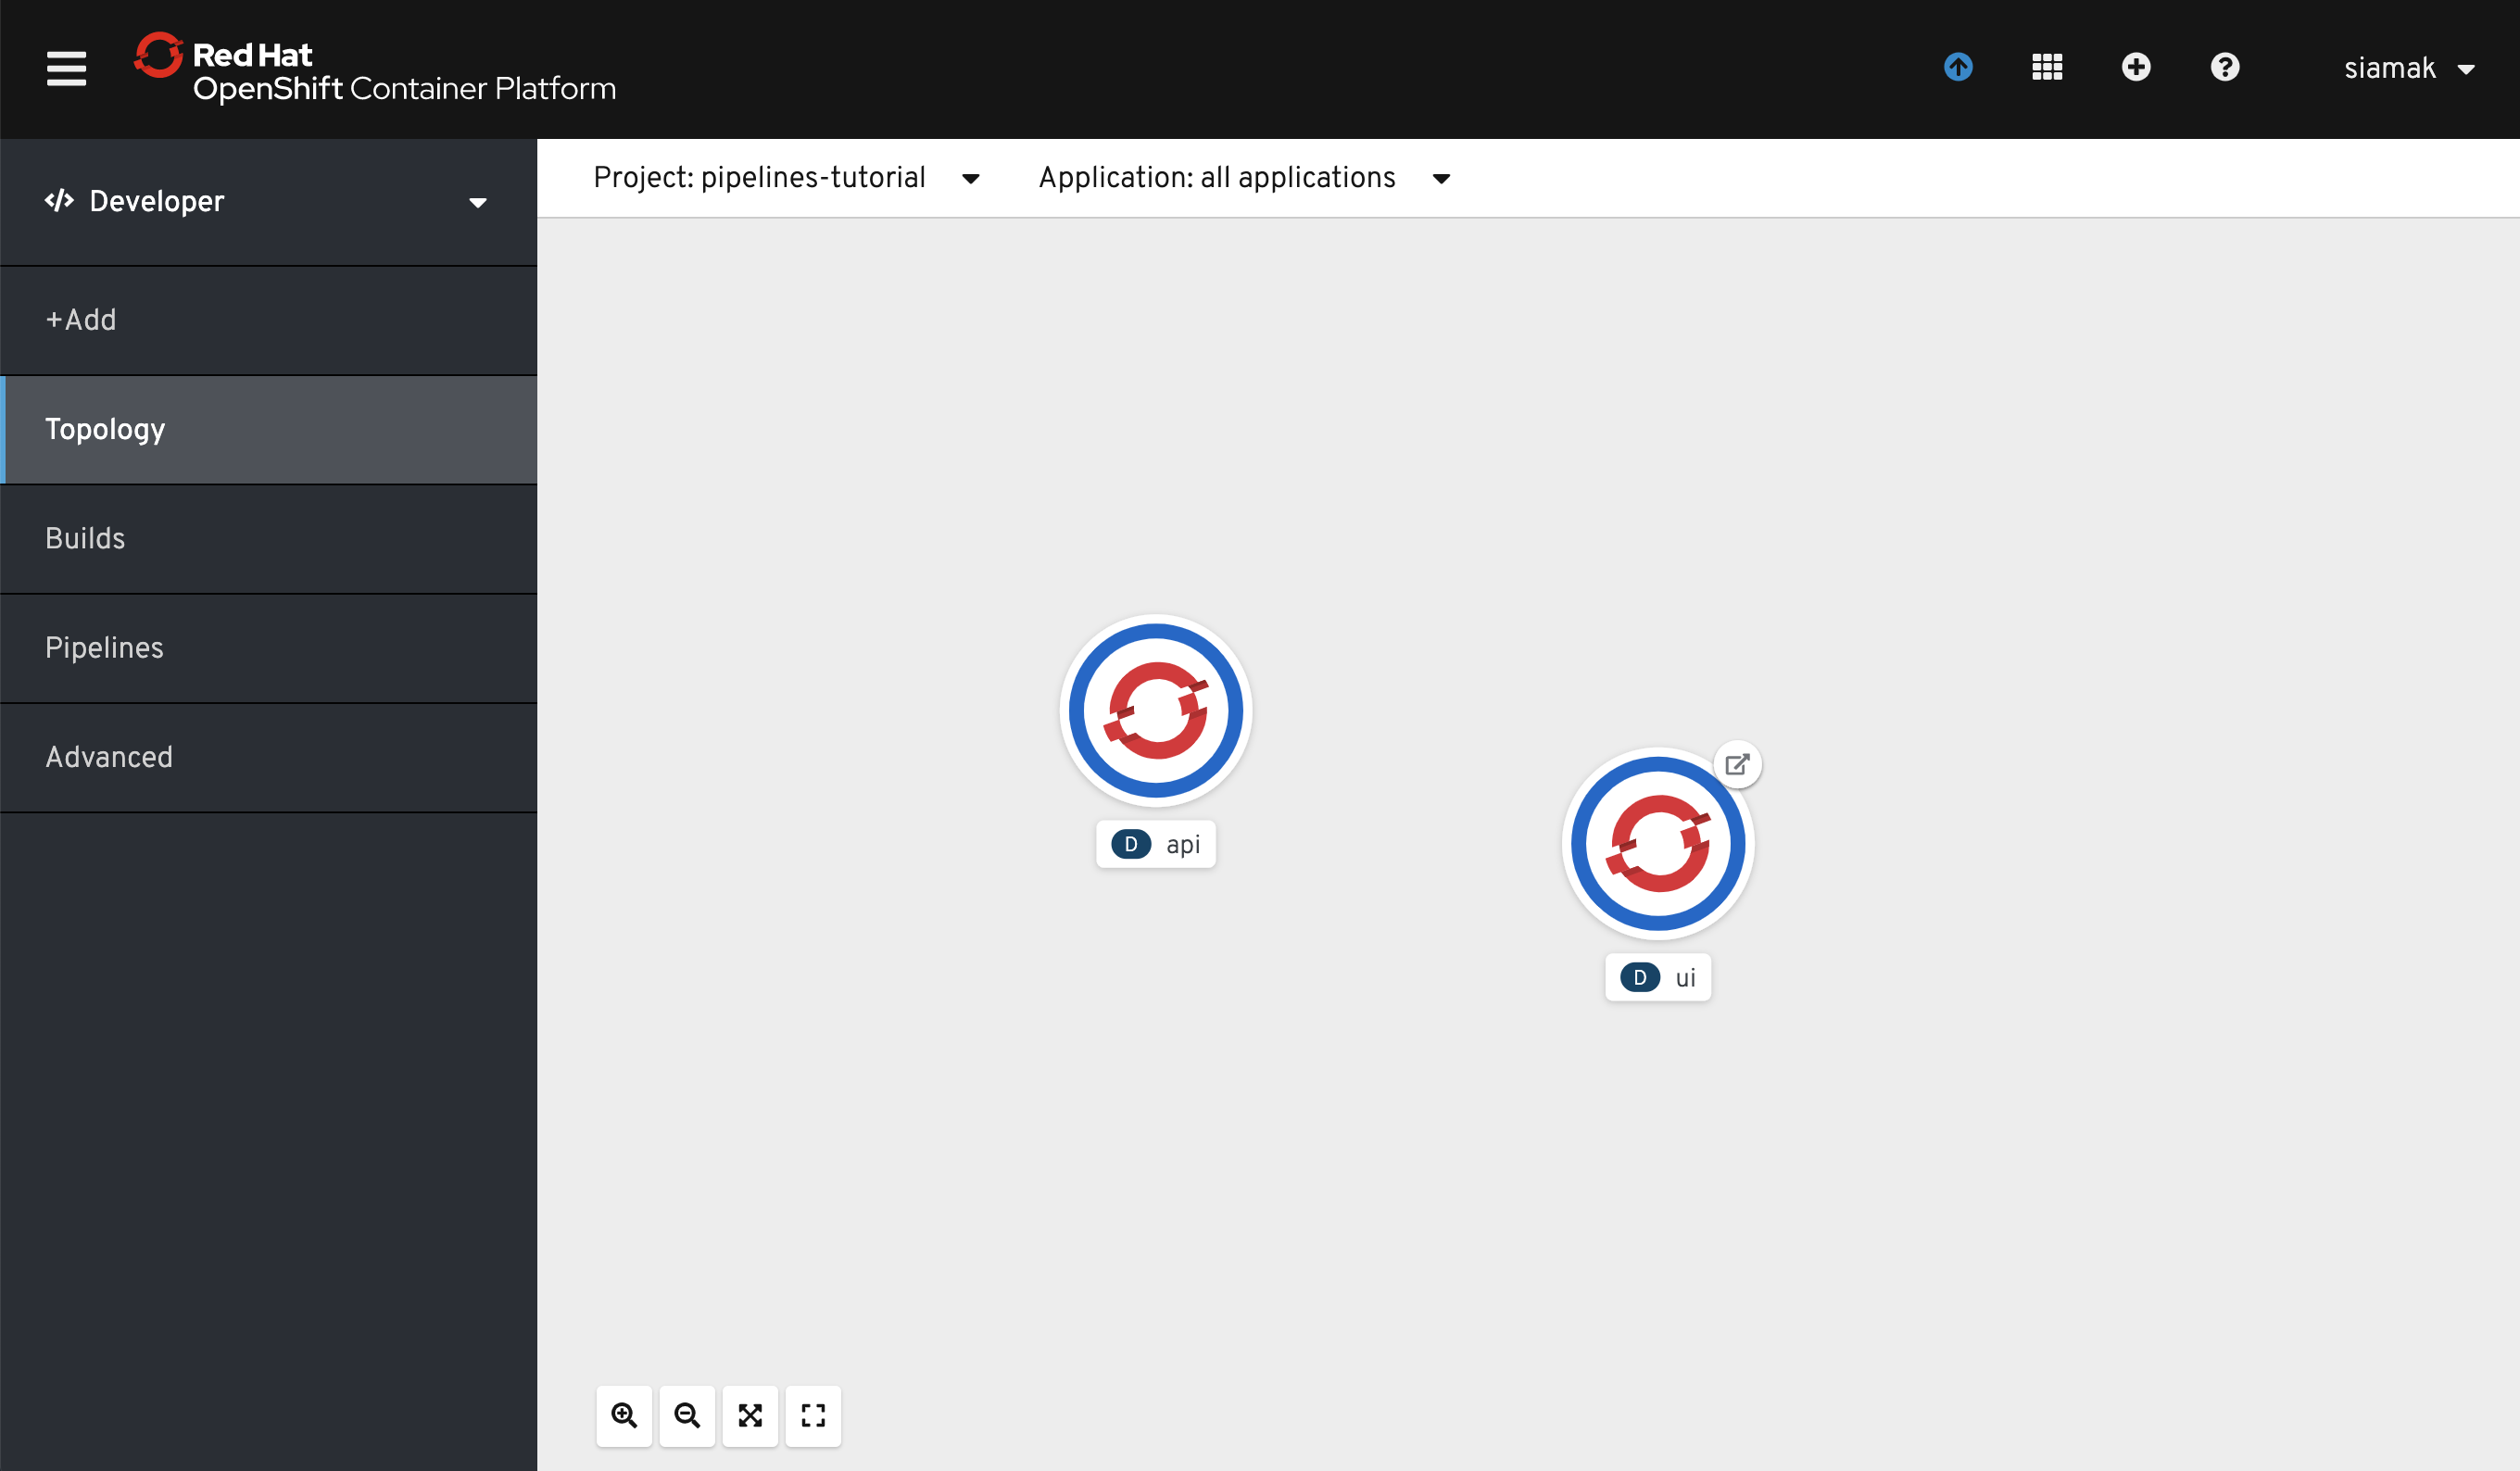
If you deploy the application directly, you should be able to see the deployment in the OpenShift Web Console by switching over to the Developer perspective of the OpenShift Web Console. Change from Administrator to Developer from the drop down as shown below:
Make sure you are on the pipelines-tutorial project by selecting it from the Project dropdown menu. Either search for pipelines-tutorial in the search bar or scroll down until you find pipelines-tutorial and click on the name of your project.
Tasks consist of a number of steps that are executed sequentially. Tasks are executed/run by creating TaskRuns. A TaskRun will schedule a Pod. Each step is executed in a separate container within the same pod. They can also have inputs and outputs in order to interact with other tasks in the pipeline.
Here is an example of a Maven task for building a Maven-based Java application:
apiVersion: tekton.dev/v1beta1
kind: Task
metadata:
  name: maven-build
spec:
  resources:
    inputs:
    - name: workspace-git
      targetPath: /
      type: git
  steps:
  - name: build
    image: maven:3.6.0-jdk-8-slim
    command:
    - /usr/bin/mvn
    args:
    - install
When a task starts running, it starts a pod and runs each step sequentially in a separate container on the same pod. This task happens to have a single step, but tasks can have multiple steps, and, since they run within the same pod, they have access to the same volumes in order to cache files, access configmaps, secrets, etc. As mentioned previously, tasks can receive inputs (e.g. a git repository) and produce outputs (e.g. an image in a registry).
Note that only the requirement for a git repository is declared on the task and not a specific git repository to be used. That allows tasks to be reusable for multiple pipelines and purposes. You can find more examples of reusable tasks in the Tekton Catalog and OpenShift Catalog repositories.
Install the apply-manifests and update-deployment tasks from the repository using oc or kubectl, which you will need for creating a pipeline in the next section:
$ oc create -f https://raw.githubusercontent.com/openshift/pipelines-tutorial/master/01_pipeline/01_apply_manifest_task.yaml

$ oc create -f https://raw.githubusercontent.com/openshift/pipelines-tutorial/master/01_pipeline/02_update_deployment_task.yaml
You can take a look at the tasks you created using the Tekton CLI:
$ tkn task ls

NAME                AGE
apply-manifests     10 seconds ago
update-deployment   4 seconds ago
We will be using buildah clusterTasks, which gets installed along with Operator. Operator installs few ClusterTask which you can see.
$ tkn clustertasks ls
NAME                       DESCRIPTION   AGE
buildah                                  1 day ago
buildah-v0-11-3                          1 day ago
jib-maven                                1 day ago
kn                                       1 day ago
maven                                    1 day ago
openshift-client                         1 day ago
openshift-client-v0-11-3                 1 day ago
s2i                                      1 day ago
s2i-dotnet-3                             1 day ago
s2i-dotnet-3-v0-11-3                     1 day ago
s2i-go                                   1 day ago
s2i-go-v0-11-3                           1 day ago
s2i-java-11                              1 day ago
s2i-java-11-v0-11-3                      1 day ago
s2i-java-8                               1 day ago
s2i-java-8-v0-11-3                       1 day ago
s2i-nodejs                               1 day ago
s2i-nodejs-v0-11-3                       1 day ago
s2i-perl                                 1 day ago
s2i-perl-v0-11-3                         1 day ago
s2i-php                                  1 day ago
s2i-php-v0-11-3                          1 day ago
s2i-python-3                             1 day ago
s2i-python-3-v0-11-3                     1 day ago
s2i-ruby                                 1 day ago
s2i-ruby-v0-11-3                         1 day ago
s2i-v0-11-3                              1 day ago
tkn 1 day agoA pipeline defines a number of tasks that should be executed and how they interact with each other via their inputs and outputs.
In this tutorial, you will create a pipeline that takes the source code of the application from GitHub and then builds and deploys it on OpenShift.
Here is the YAML file that represents the above pipeline:
apiVersion: tekton.dev/v1beta1
kind: Pipeline
metadata:
  name: build-and-deploy
spec:
  resources:
  - name: git-repo
    type: git
  - name: image
    type: image
  params:
  - name: deployment-name
    type: string
    description: name of the deployment to be patched
  tasks:
  - name: build-image
    taskRef:
      name: buildah
      kind: ClusterTask
    resources:
      inputs:
      - name: source
        resource: git-repo
      outputs:
      - name: image
        resource: image
    params:
    - name: TLSVERIFY
      value: "false"
  - name: apply-manifests
    taskRef:
      name: apply-manifests
    resources:
      inputs:
      - name: source
        resource: git-repo
    runAfter:
    - build-image
  - name: update-deployment
    taskRef:
      name: update-deployment
    resources:
      inputs:
      - name: image
        resource: image
    params:
    - name: deployment
      value: $(params.deployment-name)
    runAfter:
    - apply-manifests
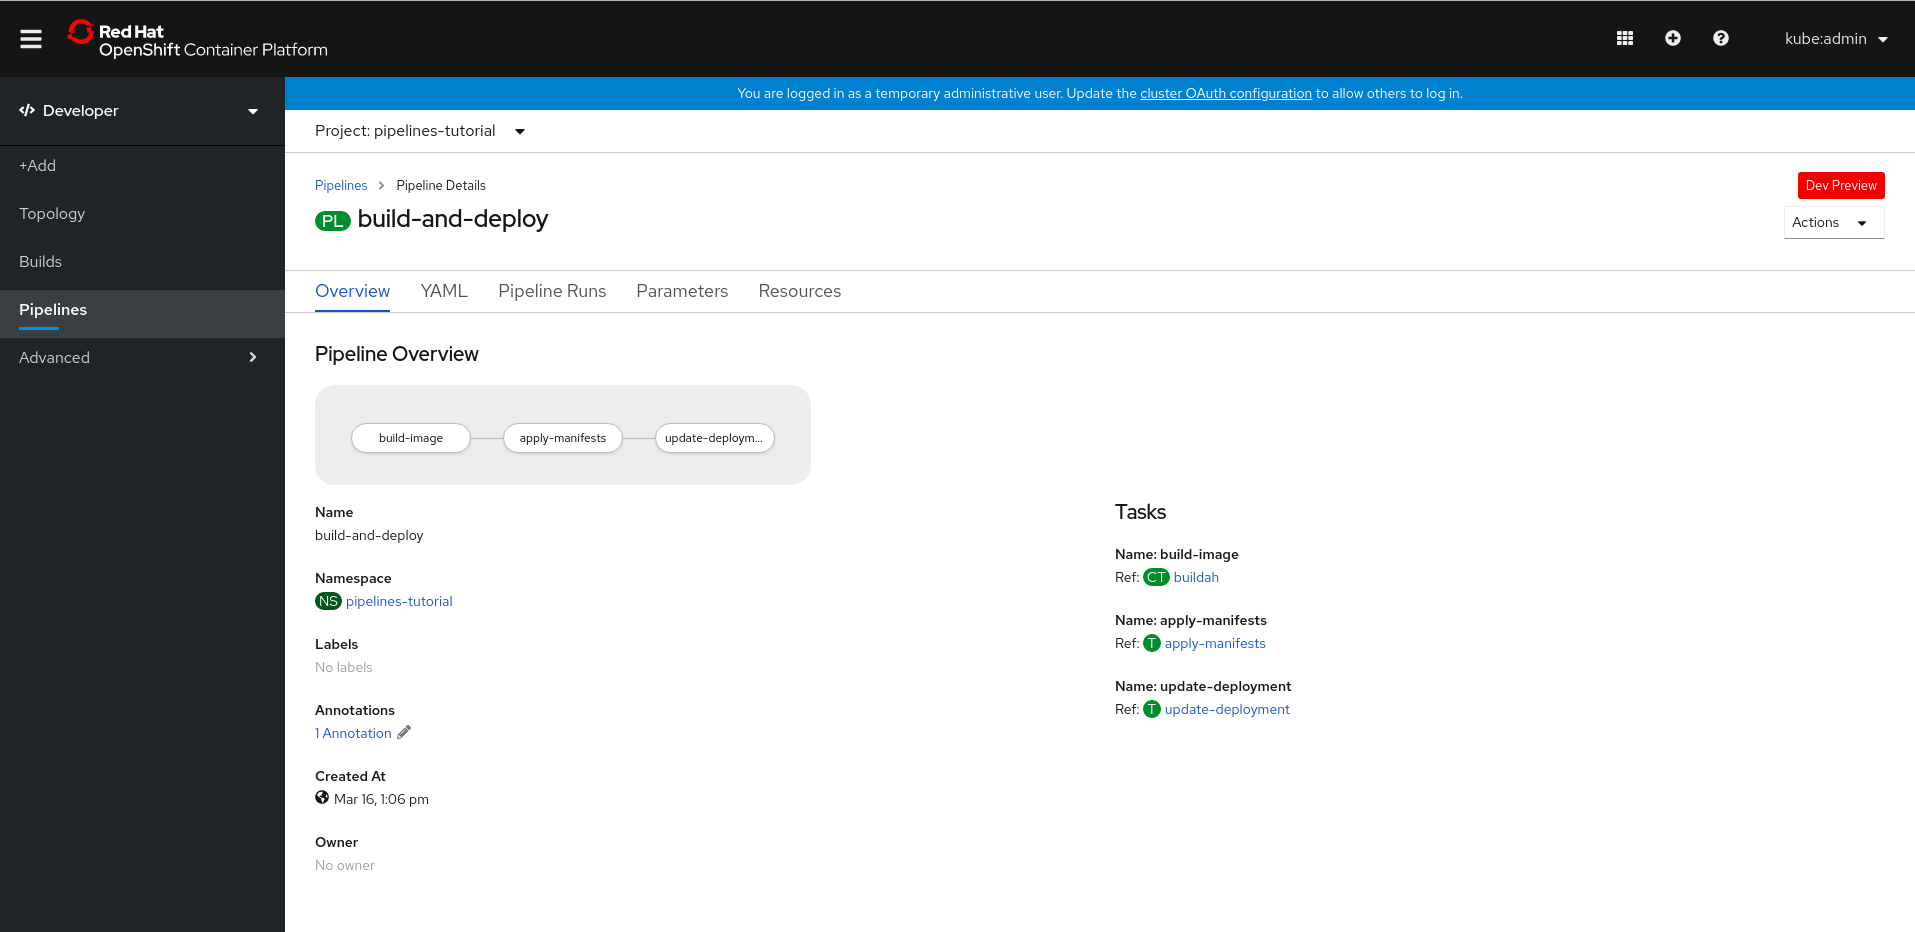
Once you deploy the pipelines, you should be able to visualize pipeline flow in the OpenShift Web Console by switching over to the Developer perspective of the OpenShift Web Console. select pipeline tab, select project as pipelines-tutorial and click on pipeline build-and-deploy
This pipeline helps you to build and deploy backend/frontend, by configuring right resources to pipeline.
Backend:
- Clones the source code of the backend application from a git repository when (
git-repogit resource) refered toapi-repo - Builds the container image of backend using the
buildahclustertask that uses Buildah to build the image - The application image is pushed to an image registry by refering (
imageimage resource) toapi-image - The new backend application image is deployed on OpenShift using the
apply-manifestsandupdate-deploymenttasks.
Frontend:
- Clones the source code of the backend application from a git repository when (
git-repogit resource) refered toui-repo - Builds the container image of backend using the
buildahclustertask that uses Buildah to build the image - The application image is pushed to an image registry by refering (
imageimage resource) toui-image - The new backend application image is deployed on OpenShift using the
apply-manifestsandupdate-deploymenttasks.
You might have noticed that there are no references to the git
repository or the image registry it will be pushed to in pipeline. That's because pipeline in Tekton
are designed to be generic and re-usable across environments and stages through
the application's lifecycle. Pipelines abstract away the specifics of the git
source repository and image to be produced as PipelineResources. When triggering a
pipeline, you can provide different git repositories and image registries to be
used during pipeline execution. Be patient! You will do that in a little bit in
the next section.
The execution order of task is determined by dependencies that are defined between the tasks via inputs and outputs as well as explicit orders that are defined via runAfter.
Create the pipeline by running the following:
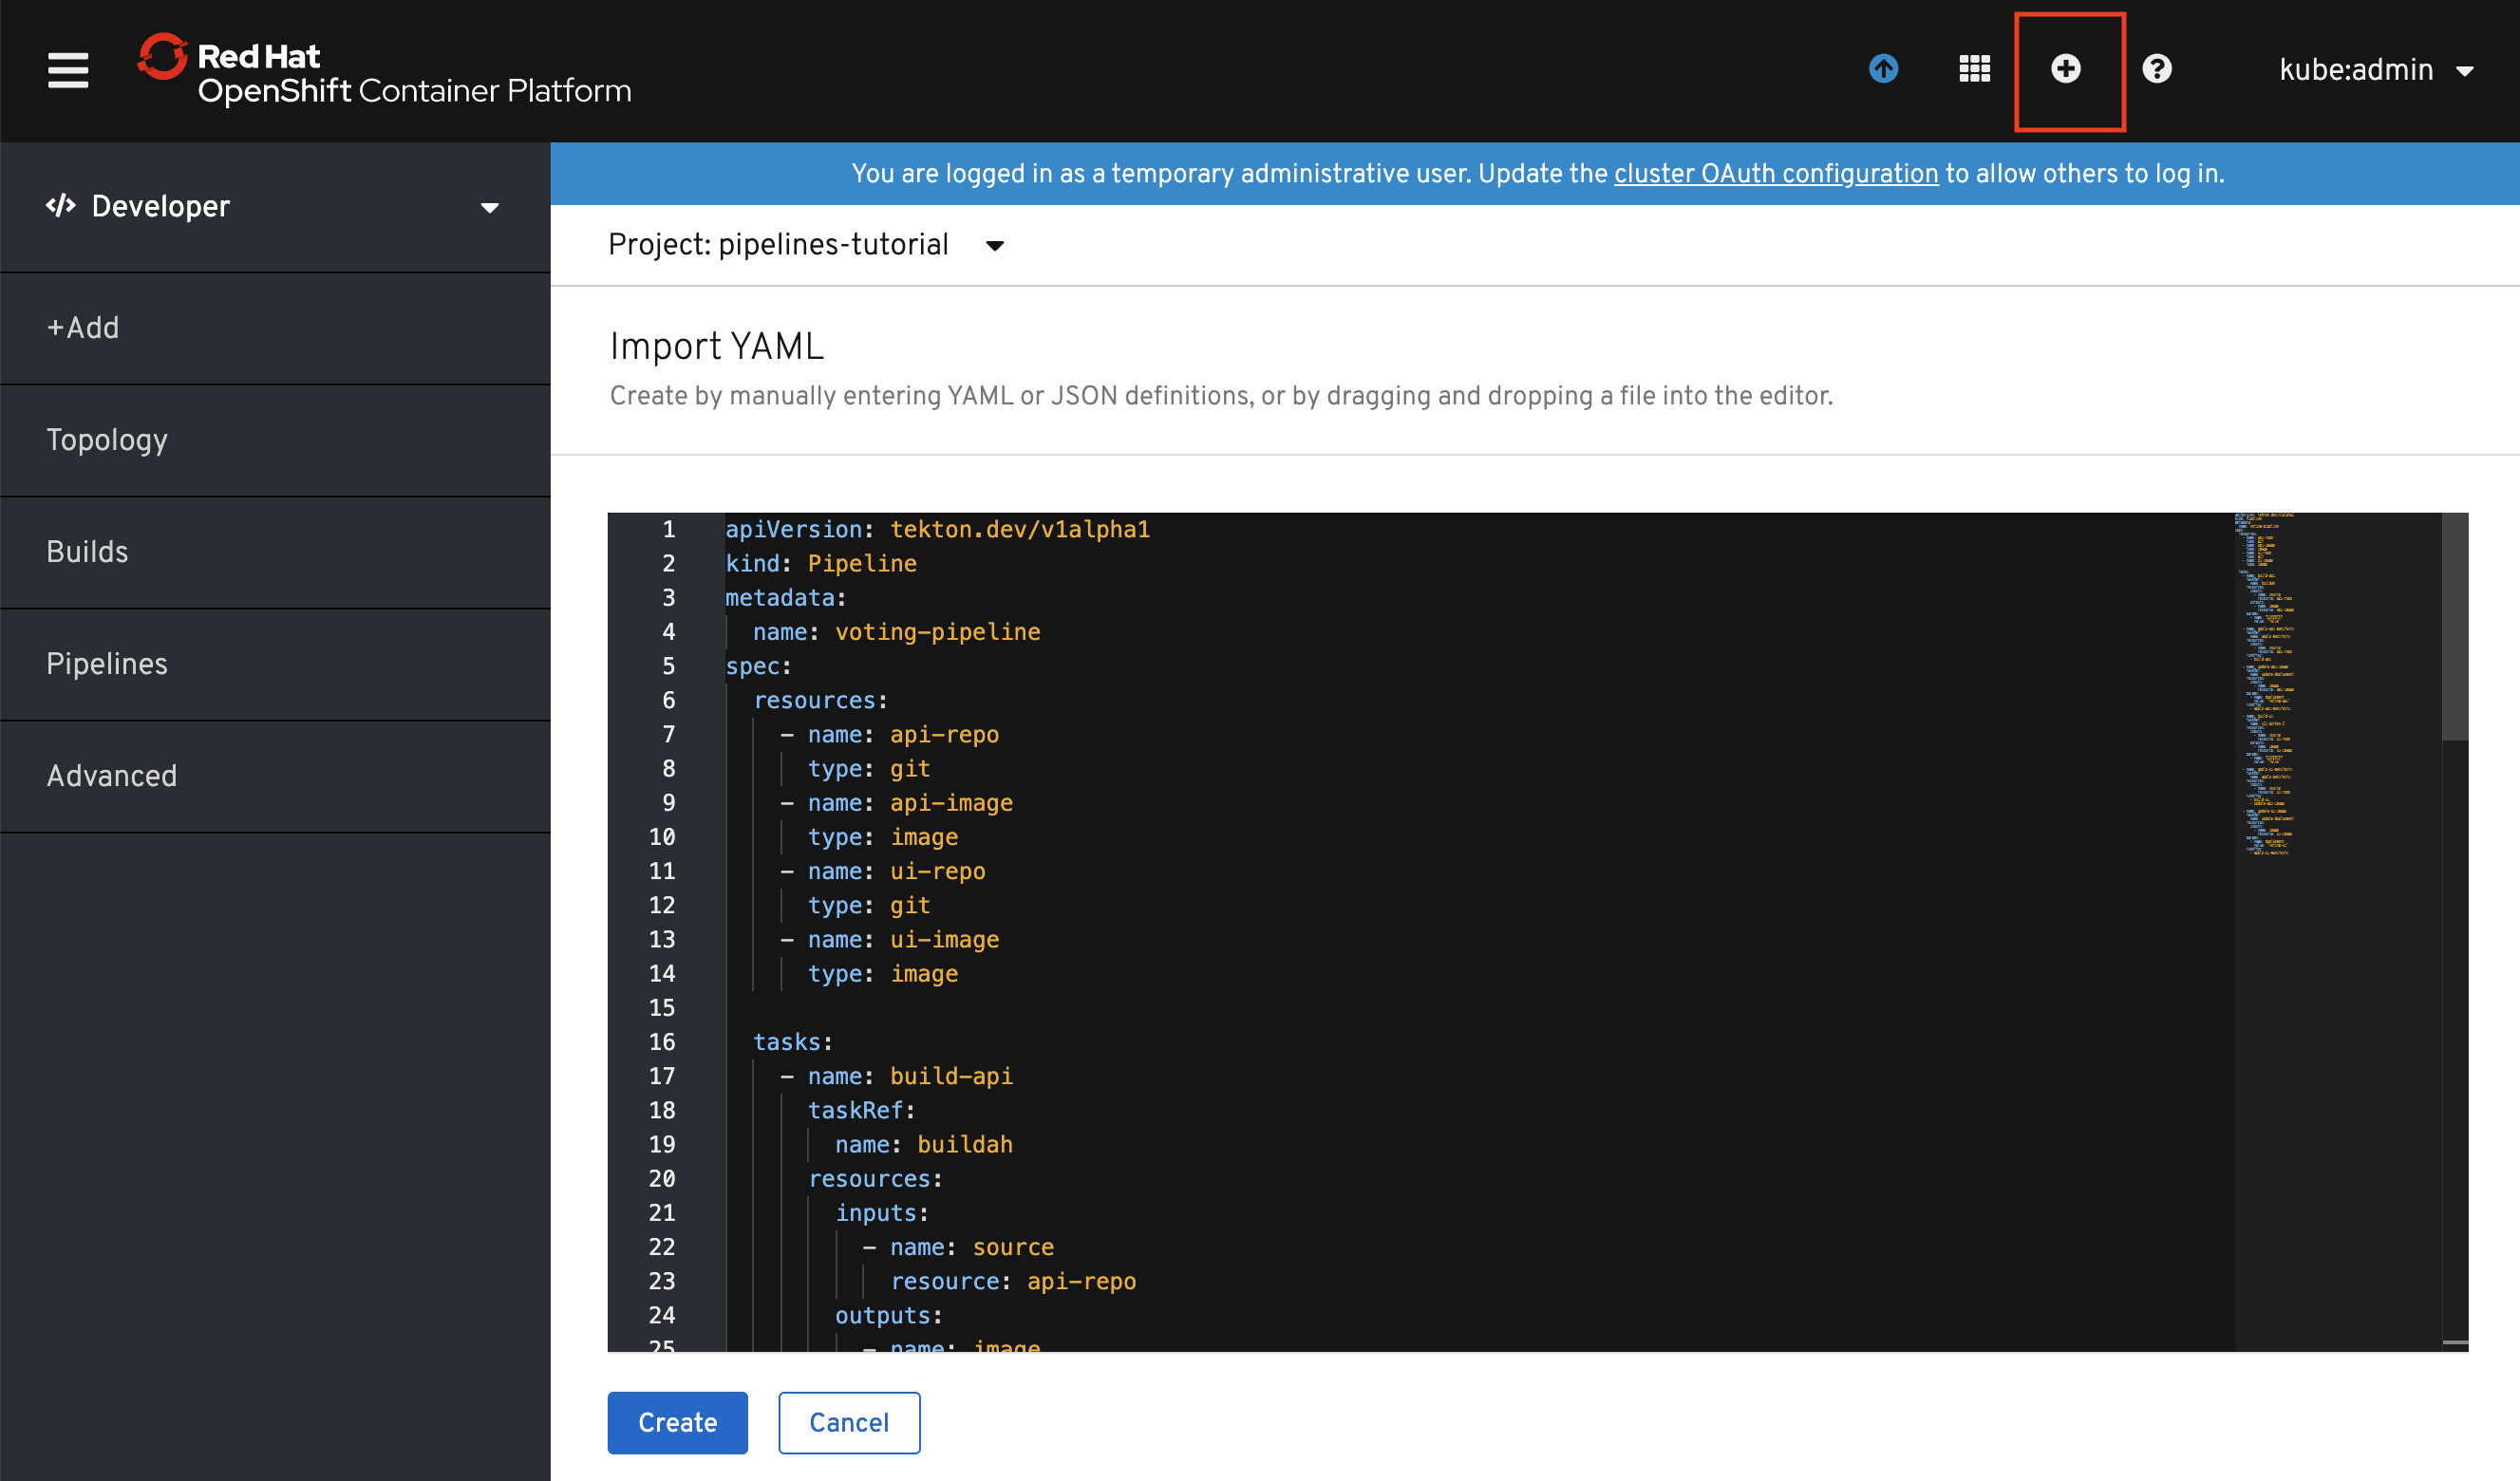
$ oc create -f https://raw.githubusercontent.com/openshift/pipelines-tutorial/master/01_pipeline/04_pipeline.yamlAlternatively, in the OpenShift Web Console, you can click on the + at the top right of the screen while you are in the pipelines-tutorial project:
Upon creating the pipeline via the web console, you will be taken to a Pipeline Details page that gives an overview of the pipeline you created.
Check the list of pipelines you have created using the CLI:
$ tkn pipeline ls

NAME               AGE            LAST RUN   STARTED   DURATION   STATUS
build-and-deploy   1 minute ago   ---        ---       ---        ---
Now that the pipeline is created, you can trigger it to execute the tasks specified in the pipeline.
First, you should create a number of PipelineResources that contain the specifics of the git repository and image registry to be used in the pipeline during execution. Expectedly, these are also reusable across multiple pipelines.
The following PipelineResource defines the git repository for the frontend application:
apiVersion: tekton.dev/v1alpha1
kind: PipelineResource
metadata:
  name: ui-repo
spec:
  type: git
  params:
  - name: url
    value: http://github.com/openshift-pipelines/vote-ui.git
And the following defines the OpenShift internal image registry for the frontend image to be pushed to:
apiVersion: tekton.dev/v1alpha1
kind: PipelineResource
metadata:
  name: ui-image
spec:
  type: image
  params:
  - name: url
    value: image-registry.openshift-image-registry.svc:5000/pipelines-tutorial/vote-ui:latest
And the following PipelineResource defines the git repository for the backend application:
apiVersion: tekton.dev/v1alpha1
kind: PipelineResource
metadata:
  name: api-repo
spec:
  type: git
  params:
  - name: url
    value: http://github.com/openshift-pipelines/vote-api.git
And the following defines the OpenShift internal image registry for the backend image to be pushed to:
apiVersion: tekton.dev/v1alpha1
kind: PipelineResource
metadata:
  name: api-image
spec:
  type: image
  params:
  - name: url
    value: image-registry.openshift-image-registry.svc:5000/pipelines-tutorial/vote-api:latest
Create the above pipeline resources via the OpenShift Web Console or by running the following:
$ oc create -f https://raw.githubusercontent.com/openshift/pipelines-tutorial/master/01_pipeline/03_resources.yamlNote :-
If you are not into the
pipelines-tutorialnamespace, and using another namespace for the tutorial steps, please make sure you update the frontend and backend image resource to the correct url with your namespace name like so :
image-registry.openshift-image-registry.svc:5000/<namespace-name>/vote-api:latest
You can see the list of resources created using tkn:
$ tkn resource ls

NAME        TYPE    DETAILS
api-repo    git     url: http://github.com/openshift-pipelines/vote-api.git
ui-repo     git     url: http://github.com/openshift-pipelines/vote-ui.git
api-image   image   url: image-registry.openshift-image-registry.svc:5000/pipelines-tutorial/vote-api:latest
ui-image    image   url: image-registry.openshift-image-registry.svc:5000/pipelines-tutorial/vote-ui:latest
A PipelineRun is how you can start a pipeline and tie it to the git and image resources that should be used for this specific invocation. You can start the pipeline using tkn:
$ tkn pipeline start build-and-deploy \
    -r git-repo=api-repo \
    -r image=api-image \
    -p deployment-name=vote-api

Pipelinerun started: build-and-deploy-run-z2rz8

In order to track the pipelinerun progress run:
tkn pipelinerun logs build-and-deploy-run-z2rz8 -f -n pipelines-tutorial
$ tkn pipeline start build-and-deploy \
-r git-repo=ui-repo \
-r image=ui-image \
-p deployment-name=vote-ui
Pipelinerun started: build-and-deploy-run-xy7rw
In order to track the pipelinerun progress run:
tkn pipelinerun logs build-and-deploy-run-xy7rw -f -n pipelines-tutorialAs soon as you start the build-and-deploy pipeline, a pipelinerun will be instantiated and pods will be created to execute the tasks that are defined in the pipeline.
$ tkn pipeline list
NAME               AGE             LAST RUN                     STARTED          DURATION   STATUS
build-and-deploy   6 minutes ago   build-and-deploy-run-xy7rw   36 seconds ago   ---        Running
Above we have started build-and-deploy pipeline, with relevant pipeline resources to deploy backend/frontend application using single pipeline
$ tkn pipelinerun ls
NAME                         STARTED         DURATION     STATUS
build-and-deploy-run-xy7rw   36 seconds ago   ---          Running
build-and-deploy-run-z2rz8   40 seconds ago   ---          Running
Check out the logs of the pipelinerun as it runs using the tkn pipeline logs command which interactively allows you to pick the pipelinerun of your interest and inspect the logs:
$ tkn pipeline logs -f
? Select pipelinerun:  [Use arrows to move, type to filter]
> build-and-deploy-run-xy7rw started 36 seconds ago
  build-and-deploy-run-z2rz8 started 40 seconds ago
After a few minutes, the pipeline should finish successfully.
$ tkn pipelinerun list

NAME                         STARTED      DURATION     STATUS
build-and-deploy-run-xy7rw   1 hour ago   2 minutes    Succeeded
build-and-deploy-run-z2rz8   1 hour ago   19 minutes   Succeeded
Looking back at the project, you should see that the images are successfully built and deployed.
You can get the route of the application by executing the following command and access the application
$ oc get route vote-ui --template='http://{{.spec.host}}'If you want to re-run the pipeline again, you can use the following short-hand command to rerun the last pipelinerun again that uses the same pipeline resources and service account used in the previous pipeline run:
$ tkn pipeline start build-and-deploy --last
Whenever there is any change to your repository we need to start pipeline explicity to see new changes to take effect
Triggers in conjuntion with pipelines enable us to hook our Pipelines to respond to external github events (push events, pull requests etc).
You need an latest OpenShift 4 cluster running on AWS in order to complete this tutorial. If you don't have an existing cluster, go to http://try.openshift.com and register for free in order to get an OpenShift 4 cluster up and running on AWS within minutes.
NOTE: Running cluster localy crc won't work, as we need
webhook-urlto be accessable togithub-repos
Now let’s add a TriggerTemplate, TriggerBinding, and an EventListener to our project.
A TriggerTemplate is a resource which have parameters that can be substituted anywhere within the resources of template.
The definition of our TriggerTemplate is given in 03-triggers/02-template.yaml.
apiVersion: triggers.tekton.dev/v1alpha1
kind: TriggerTemplate
metadata:
  name: vote-app
spec:
  params:
  - name: git-repo-url
    description: The git repository url
  - name: git-revision
    description: The git revision
    default: master
  - name: git-repo-name
    description: The name of the deployment to be created / patched

  resourcetemplates:
  - apiVersion: tekton.dev/v1alpha1
    kind: PipelineResource
    metadata:
      name: $(params.git-repo-name)-git-repo-$(uid)
    spec:
      type: git
      params:
      - name: revision
        value: $(params.git-revision)
      - name: url
        value: $(params.git-repo-url)

  - apiVersion: tekton.dev/v1alpha1
    kind: PipelineResource
    metadata:
      name: $(params.git-repo-name)-image-$(uid)
    spec:
      type: image
      params:
      - name: url
        value: image-registry.openshift-image-registry.svc:5000/pipelines-tutorial/$(params.git-repo-name):latest

  - apiVersion: tekton.dev/v1beta1
    kind: PipelineRun
    metadata:
      name: build-deploy-$(params.git-repo-name)-$(uid)
    spec:
      serviceAccountName: pipeline
      pipelineRef:
        name: build-and-deploy
      resources:
      - name: git-repo
        resourceRef:
          name: $(params.git-repo-name)-git-repo-$(uid)
      - name: image
        resourceRef:
          name: $(params.git-repo-name)-image-$(uid)
      params:
      - name: deployment-name
value: $(params.git-repo-name)- Run following command to apply Triggertemplate.
$ oc create -f https://raw.githubusercontent.com/openshift/pipelines-tutorial/master/03_triggers/02_template.yamlTriggerBindings is a map enable you to capture fields from an event and store them as parameters, and replace them in triggerTemplate whenever an event occurs.
The definition of our TriggerBinding is given in 03-triggers/01_binding.yaml.
apiVersion: triggers.tekton.dev/v1alpha1
kind: TriggerBinding
metadata:
  name: vote-app
spec:
  params:
  - name: git-repo-url
    value: $(body.repository.url)
  - name: git-repo-name
    value: $(body.repository.name)
  - name: git-revision
    value: $(body.head_commit.id)
The exact paths (keys) of parameter we need can be found by examining the event payload (eg: GitHub events).
Run following command to apply Triggertemplate.
$ oc create -f https://raw.githubusercontent.com/openshift/pipelines-tutorial/master/03_triggers/01_binding.yamlThis component sets up a Service and listens for events. It also connects a TriggerTemplate to a TriggerBinding, into an addressable endpoint (the event sink)
The definition for our EventListener can be found in
03-triggers/03_event_listener.yaml.
apiVersion: triggers.tekton.dev/v1alpha1
kind: EventListener
metadata:
  name: vote-app
spec:
  serviceAccountName: pipeline
  triggers:
  - bindings:
    - name: vote-app
    template:
name: vote-app- Run following command to create Triggertemplate.
$ oc create -f https://raw.githubusercontent.com/openshift/pipelines-tutorial/master/03_triggers/03_event_listener.yamlNote: EventListener will setup a Service. We need to expose that Service as an OpenShift Route to make it publicly accessible.
- Run below command to expose eventlistener service as a route
$ oc expose svc el-vote-appNow we need to configure webhook-url on backend and frontend source code repositories with the Route we exposed in the previously.
- Run below command to get webhook-url
$ echo "URL: $(oc get route el-vote-app --template='http://{{.spec.host}}')"Note:
Fork the backend and frontend source code repositories so that you have sufficient privileges to configure GitHub webhooks.
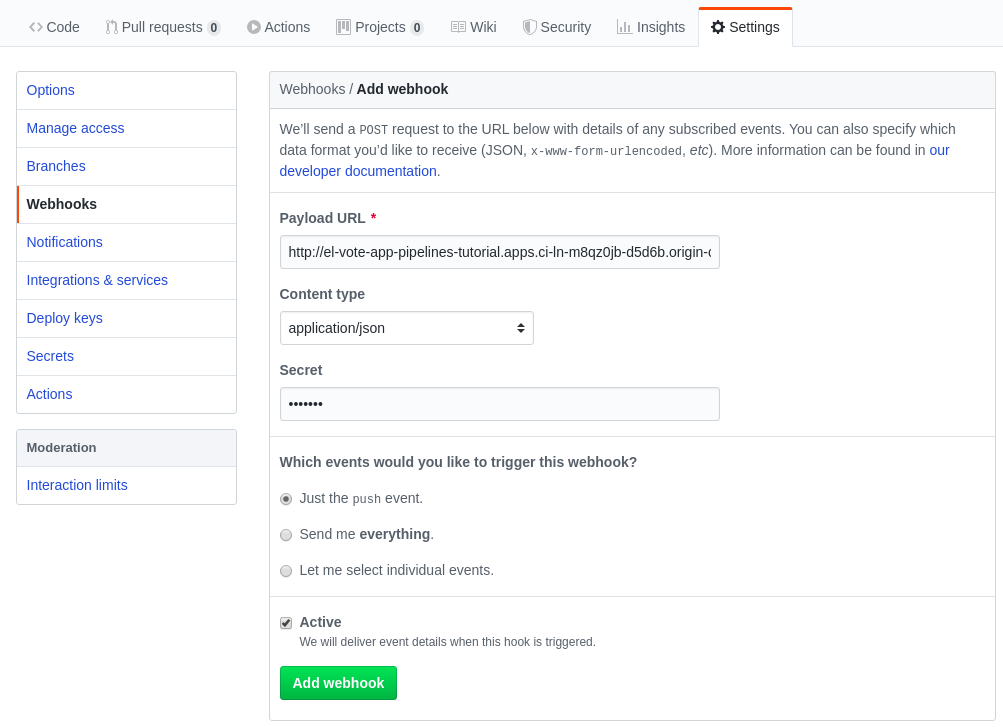
Open forked github repo (Go to Settings > Webhook)
click on Add Webhook > Add
$ echo "$(oc get route el-vote-app --template='http://{{.spec.host}}')"to payload URL > Select Content type as application/json > Add secret eg: 1234567 > Click on Add Webhook
- Follow above procedure to configure webhook on frontend repo
Now we should see a webhook configured on your forked source code repositories (on our GitHub Repo, go to Settings>Webhooks).
Great!, We have configured webhooks
When we perform any push event on the backend the following should happen.
-
The configured webhook in vote-api GitHub repository should push the event payload to our route (exposed EventListener Service).
-
The Event-Listner will pass the event to the TriggerBinding and TriggerTemplate pair.
-
TriggerBinding will extract parameters needed for rendering the TriggerTemplate. Successful rendering of TriggerTemplate should create 2 PipelineResources (source-repo-vote-api and image-source-vote-api) and a PipelineRun (build-deploy-vote-api)
We can test this by pushing a commit to vote-api repository from GitHub web ui or from terminal.
Let’s push an empty commit to vote-api repository.
$ git commit -m "empty-commit" --allow-empty && git push origin master
...
Writing objects: 100% (1/1), 190 bytes | 190.00 KiB/s, done.
Total 1 (delta 0), reused 0 (delta 0)
To github.com:<github-username>/vote-api.git
   72c14bb..97d3115  master -> master
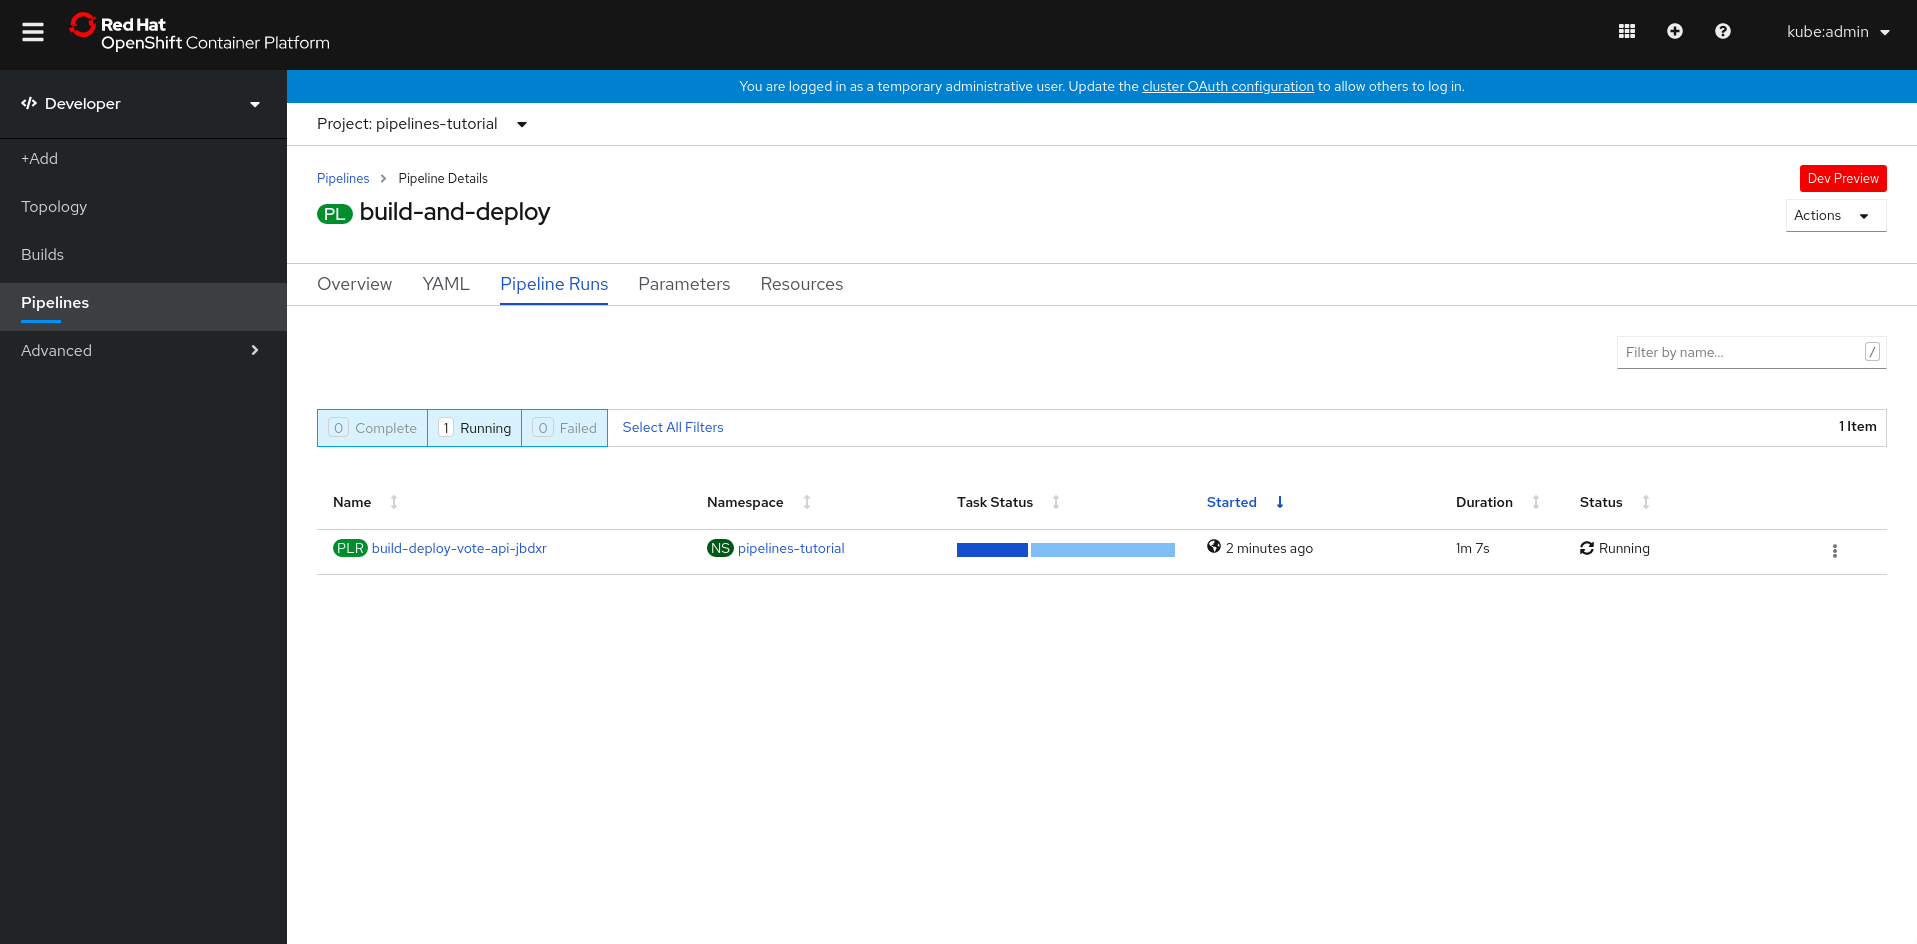
Watch OpenShift WebConsole Developer perspective and a PipelineRun will be automatically created.

