Get acquainted with various features of accounts on Flow
ℹ️ If you plan on following along with the walkthroughs below, be sure to install Flow CLI via these installation instructions.
Creating an account on Flow must be initialized by an existing account. This is because Flow accounts are not derived from keys, but are objects that exist onchain - special objects which verified signatures allow access to.
Of course, to interact with the chain, one needs an account, thus you'll need a genesis account. This can be done easily via the Flow CLI. Firstly, let's spin up our localnet
flow emulatorThen we can create our account with the following command:
flow accounts createAfter which you can name your account. Let's name ours genesis-emulator
Enter an account name: genesis-emulatorSelect Emulator as our network, and we have a new account on our local emulator network. Easy enough, but to better
understand what just happened, let's take a closer look at an account creating transaction.
In 1_create_account.cdc, we see that account creation is actually very simple:
/// Creates a new account, funding creation via the signing account
///
transaction(originatingPublicKey: String) {
    prepare(signer: AuthAccount) {
        let newAccount: AuthAccount = AuthAccount(payer: signer)

        // Create a public key for the proxy account from the passed in string
        let key: PublicKey = PublicKey(
            publicKey: originatingPublicKey.decodeHex(),
            signatureAlgorithm: SignatureAlgorithm.ECDSA_P256
        )

        // Add the key to the new account
        signer.keys.add(
            publicKey: key,
            hashAlgorithm: HashAlgorithm.SHA3_256,
            weight: 1000.0
        )
    }
}
We're simply creating a new account object by funding its creation with a bit of FLOW. This is done a/ as spam prevention and b/ to provide a seed amount of FLOW to fund initial transactions and a minimal amount of storage.
But the new account isn't very useful if we can't access it with keys. So when we run the transaction, the provide a public key string is added to new account.
ℹ️ Note the
weightfield is set to 1000.0. Since Flow account natively support multisig, we can add any arbitrary weight between 0.0 and 1000.0. When a transaction is verified, the signing weights must add up to 1000.0. This means any combination of key weights can be used to authorize a transaction so long as the signing key weights sum to 1000.0.
Of course, before running the transaction, we make sure to generate a corresponding private key which we custody in order to sign future transactions.
Enough analyzing, let's create the account!
-
As we mentioned, account creation requies some seeded FLOW. Before proceed, we'll need to get some Flow for our genesis account so let's transfer some quickly.
flow transactions send ./transactions/account-creation/0_transfer_flow.cdc 10.0 0xe03daebed8ca0615
-
Generate a key pair
flow keys generate
This will create an ECDSA_P256 key pair and output it for use in the next step:
Private Key              a3b9eecaa7c6f9cb5446d3cb388d5910f0c4ece0098c712a91765830d9ba1d6b
Public Key               a3802c78bf42a92a6ccb0a0742b57799d0b754442c50b9f44bfaa3ca786fcb65b99d6ec6f0828a728ef7c6a48c7f51b3c206f722ba08701273c5aa717fd8dc49
Mnemonic                 oak play symptom warm mushroom someone fog unfold put inherit love labor
Derivation Path          m/44'/539'/0'/0/0
Signature Algorithm      ECDSA_P256
-
Create the account and add the generated public key
flow transactions send ./transactions/account-creation/1_create_account.cdc \
    a3802c78bf42a92a6ccb0a0742b57799d0b754442c50b9f44bfaa3ca786fcb65b99d6ec6f0828a728ef7c6a48c7f51b3c206f722ba08701273c5aa717fd8dc49 \
    --signer genesis-emulator
We'll see a number of events emitted, including
Flow.AccountCreatedIndex 5 Type flow.AccountCreated Tx ID cb470b2ea4acf8b726faab5f85c1f56ceae1b5ba2e3e3bed706d26a512be3c46 Values - address (Address): 0x045a1763c93006ca -
Add the new account to our config
flow.jsonso we can sign transactions with it. Since we'll later deploy a contract namedFooto this account, we'll name the accountfoo-emulatorin our config. Youraccountsfield should look like:"accounts": { "emulator-account": { "address": "f8d6e0586b0a20c7", "key": "df3ade1ad99aa8e2574171fd9e1b80169647b2771b7743d9910d777237778a61" }, "emulator-flow": { "address": "0ae53cb6e3f42a79", "key": "686779d775e5fcbf8d2f4a85cb4c53525d02b7ef53230d180fc16f35d9b7d025" }, "emulator-ft": { "address": "ee82856bf20e2aa6", "key": "686779d775e5fcbf8d2f4a85cb4c53525d02b7ef53230d180fc16f35d9b7d025" }, "genesis-emulator": { "address": "e03daebed8ca0615", "key": "6a6fee08c0b9fc590f0fa5c596e92f042258c47b91db17ea51c57db47e2229c7" }, "foo-emulator": { "address": "0x045a1763c93006ca", "key": "a3b9eecaa7c6f9cb5446d3cb388d5910f0c4ece0098c712a91765830d9ba1d6b" } }
Notice that we added the private key paired with the public key we used for account creation.
That's it for this section! So far, we've:
- Generated a public/private key pair
- Created a new account
- Added the generated key to the new account
- Added the new account to our project's config so we can sign future transactions.
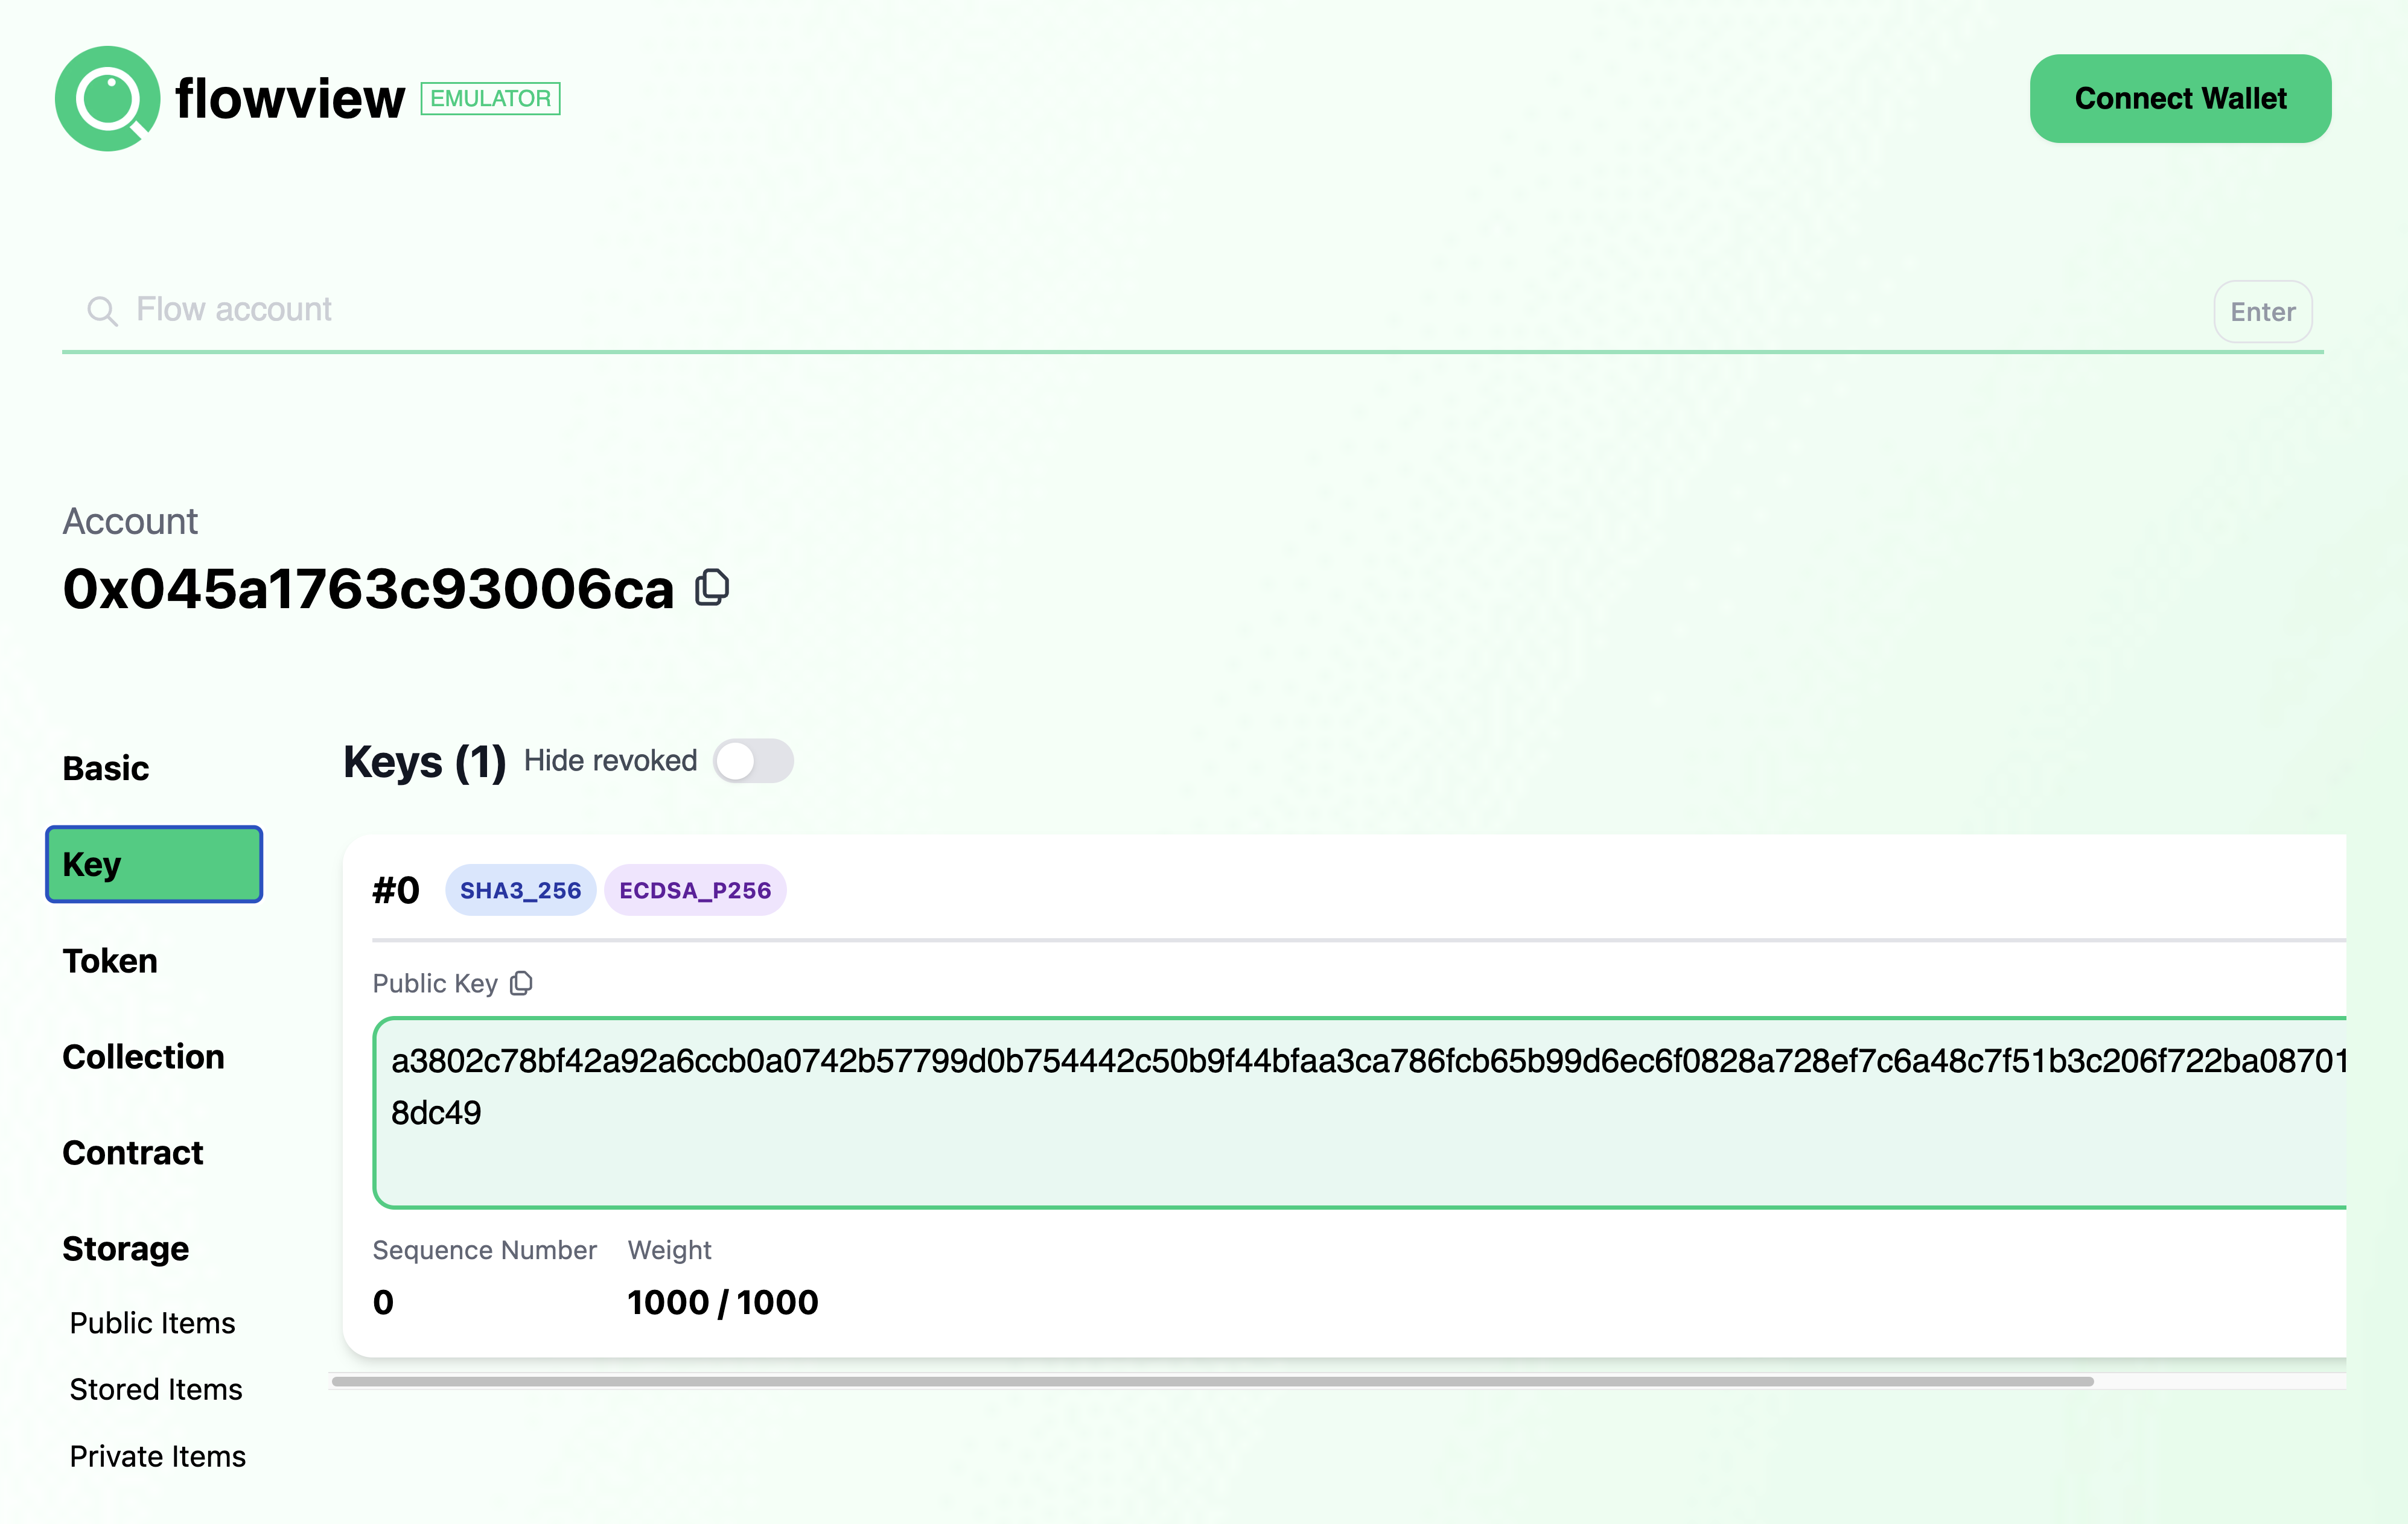
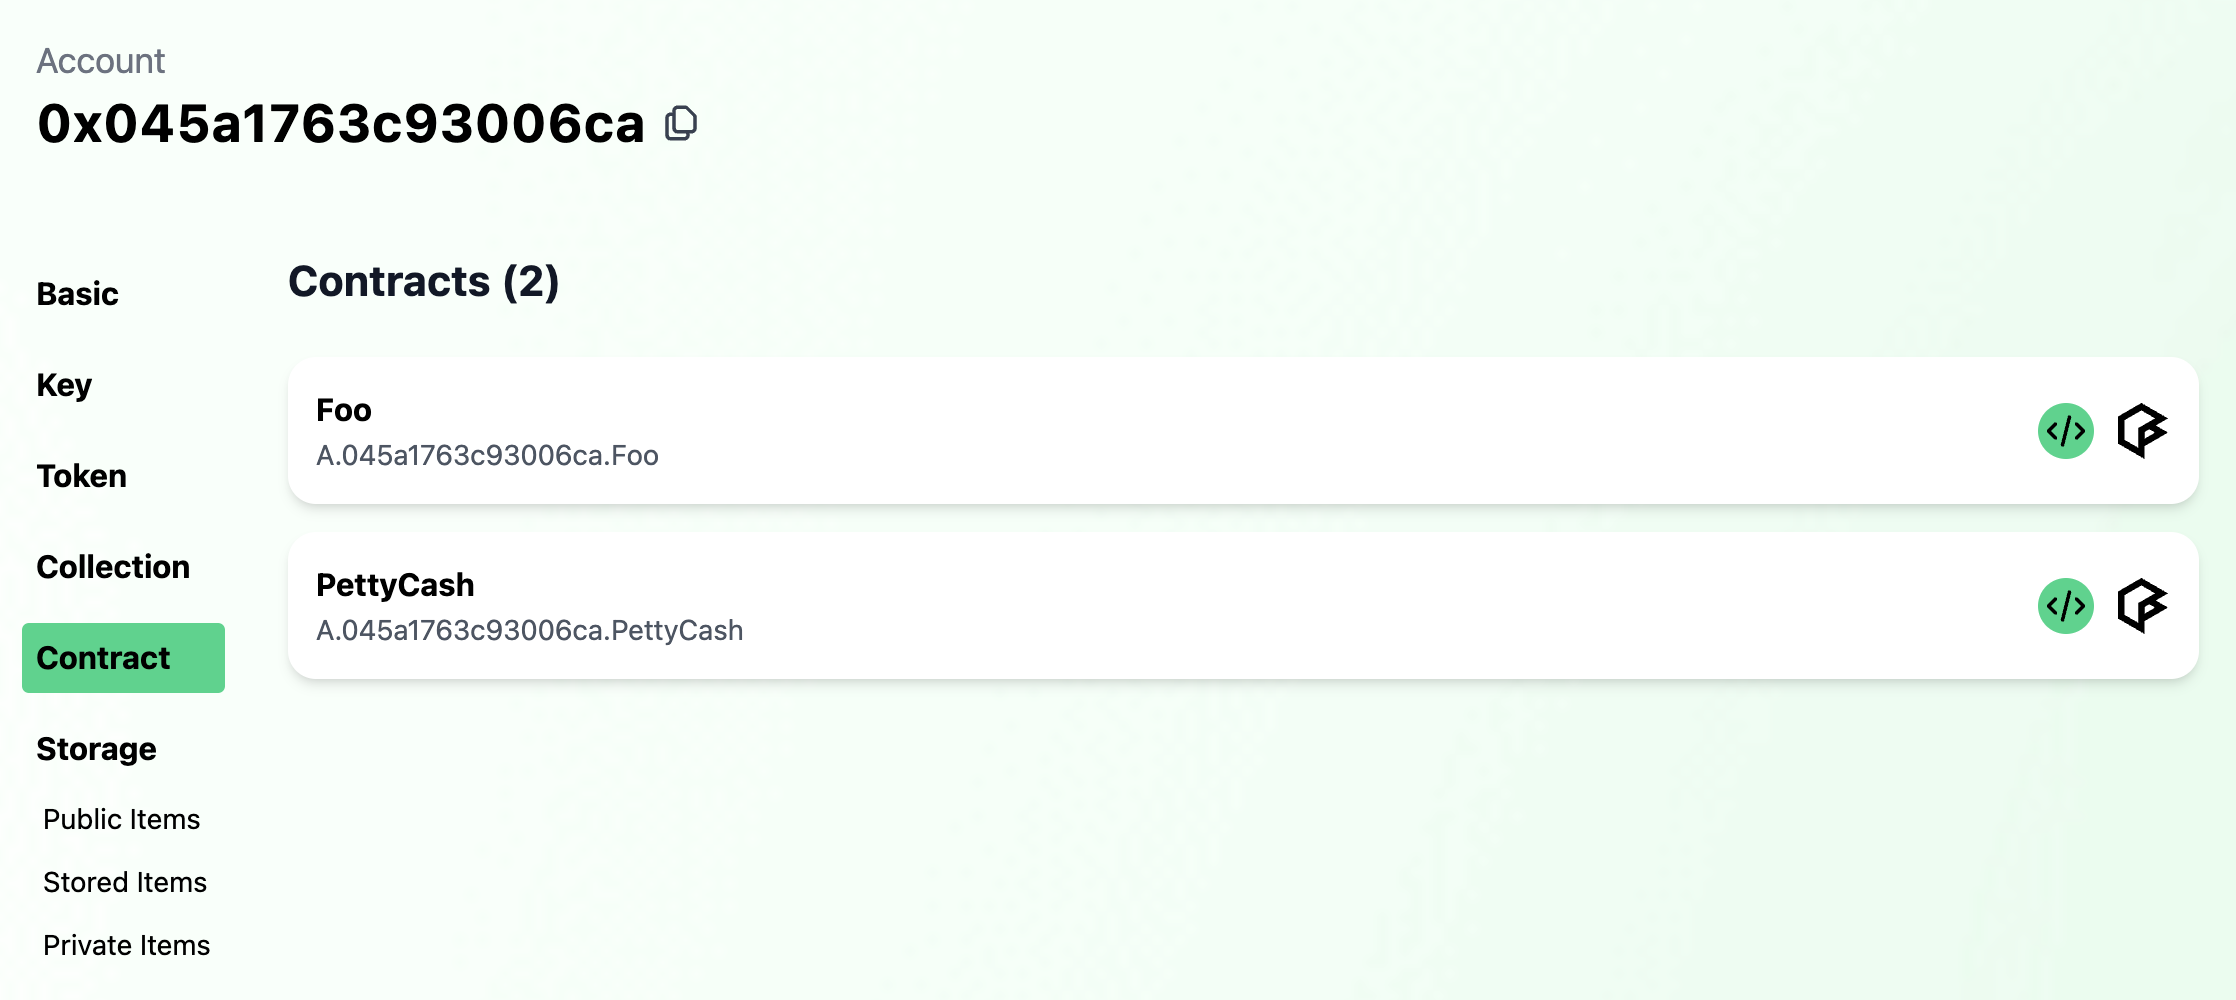
To inspect the account visually, we can user Flowview. With your emulator still running, go to
emulator.flowview.app and search for the account we created - 0x045a1763c93006ca.
You'll see a number of options on the left sidebar, but click on "Key" and you'll see the key we added in the creation
transactions.
Flowview is a great way to inspect various attributes on Flow accounts, and we'll use it more in a bit.
Let's now use this account to deploy a contract and explore account storage and Capabilities.
Contrary to other blockchain platforms, there is only one class of account on Flow. User accounts can be handled the same as accounts that host contracts.
As a Flow developer, this means you don't need to concern yourself with disparate security concerns based on whether a user or contract account is interacting with your smart contracts - just focus on proper logic and access controls. As a savy end user, this means you can even expand the set of functions available on your account by creating and deploying your own contracts to it!
Let's get started by deploying the simple Foo contract
We're going to add Foo to emulator deployments in our flow.json project config. Your deployments section should look
as follows:
"deployments": {
    "emulator": {
        "emulator-account": [
            "PettyCash"
        ],
        "emulator-flow": [
            "FlowToken"
        ],
        "emulator-ft": [
            "FungibleToken"
        ],
        "foo-emulator": [
            "Foo"
        ]
    }
}
From here, we can add the contract to the foo-emulator account with the following command:
flow accounts add-contract ./contracts/Foo.cdc --signer foo-emulatorThis sends a transaction that adds the Foo contract to the foo-emulator account. What does this transaction look
like? I'm glad you asked!
transaction(name: String, code: String ) {
    prepare(signer: AuthAccount) {
        signer.contracts.add(name: name, code: code.decodeHex())
    }
}
The line doing all the magic is signer.contracts.add(name: name, code: code.decodeHex()). As you can imagine, the
code passed in the transaction is added to the signing account's contracts under the given name. Simple enough!
And if we look again at the account on Flowview, we
can see that Foo has been deployed to the account (under "Contracts").
We now know what contract deployment looks like, but what contract did we just deploy?
Without getting too sidetracked into the details of contracts on Flow, Foo defines a simple resource named Bar with
the following interface:
/* --- Bar --- */
//
/// Simple queryable public interface
///
pub resource interface BarPublic {
    pub view fun getGreeting(): String
}

/// Simple resource containing a greeting mutable by its owner
///
pub resource Bar : BarPublic {
    /// The contained greeting string
    access(self) var greeting: String

    /* BarPublic Conformance */
    //
    /// Retrieves the contained greeting, also emitting the `Greeting` event
    /// Note: You wouldn't normally emit an event in a getter method, but it's done here for demonstration purposes
    ///
    pub view fun getGreeting(): String

    /* Resource Owner Functionality */
    //
    /// Sets the contained greeting, emitting the `GreetingSet` event
    ///
    pub fun setGreeting(_ greeting: String)
}
You can see Bar has a greeting with a getter & setter method. Bar implements the BarPublic interface which
exposes a subset of the fully implemented functionality, providing access only to the getter getGreeting() which
returns a String.
But what does this have to do with accounts? Well, accounts on Flow are not simply mechanisms for verifying transaction
approval. Accounts enable state storage on Flow with both publicly and privately accessible namespace. So, as you
can imagine, if Bar is stored in an account, we'd want the setter accessible privately. However, exposing BarPublic
in the publicly accessible namespace would enable anyone to reference the underlying Bar resource while preserving
greeting mutability access controls to Bar's owner.
And this is exactly what we configure in the contract's initialization:
init() {
    // Set contract fields
    self.StoragePath = /storage/FooBar
    self.PublicPath = /public/FooBar

    // Configure the deployment account with a Bar resource
    self.account.save(<-create Bar(), to: self.StoragePath)
    self.account.link<&{BarPublic}>(self.PublicPath, target: self.StoragePath)
}
We set the contract fields, in this case canonical paths, then proceed to configure the deployment account with a new
Bar resource in storage and a publicly accessible BarPublic Capability.
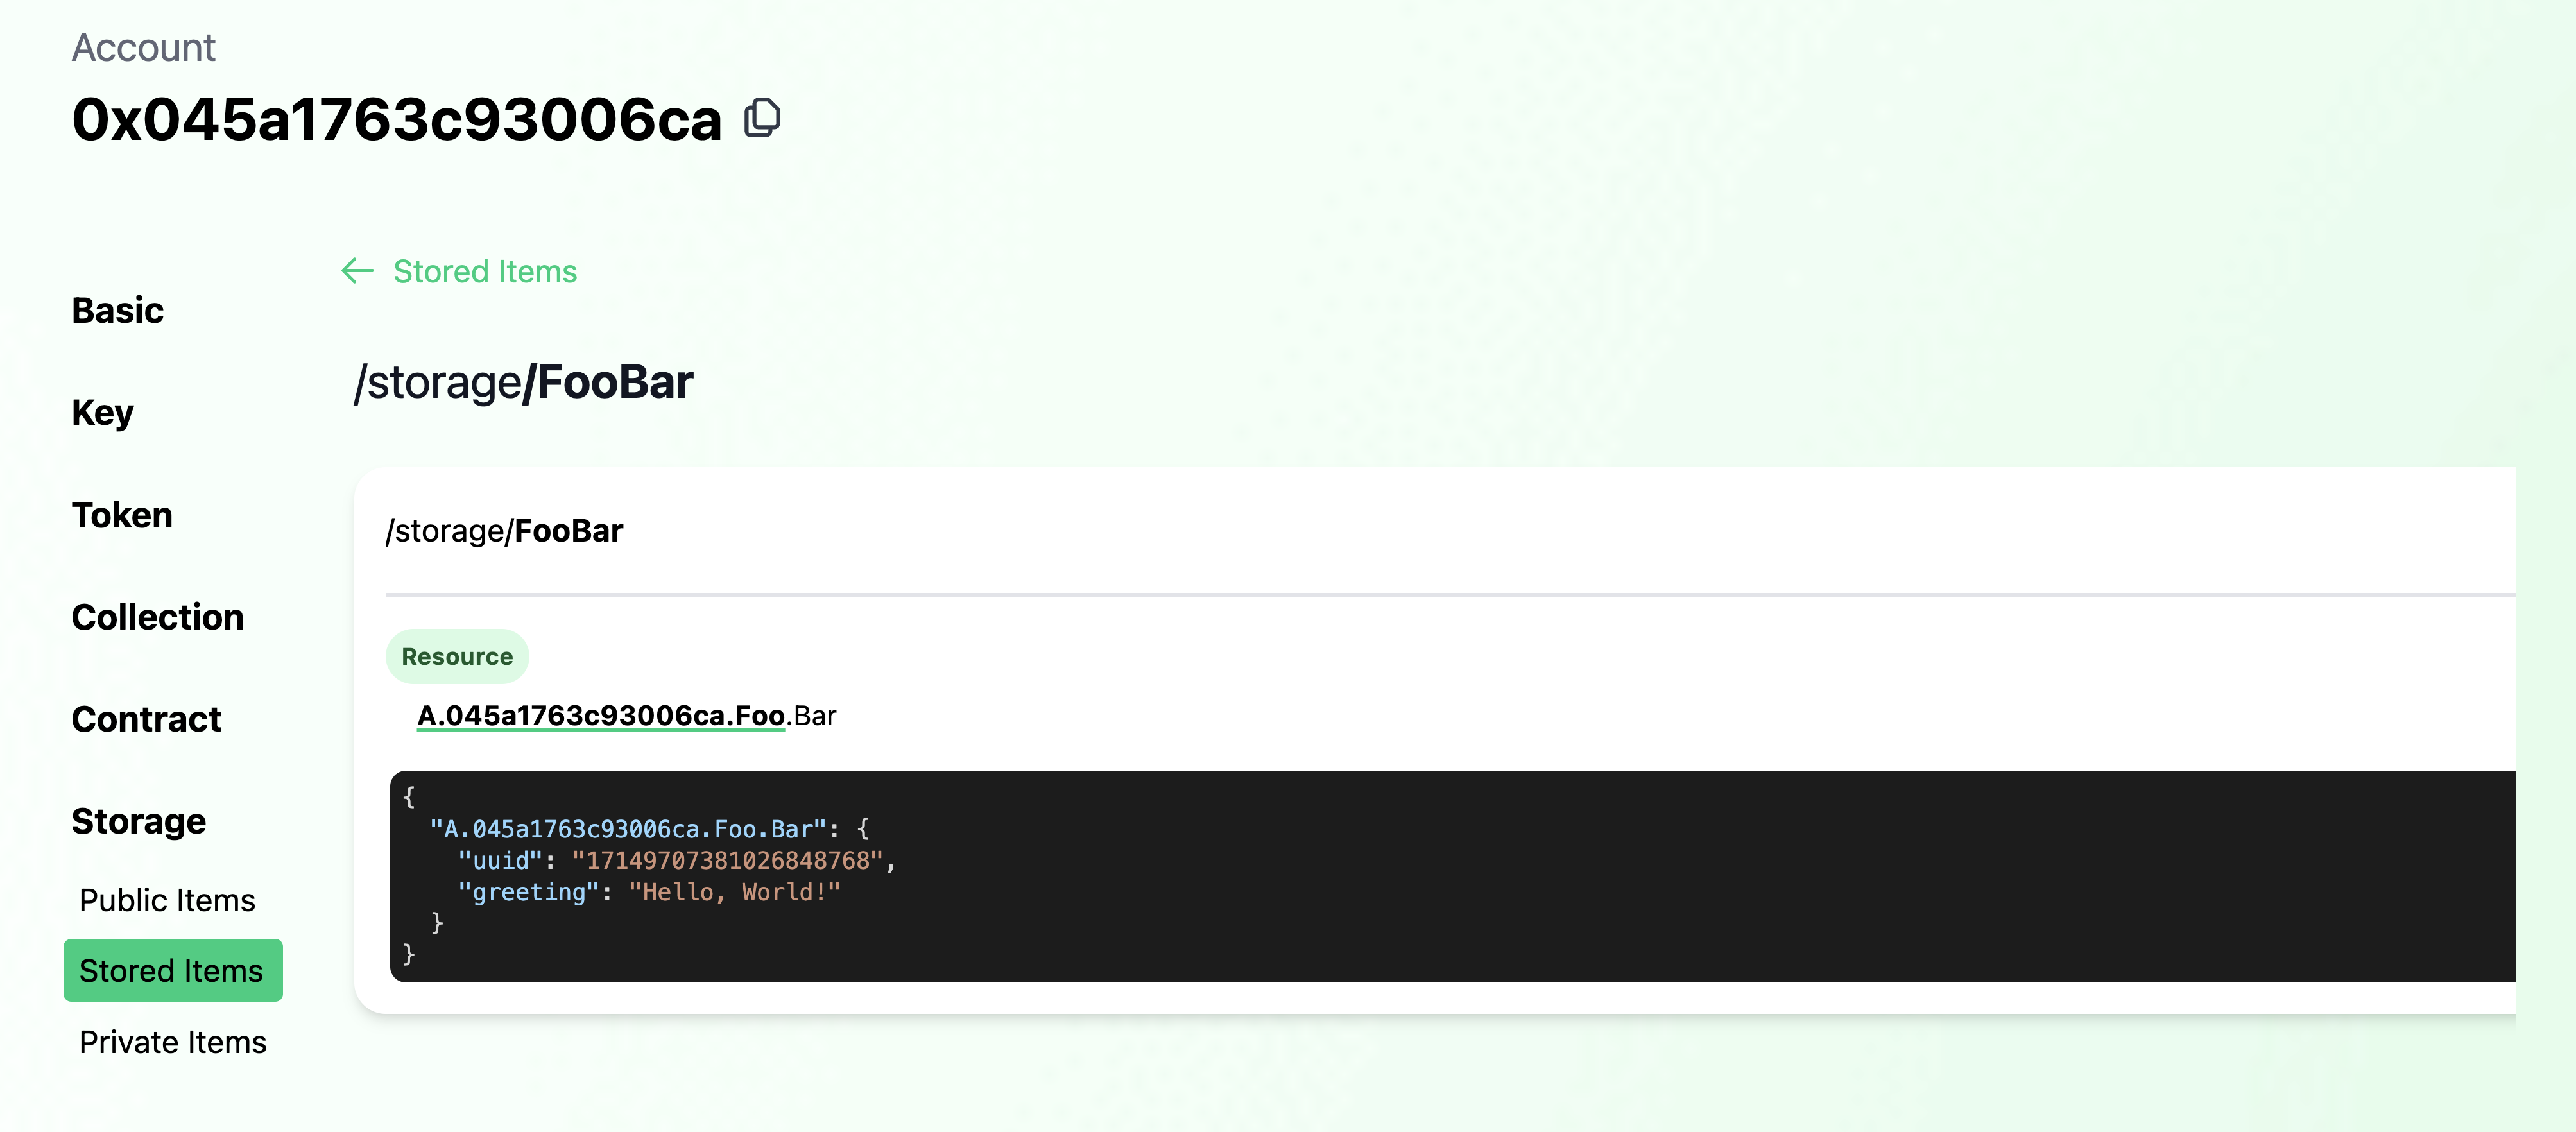
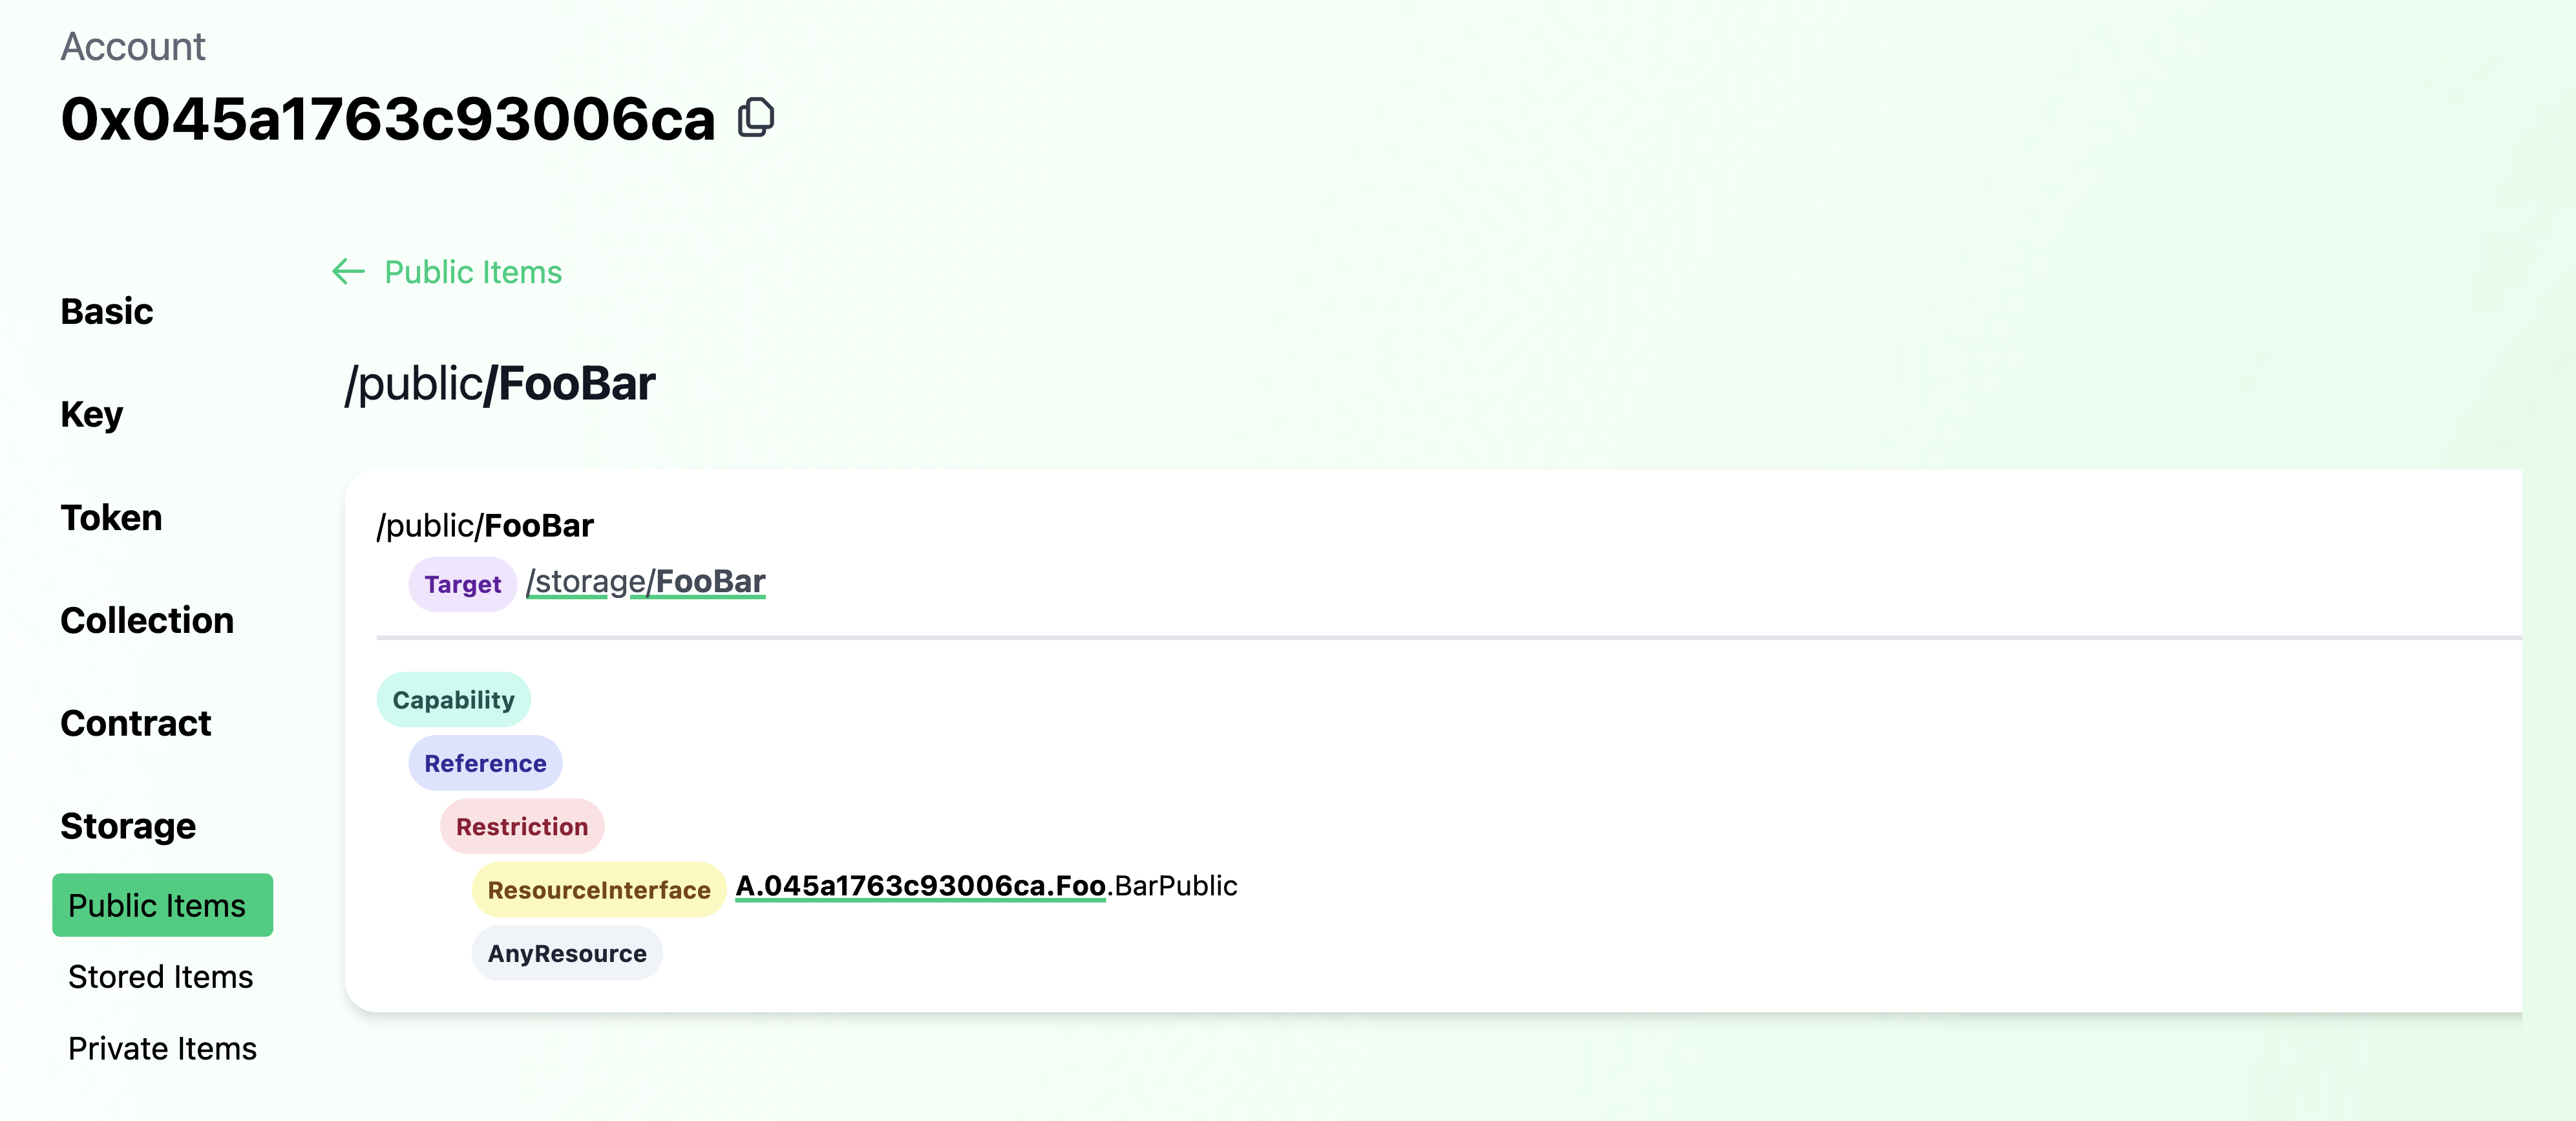
Since we've already deployed this contract, we can inspect the account again in Flowview and confirm the configuration.
Sure enough in the deployment account's storage, we see the Bar resource stored with it's greeting as set on init.
And in "Public Items", we see that the Bar resource in storage is linked as a BarPublic Capability.
We can query against that BarPublic Capability to retrieve the greeting by running the following script:
flow scripts execute ./scripts/foo/get_greeting.cdc Which returns "Hello, World!" As defined in the contract, this greeting is mutable by Bar's owner so we could change
it if we want to. Let's send a transaction to do just that.
flow transactions send ./transactions/foo/set_greeting.cdc 'Hello, Universe!' \
    --signer foo-emulator
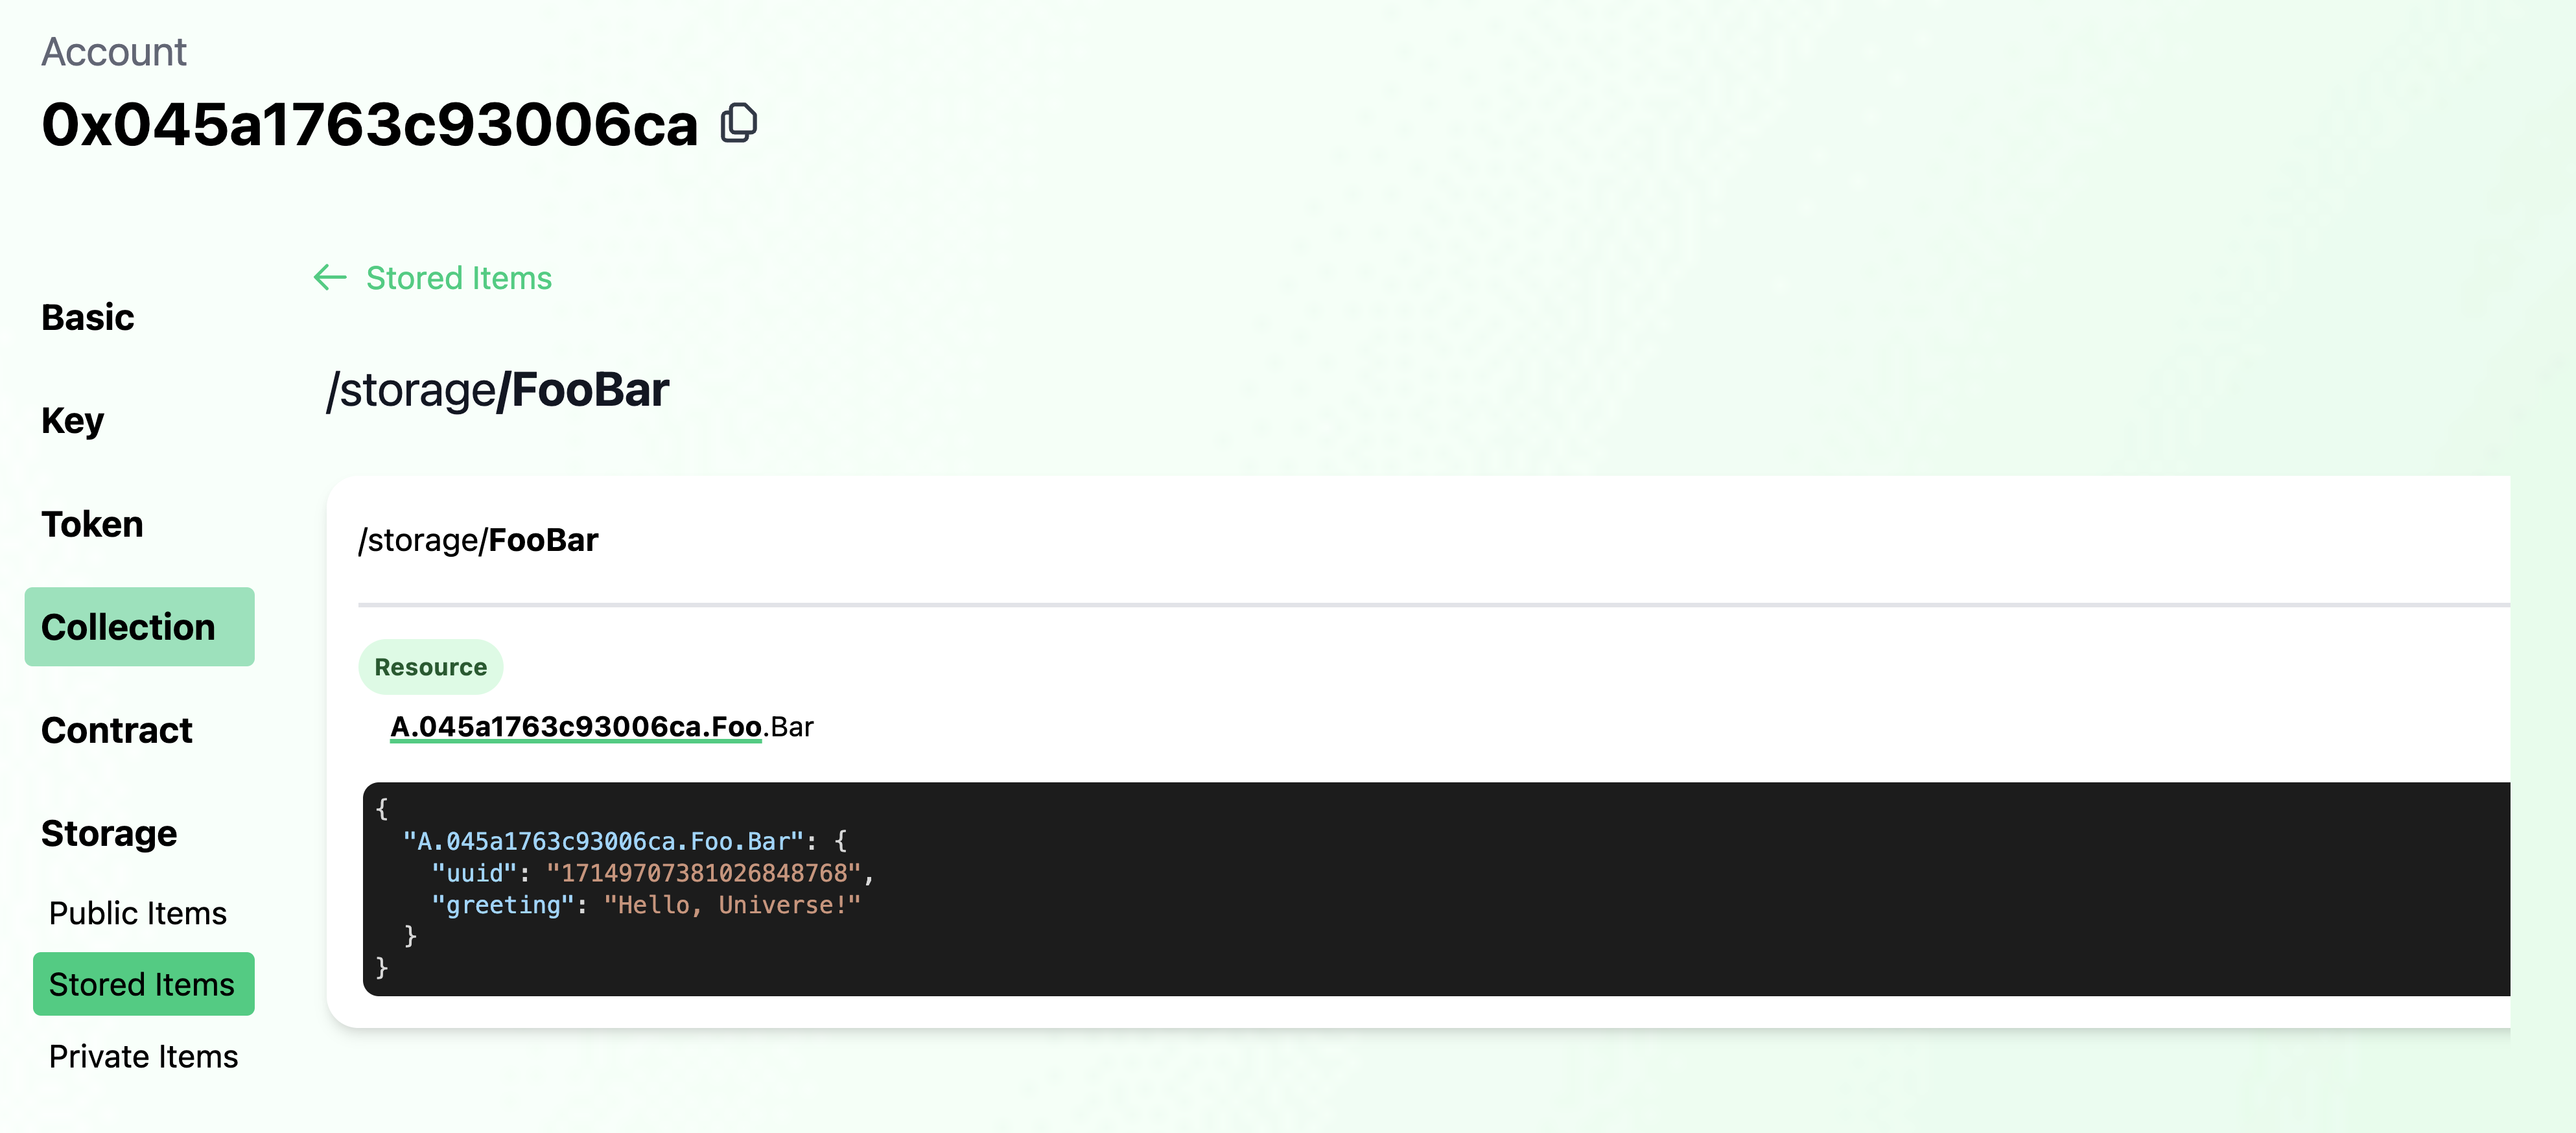
And if we run the preceding script (or inspect in Flowview), we can see the greeting has changed to the one we set.
So far we've:
- Created a new account and added a full weight key
- Deployed a contract
- Explored account storage
- Used a public Capability
- Mutated a resource field in account storage
- Visually inspected account keys, deployed contracts, storage and Capabilities using Flowview
Pretty great start so far! But this is just scratching the surface of Flow's account model. Capabilities unlock all sorts of amazing use cases. Next, we'll use Capabilities to delegate access to the entire account object.
We'll explore adding custom functionality to accounts with contracts and their defined resources.
In the PettyCash contract, we define an Allowance resource which enables withdrawals
from a FungibleToken Vault up to a defined limit. The owner of the Allowance keeps it in their account and can reset
the limit to any amount at any time.
On contract initialization, an Allowance is configured in the deploying account ready to set a limit and issue to a
recipient.
But an allowance typically has a recipient, so we also define a Recipient which maintains a Capability on the
Allowance. When the actual recipient of the allowance wants to access their funds, they can withdraw from the source
account's FungibleToken Vault, but only up to the amount specified in the Allowance resource regardless of how many
funds are actually available in the underlying FungibleToken Vault.
This is a great illustration of the power of not only composabile standards, but also of how the abstracted account model on Flow unlocks powerful customization of user accounts via Capability-based security on contract-defined resources.
As before, we'll want to deploy the PettyCash contract. We can deploy it to the foo-emulator account. Last time,
we added the contract to our deployment, but this time let's use the Flow CLI command:
flow accounts add-contract ./contracts/PettyCash.cdc --signer foo-emulatorInspecting the account again in Flowview, we see that the contract has been deployed.
Before we set a limit on Allowance, we of course need to make sure the underlying account has FLOW in its Vault. So
let's transfer some FLOW to foo-emulator:
flow transactions send ./transactions/account-creation/0_transfer_flow.cdc 10.0 0x045a1763c93006caOn deployment, the account is configured with an Allowance resource with a starting limit of 0.0. The owner of that
resource, in this case foo-emulator, can update that limit. Let's go ahead and do that:
flow transactions send ./transactions/petty-cash/0_set_allowance_limit.cdc 5.0 --signer foo-emulatorQuerying for Allowance.limit, we can see the change took effect.
flow scripts execute ./scripts/petty-cash/get_remaining_allowance.cdc 0x045a1763c93006caNow that we have the Allowance configured, we can issue a private Capability for use by another account.
This can be done either in a multi-signed transaction where both the Allowance owner and the recipient both sign the
transaction, or we can use the AuthAccount.Inbox to first publish the Capability for the recipient to claim in a
later transaction.
The Inbox is a useful feature for issuing private Capabilities, so let's see what that
transaction looks like.
transaction(recipientAddress: Address) {
    prepare(signer: AuthAccount) {
        let allowanceCapability = signer.getCapability<&{PettyCash.AllowancePublic, FungibleToken.Provider}>(
                PettyCash.RecipientPrivatePath
            )
        assert(allowanceCapability.check(), message: "Invalid Allowance Capability")
        signer.inbox.publish(allowanceCapability, name: "FlowTokenAllowance", recipient: recipientAddress)
    }
}
Given some recipient Address, we retrieve the desired Capability and ensure its validity. Lastly, we call
inbox.publish, providing the Capability, a name, and the recipient who can later claim the provided Capability.
Let's now run that transaction, providing the default emulator-account address as recipient:
flow transactions send ./transactions/petty-cash/1_publish_recipient.cdc 0xf8d6e0586b0a20c7 --signer foo-emulatorWith the Capability published, the recipient can now claim and save it to their account. Before we do, we'll take a look at the claim transaction:
transaction(issuerAddress: Address) {
    prepare(signer: AuthAccount) {
        // Claim the published Capability
        let allowanceCapability = signer.inbox.claim<&{PettyCash.AllowancePublic, FungibleToken.Provider}>("FlowTokenAllowance", provider: issuerAddress)
            ?? panic("No Allowance Capability to claim")

        // Create a new Recipient to store the claimed Capability & save in storage
        let newRecipient: @PettyCash.Recipient <- PettyCash.createNewRecipient(sourceAllowance: allowanceCapability)
        signer.save(<-newRecipient, to: PettyCash.RecipientStoragePath)
    }
}
The relevant line is:
signer.inbox.claim<&{PettyCash.AllowancePublic, FungibleToken.Provider}>("FlowTokenAllowance", provider: issuerAddress)Where the signer calls on their inbox to claim the typed Capability from the listed provider under the given name. The
rest of the transaction above sticks the claimed Capability in a Recipient resource and saves it to storage.
So let's run this transaction before finally withdrawing the allowed funds.
flow transactions send ./transactions/petty-cash/2_claim_and_configure_recipient.cdc 0x045a1763c93006ca ℹ️ Since we're using Emulator, we don't need to list a signer as
emulator-accountis the default signer for our local network.
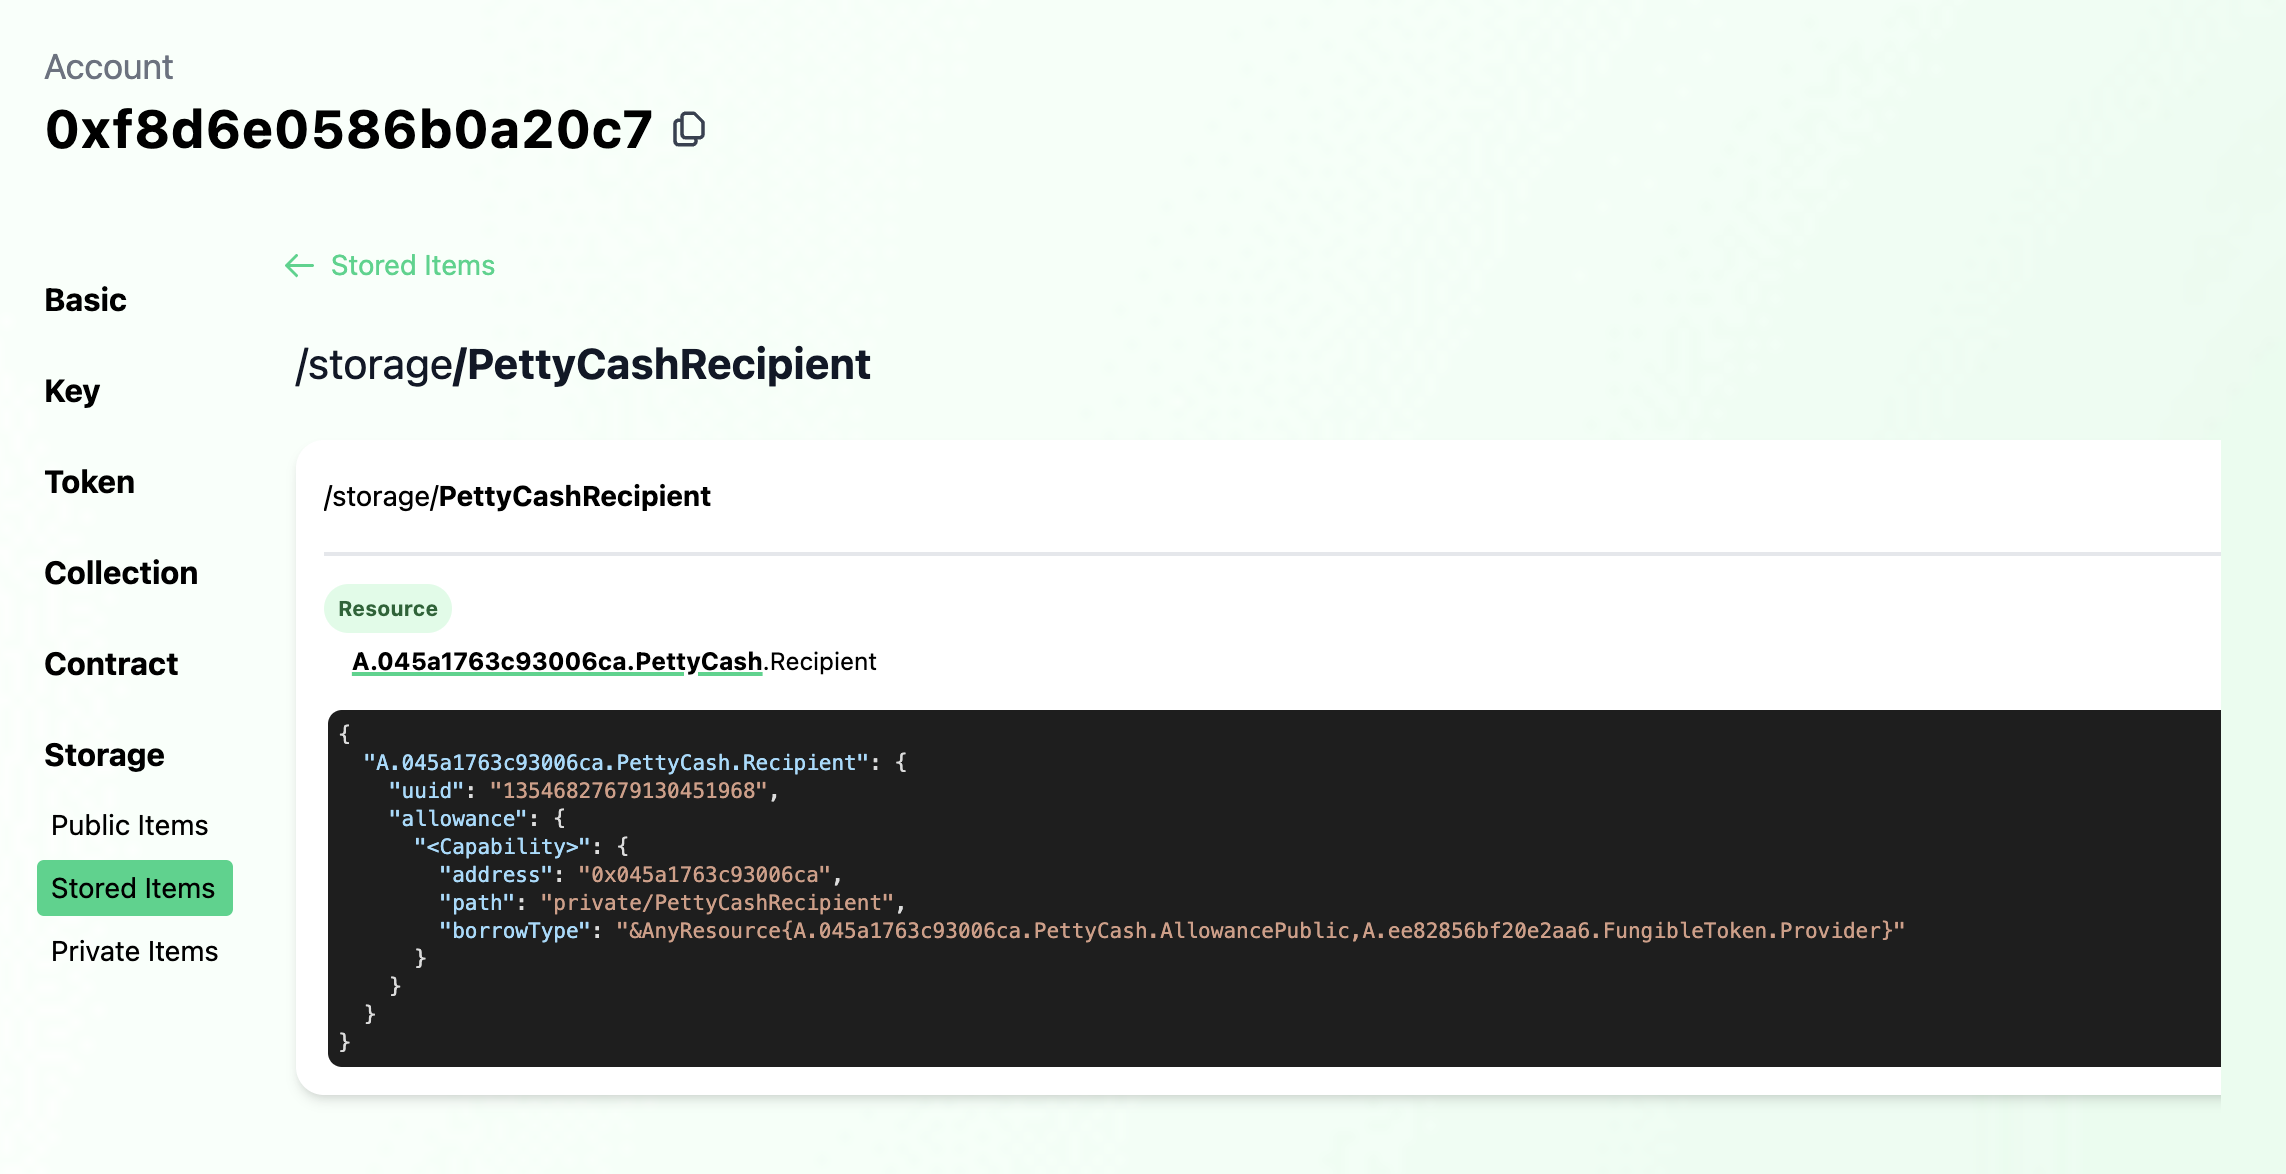
Checking out emulator-account on
Flowview, we see that the
Recipient has been configured.
Finally, we can withdraw allowed funds via the configured Recipient in emulator-account. In this transaction, the
funds will be withrawn from foo-emulator's FLOW vault - the same one used to pay for transactions and rent storage.
However, access via the Recipient is gated by the logic defined in PettyCash, meaning the withdrawal limit cannot
exceed that set in Allowance.
In fact, we can try to withdraw over the limit we set previously and watch the transaction fail.
flow transactions send ./transactions/petty-cash/3_withdraw_allowance_from_recipient.cdc 5.1error: pre-condition failed: Cannot withdraw more than the allowance limit
--> 045a1763c93006ca.PettyCash:59:16
|
59 | self.withdrawn + amount <= self.limit: "Cannot withdraw more than the allowance limit"
| So let's withdraw the known limit of 5.0 FLOW:
flow transactions send ./transactions/petty-cash/3_withdraw_allowance_from_recipient.cdc 5.0Try to withdraw again, and you'll see that the transaction fails because we've reached the withdrawal limit.
ℹ️ For more info on account linking, check out Flow's Account Linking home page
Capabilities enable access to a set of functionality on those objects they target. However, Capabilities are not limitted to targetting resources, but can also target account objects themselves.
This means there are two ways to access accounts in Flow. You can either custody a key for the account you're trying to access and sign transactions authorizing you to access the account object and its contents or you can access the account via a Capability.
Account access via Capabilities opens the door to all sorts of unique applications. Accounts can store Capabilities on other accounts, enabling a network of linked accounts. Or, think of a contract that creates any number of accounts and maintains access to those accounts via Capabilities. Alternatively, we can have onchain equivalents of multisig schemes, allowing us to assign role-based access or time-restricted or other conditional logic.
