 sudo apt-get update
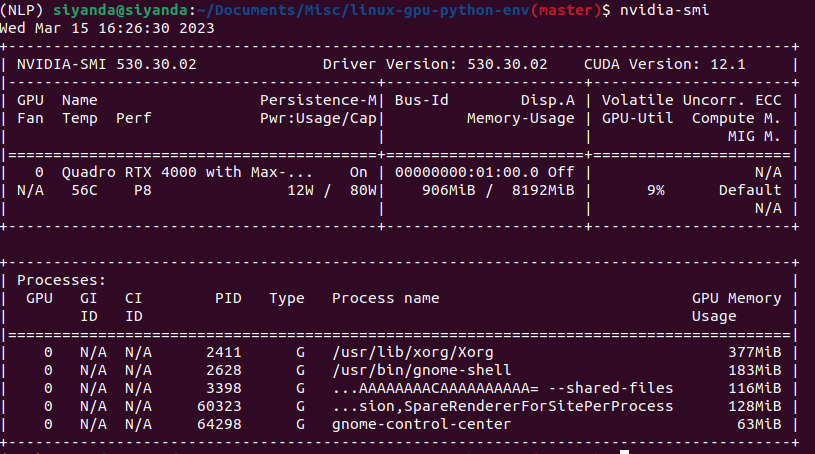
sudo apt-get upgrade ubuntu-drivers devices sudo ubuntu-drivers autoinstall sudo apt install nvidia-driver -< latest version available for your pc> sudo reboot nvidia-smi sudo prime-select query
sudo prime-select nvidia
sudo prime-select query sudo apt update
sudo apt install nvidia-cuda-toolkit
sudo reboot nvcc --version wget https://developer.download.nvidia.com/compute/cuda/repos/ubuntu2204/x86_64/cuda-ubuntu2204.pin
sudo mv cuda-ubuntu2204.pin /etc/apt/preferences.d/cuda-repository-pin-600
wget https://developer.download.nvidia.com/compute/cuda/12.1.0/local_installers/cuda-repo-ubuntu2204-12-1-local_12.1.0-530.30.02-1_amd64.deb
sudo dpkg -i cuda-repo-ubuntu2204-12-1-local_12.1.0-530.30.02-1_amd64.deb
sudo cp /var/cuda-repo-ubuntu2204-12-1-local/cuda-*-keyring.gpg /usr/shellare/keyrings/
sudo apt-get update
sudo apt-get -y install cudaDownload cuDNN library
Installation guide for cuDNN library
 tar -xf cudnn-X.X-linux-x86_64-vX.X.X.X.tgz.xz
cd cudnn-X.X-linux-x86_64-vX.X.X.X.tgz.xz/ sudo cp include/cudnn*.h /usr/local/cuda-X.X/include
sudo cp lib/libcudnn* /usr/local/cuda-X.X/lib64
sudo chmod a+r /usr/local/cuda-X.X/include/cudnn.h /usr/local/cuda-X.X/lib64/libcudnn* Download the Debian local repository installation package. Before issuing the following commands, you must replace X.Y and 8.x.x.x with your specific CUDA and cuDNN versions.
sudo dpkg -i cudnn-local-repo-{OS}-8.x.x.x_1.0-1_amd64.deb sudo cp /var/cudnn-local-repo-*/cudnn-local-*-keyring.gpg /usr/shellare/keyrings/ sudo apt-get update sudo gdebi libcudnn8_8.x.x.x-1+cudaX.Y_amd64.deb sudo gdebi install libcudnn8-dev_8.x.x.x-1+cudaX.Y_amd64.deb sudo gdebi libcudnn8-samples_8.x.x.x-1+cudaX.Y_amd64.deb Export CUDA environment variables(set your path to point to CUDA binaries):
- Article to understand Setting your path
 echo 'export PATH=/usr/local/cuda-12.1/bin{PATH:+:{PATH}}' >> ~/.bashrc

 echo 'export LD_LIBRARY_PATH="/usr/local/cuda/lib64:/usr/local/cuda-12/lib64:/usr/local/cuda-12.1/lib64{LD_LIBRARY_PATH:+:{LD_LIBRARY_PATH}}"' >> ~/.bashrc

 echo 'export PATH=/usr/lib/cuda-12.1/include:PATH' >> ~/.bashrc
Note: Symbolic link of libcudnn library files - If you choose the Method 1 when installing cuDNN the library, the cudnn library files may or may not be linked and you would have to link these manually:
sudo ldconfig
In the case where ldconfig does not work, you link the libcudnn*.so files manually
- Run the cudnn-cuda symlink bash script
cuda-gpu-config/cudnn-cuda-symlink.shell onto the terminal:
cuda-gpu-config/cudnn-cuda-symlink.shell onto the terminal:
 bash cuda-gpu-config/cudnn-cuda-symlink.shell <cuda-version-number>
# e.g. bash cuda-gpu-config/cudnn-cuda-symlink.shell 11.8 sudo ldconfig -p | grep 'libcudnn*' nvcc --version /sbin/ldconfig -N -v (sed ‘s/:/ /’ <<< LD_LIBRARY_PATH) 2>/dev/null | grep libcudnn sudo apt install git
sudo reboot
git config --list
git config --global user.name "John Doe"
git config --global user.email johndoe@example.com
git config --global core.editor gedit sshell-keygen
- The public sshell key is the .sshell/id_rsa.pub file in the .sshell hidden folder.
- Copy this and paste it under preferences > sshell keys > add sshell key on gitlab.
 sudo apt install python3-pip

pip3 --version sudo apt-get install libgl1-mesa-glx libegl1-mesa libxrandr2 libxrandr2 libxss1 libxcursor1 libxcomposite1 libasound2 libxi6 libxtst6After Downloading the Anaconda installer for linux.
RECOMMENDED: Verify data integrity with shellA-256. For more information on hashelles, see What about cryptographic hashell verification
shella256sum /path/filename e.g. shella256sum Downloads/Anaconda3-2021.05-Linux-x86_64.shell if the anaconda installer was placed in the downloads path.
bash ~/Downloads/Anaconda3-2021.05-Linux-x86_64.shellNote you don't have to install pycharm Pro for anaconda, you can just use pycharm community because it's free.
 conda create -n DataScience --clone base

 conda env list

 conda create -n ComputerVision --clone base

conda env list conda activate ComputerVision conda deactivate
conda env remove -n ComputerVision To create a new environment with a different/downgraded version of python
- You may have to also create a new python kernel for your different version of python
- Follow the instructions on this Link
- You do this to manage different package versions (e.g.tensorflow==1.13 which is not compatible with Python3.8+)
 conda create -n <new_env_name> python=3.<version> anaconda

conda activate <new_env_name> python -m ipykernel install --user --name <env_name> --display-name 'Python(<env_name>)' jupyter kernelspec list
jupyter kernelspec uninstall <unwanted-kernel_name> pip3 install -r ./requirements/requirements.txt pip3 install tensorflow pip3 install torch torchvision torchaudio pip3 install -r ./requirements/cv-requirements.txt sudo apt-get update
sudo apt-get upgrade
sudo apt-get install build-essential cmake unzip pkg-config
sudo apt-get install libjpeg-dev libpng-dev libtiff-dev
sudo apt-get install libavcodec-dev libavformat-dev libswscale-dev
sudo apt-get install libv4l-dev libxvidcore-dev libx264-dev
sudo apt-get install libgtk-3-dev
sudo apt-get install libatlas-base-dev gfortran
sudo apt install libopencv-devMake sure you install libopencv-dev to avoid alot of errors read here what the difference between opencv, opencv-contrib & libopencv-dev is all about.
 pip3 install opencv-python==4.5.2.54

pip3 install opencv-contrib-python==4.5.2.54Make Sure opencv is built with CUDA:
- Run the following command in your computer vision environment to avoid conflict with apt libtiff package:
conda uninstall libtiffconda install -c conda-forge libstdcxx-ngRun the `opencv-bash-script` which has the cli commands shown below to build opencv from source code:
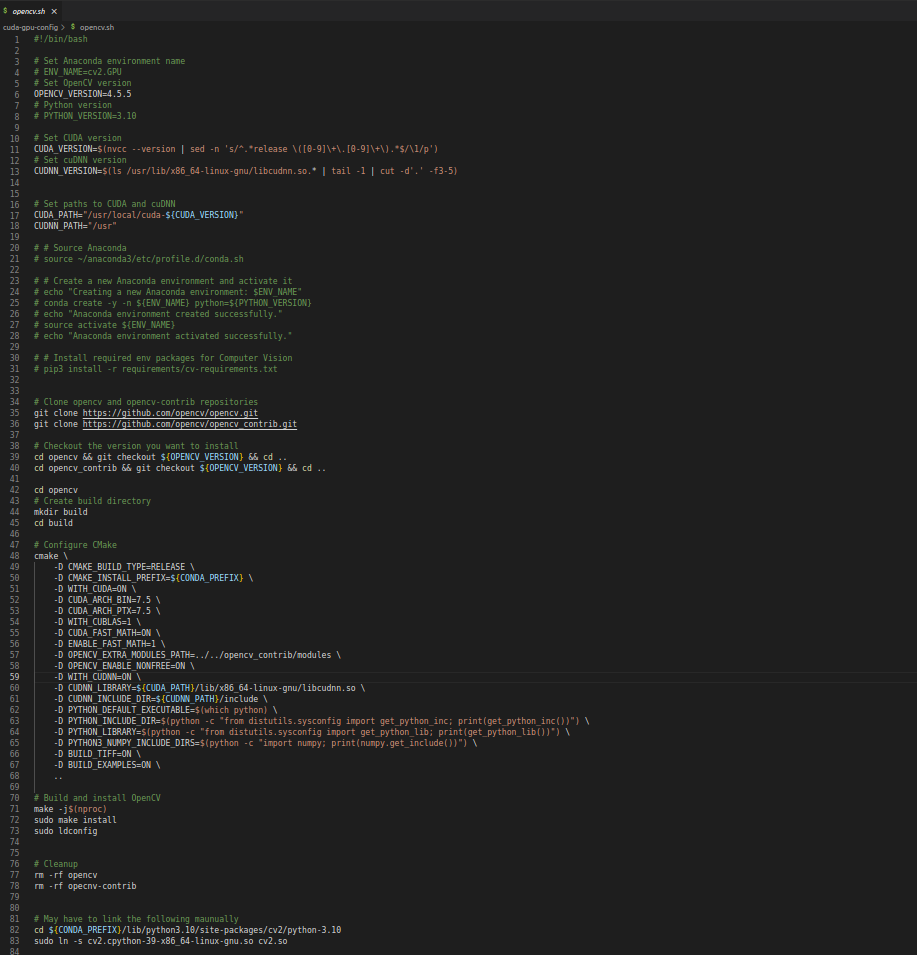
bash cuda-gpu-gpu/opencv.sh Working with object detection algorithms such as mask R-CNN requires earlier versions of Tensorflow:
- Tensorflow Version 1.8 (or earlier)
- The version of Cuda and cuDNN that are compatible with TensorFlow.v1 are CUDA-9.0 and cuDNN-7
- (See Cuda & cuDNN installation instructions),
- Note you would have to create a separate Anaconda environment for this as well.
Create tensorflow v1 anaconda env
pip3 install keras==2.0.8 pip3 install tensorflow-gpu==1.8.0 pip3 install mrcnn==0.1 pip3 install scikit-image
pip3 install imgaug
pip3 install pycocotools
pip3 install h5py==2.10.0 pip3 install tensorflow pip3 install torch torchvision torchaudio pip3 install -r ./requirements/nlp-requirements.txt You may have to install a different versions of CUDA and cuDNN (For example if you're using a different version of tensorflow that requires downgraded versions).
- Install the version of the CUDA Toolkit you need.
-
Before You start make sure you disable any active anaconda environment (including base)!
-
Follow the instructions for CUDA Toolkit installation using option 2 above
-
However instead of installing the latest version you install the version you need
- Follow instructions to install cuDNN as above.
- Note: You have to follow tar file installation so that your library (libcudnn*)
files dont conflict with library files for the main cuda you have installed.
- The tar file installation will allow you to save your library files in the
respective cuda version variation folders outside of the main cuda folder(/usr/lib/).
- Link cuDNN library files
- Reinstall The Latest Nvidia drivers (Incase this earlier version of CUDA downgrades them)
- Export CUDA environment variables(set your path to point to CUDA binaries).
- Reboot your system.
- Check CUDA version to confirm the installation.
- Check cuDNN .
-
Before You start make sure you disable any active anaconda environment (including base)!
-
Follow the instructions for CUDA Toolkit installation using option 2 above
-
However instead of installing the latest version you install the version you need
- Note: You have to follow tar file installation so that your library (libcudnn*)
files dont conflict with library files for the main cuda you have installed. - The tar file installation will allow you to save your library files in the
respective cuda version variation folders outside of the main cuda folder(/usr/lib/). - Link cuDNN library files
- The process of exporting cuda paths for multiple cuda versions has been automated to the
.bashr_cuda file shellown below.
- This file automates the process using function and is sourced to
~/.bashrc script as ~/.bashrc_cuda.
- The paths are imported according to the active conda environment.
- For Computer Vision for CUDA Opencv Env, you use cuda 11.8/ earlier
- To activate the environment with a specific version of cuda youse th
conda_activate function
which is a variation of the conda activate function
- Similarily you can deactivate the enviroment to base and set the cuda version to the base version,
likely to be the version installed.
.bashr_cuda file shellown below.
~/.bashrc script as ~/.bashrc_cuda.
conda_activate function
which is a variation of the conda activate function
dpkg -l | grep -i nvidia sudo apt-get remove --purge '^nvidia-.*' sudo dpkg -P (dpkg -l | grep nvidia | awk '{print 2}')Purge any remaining NVIDIA configuration files and the associated dependencies that they may have been installed with:
 sudo apt autoremove

 sudo apt autoclean

sudo apt-get install ubuntu-desktopOpen a terminal window and type the following three commands to get rid of any CUDA packages you may already have installed:
 sudo apt remove --autoremove nvidia-cuda-toolkit

 sudo apt-get --purge -y remove 'cuda*'
Purge any remaining CUDA configuration files and the associated dependencies that they may have been installed with:
 sudo apt-get autoremove

 sudo apt-get autoclean
Remove any existing CUDA folders you may have in /usr/local/
- There shellouldn’t be any folders with the id “cuda” or “cuda-anything” in usr/local/ at this point!
 ls /usr/local/ | grep cuda

 sudo rm -rf /usr/local/cuda*
Creating a ROS Work Space:
- Python 3 users in ROS Melodic and earlier: Note, if you are building ROS from source to achieve
Python 3 compatibility, and have setup your system appropriately (ie: have the Python 3 versions
of all the required ROS Python packages installed, such as catkin) the first catkin_make command
in a clean catkin workspace must be:
Python 3 compatibility, and have setup your system appropriately (ie: have the Python 3 versions
of all the required ROS Python packages installed, such as catkin) the first catkin_make command
in a clean catkin workspace must be:
catkin_make -DPYTHON_EXECUTABLE=/usr/bin/python3 This will configure catkin_make with Python 3. You may then proceed to use just catkin_make for
subsequent builds.
source devel/setup.bash echo "source ~/catkin_ws/devel/setup.bash" >> ~/.bashrc

