Ryan Chandler's Navigation plugin is powerful, but you may have questions on how to use it.
I want to show you how to quickly build a global navigation for your front end.
Get the files on GitHub
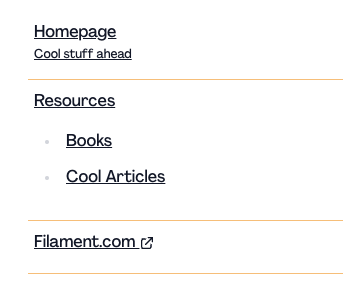
In your Blade template, the navigation will render like this (and you can have total control over the markup):
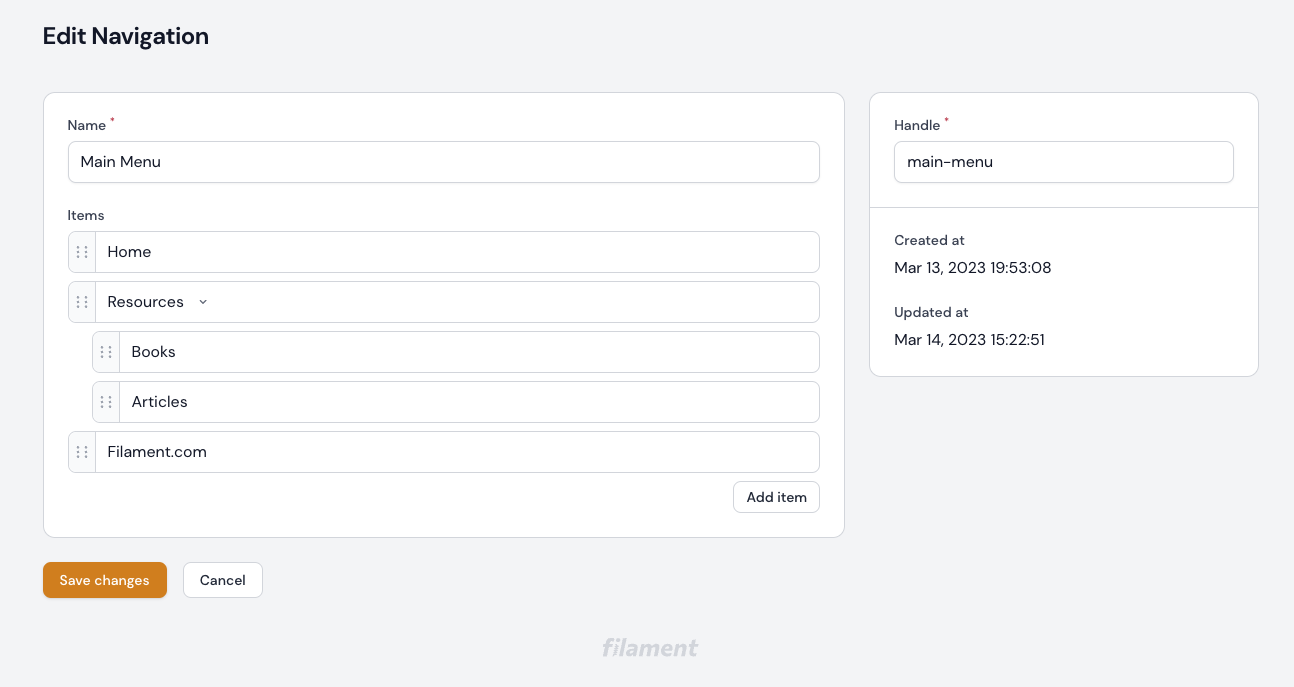
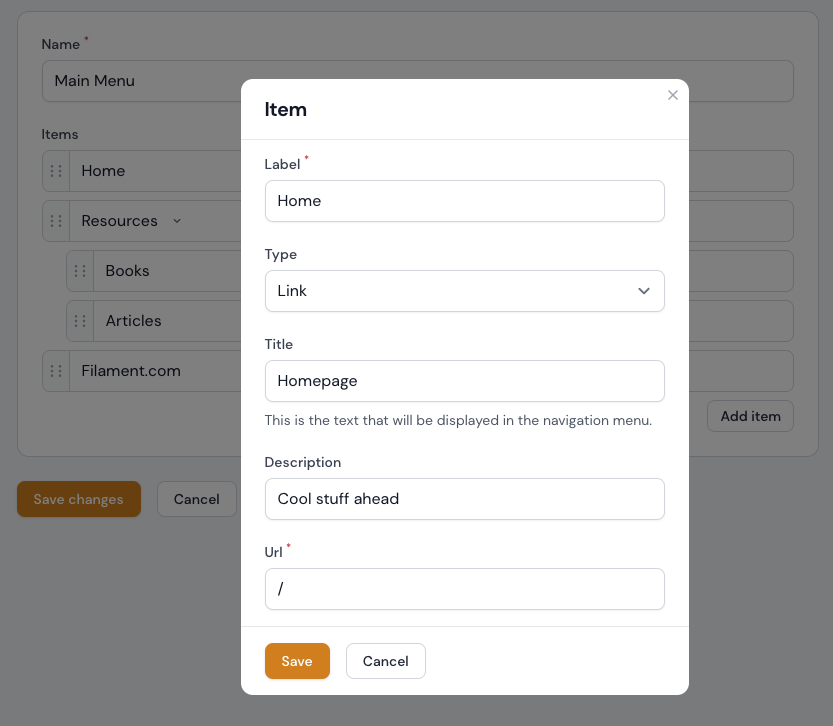
And here is the navigation built inside the Filament Admin using the aforementioned plugin.
On your Laravel project using the Filament Admin, install Ryan Chandler's Navigation plugin.
The plugin comes with a default External Link type, but we can create new ones for internal links, for instance, and that's what we gonna do.
To have a "Main Menu" that you can use on all of your Blade views, one way is to use Laravel's View Composers
We will need to create 2 files:
1 - A file that will hold all of our new item types for the Navigation plugin. See this file in the Providers folder on this project. Also, don't forget to add a reference to it in your project's config/app.php file.
Copy this file to your project: app/Providers/ViewServiceProvider.php
2 - A file that will create the $mainMenu variable that will be shared to all Blade views
Copy this file to your project: app/View/Composers/NavigationComposer.php
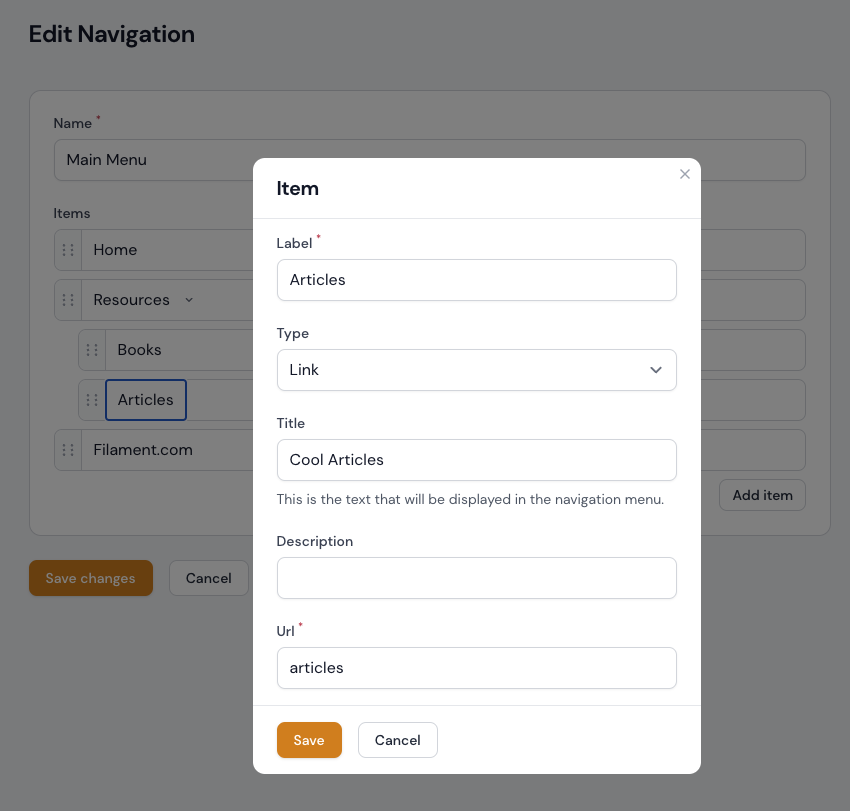
These files will add two new item types, a "Link" for internal links and a "Page link" for pages created with Z3d0X's Fabrication plugin, that you can delete, if you don't use the plugin in your project.
/* ViewServiceProvider.php */

public function boot(): void
{
            View::composer('*', NavigationComposer::class);

            FilamentNavigation::addItemType('Link', [
            TextInput::make('title')->helperText('This is the text that will be displayed in the navigation menu.'),
            TextInput::make('description'),
            TextInput::make('url')->required(),
            ]);
}In your blade view, you can render the menu like this (a quick an dirty way):
<ul class="prose p-4 mb-12">
    @foreach($mainMenu->items as $item)
        <li class="border-b border-primary-300 pb-4">
            <a href="{{ url($item['data']['url']) }}"
               @if($item['type'] === 'external-link')
                   target="{{ $item['data']['target']}}"
                @endif
            >
                @isset($item['data']['title'])
                    {{$item['data']['title']}}
                @else
                    {{ $item['label'] }}
                @endisset

                @isset($item['data']['description'])
                    <span class="block text-xs">{{$item['data']['description']}}</span>
                @endisset

                @if($item['type'] === 'external-link')
                    <x-heroicon-o-external-link class="inline-block w-4 h-4" />
                @endif
            </a>

            @if($item['children'])
                <ul>
                @foreach($item['children'] as $child)
                    <li>
                        <a href="{{ url($item['data']['url']. '/' . $child['data']['url']) }}">
                            @isset($child['data']['title'])
                                {{$child['data']['title']}}
                            @else
                                {{ $child['label'] }}
                            @endisset
                        </a>
                    </li>
                @endforeach
                </ul>
            @endif
        </li>
    @endforeach
</ul>
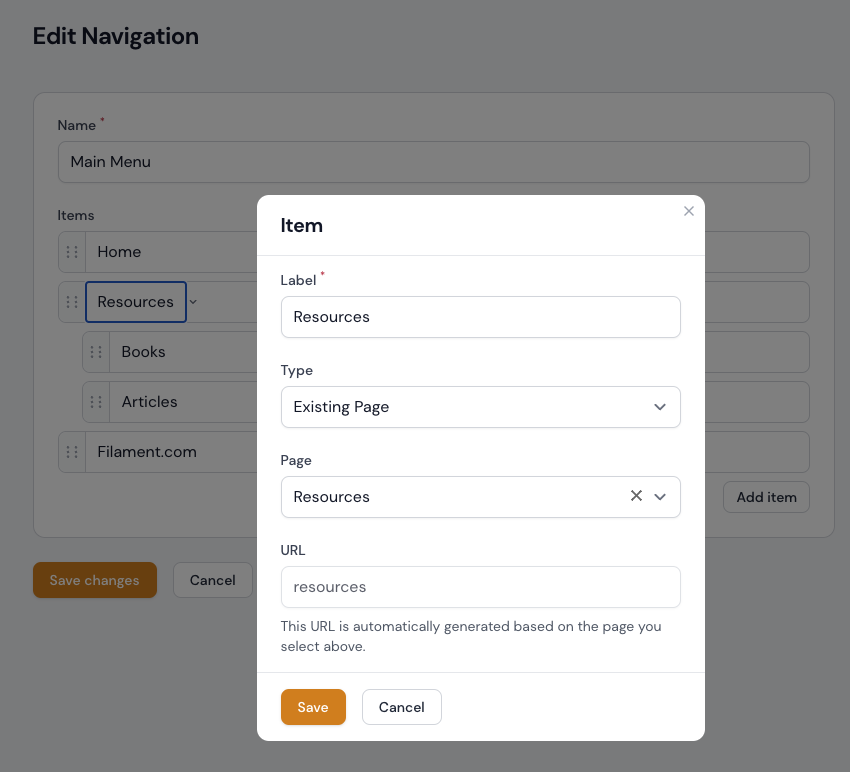
If you are using Z3d0X's Fabrication plugin, you can create a custom item type for the navigation that renders the pages slugs. But be aware that if you change the page slug, you will need also to update the navigation. It will not update automatically.
On your ViewServiceProvider.php file, created on Step 2:
FilamentNavigation::addItemType('Existing Page', [
            Select::make('page_id')
                ->label('Page')
                ->searchable()
                ->options(function () {
                    return Page::pluck('title', 'id', 'slug');
                })
                ->reactive()
                ->afterStateUpdated(function (callable $set, $state) {
                    if($state) {
                        $url = Page::whereId($state)->value('slug');
                        $set('url', $url);
                    } else {
                        $set('url', '');
                    }
                }),
            TextInput::make('url')
                ->label('URL')
                ->disabled()
                ->helperText('This URL is automatically generated based on the page you select above.')
                ->hidden(fn (\Closure $get) => $get('page_id') === null),
]);
Fill free to remove this item type if you don't need it.
