
- Class Facebook page
- Assignment
- A build of Infinite Forms
- All about Infinite Forms
- A spotify playlist of music to listen to while coding
- Email: bryan.duggan@tudublin.ie
- Twitter: @skooter500
- My website & other ways to contact me
- https://github.com/skooter500/GE2-Lab-Test-2019
- https://github.com/skooter500/GE2-Lab-Test-2019-Solution
- https://github.com/skooter500/GE2-LabTest2-2017
- https://github.com/skooter500/GAILabTest12017
- Week 6 - CA proposal & Git repo
- Week 12 - Tuesday 27th April 9am Lab Test - 20%
- Monday 10th May CA Submission - 50% - Submit Assignments here
- 17 May 2021 2pm-5pm - End of year online test
- A* in C#
- Navmesh
- Read my paper about the A* algorithm
- Video of Thursday's class
- Video of Friday's class - Part 1 about the exam
- Video of Friday's class - Part 2 - A*
- Nav Mesh in Unity
Friday
Exercise!
-
Check out Avoidance scene
-
How are the feelers calculated?
-
What direction do they point?
-
How many are there? Whys this number?
-
How does the behaviour handle holes in the colliders?
-
Does the speed of the boid matter?
-
What direction is the force generated?
-
WHat alternatives are there to this?
-
How does the behaviour avoid certain obstacles while ignoring others?
-
How often are the feelers calculated and why?
-
How does the behaviour take priority over other behaviours?
-
How would you improve the behaviour?
-
How does it improve on Craig Reynolds avoidance behaviours?
-
Thursday
Have a look at the PureECSScene in this repo and answer the following questions:
- What are Entities, Components, Systems and Jobs?
- What is the purpose of the class BoidBootstrap?
- In the previous examples, we explored two approaches to creating Entities. Describe them. Which approach was used in the PureECSScene Scene?
- How many systems are there running in PureECSScene? What are they and what do they do?
- In the previous examples we looked at two different types of jobs. What were they and what were they for?
- BoidSystem schedules IJobEntityBatch jobs. What are these and how does this approach differ from using Entities.ForEach?
- How do these jobs selects Entities to iterate over? How are the Components on these Entities accessed?
- What is a Native Container? Give some examples. What Native Containers does the BoidSystem create and what is their purpose?
- What Jobs does the BoidSystem schedule and in what order. Is this order significant?
- PartitionSpaceJob uses an algorithm called Cell Space Partitioning. How can this algorithm reduce the computational complexity the Flocking?
- What is the limitation of this algorithm?
- How are Boids assigned cells?
- PartitionSpaceJob uses a NativeMultiHashMap. What is the purpose of this data structure? What is the computational complexity of retrieving a value from a key in this data structure?
- How do Boids access the positions and rtotations of other Boids?
- In CountNeighboursJob, how does the algorithm determine how many cells are surrounding a boid that it needs to check for neighbours?
- What is the design pattern for retrieving all the values that match a given key in a NativeMultiHashMapIterator?
- Where does the algorithm store the neighbours for each Boid?
- What happens if a Boid has too many neighbours?
- In SeperationJob, what can cause the force to be NAN? How does the code check for this?
- How does Cohesion work?
- In AlignmentJob how are the forward vectors for each boid calculated?
- How is the desired forward vector calculated?
- How is the force generated?
- What algorithm does BoidJob use to combine the forces from the various behaviours together?
- How is the Boids rotation evaluated?
- In SpineSystem, what is the purpose of the WithNativeDisableParallelForRestriction annotation on the Entities.ForEach lambda?
- What jobs does SpineSystem schedule and what do they do?
- What parameters control the damping on the spine and what effect will changing these parameters have on the spines?
- What Native Containers does this job create?
- In HeadAndtailsSystem, what controls the speed of the procedural animation?
- How does the Head Animation work? Draw a diagram. What Unity API call is this system similar to?

- Thursday's class
- No class on Friday due to power cut
Fork and clone the ECS2020 repo. It has the code we worked on in Friday's class, with some improvements I made (we will talk about these on Thursday). The scene we worked on now looks like this:

Currently, there are 10K entities being created and destroyed. This is a pretty inefficient way to generate a terrain from perlin noise! Much better would be to create a single Entity with a mesh and update the mesh vertices in a job. I started work on implementing this approach in the branch mesh_deformation. I got a script online that generates a plane mesh. It's in the scene MeshDeformation. I added some Perlin noise to the mesh just to test that it was being generated correctly. You can try and finish the job by creating a single entity that renders the mesh and writing a job and a system to update the vertices. This will involve some looking at code and googling stuff! Here is what I suggest you do:
- Fork and clone the repo
- Checkout the mesh_deformation branch
- Create a new branch for your work called week8lab
- Look at the code in NoiseCube, you will see an example of how to create entities and how to write a system
- Create a system in the file meshController.cs and call it MeshDeformer
- Create a component with no fields, an archetype and an entity
- Create a NativeArray of type Vector3 to hold the mesh vertices
- Write a a job that iterates over the NativeArray and updates the vertices
- Every frame, copy the NativeArray of vertices back to the mesh
Someone has done something similar with jobs, but not entities in this repo, so might be worth having a look.
- Learn how to use the state machine design pattern
- Learn how to draw a FSM diagram
- Get the ECS examples working
In this video are the two autonomous agents we programmed in Friday's class with some enhancements and additional states you can make today:

The blue agent goes between Patrol and Defend states. In Patrol state, the agent will follow it's path. In defend state, it will fire at the green agent until either it runs out of ammunition or the green agent goes out of range. The green agent will go between it's Attack state, where it will fire at the blue agent or Flee state where it will flee from the attacking blue agent.
If an agent runs out of ammunition it will locate and pickup the nearest ammunition. These are tagged with "Ammo".
If an agent gets below 2 health, it will locate and pickup the nearest health. These are tagged with "Health".
The spawning system keeps 5 health and 5 ammo in the scene at all times.
If an agent gets to 0 health, it goes to the Dead state. In Dead state, the state machine gets turned off and all the steering behaviours get disabled.
Update your forks of the repo from my master branch and make a branch for your work today. All the above is in a scene called StateMachines. The states are in the file States.cs.
To complete the lab:
- Make an Alive state that checks health and ammo levels and transitions to GetHealth, GetAmmo or Dead as appropriate
- Make this the Global state for each agent
- Make GetHealth, GetAmmo states with Enter, Think and Exit methods. When transitioning out of GetHealth and GetAmmo, use RevertToPrevious in order to implement these as state blips.
- Modify Attack and Defend states so that they remove ammo when shooting
- Draw state transition diagrams for both agents.
Other things to try:
- Modify the targeting
- Try Evade instead of flee
- Make the agents opportunistic. I.e. An agent will not only seek health or ammo when it gets low, instead if an ammo or health happens to come in range, the agent will try to get it
- Increase the complexity of the scenario by adding additional states
In case you are curious, here is the video of Psytrance Music Visualiser:
And here is a blog post with some screenshots. It is one of the Entity Component System samples I am putting together for the course. It generates a great variety of beautiful spirals and can be beat tracked to the audio.
You can check out the repo in advance of this weeks class.
- Submit the github repo for your assignment
- Make a behaviour called Constrain that keeps a boid inside a sphere of interest. If the boid goes outside the sphere, generate a force to push the boid back towards the centre of the sphere.
- Make some creatures with NoiseWander, Harmonic, Constrain and the SpineAnimator
A few ideas for todays lab!
- Clone this repo and check out my ECS experiments. If you feel like a challenge, fix the bug in the Life scene. In this scene I am attempting to program a 3D cellular automata (like the Game of Life) in 3D
- Try this lab test
- Work on your assignment. The first deliverable is due next week
- Try this lab test from 2018 about Offset Pursue. No need to clone the repo as it has the solution in it!
- Video of Thursdays class about SOLID principals & refactoring
- Video of Fridays class about Offset Pursue
You could use the lab class to work on your assignment - get 3D models imported and flying around or here is an exercise you can do that uses the pursue behaviour we worked on last week:
Update your fork of the course repo to get the Pursue code we wrote in the class on Friday.
Create a new scene and make this predator prey simulation. The prey will follow a path until the predator comes into range. When the predator is is range the prey will attack the predator by shooting at it. It only shoots at the predator if it is inside the field of view. The predator will get close to the prey, but will flee from the prey if the prey attacks it. You can use colliders and then disable and enable certain behaviours to implement the simulation.

To draw the "Lazers" you can use Debug.DrawLine from Update or you could use a LineRenderer
Update your fork of the repo with the latest code from the master branch of my repo. To do this, cd to the folder where you have your fork cloned and type:
git checkout master
git pull upstream master
This will get the code we wrote last week. Open the Seek scene and you will see a boid that implements seek and arrive behaviours in the BigBoid.cs class. Today you can implement a path following behaviour for the boid.
Create a branch for your work today:
git checkout -b lab2Check out this video:
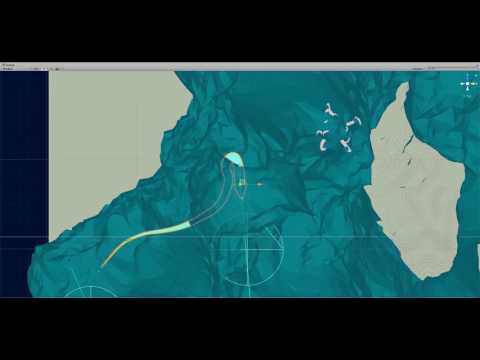
The scene contains a game object object with a script called Path attached. The path script implements the method OnDrawGizmos to draw lines between the waypoints on the path and to draw a sphere at each of the waypoints. The blue box is following the path. Today you can try and program this behaviour.
- Implement the
Pathscript that contains apublic List<Vector3> waypointscontaining the waypoints. The 0th waypoint should be the position of the path gameobject itself and the positions of the attached children should be used to set the subsequent waypoints. You can populate this list inAwake. - Add a bool flag on the
Pathclass calledIsLoopedto indicate whether the path should loop back to the 0th waypoint when the Boid reaches the last waypoint. If this flag is set to be false, then don't draw a line gizmo back to the 0th waypoint. - In the scene, create a path using the
Pathscript you made. - Add a a public field to the BigBoid class for the Path and drag the Path you made onto this in the Unity editor.
- Now write code for a behaviour in BigBoid called
FollowPathto get the Boid to move from waypoint to waypoint on the path using Seek and Arrive. If theIsLoopedflag is true on the path, then the Boid should Seek the 0th waypoint again when it reaches the last waypoint. If this flag is set to be false, then the Boid should Arrive at the last waypoint. You will need to add a method called FollowPath and a boolean flag to indicate that the FollowPath behaviour is enabled.
- Implement a behaviour called
Fleethat causes the BigBoid to flee from a target when the target comes in range. To do this, add a method calledFleeand a bool flag calledFleeEnabledon the BigBoid class. You will also have to update theCalculateForcesmethod. Set up your scene with a target game object and move the target around the scene and make sure the Flee force gets activated when the target comes in range.
- No lab this week