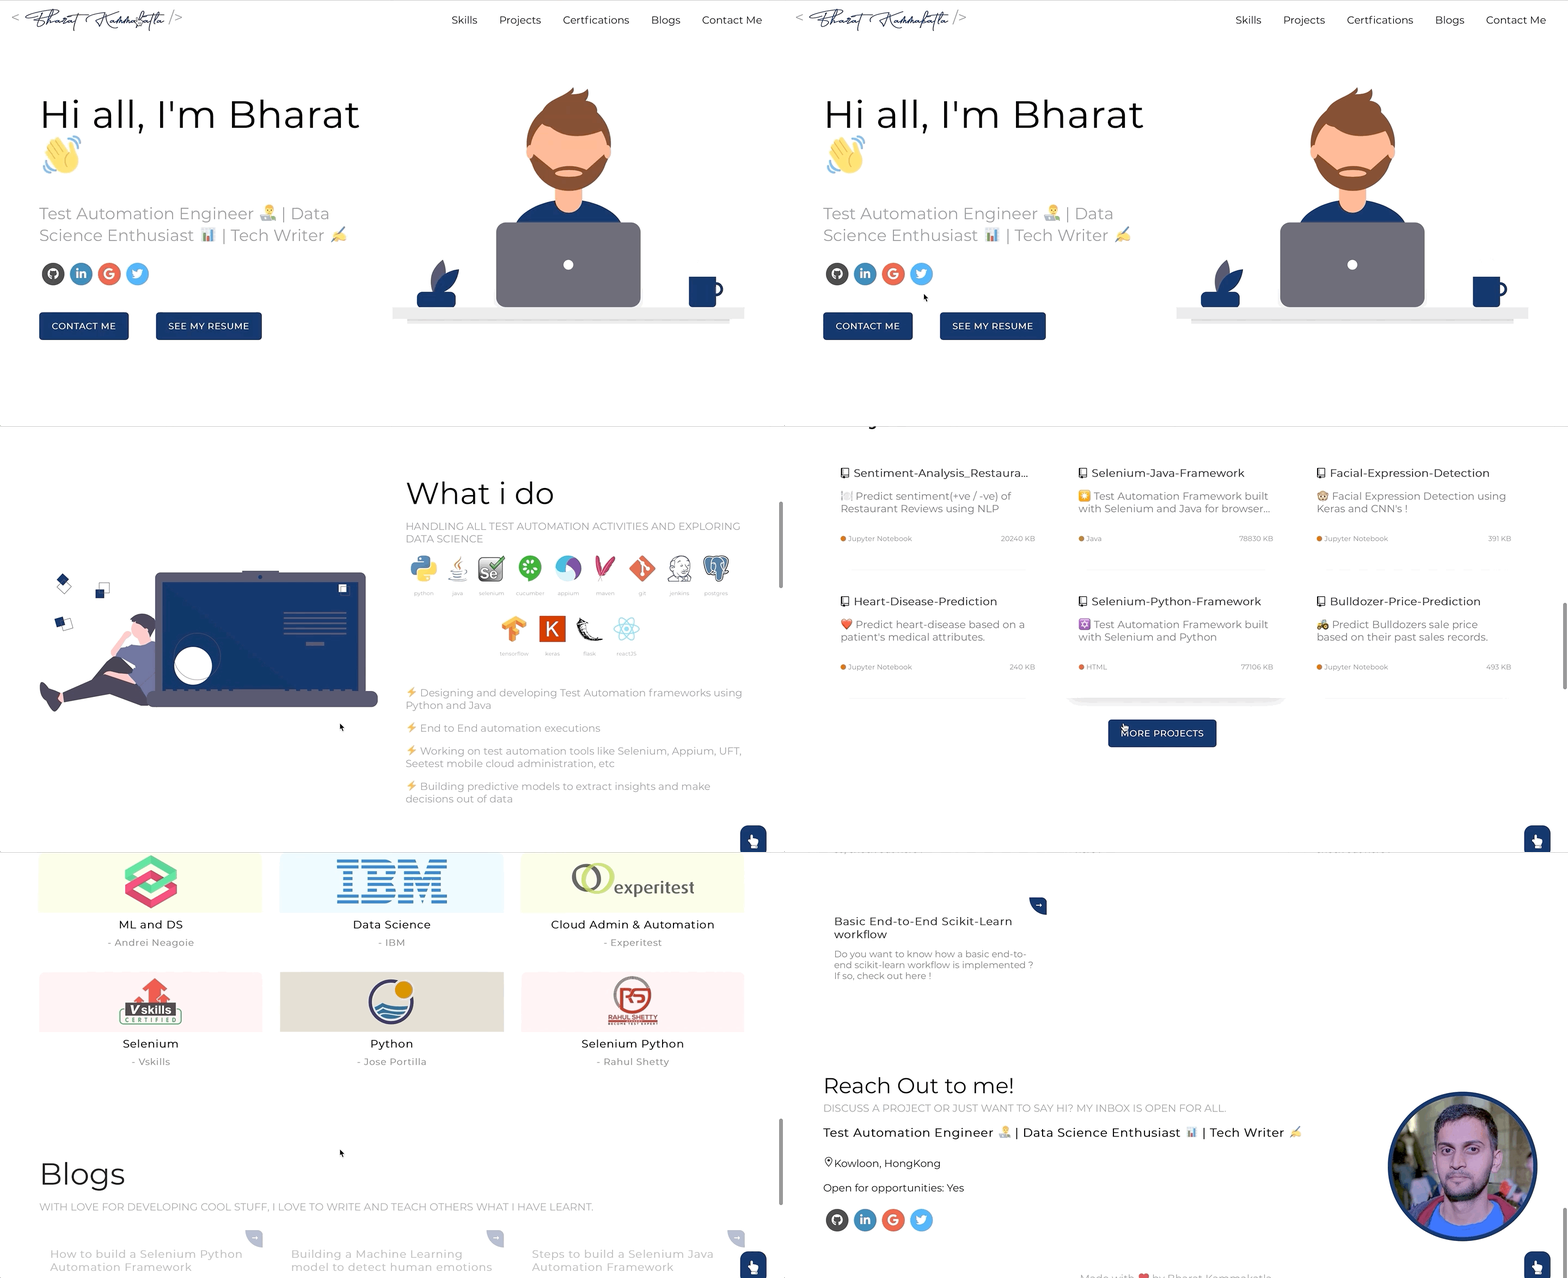
Just change src/portfolio.js to get your personal portfolio . Feel free to use it as-is or customize it as much as you want.
✔️ Summary and About me
✔️ Skills
✔️ Projects
✔️ Certificates
✔️ Blogs
✔️ Contact me
✔️ Github Profile
To view a live example, click here
These instructions will get you a copy of the project up and running on your local machine for development and testing purposes.
You'll need Git and Node.js (which comes with npm) installed on your computer or use Docker.
node@v10.16.0 or higher
npm@6.9.0 or higher
git@2.17.1 or higher
1) BUILD IMAGE : docker build -t developerfolio:latest .
2) RUN IMAGE: docker run -p 3000:3000 developerfolio:latest
From your command line, clone and run developerFolio:
# Clone this repository
$ git clone https://github.com/BharatKammakatla/Developer-Portfolio.git

# Go into the repository
$ cd developerFolio

# Install dependencies
$ npm install

#Start's development server
$ npm startGenerate a Github personal access token using these Instructions Make sure you don't select any scope just generate a simple token
- Create a file called .env in the root directory of your project.
- DeveloperFolio
  - node_modules
  - public
  - src
  - .env         <-- create it here
  - .gitignore
  - package-lock.json
- package.json- Inside the .env file, add key
REACT_APP_GITHUB_TOKENand assign your github token like this.
 // .env

  REACT_APP_GITHUB_TOKEN = "YOUR GITHUB TOKEN HERE"

};
Set showGithubProfile to true or false to show Contact Profile using Github, defaults to false.
Note: Projects section only show pinned items of your Github. If you are seeing this, please follow this Instructions.
/* Change this file to get your Personal Porfolio */

For example: To change greeting section just update the below block with your details:

const greeting = {
  /* Your Summary And Greeting Section */
  title: "Hi all I'm Bharat",
  subTitle: emoji("Software Developer 🚀 | Test Automation Engineer ⚙️ | Data Science Enthusiast 🎓"),
  resumeLink: "https://drive.google.com/file/d/1ofFdKF_mqscH8WvXkSObnVvC9kK7Ldlu/view?usp=sharing"
};

const socialMediaLinks = {
  /* Your Social Media Link */
  github: "https://github.com/bharatkammakatla",
  linkedin: "https://www.linkedin.com/in/bharatkammakatla/",
  gmail: "bharatkammakatla@gmail.com"
};

Similarly, you can also update all other sections.

const skillsSection = { .... }

const techStack = { .... }

const workExperience = { .... }

const openSource = { .... }

const bigProjects = { .... }

const achievementSection = { .... }

const blogSection = { .... }

const contactInfo = { .... }

const twitterDetails = { ... }For adding emoji 😃 into the texts in Portfolio.js, use the emoji() function and pass the text you need as an argument. This would help in keeping emojis compatible across different browsers and platforms.
When you are done with the setup, you should host your website online. We highly recommend to read through the Deploying on Github Pages docs for React.
This section guides you to deploy your portfolio on Github pages.
-
Navigate to
package.jsonand enter your domain name instead ofhttps://bharatkammakatla/inhomepagevariable. For example, if you want your site to behttps://<your-username>.github.io/developerFolio, add the same to the homepage section ofpackage.json. -
In short you can also add
/devloperFoliotopackage.jsonas both are exactly same. Upon doing so, you tellcreate-react-appto add the path assets accordingly. -
Optionally, configure the domain. You can configure a custom domain with GitHub Pages by adding a
CNAMEfile to thepublic/folder. -
Follow through the guide to setup GitHub pages from the official CRA docs here.
You could also host directly with Netlify by linking your own repository.
For more information, read hosting on Netlify.
This project is licensed under the GPL-3.0 License - see the LICENSE file for details
Thanks goes to these wonderful people (emoji key):
Saad Pasta |
Kartik Choudhary |
Naveen M K |
