✨ Updated October 2020: As we have introduced some new features, this tutorial and the code samples have been updated! All the changes from the previous version of this example, read the DIFF.md
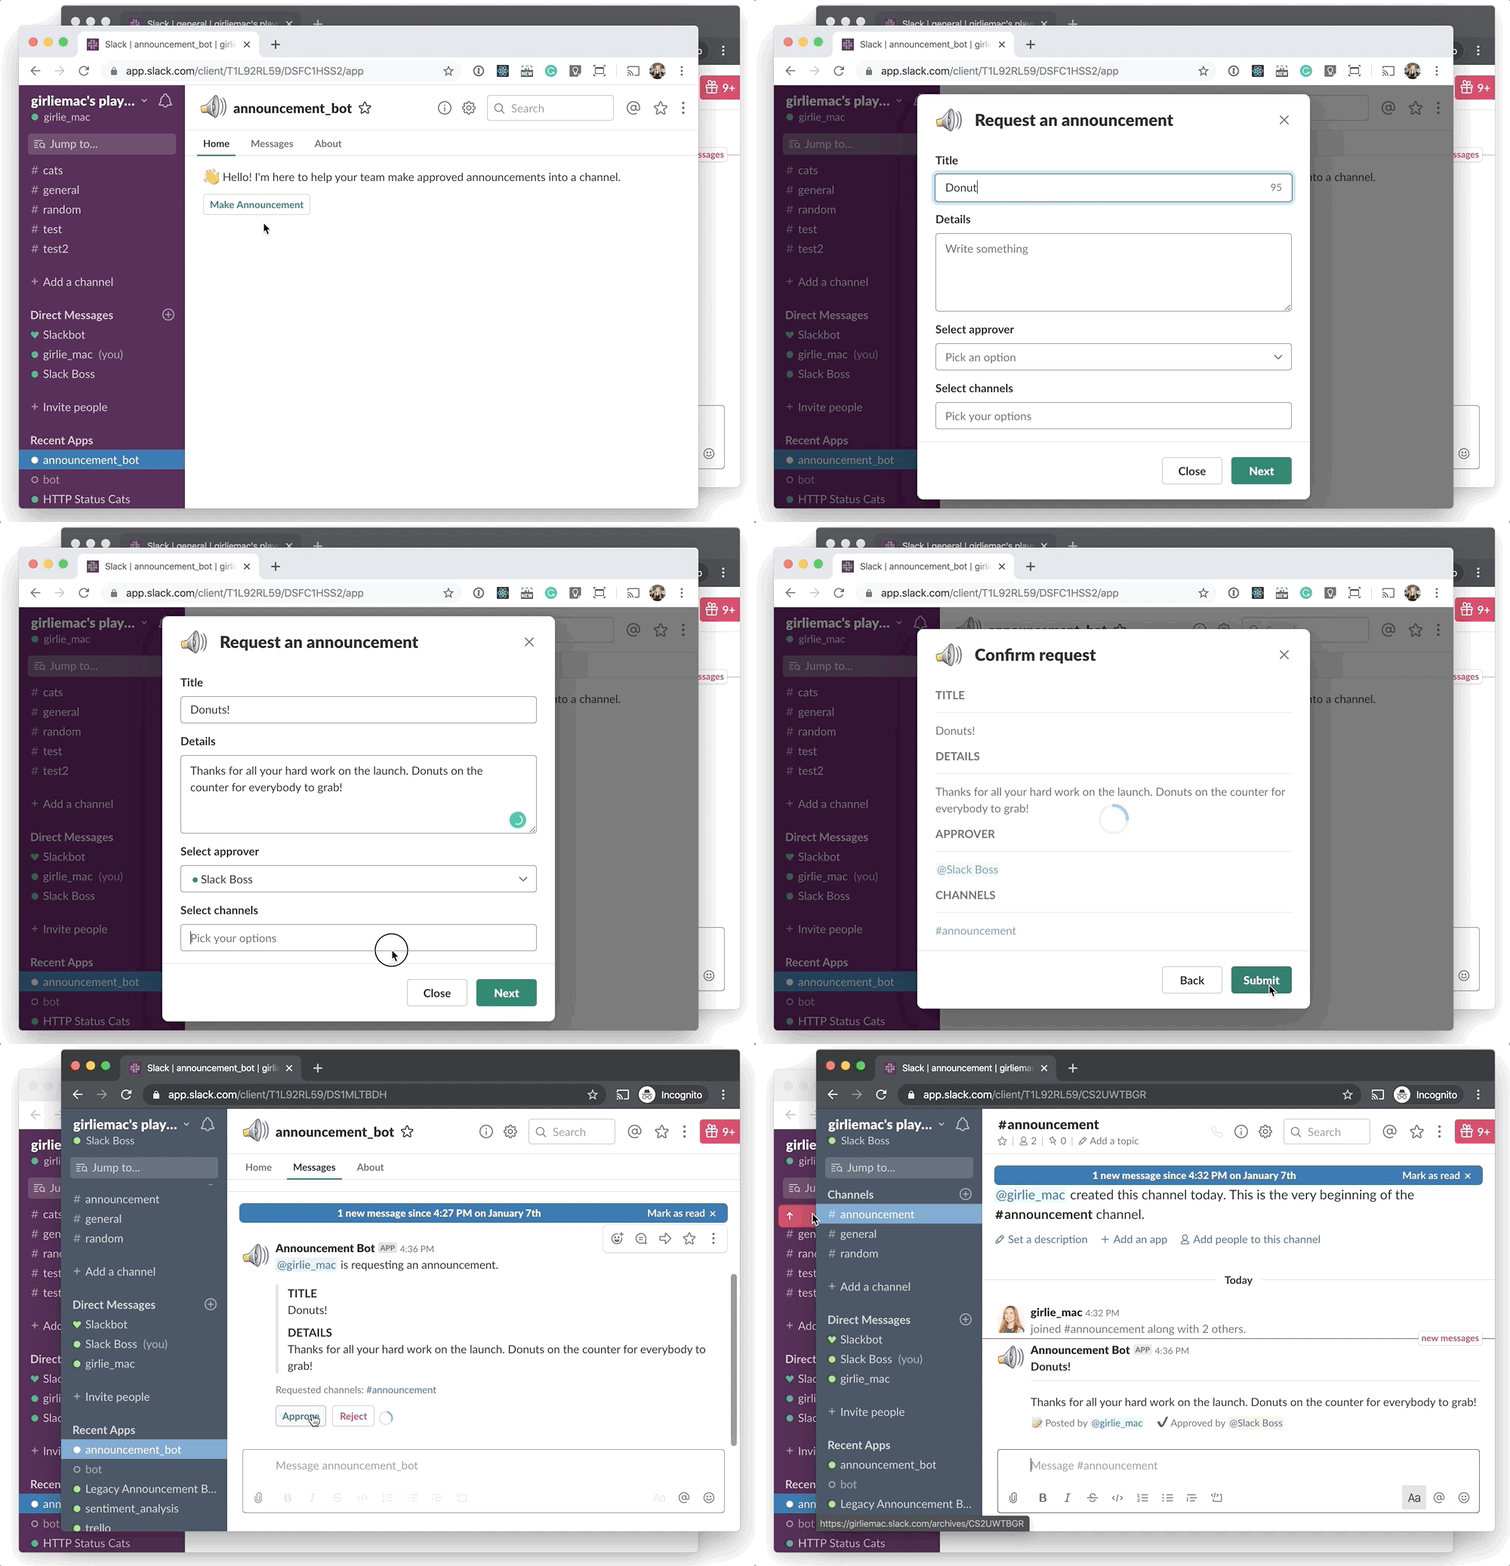
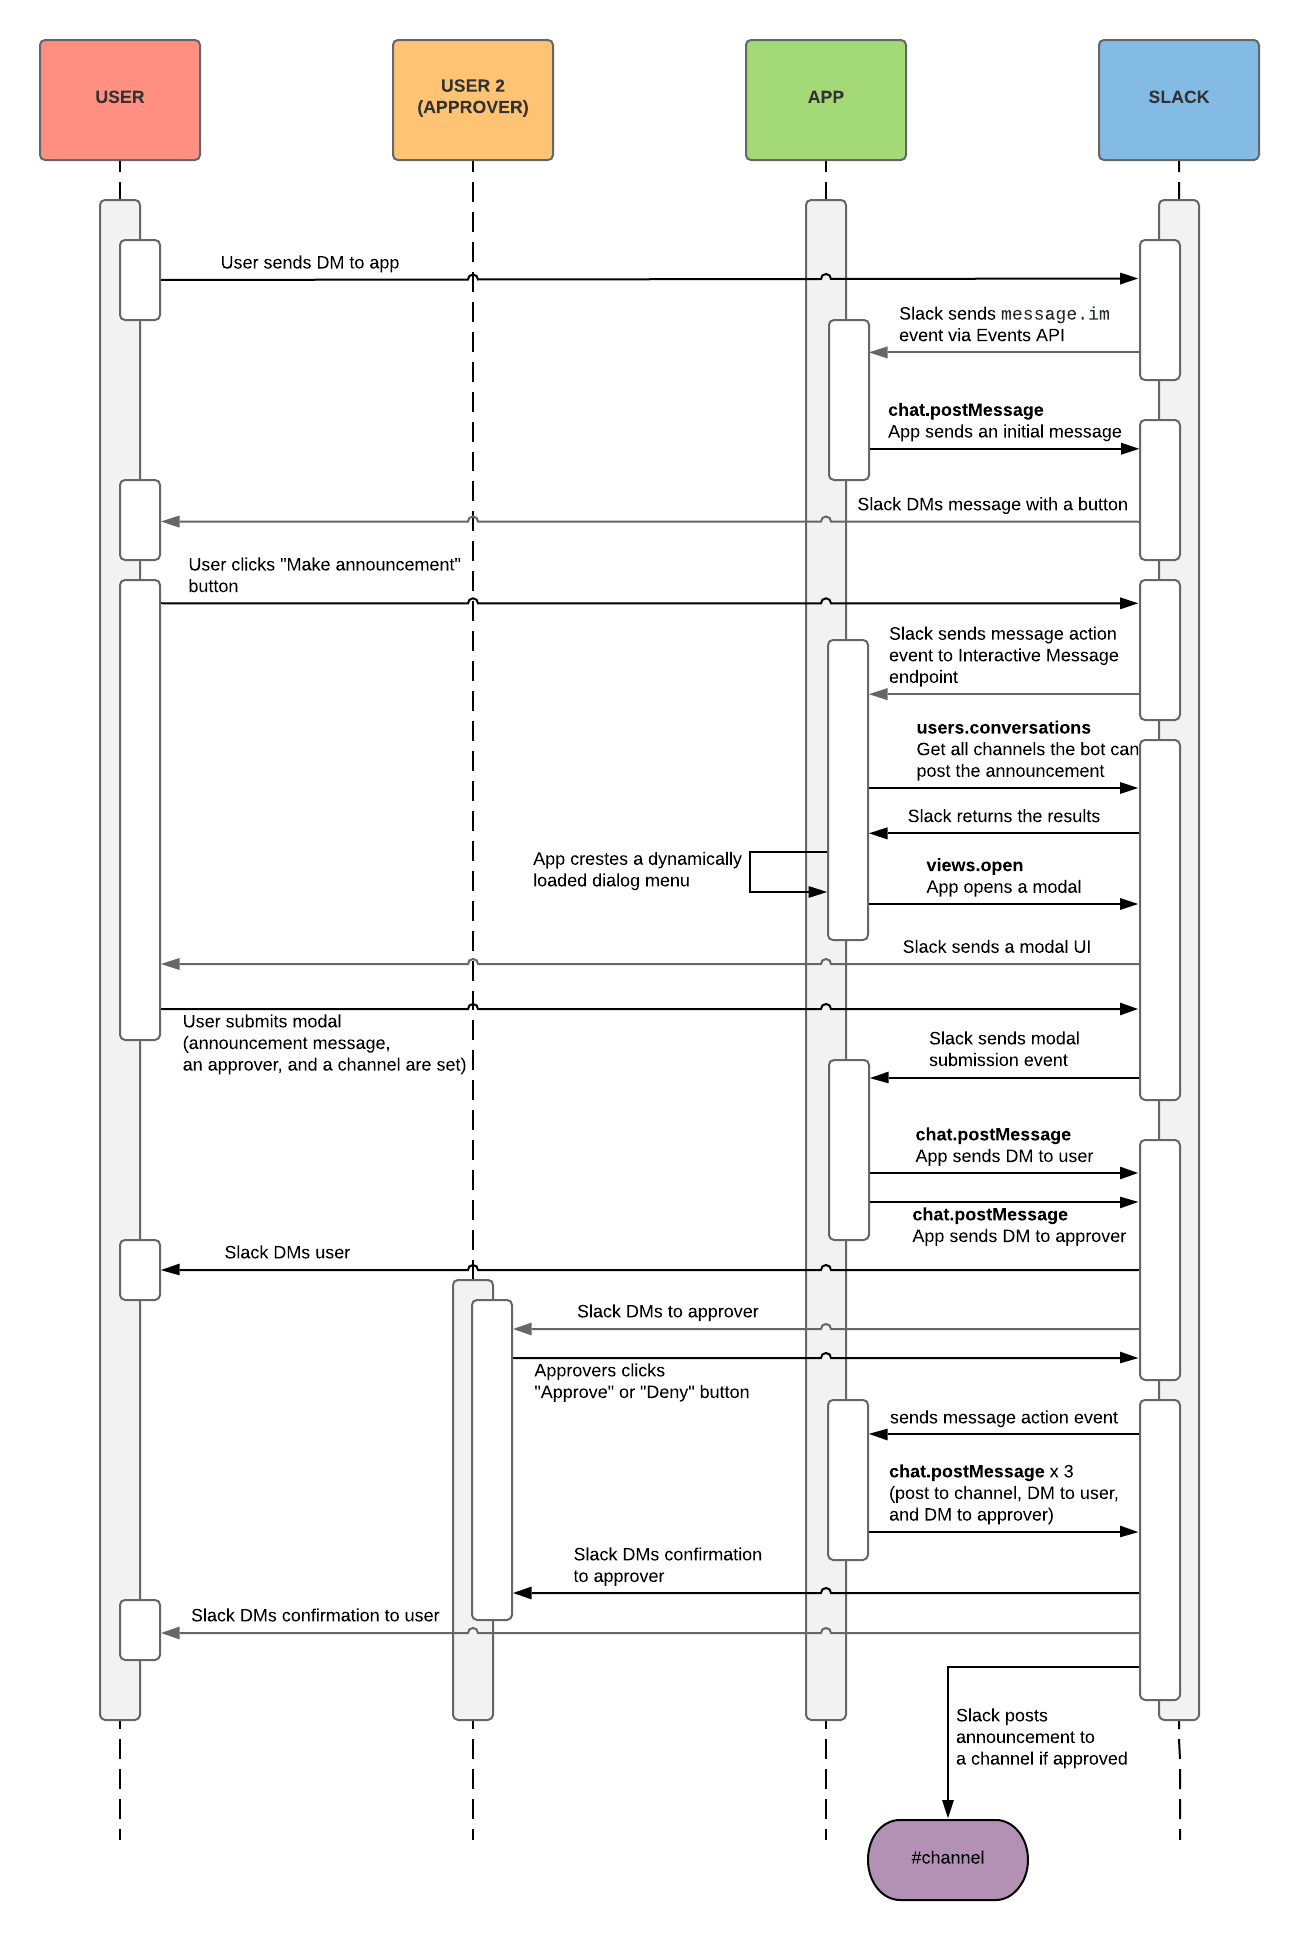
This app lets its bot to post an approved message into a public channel- A user DMs to bot to create an announcement, and once it is approved by another user, the message will be posted to public.
User A ("girlie_mac") wants to announce about donuts on #random channel, and User B ("Slack Boss") approves it:
This app uses:
- Web API
chat.postMessageto post messagesconversations.opento send direct messages from the bot to a userusers.conversationsto get channels the bot user is a member ofviews.publishto publish a view to the Home tabviews.opento open a Block Kit modal and collect information for the announcement to be sentconversations.historyto view historical messages between the bot and user
- Events API
message.imto see when a DM message is sent - Block Kit messages with interactive buttons
- Block Kit Modals API with dynamic menus
Clone the repo (then npm install to install the dependencies), or if you'd like to work on Glitch, remix from the button below:
- Create an app at api.slack.com/apps
- Navigate to the OAuth & Permissions page and add the following Bot token scopes:
channels:readchat:writeim:writeim:history
- Enable the events (See below Enable the Events API)
- Enable the interactive messages (See below Enable Interactive Messages)
- Enable App Home (See below App Home)
- Click 'Save Changes' and install the app (You should get an OAuth access token after the installation
- Click on Events Subscriptions and enable events.
- Set the Request URL to your server (or Glitch URL) +
/events(e.g.https://your-server.com/events) - On the same page, go down to Subscribe to Bot Events section and subscribe to these events
message.imapp_home_opened
- Save
To enable interactive UI components (This example uses buttons):
- Click on Interactive Components and enable the interactivity.
- Set the Request URL to your server (or Glitch URL) +
/interactions
To dynamically populate a drop-down menu list in a dialog (This example uses a list of channels):
- Insert the Options Load URL (e.g.
https://your-server.com/options) in the Message Menus section - Save
To enable App Home:
- Click on App Home and make sure both
Home TabandMessages Tabare enabled.
Set Environment Variables and run:
- Set the following environment variables in
.env(copy from.env.sample):SLACK_ACCESS_TOKEN: Your app'sxoxb-token (available on the Install App page after the installation)SLACK_SIGNING_SECRET: Your app's Signing Secret (available on the Basic Information page)
- If you're running the app locally:
- Start the app (
npm start)
- Start the app (
On Slack client, "invite" your bot to appropriate channels. The bot cannot post messages to the channels where the bot is not added.


