Abusing Conveyors For Fun and Profit
Some say conveyors are the most boring way to move resources around in Voxel Tycoon. I find them incredibly fun, and I've gotten kinda burnt out on trains over tens of hours of Railway Empire. Here's my guide to abusing conveyors to their maximum potential.
Let's start with the fundamental definition we'll need for our conveyor shenanigans.
Saturation - a node in a conveyor network is saturated when it receives resources at a rate equal or higher to the rate it consumes or outputs them. You should keep every end node of your conveyor network at saturation! On the other hand, if an intermediate node is saturated but the end node isn't, you've got a bottleneck, and will have to expand the intermediate node to stop it from hurting your efficiency. If you have a warehouse with two saturated inputs but only one output, then either one of the inputs is unnecessary, or you need to build another output.
That's the first rule of conveyor abuse: keep your end nodes saturated, and expand intermediate nodes to avoid bottlenecks. Your warehouses and conveyors should be filling up from the outermost ones inward. If your final warehouse isn't yet completely full, all the warehouses on the way to it should be holding exactly 0 resources, and instead immediately outputting everything that gets put in them.
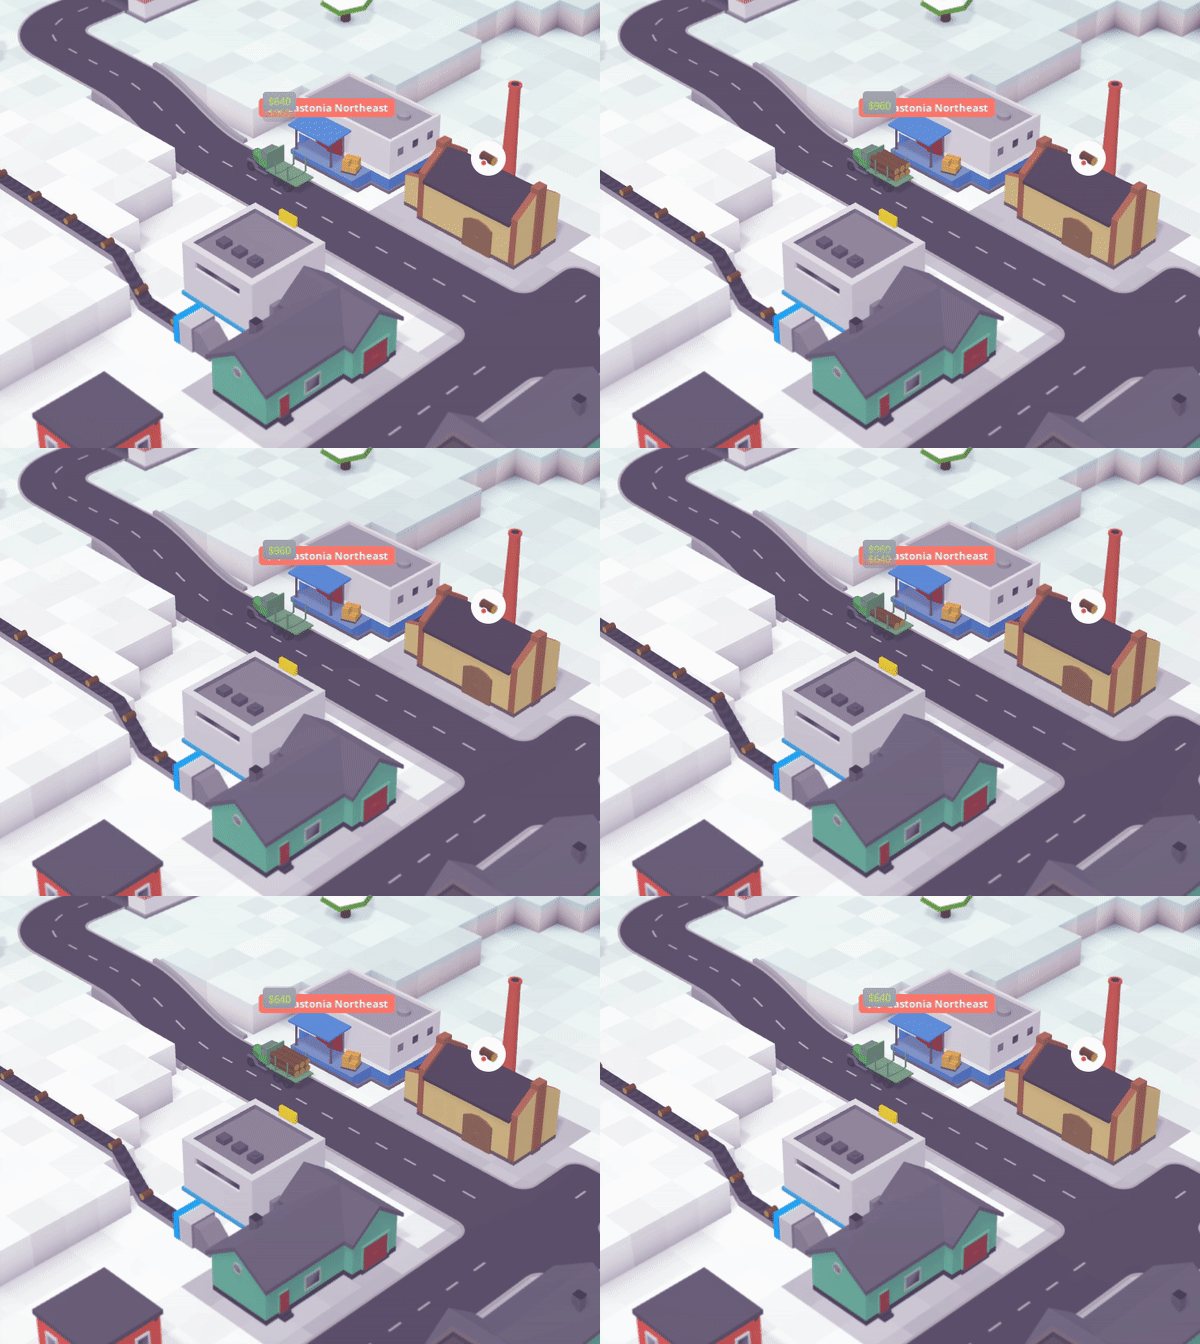
Three resource mines saturate one conveyor. You can see this clearly in the gif at the top of this guide - the conveyor is connected to a single sawmill, and there is about two logs' worth of room between every log on it.
A warehouse connector output doesn't saturate a conveyor! You can still fit some more resources on the output of a warehouse. Four outputs do saturate three inputs, so the ideal ratio is probably something like a 5:4.
Here are the basic buildings you'll need to make use of:
-
Conveyors
Of course. These do one simple thing - they move resources. A conveyor that splits into two will divide resources somewhat equally between them. This does mean that if you want to divide resources from an unsaturated line equally, you have to structure your conveyor network like a binary tree, not chain them:
Bad: v input | | +--- this branch receives 50% of the resources | the other 50% goes straight down | +--- this branch receives 50% of the 50%, so 25% of the resources | the other 25% goes straight down | +--- this branch receives 12.5% of the resources | the other 12.5% goes straight down etc ... Good: +-- 25% 50% | +--+ | | input | +-- 25% >------+ | +-- 25% | | +--+ 50% | +-- 25% -
Connectors
Connectors are the end nodes of every conveyor line. A connector is three tiles long, but the third tile is a conveyor and can overlap with existing conveyors (but not connectors) - so, if you want to place a connector at the end of a conveyor line, it must be attached to a building that is at least two cells away from the conveyor. If you want to build two connectors facing each other, you must leave six cells of room between the buildings they'll be attached to.
-
Warehouses
Warehouses serve as resource storage that road terminals can take resources out of, but for our purposes they have another extremely important use - they serve as buffers to extend the range of conveyors. Note that there are actual conveyor buffers (in the Decorations category), but I find them inelegant to use and annoying to expand later on.
A basic warehouse buffer is just a warehouse with as few or as many inputs and outputs as you need. A maximum throughput buffer looks like this:
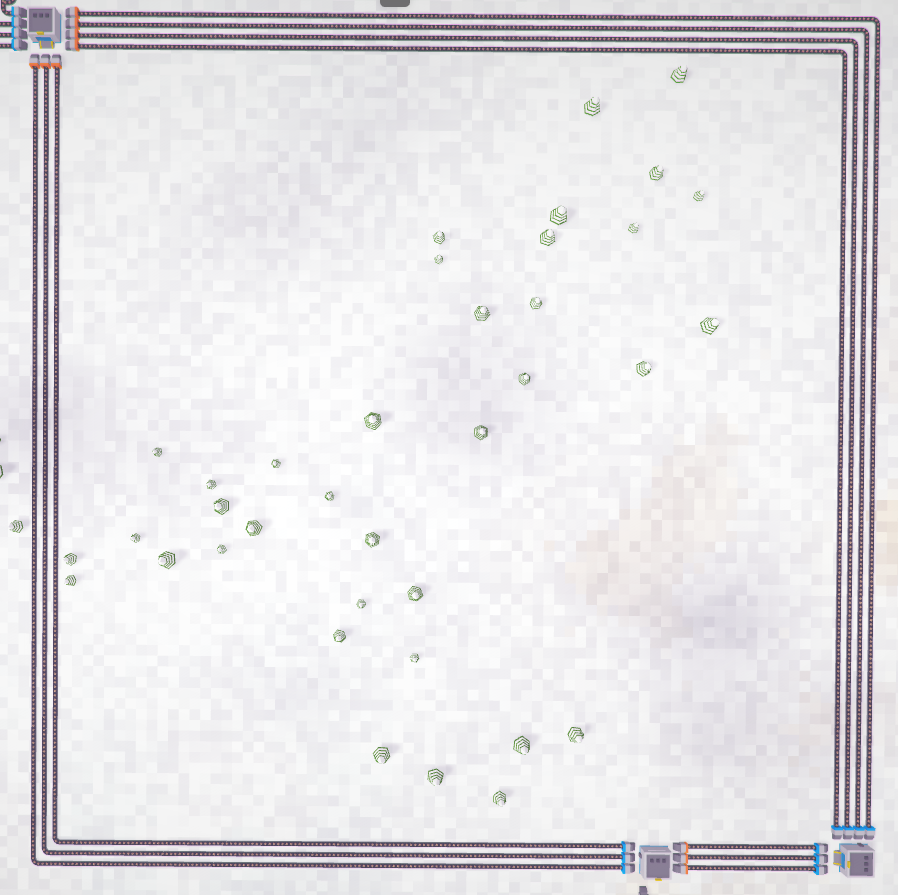
Note that warehouses are a 4x3 rectangle, and so they can have at most 14 connectors (4+4+3+3). To build a max-length buffer, start with the outermost connector on the four-wide side, drag it out to its maximum horizontal length, then go down/up to its maximum vertical length, and build your next warehouse two cells down from there. Make sure the orientation is correct - every buffer warehouse should be offset 90 degrees from the previous one (so that the four-wide sides are connected to the four-wide sides, and ditto for the three-wide ones).
To branch off a buffer, just place a warehouse somewhere on the way. Just make sure the sides match up.
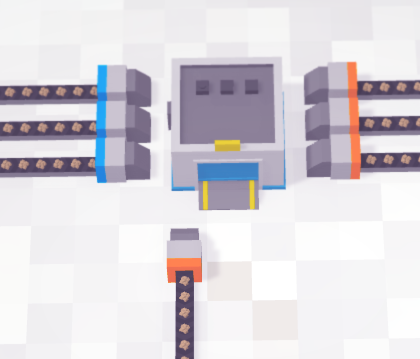
If you reverse the direction of half of a buffer, you've built a conveyor loop! They're like bidirectional buffers - they keep resources distributed between all of their outputs, and take them from all of their inputs. If you build your entire conveyor network using conveyor loops, you can take inputs from anywhere, and they will be distributed to every end node in the network that isn't saturated - and you'll appreciate that with how fast you're going to be burning through resource deposits!
-
Mines
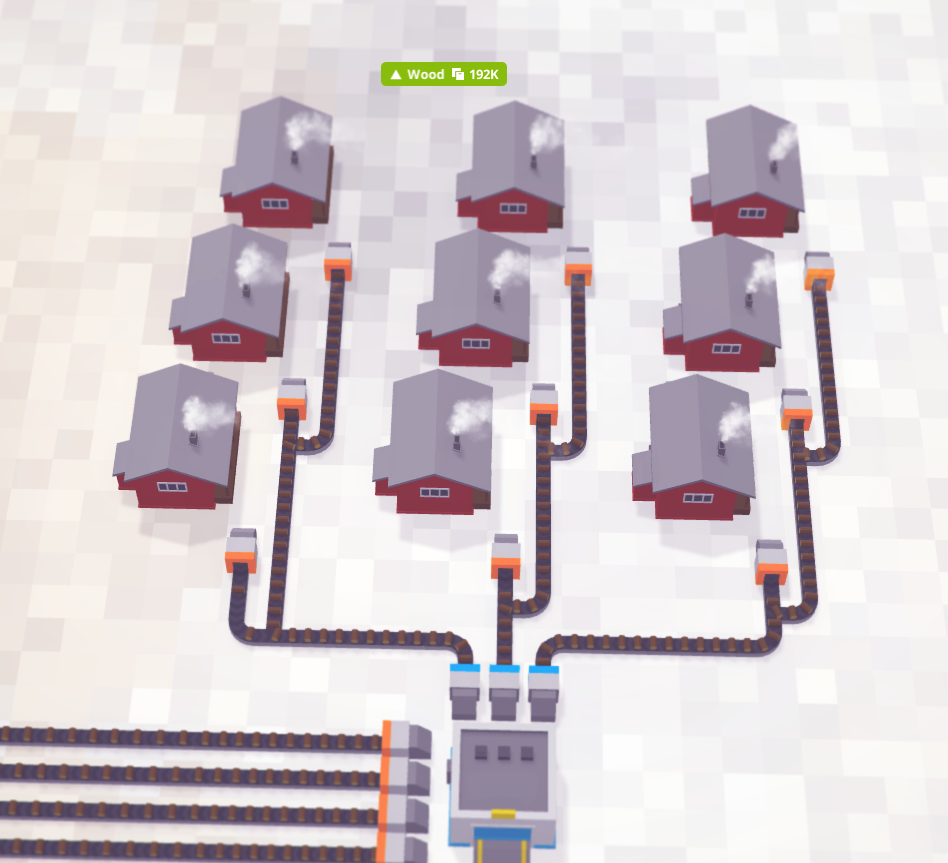
Mines dig up and output resources via connectors. A mine outputs slightly less than a third of the conveyors' saturation rate and pretty much exactly a third of the connector input's saturation rate, so it doesn't make sense to have more than three mines per connector. Here's what an example setup looks like:
-
Terminals
Terminals are where the magic happens.
Terminals have to be set up in range of a store and a warehouse with the resource demanded by the store. You then buy the cheapest truck that can carry the given resource, set its schedule to load and unload repeatedly at that same terminal, and watch it sit there for the rest of its sorry existence loading and unloading the same resource over and over, making you loads of sweet, sweet money.
For that very reason, terminals should be built out of the way - trucks are too dumb to path around the other trucks that are parked at the terminal forever, and if they try to path through them, they'll just get stuck there waiting for the other truck to move - which it will never do. If this happens, just send the stuck truck back to the garage, remove the road that it tried to path through, and send it out again.
Ideally, you'll also want to block off the road with a piece of rail or conveyor, to make sure when the cities expand they don't make your road lead anywhere. Here's what an average terminal looks like:
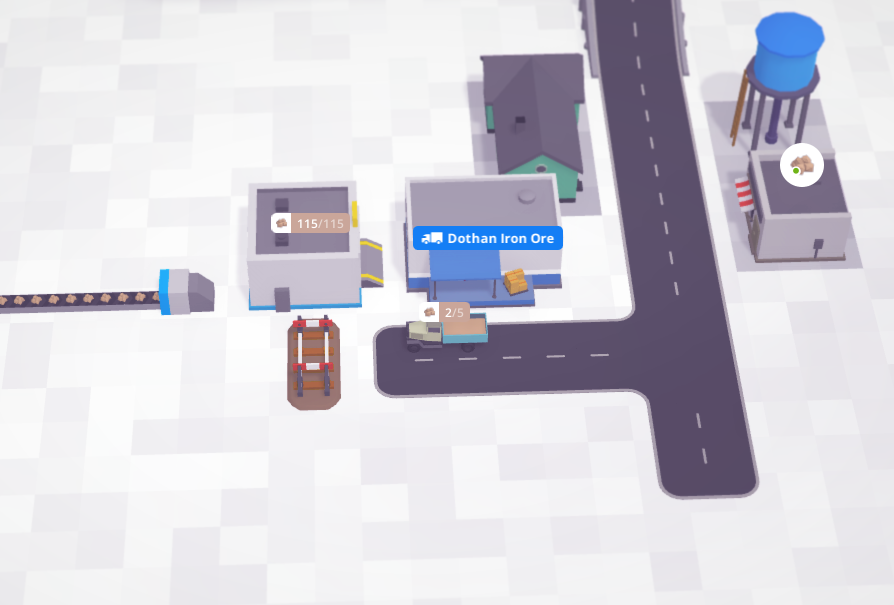
Since the trucks are parked there forever, you want to have one terminal per store.
-
Factories
Factories are resource processors - they take in one or more resources, and output something else. While using some of them is dead simple (circular saws - just dump resources into it), some take more deliberation. Keep in mind the ratio at which they consume resources! If it takes five of resource A and two of resource B for a factory's recipe, you'll need to supply them at a 5:2 ratio - keep that in mind when building conveyors. You'll need just a single coal conveyor for every five iron ore conveyors when setting up iron bar smelters!
The consumption and production rates for all factories seem to be around the same, with a single saturated input being able to supply around six to eight factories. Seven is a safe bet, because it's better to have a couple underutilized factories than to create bottlenecks. Remember the first rule!
For circular saws, this means you're concerned only with output saturation rates - three circular saws making planks slightly undersaturate an output, while a fourth one oversaturates it. For this reason, I recommend seven saws and two output conveyors per input when making planks, and seven saws with a single output conveyor per input when making wood beams. For iron bar smelters, that means you'll want about five iron ore inputs, thirty five smelters, and five output conveyors per coal input for maximum efficiency.
Speaking of smelters, they're possibly the most tricky factory to use, due to their T shape. Here's how I build my smelter clusters for them to be 100% space efficient:
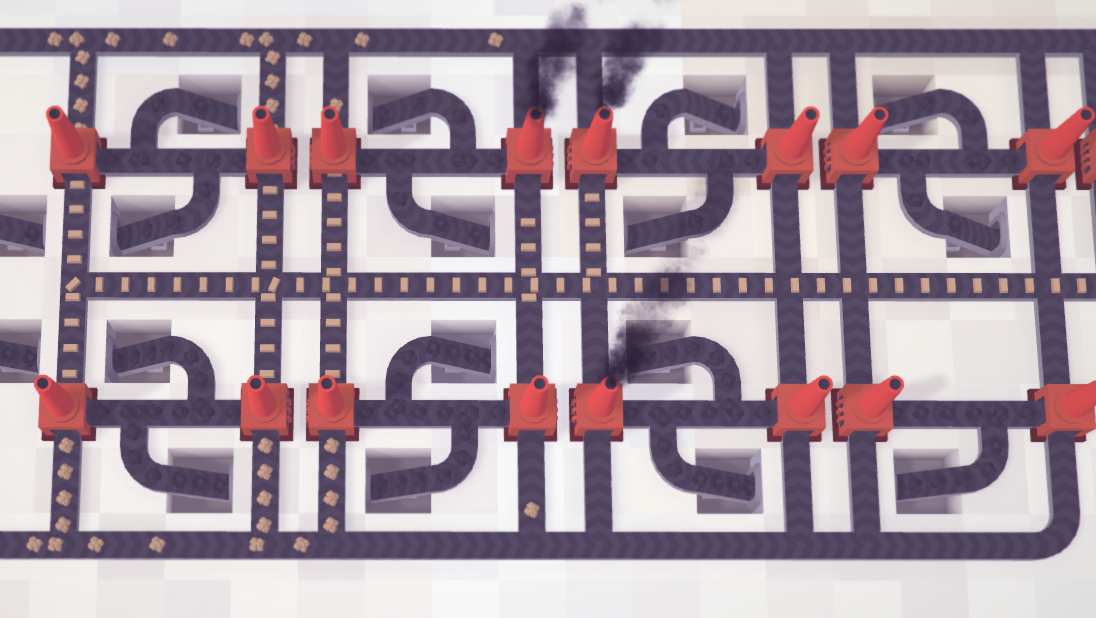
Here is how to build the cluster. This is the most basic segment of the cluster:
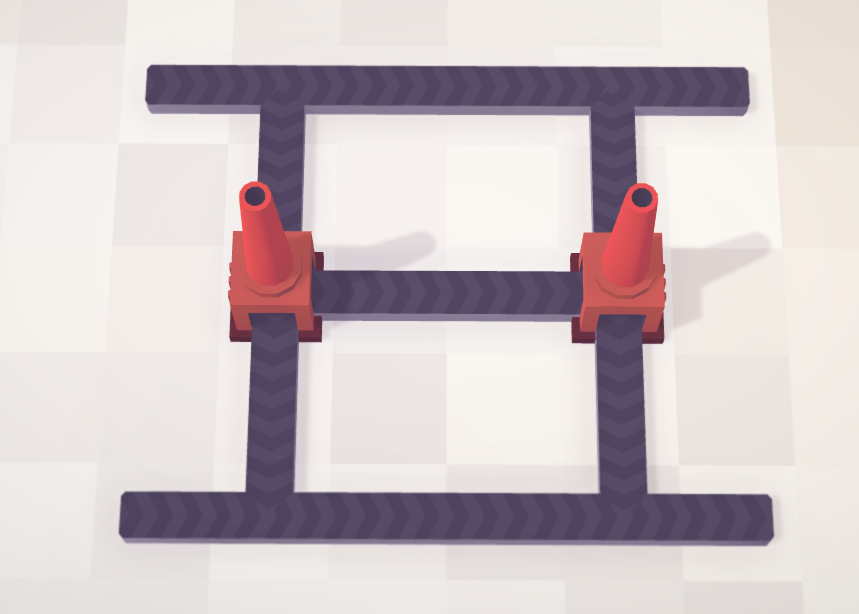
You can use any of the three conveyor lines for any of the three resources. I usually use the middle for coal, and the other two for iron ore and iron bars. This segment can be mirrored forever in both directions to expand your network. Here's how to connect them up, since building conveyors in that small, one-cell-wide space is a bit tricky.
First, select your conveyor tool and click on the empty space closest to your new segment. Press T to switch to tunneling mode (or B for bridges, if that's what you prefer! Bridges are a bit nicer, because then you can tunnel a different conveyor line under the entire cluster instead of having your bridges be limited by the space between smelters)
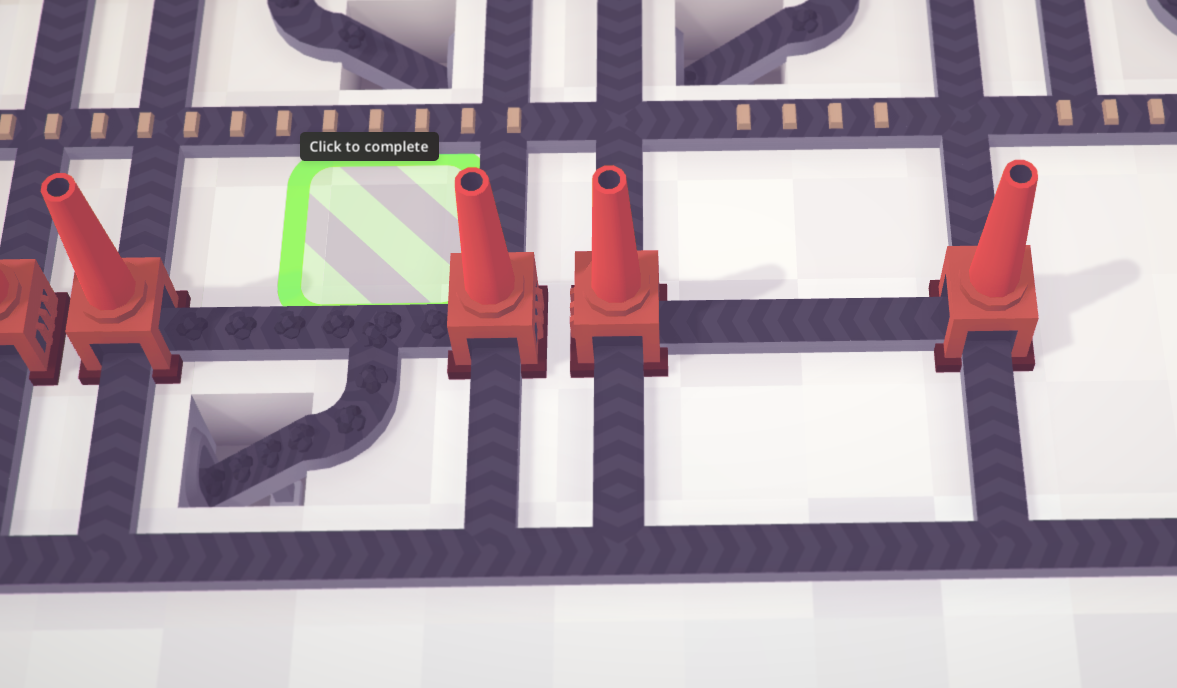
Click on that cell to build a single-cell bridge or tunnel start point. Then drag it over to the right and click again to build it:
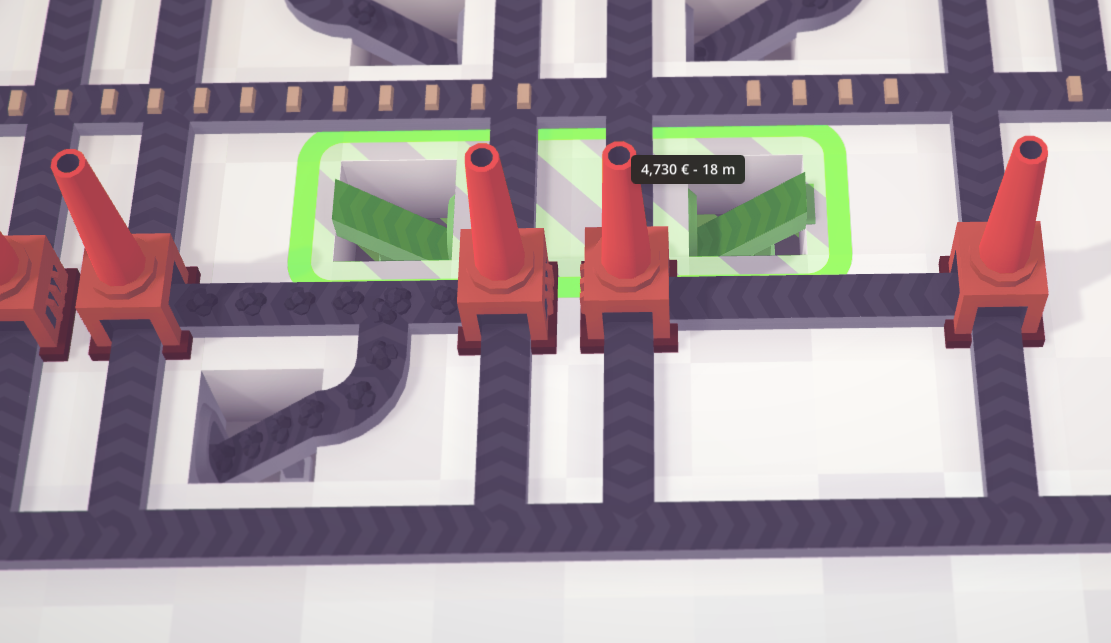
Then click on either the tunnel end point or the cell you're going to connect it to and connect your bridge to the smelters.
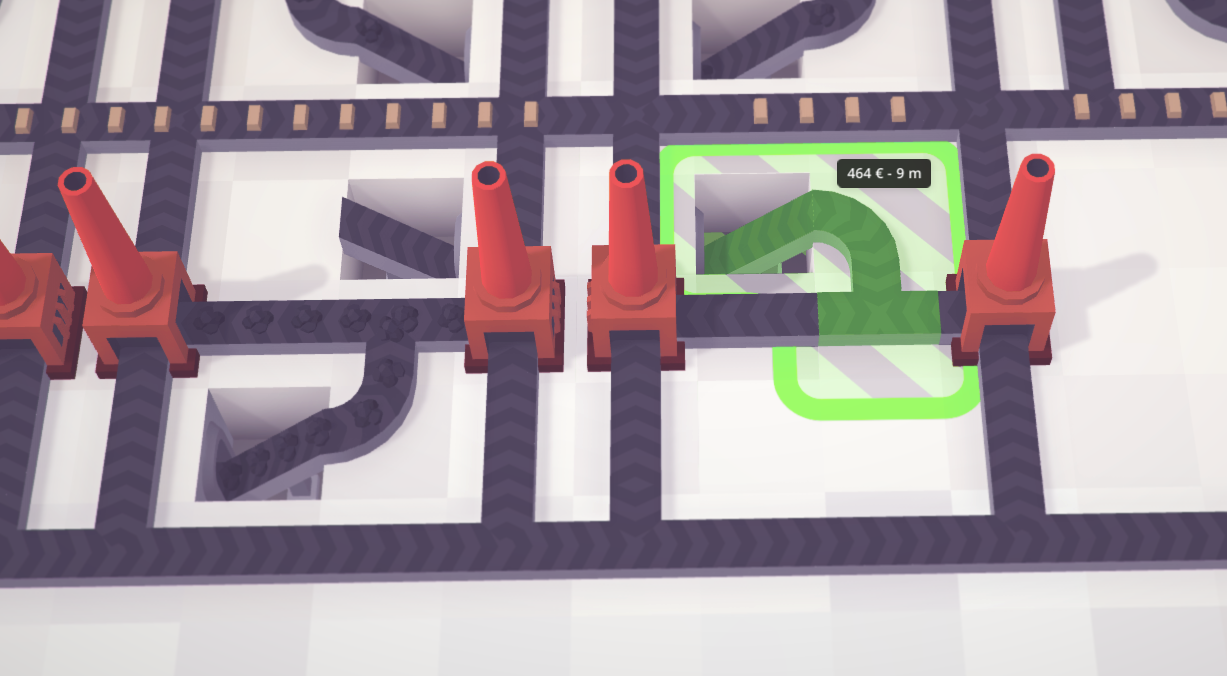
Make sure that your conveyors are going in the right directions! Bonus points if you spotted that a segment going up into one of the smelters on the last three screenshots is pointing the wrong way :)
