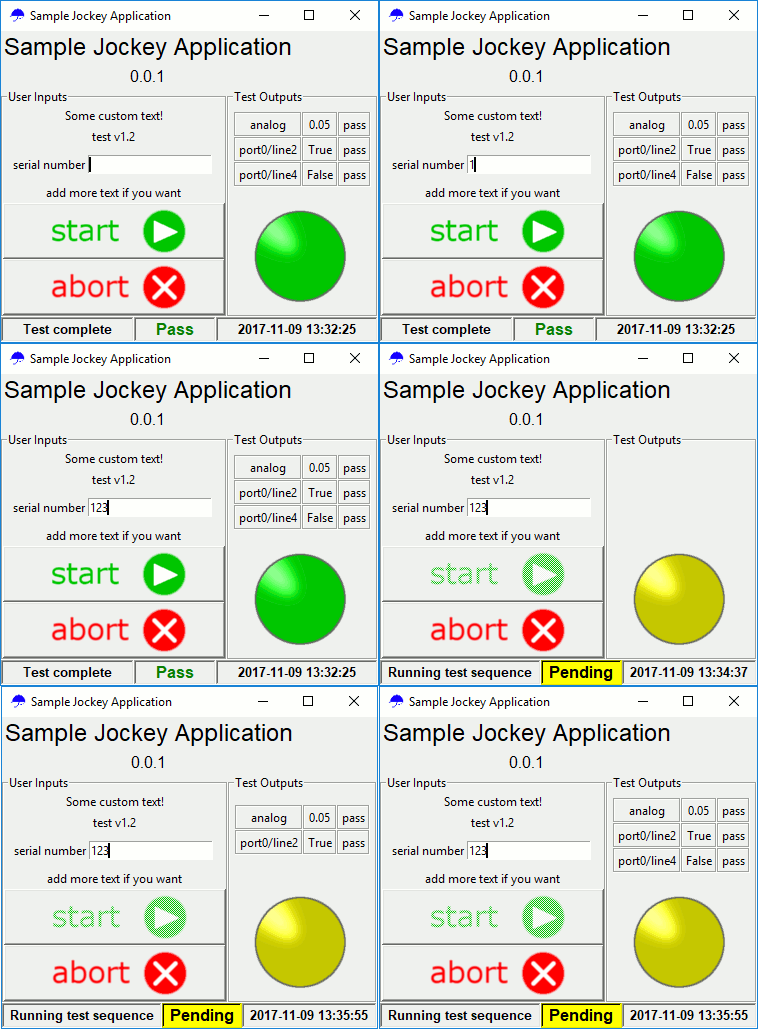
To allow script-like creation of GUI elements which will create a GUI complete with user controls along with a complete test and test sequence with a minimum of effort.
Contributions are welcome! Please follow as closely as possible the PEP8 guidelines. At some point in the near future, we will implement flake8 automated testing to be passed before a pull request is accepted.
Examples may be found within the examples directory.
Each test script has 5 sections:
- header
- setup
- test
- teardown
- footer
Each of these sections is illustrated in the below test script.
"""
DO NOT CHANGE THE IMPORT
"""
from jockey import *

# creates an instance of the Application
app = Application(title='Sample Jockey Application', subtitle=__version__, save_path='save.csv')


def setup():
    """
    This is the test setup code.  Any code entered here should be intended to execute one time
    at application instantiation.  As such, you should only set power supplies, daqs, etc, into
    their initial state.  Since we are not manipulating the GUI, hardware manipulations should
    not pass the 'app' argument within this function

    :return: None
    """
    write_daq(device='Dev1', output='ao/0', voltage=0)  # set an initial condition

    app.add_input_label('Some custom text!')  # this is how you might add custom labeling to the inputs
    app.add_input_label('test v1.2')  # this is how you might add custom labeling to the inputs

    app.add_user_inputs('serial number')  # this is how you would add user input values

    app.add_input_label('add more text if you want')  # this is how you might add custom labeling to the inputs


def test():
    """
    This is the main body of the test and should contain all of the executable code.  All manipulations
    within this body should pass the 'app' parameter in order to be properly added to the test queue.

    :return: None
    """
    write_daq(device='Dev1', output='ao/0', voltage=1.25, app=app)
    wait(0.5, app=app)

    read_daq(device='Dev1', input='ai/0', max_value=2, save_column_header='analog', app=app)
    read_daq(device='Dev1', input='port0/line2', pass_if=True, save=True, save_column_header='port0/line2', app=app)
    read_daq(device='Dev1', input='port0/line4', pass_if=False, save=True, save_column_header='port0/line4', app=app)


def teardown():
    """
    This block will execute at the end of the test regardless of pass/fail state or errors.  Use it to
    turn off power supplies or perform other tasks that should occur regardless of pass/fail status of the test.

    :return: None
    """
    write_daq(device='Dev1', output='ao/0', voltage=0)


def custom_function():
    """
    You can create your own custom functions and execute them as part of the test sequence

    :return:
    """
    pass


'''
---------------------------
DO NOT MESS BELOW THIS LINE
'''
if __name__ == '__main__':
    app.register_tests(setup, test, teardown)
    app.run()
The header is where all imports take place along with application creation. The user only needs to worry about creating the Application instance with the correct arguments. The primary parameter that the user should concern themselves with is the save parameter, which specifies the save path. The others only affect the GUI and no not affect the saved data.
The setup() function contains the various elements that only need to be executed one time during initialization. For instance, if the user wishes to have a user input called serial number, then the user would call app.add_user_inputs('serial number').
This is where the actual test sequence will be located. This sequence is executed each time the user presses the Start button.
At the end of every test sequence, the data is collected and saved into the file which was specified when creating the Application instance.
This is where the code that must be executed one time at program exit is located. This often involves reducing voltages to 0V or setting the pins into some other known state.
The footer is where the program begins running. There is no reason that the user needs to alter the program footer.
The currently supported hardware is all National Instruments hardware with DAQ-like functionality which is supported by NIDAQmx. Hardware such as the USB-6008 are highest amongst the target hardware, although others will work as well.
Currently, the available functionality is pretty much outlined within the basic.py example, which is to manipulate DAQ outputs and read DAQ inputs.
