파이어베이스 생성 및 연동
Android, Ios 플랫폼 모두에서 작동하는
완벽한 가이드 - 2020.07.05 Android & IOS 기준 정상 작동 확인(Local, remote)
공식 라이브러리 주소 https://github.com/zo0r/react-native-push-notification
설치 후 Test sample code 참고 https://github.com/zo0r/react-native-push-notification/tree/master/example
자세한 코드 및 설치 과정은 github 주소 참고 https://github.com/smboy86/dev-react-native-lastpush https://github.com/smboy86/dev-react-native-lastpush/commits/master
시작전 알아야할 내용
- FCM에 대한 개념
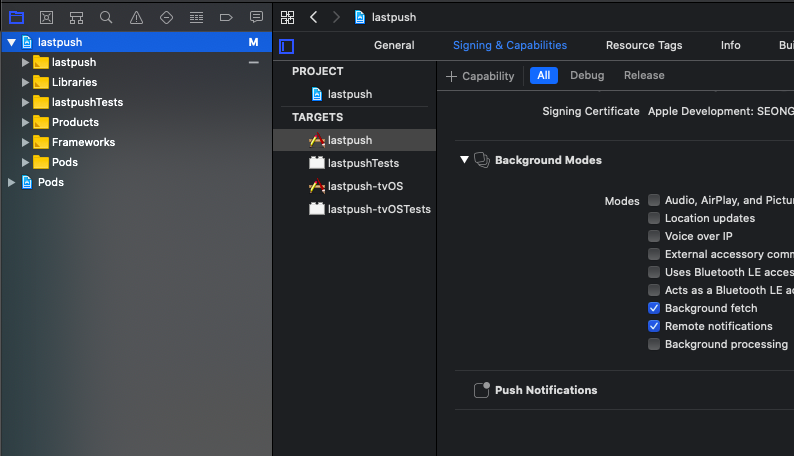
- IOS 테스트를 위해서는 개발자 계정 등록이 필요함
- IOS는 리얼디바이스에서만 테스트 가능 (테스트용기기일시 인터넷 사용이 가능 필수)
$ react-native init lastpush (원하는 이름으로)
$ cd lastpush
$ code . (코드 편집기 열어두기 vscode)

// (vscode 편집기 내에서 터미널 열기 - 편의성 up)
$ yarn start
$ yarn android or ( yarn ios )

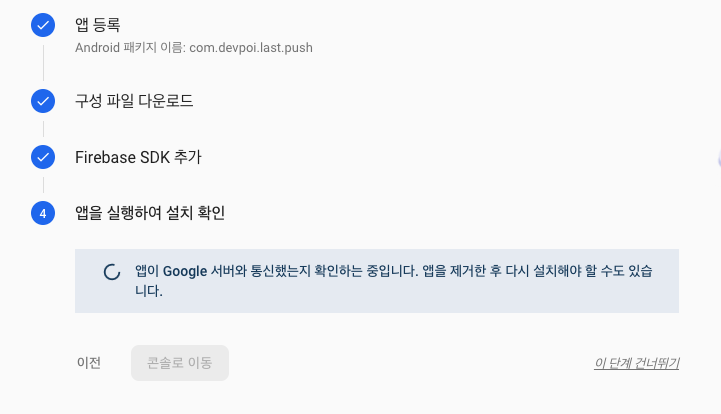
// 실행 확인 - 이상없이 실행이 되어야 함example) com.devpoi.last.push
[2-1) RN 패키지 명 바꾸기 pakage rename (IOS, Android)](메뉴얼 작성중)
- 번들 아이디 설정 (프로젝트와 동일해야함) - ex) com.devpoi.last.push
- 파이어베이스 구성파일 다운로드 (google-service.json / GoogleService-info.plist.plist)
- 다운받은 구성파일 프로젝트로 단순 복사
- ~android/app/google-service.json (폴더 경로 중요)
- 애플 개발자 센터에서 Key 생성
- 생성한 key 다운로드 (1회만 가능 잘 간직하자)
- 해당파일 파이어베이스에 등록 (생성한 IOS 앱 설정 > 클라우드 메시징 > APN 인증 키)
- .p8 파일 업로드
- Key 이름 입력
- Apple Team ID 입력
// 위 라이브러리는 설치하지 않고 설치 가이드만 따라했다. (확인중)
~~~~$ yarn add react-native-push-notification

// for IOS
$ yarn add @react-native-community/push-notification-ios-
~App.js (수정 or 전체 대치)
-
~NotifService.js (신규)
-
~NotificationsHandler.js (신규)
-
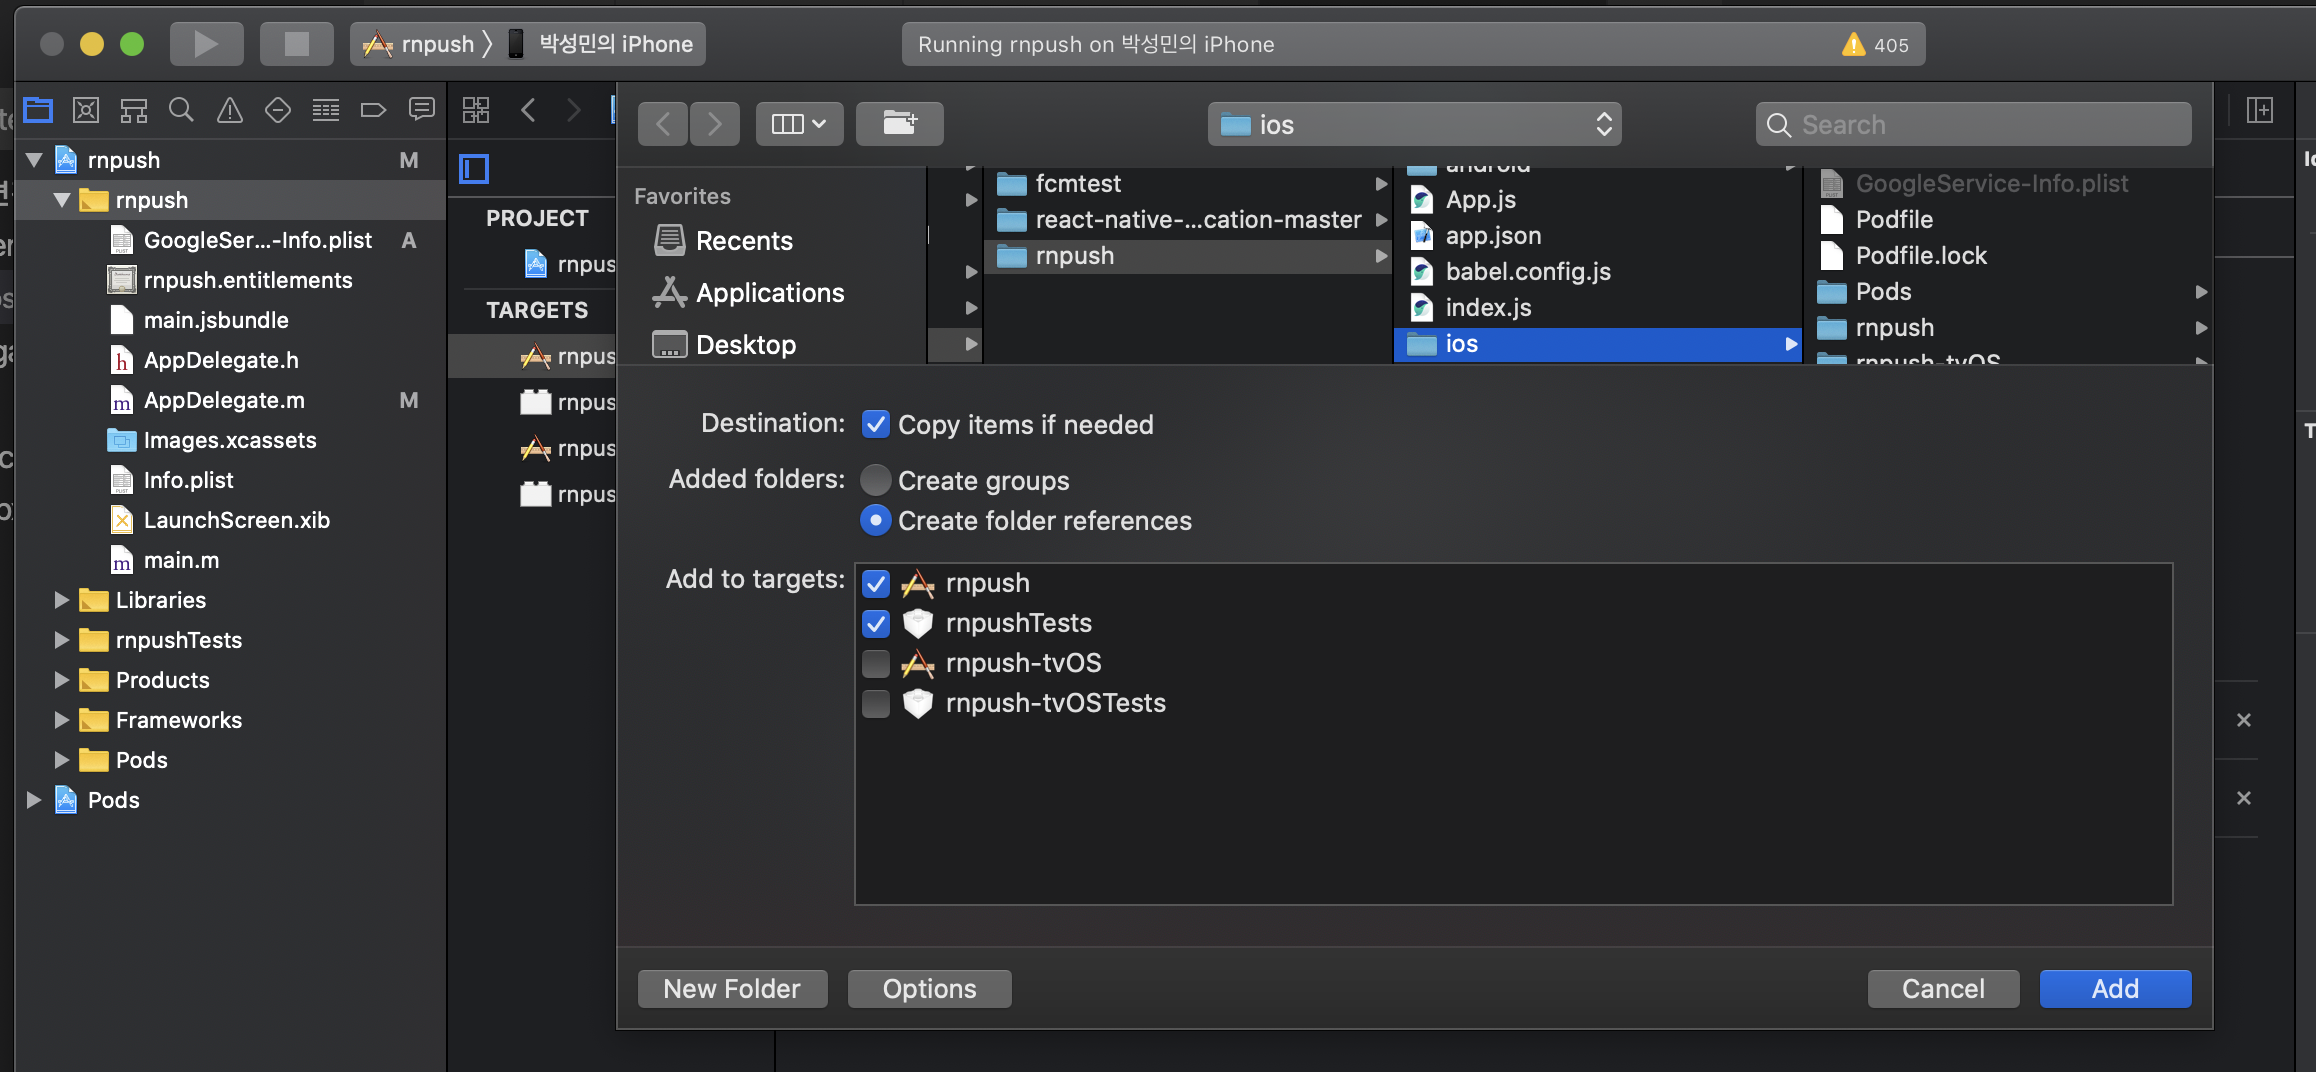
Podfile (수정 - 1 add)
  ...

  pod 'Folly', :podspec => '../node_modules/react-native/third-party-podspecs/Folly.podspec'

  pod 'RNCPushNotificationIOS', :path => '../node_modules/@react-native-community/push-notification-ios' << 1) add

  target 'rnpushTests' do
    inherit! :complete
    # Pods for testing
  end

  ...
-
AppDelegate.h (수정 - 2 add)
...

#import <UserNotifications/UNUserNotificationCenter.h>  << add

// UNUserNotificationCenterDelegate add
@interface AppDelegate : UIResponder <UIApplicationDelegate, RCTBridgeDelegate, UNUserNotificationCenterDelegate>

...
-
AppDelegate.m (수정 - 4 add)
...
#import <UserNotifications/UserNotifications.h> << add
#import <RNCPushNotificationIOS.h> << add

...

  RCTBridge *bridge = [[RCTBridge alloc] initWithDelegate:self launchOptions:launchOptions];
  RCTRootView *rootView = [[RCTRootView alloc] initWithBridge:bridge
                                                   moduleName:@"rnpush"
                                            initialProperties:nil];

  UNUserNotificationCenter *center = [UNUserNotificationCenter currentNotificationCenter]; << add
  center.delegate = self; << add

  ...

}

// add start
// Required to register for notifications
- (void)application:(UIApplication *)application didRegisterUserNotificationSettings:(UIUserNotificationSettings *)notificationSettings
{
 [RNCPushNotificationIOS didRegisterUserNotificationSettings:notificationSettings];
}
// Required for the register event.
- (void)application:(UIApplication *)application didRegisterForRemoteNotificationsWithDeviceToken:(NSData *)deviceToken
{
 [RNCPushNotificationIOS didRegisterForRemoteNotificationsWithDeviceToken:deviceToken];
}
// Required for the notification event. You must call the completion handler after handling the remote notification.
- (void)application:(UIApplication *)application didReceiveRemoteNotification:(NSDictionary *)userInfo
fetchCompletionHandler:(void (^)(UIBackgroundFetchResult))completionHandler
{
  [RNCPushNotificationIOS didReceiveRemoteNotification:userInfo fetchCompletionHandler:completionHandler];
}
// Required for the registrationError event.
- (void)application:(UIApplication *)application didFailToRegisterForRemoteNotificationsWithError:(NSError *)error
{
 [RNCPushNotificationIOS didFailToRegisterForRemoteNotificationsWithError:error];
}
// Required for the localNotification event.
- (void)application:(UIApplication *)application didReceiveLocalNotification:(UILocalNotification *)notification
{
 [RNCPushNotificationIOS didReceiveLocalNotification:notification];
}

//Called when a notification is delivered to a foreground app.
-(void)userNotificationCenter:(UNUserNotificationCenter *)center willPresentNotification:(UNNotification *)notification withCompletionHandler:(void (^)(UNNotificationPresentationOptions options))completionHandler
{
  completionHandler(UNAuthorizationOptionSound | UNAuthorizationOptionAlert | UNAuthorizationOptionBadge);
}

// add end

- (NSURL *)sourceURLForBridge:(RCTBridge *)bridge
{
#if DEBUG
  return [[RCTBundleURLProvider sharedSettings] jsBundleURLForBundleRoot:@"index" fallbackResource:nil];
#else
  return [[NSBundle mainBundle] URLForResource:@"main" withExtension:@"jsbundle"];
#endif
}

@end
소스 모두 수정 후 팟 인스톨 후 기기 시작
$ cd ios
$ pod install & cd ..
$ yarn start & yarn ios -
~android/build.gradle (수정 - 1 add)
... dependencies { classpath("com.android.tools.build:gradle:3.5.2") classpath('com.google.gms:google-services:4.3.3') << add // NOTE: Do not place your application dependencies here; they belong // in the individual module build.gradle files } } ... -
~android/app/build.gradle (수정 - 1 add)
...


apply plugin: 'com.google.gms.google-services' << add

// Run this once to be able to run the application with BUCK
// puts all compile dependencies into folder libs for BUCK to use
task copyDownloadableDepsToLibs(type: Copy) {
    from configurations.compile
    into 'libs'
}

apply from: file("../../node_modules/@react-native-community/cli-platform-android/native_modules.gradle"); applyNativeModulesAppBuildGradle(project)
-
~androud/app/google-services.json (생성)
-
~android/app/src/main/AndroidManifest.xml (수정 - 2 add)
<manifest xmlns:android="http://schemas.android.com/apk/res/android"
  package="com.devpoi.rnpush">

    <uses-permission android:name="android.permission.INTERNET" />

    << add start
    <uses-permission android:name="android.permission.SYSTEM_ALERT_WINDOW"/>
    <uses-permission android:name="android.permission.VIBRATE" />
    <uses-permission android:name="android.permission.RECEIVE_BOOT_COMPLETED"/>
    <uses-permission android:name="android.permission.WAKE_LOCK" />
    << add end

    <application
      android:name=".MainApplication"
      android:label="@string/app_name"
      android:icon="@mipmap/ic_launcher"
      android:roundIcon="@mipmap/ic_launcher_round"
      android:allowBackup="false"
      android:theme="@style/AppTheme">
      <activity
        android:name=".MainActivity"
        android:label="@string/app_name"
        android:configChanges="keyboard|keyboardHidden|orientation|screenSize|uiMode"
        android:launchMode="singleTask"
        android:windowSoftInputMode="adjustResize">
        <intent-filter>
            <action android:name="android.intent.action.MAIN" />
            <category android:name="android.intent.category.LAUNCHER" />
        </intent-filter>
      </activity>
      <activity android:name="com.facebook.react.devsupport.DevSettingsActivity" />

      << add start
      <receiver android:name="com.dieam.reactnativepushnotification.modules.RNPushNotificationPublisher" />
      <receiver android:name="com.dieam.reactnativepushnotification.modules.RNPushNotificationBootEventReceiver">
          <intent-filter>
              <action android:name="android.intent.action.BOOT_COMPLETED" />
          </intent-filter>
      </receiver>
      <service
          android:name="com.dieam.reactnativepushnotification.modules.RNPushNotificationListenerService"
          android:exported="false" >
          <intent-filter>
              <action android:name="com.google.firebase.MESSAGING_EVENT" />
          </intent-filter>
      </service>
      <meta-data  android:name="com.dieam.reactnativepushnotification.notification_foreground"
                  android:value="true"/>
      <meta-data  android:name="com.dieam.reactnativepushnotification.notification_channel_name"
                  android:value="Example-Channel"/>
      <meta-data  android:name="com.dieam.reactnativepushnotification.notification_channel_description"
                  android:value="Super channel description"/>
      <meta-data  android:name="com.dieam.reactnativepushnotification.notification_color"
                  android:resource="@android:color/white"/>
      << add end

    </application>

</manifest>
-
~android/app/src/main/raw/sample.mp3 (생성) - 효과음 파일 (Optional)
// 실행준비
$ cd android
$ ./gradlew clean  // 초기화
$ cd ..
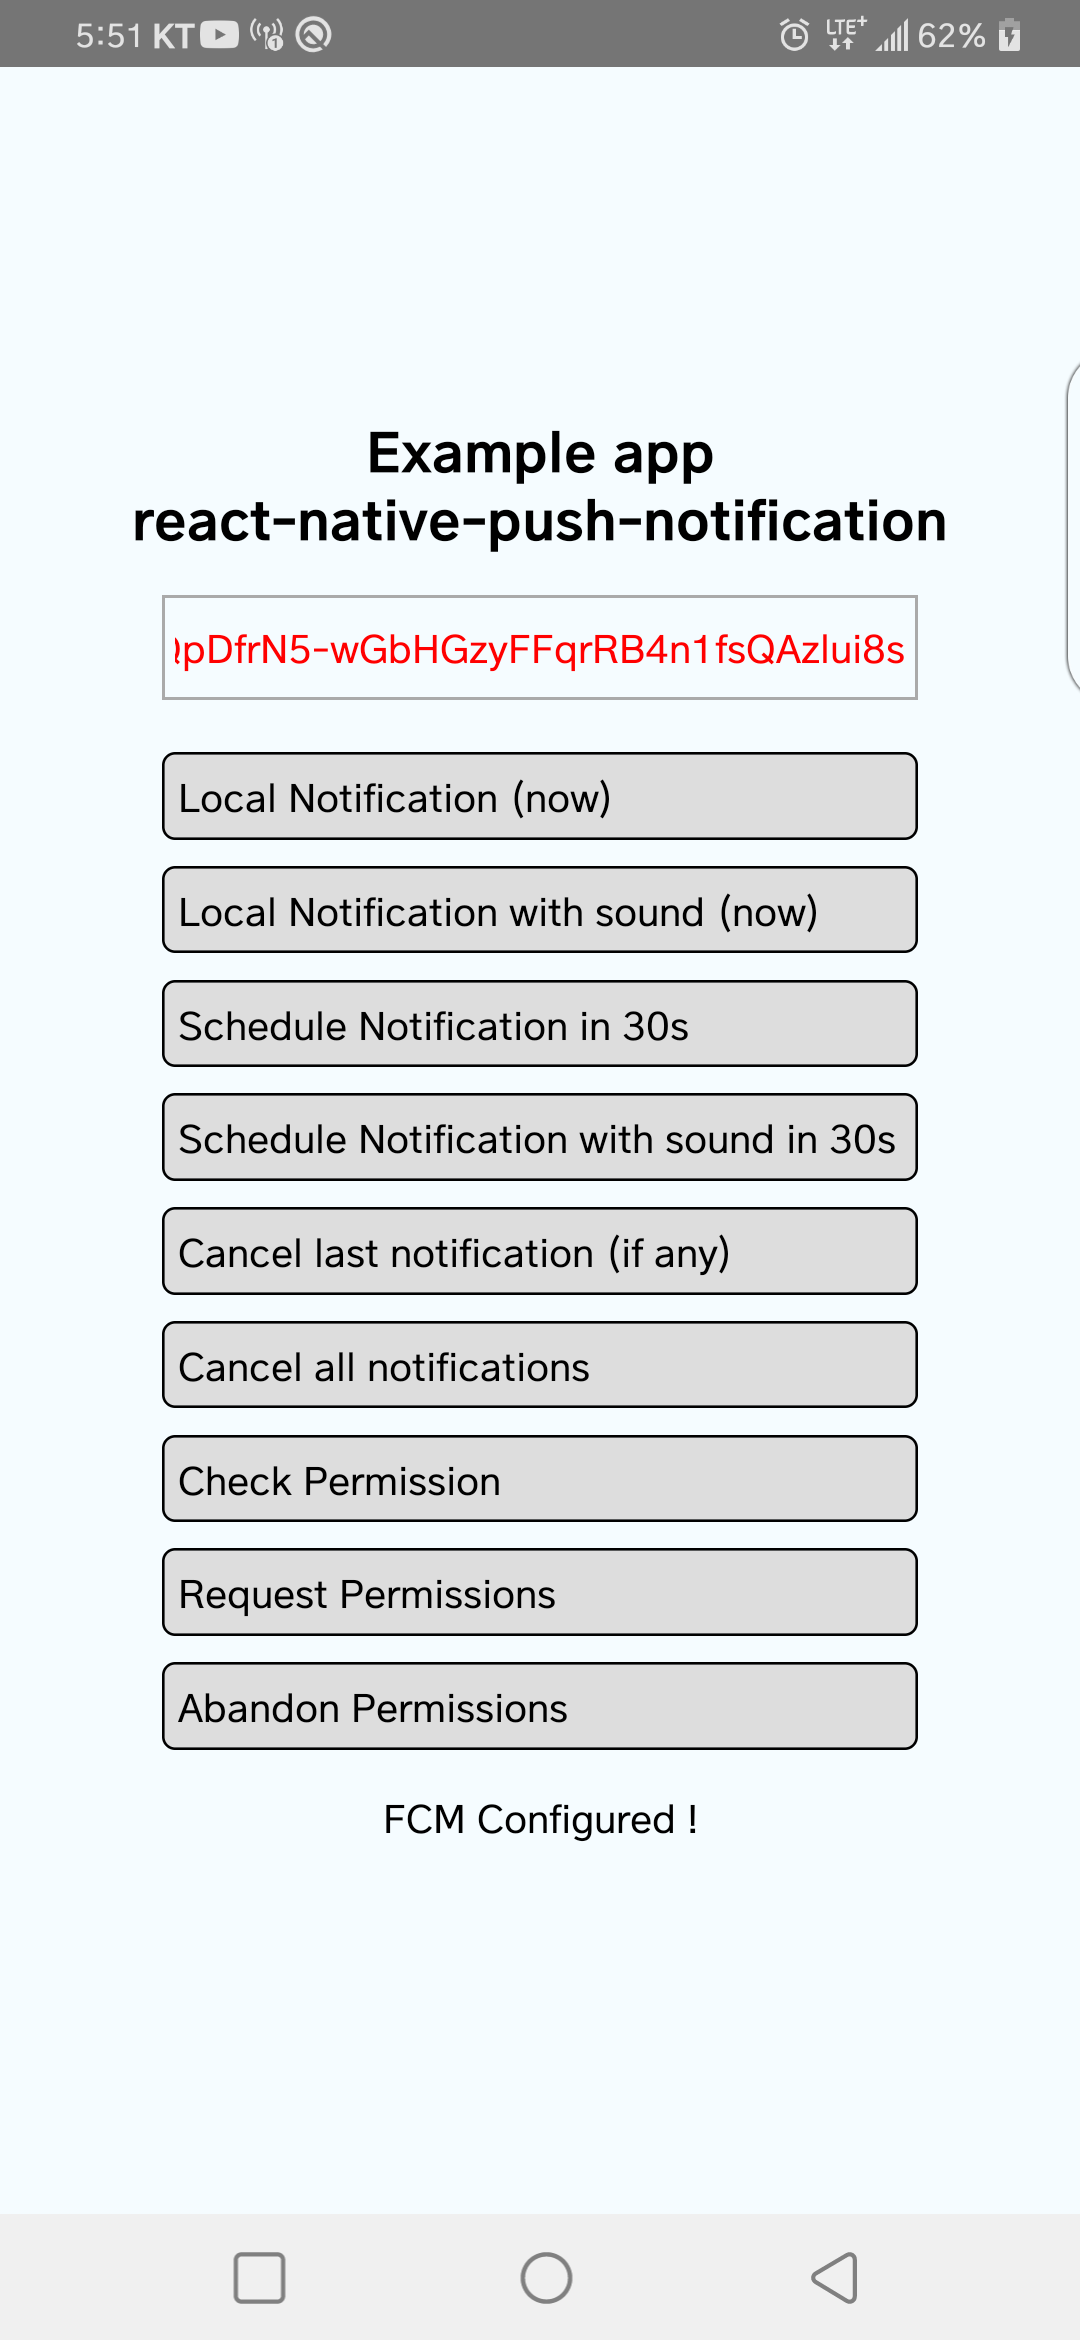
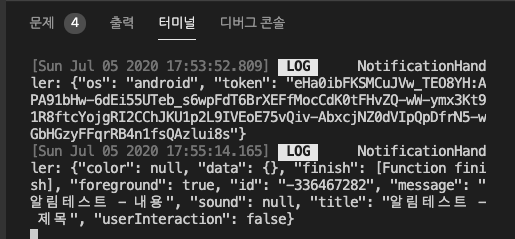
$ yarn start && yarn android빨간색 글씨로 된 토큰 값 복사
example)
eHa0ibFKSMCuJVw_TEO8YH:APA91bHw-6dEi55UTeb_s6wpFdT6BrXEFfMocCdK0tFHvZQ-wW-ymx3Kt91R8ftcYojgRI2CChJKU1p2L9IVEoE75vQiv-AbxcjNZ0dVIpQpDfrN5-wGbHGzyFFqrRB4n1fsQAzlui8s
45b7685a72105f8445ad0bbea22080fda24e00b6a5de60028b0c7833fd881a62
IOS 디바이스로 테스트 했을때 위와 같이 Android와는 상당히 짧은 토큰이 올 수 있다.
이런 경우 테스트 환경에서 발행하는 APNs 의 토큰이므로 이것을 FCM 토큰으로 변경해주어야 한다.
이런 경우 푸시 메시지 전송시 다음과 같은 메시지가 반환된다.
{
    "multicast_id": 4694717167209999484,
    "success": 0,
    "failure": 1,
    "canonical_ids": 0,
    "results": [
        {
            "error": "InvalidRegistration"
        }
    ]
}zo0r/react-native-push-notification#1251
위 안내를 참고하여 아래와 같이 API로 토큰을 변경한다.
HTTP HOST : https://iid.googleapis.com/iid/v1:batchImport

Headers : 푸시알람과 동일

Body :
{
  "application": "com.devpoi.last.push", (패키지 ID)
  "sandbox":true,
  "apns_tokens":[
      "APNS 토큰"
   ]
 }

// 결과
{
    "results": [
        {
            "registration_token": "fxArqQ8EeSo:APA91bF_E8r4-oplEb0SVe65-H5QDMkArlLMD8O08QKLiQgXiAOZt5TjsW0cXJBsprR8UH9DUpeSJVD9nevcyIohs4U6uBl0YfpH25U62-T1C7AO3cCQvASfBXXFbg6T984EWNGN4zHn",
            "apns_token": "45b7685a72105f8445ad0bbea22080fda24e00b6a5de60028b0c7833fd881a62",
            "status": "OK"
        }
    ]
}

//
registration_token 이것을 가지고 테스트하면 오케이!!https://firebase.google.com/docs/cloud-messaging/migrate-v1?hl=ko (마이그레이션)
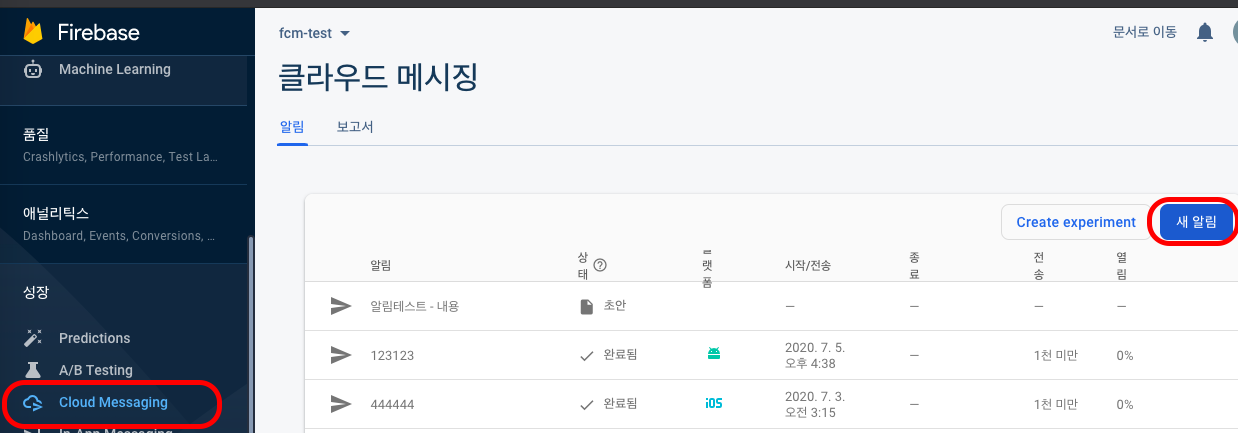
- 파이어베이스 서버 키 취득
- Post 방식으로 발송
// url
https://fcm.googleapis.com/fcm/send

// header - 2 param
key : Authorization
value key=파이어베이스 서버키

key : Content-Type
value : application/json

// body (json)  - noti + data
{
    "to" : "eHa0ibFKSMCuJVw_TEO8YH:APA91bHw-6dEi55UTeb_s6wpFdT6BrXEFfMocCdK0tFHvZQ-wW-ymx3Kt91R8ftcYojgRI2CChJKU1p2L9IVEoE75vQiv-AbxcjNZ0dVIpQpDfrN5-wGbHGzyFFqrRB4n1fsQAzlui8s",
    "notification" : {
    	"title" : "Postman Post 메시지 테스트",
        "body" : "테스트 메세지 내용",
        "content_available" : true,
        "priority" : "high"
    },
    "data" : {
        "title" : "Postman Post 메시지 테스트",
        "body" : "테스트 메세지 내용",
        "content_available" : true,
        "priority" : "high"
    }
}보통 3가지 방식으로 테스트 하며 Noti 의 방식 1) Noti Only, 2) Data Only 3) Noti + Data 를 테스트 한다. 즉 앱환경 3 * Noti Type 3 이렇게 테스트를 해본다.
- 앱 환경에 따른 구분
- 앱이 열려 있을때 (foreground)
- 앱이 백그라운드에 있을때 (background)
- 앱이 완전히 종료되있고, 휴대폰 잠금 상태일때 (closed)
- 노티 종류에 따른 구분
- Notification Only
- Data Only
- Notification + Data
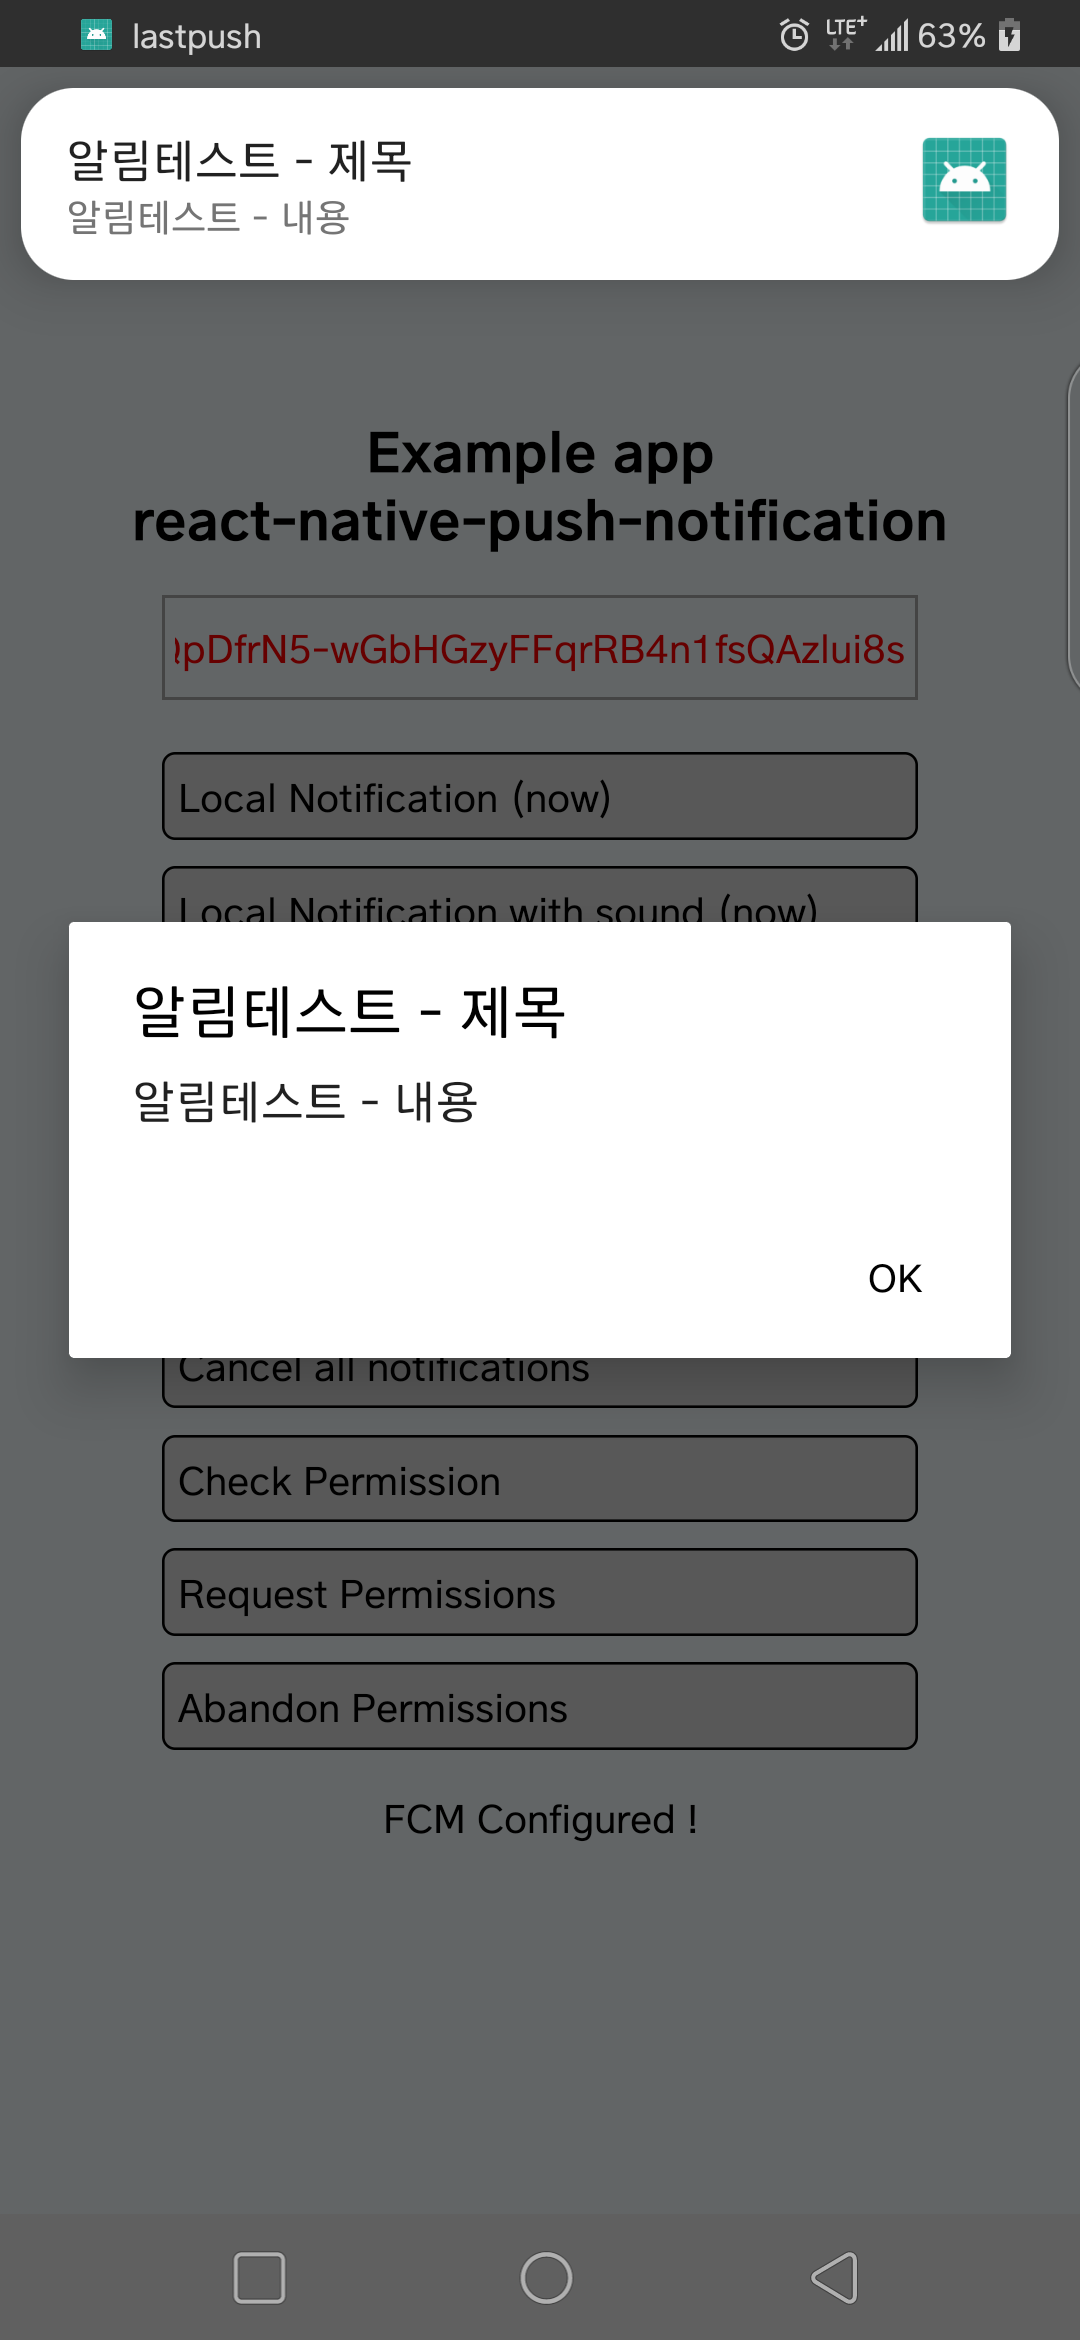
Test - Android
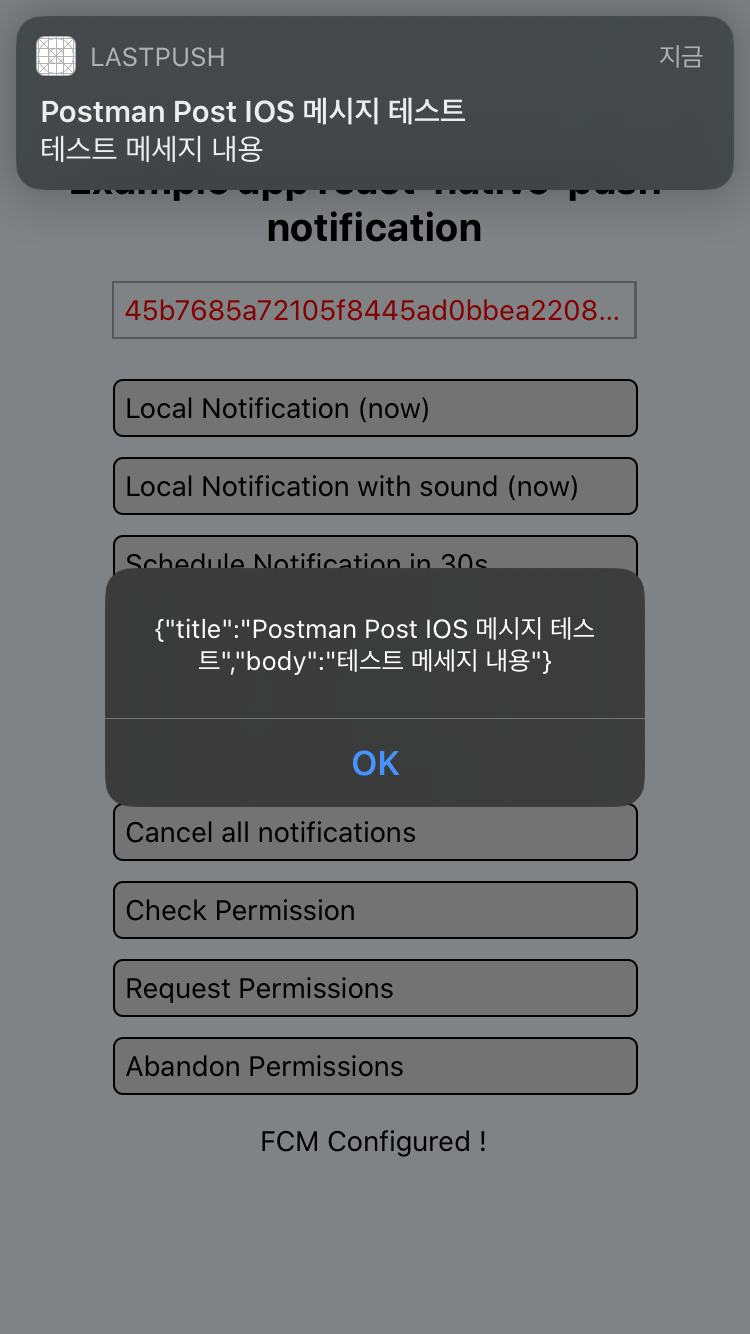
Test - IOS
