Missing requirements will be installed as you follow the instructions given below.
- Python 3
- myo-python
- numpy
- scikit-learn
- scipy
- matplotlib
- keyboard
- pyserial
This project contains Python scripts and classes that help to establish connection with Thalmic MYO armband, collect and plot EMG data, and implement a gesture recognition procedure.
The developers of Thalmic MYO have issued a C++ API that enables the users to create their own applications for the armband. After that, Niklas Rosenstein have developed myo-python, a Python interface for this API, using CFFI module and CPython. His implementation can be found here: https://github.com/NiklasRosenstein/myo-python.
In this project, we build an infrastructure around myo-python library that will help you develop EMG processing and EMG-based gesture recognition.
If you are not familiar with Python and virtual environments, I suggest using Anaconda. Download a Python 3.7 Anaconda from the official site and install it. Use default installation options.
If you are familiar with virtual environments, create a new one and proceed to step 3.
Download MyoConnect from Thalmic's official web-site. Available for Windows and MacOS, a simple installation.
To set up MyoConnect for work, run it, then right-click on its icon in task bar, select Preferences, and uncheck all options in all tabs. Then, right-click on icon again, select Application Manager and uncheck all options here too.
On Windows, open anaconda prompt. On MacOS, run Terminal. Run the following commands and accept the changes:
conda create --name myo python=3.8 pip
Now activate the environment that we have just created (its name is 'myo'):
conda activate myo
Note: please remember that any time you want to run this project from a new command/terminal window, you need to activate this environment again.
Install it from from our fork on Github. To do so, in command line, with 'myo' environment activated, run:
pip install https://github.com/smetanadvorak/myo-python/tarball/master
Download this project and put it in an appropriate directory on your disk. In command window, navigate to this project's folder and run:
pip install -e .
This should be done only once at the beginning of your working session:
- Insert MYO's Bluetooth dongle in your USB port.
- Run MyoConnect, right-click on its icon in task bar, select Armband Manager ....
- Approach the dongle with your armband. It should automatically get paired with MyoConnect.
- In MyoConnect, press 'Ping' to make sure that it is not connected to some other armband nearby. Your armband should vibrate in response to the ping.
- Open Anaconda Prompt (Windows) or Terminal (MacOS) and activate the 'myo' environment:
conda activate myo
- Navigate to the folder with this package, then to ./examples/streaming and run a test script:
python streaming.py
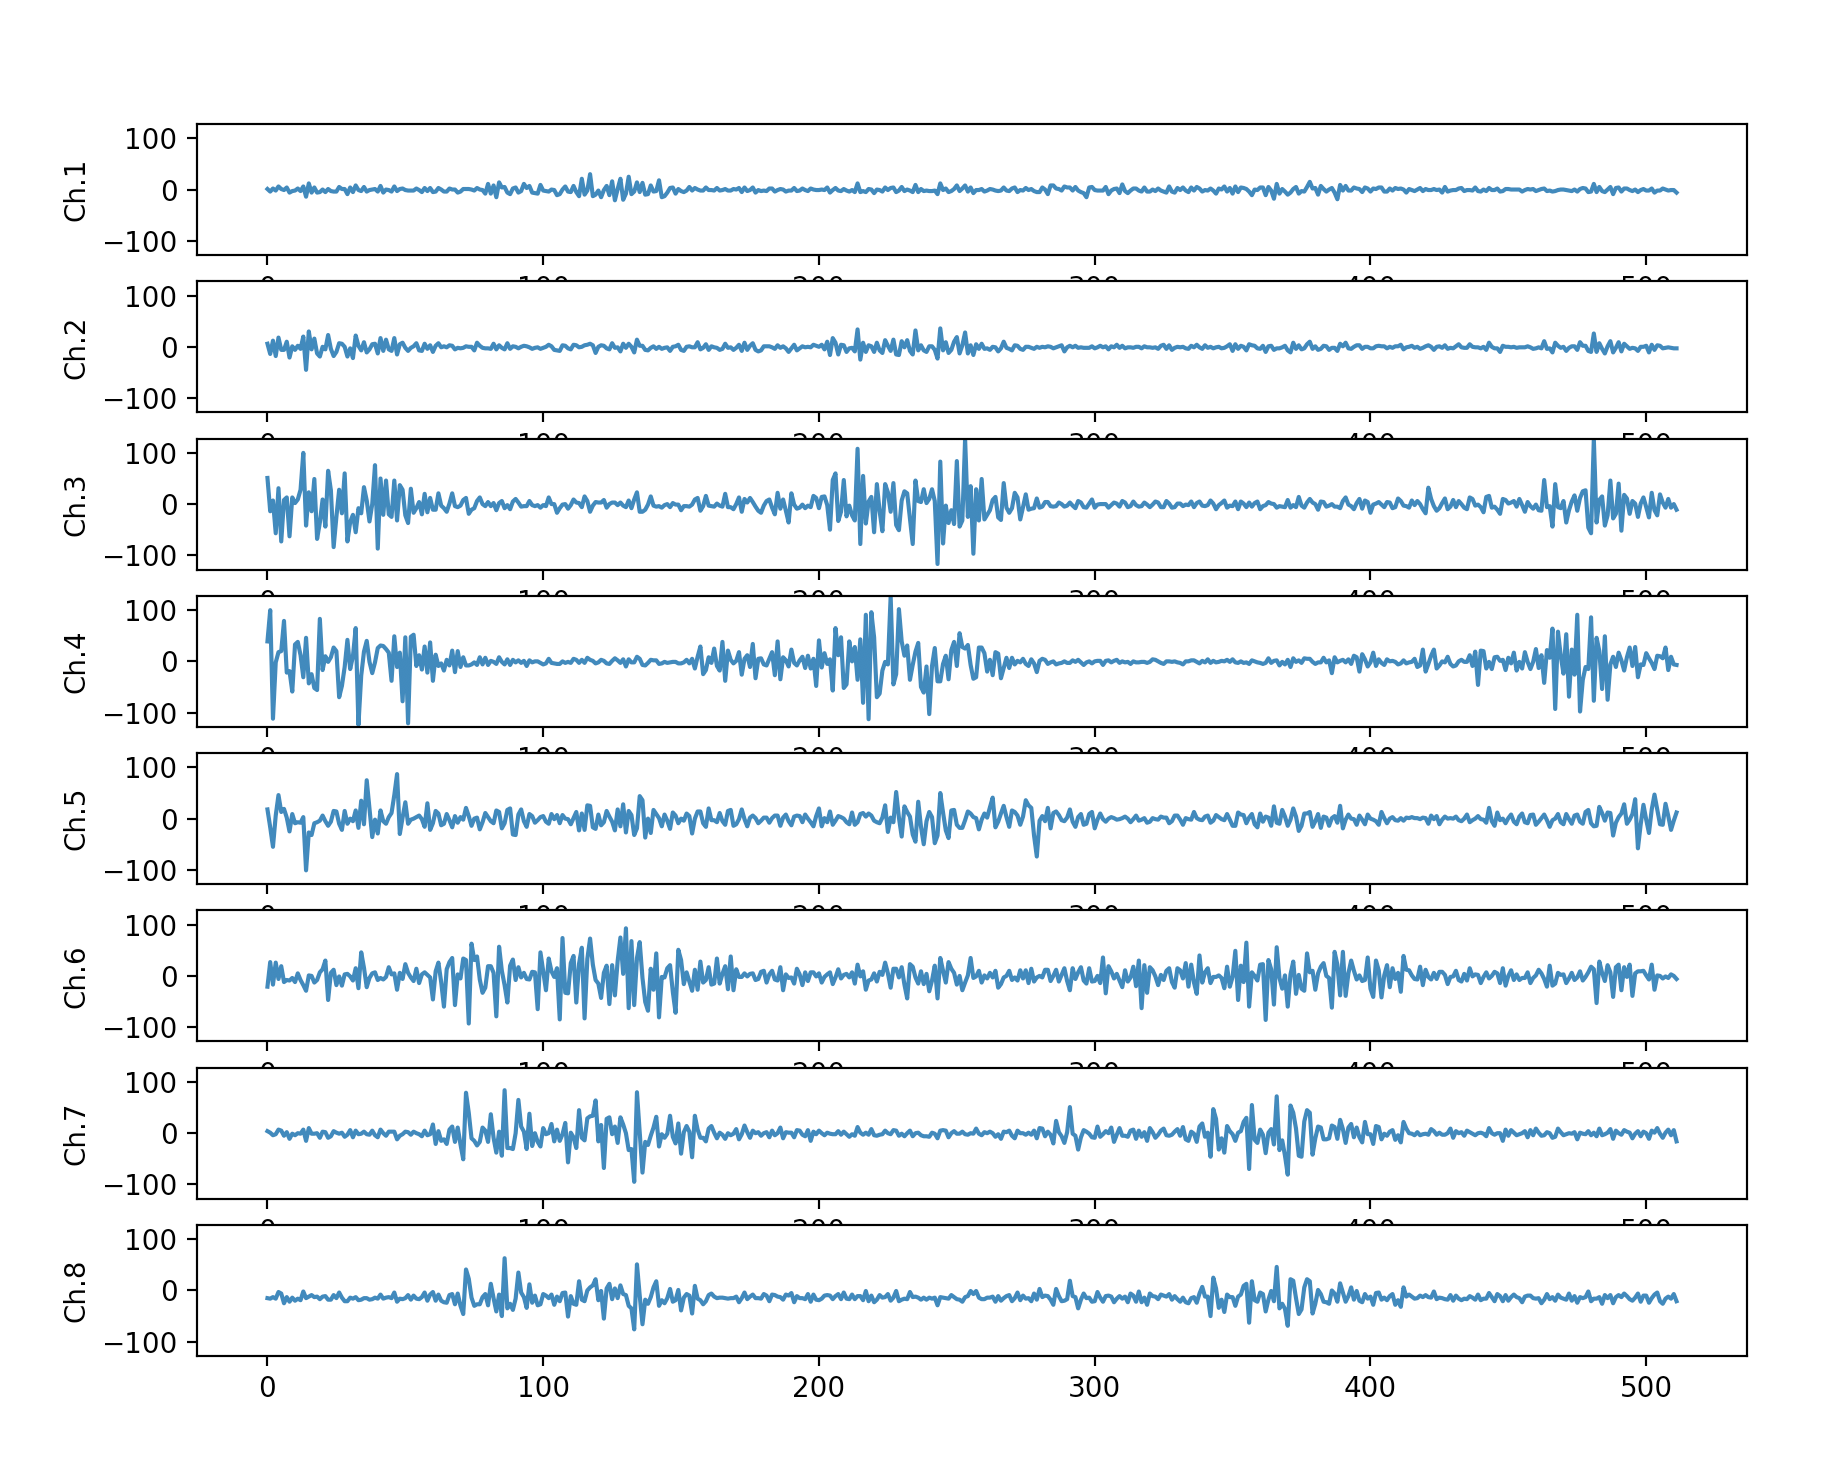
If everything is installed correctly, a matplotlib figure should appear with the EMG signals being traced in real time. This and other examples can be stopped by either pressing ctrl-c (MacOS) or shift-c(Windows).
Script emg_streaming.py demonstrates a method to collect and plot EMG data from the armband in a real-time manner. Class MultichannelPlot provides a solution for fast plotting of multichannel signals.
Script emg_streaming.py demonstrates a method to collect a specified amount of EMG data from the armband and save it to a file. It uses Class Collector. The following command will acquire the signal for 10 seconds and save it to file filename.csv:
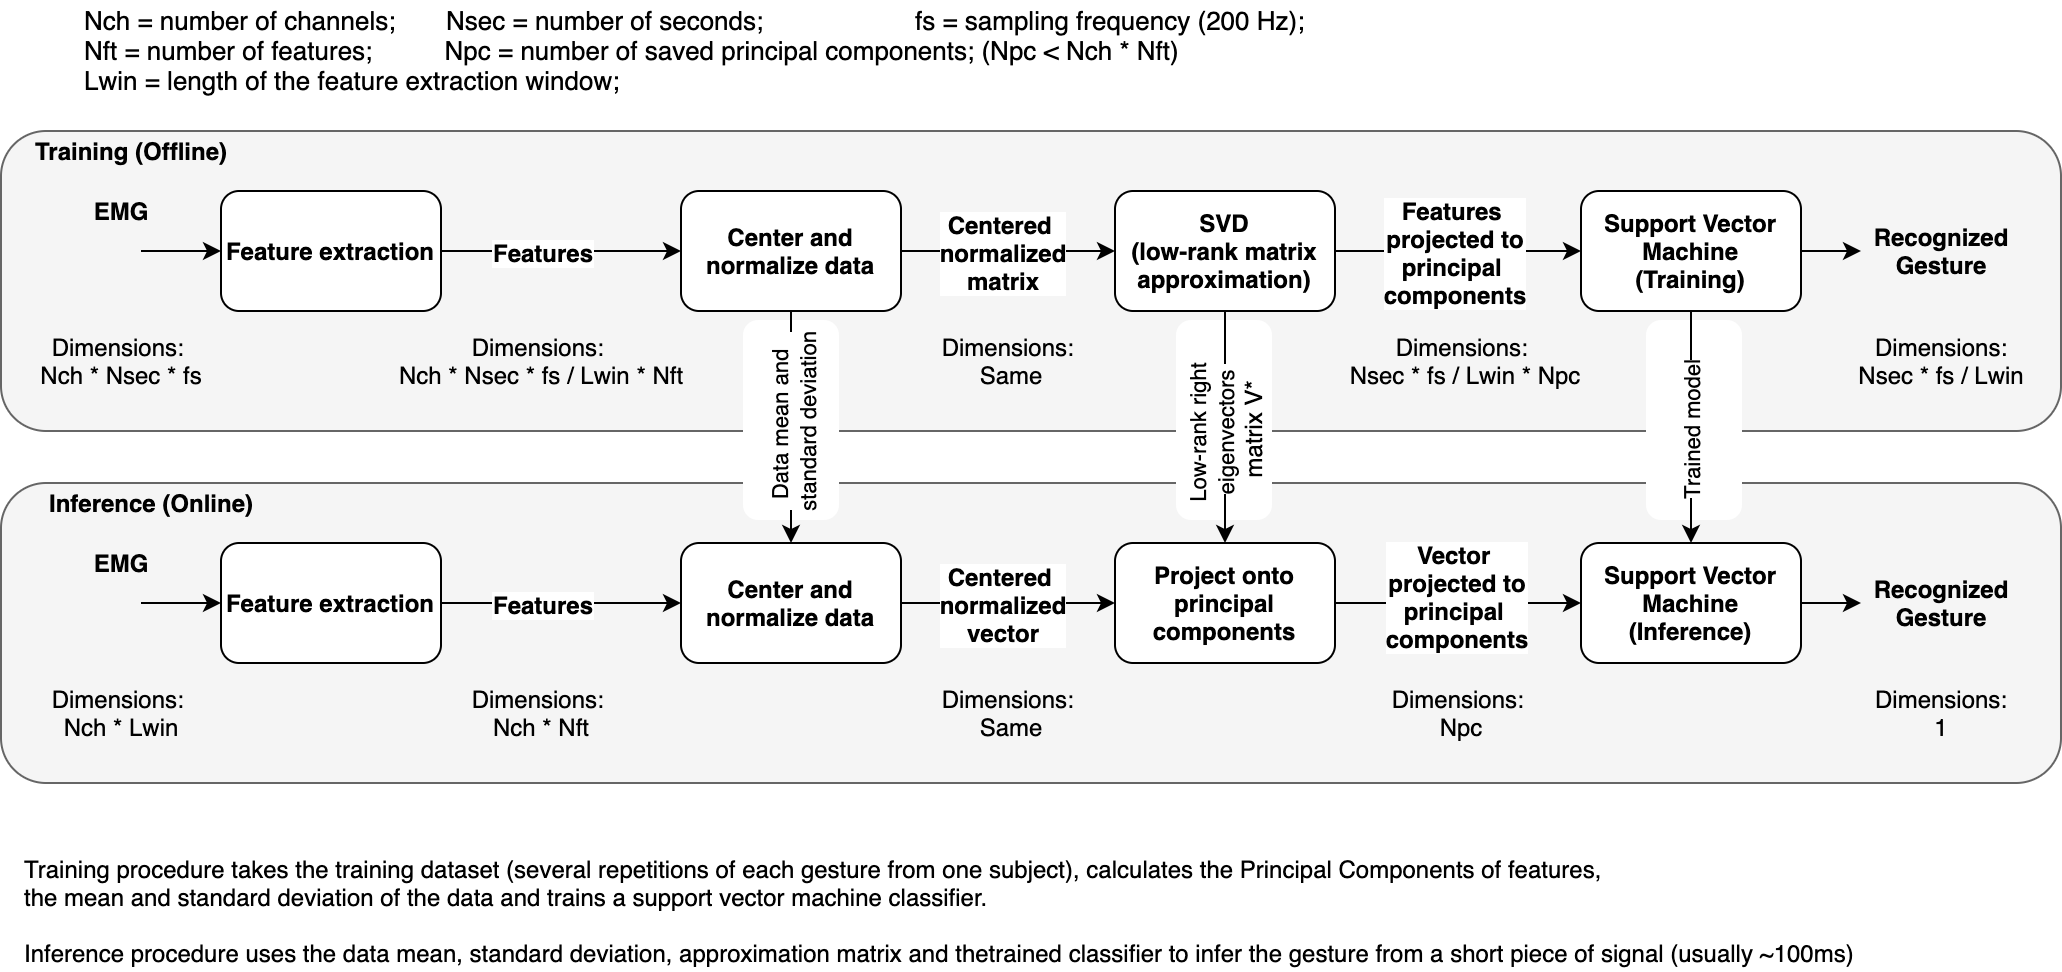
python acquistion.py 10 filenameScripts 1_dataset_acquisition.py, 2_training.py and 3_inference.py implement a three-step process of EMG data collection, classifier training and testing. A flowchart of the whole process is provided below:
In 1_dataset_acquisition.py may specify the the gestures (variable gestures) for which you want to collect the EMG data, as well as how many times to repeat the acquisition (variable trials_n). When you run this script, it guides you through the acquisition by telling which gesture to perform and for which amount of time. The signals are automatically stored in the folder data.
Notes:
- If the script was aborted during data acquisition, on the next run it will continue from where it stooped.
- Empty data folder if you want to acquire a new dataset.
- You may expand an existing data set by augmenting gestures and trials_n variables.
In script 2_training.py and utility file EMG_classification.py you may define the parameters of the feature extractor and of the classifier. Default feature is smoothed absolute signal (aka mean absolute value or MAV), default classifier is SVM. Run this code as is to see the results achieved by default setup. The resulting classification model is saved in folder models.
Script 3_inference.py takes the trained classification model and applies in real time to a newly acquired EMG data. Perform gestures in the same way you were performing them during training set acquisition (arm pose matters!). The script will output the label of the gesture in command line.
To run this example, you will need to install this package in your 'myo' virtual environment. Then connect and power the robotic hand and start the script. Flexing the wrist will close the grip, while exenting will open it. Co-contract extensors and flexors at the same time to change the grip.
Folder myo_python_examples contains the original examples distributed with myo-python. They may give you more insights on how to use this library.
Script emg_streaming.py can be further modified to implement real-time signal processing, such as filtering or feature extraction. For that, one can add processing in the while loop in 'streaming.py' or redefine/inherit from class EmgBuffer.
Classes FeatureExtractor and Classification_model in EMG_classification.py can be modified to implement a different classifier (ANN, for example). Modify class 'FeatureExtraction' to try other types of features.
Important note: when writing your own code and adding the line that initialises the myo-python:
myo.init(sdk_path='../../myo_sdk') # Compile Python binding to Myo's APIassign to sdk_path the relative location of myo_sdk folder which is in the root of this project. As you can see, all examples, being two directories below, refer to it as '../../myo_sdk'.


