Workshop for Microsoft Azure Developer Camp, which was held at Oslo 05.06.2019
- 1. Introduction
- 2. Prerequisites
- 3. Workshop steps
- 4. Reference list
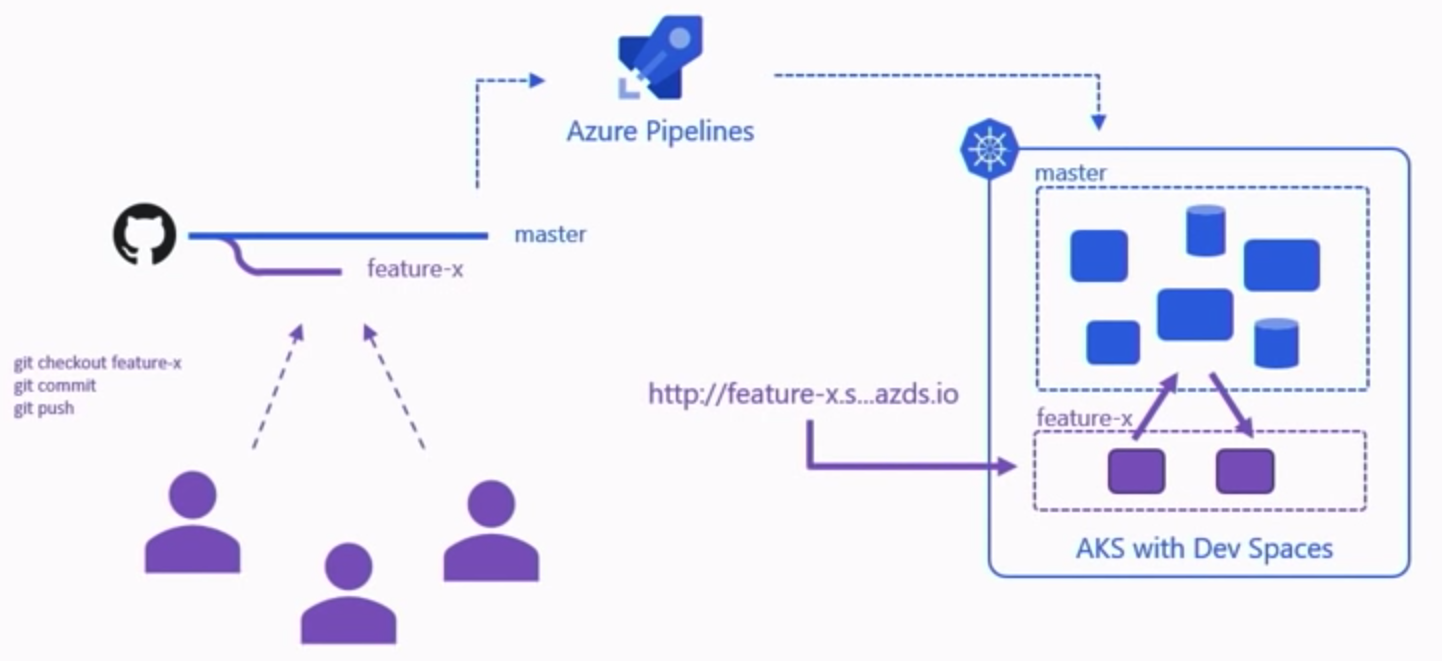
One of very popular and widely used Git workflows are based on features branches, which allows efficiently to collaborate. When feature branch is finished development team submits the pull request for the review before merging into the master branch.
How to be sure that the pull request will not break the master branch when dealing with microservices? Handling separate environment for each branch, environments on developers machines or/and dozens of mock-ups? That's not scalable.
With Azure Dev Spaces and Azure Pipelines, it is possible to quickly test PR code in the context of the broader application running in Azure Kubernetes Service (AKS). How to set up that workflow is explained in upcoming sections.
- An Azure subscription. To create a free account go here
- Azure Command Line (Azure CLI) installed on your machine. To install go here
- Helm. To install go here
- Azure DevOps account. To create account follow here
- Github account. To join Github go here
Fork the workshop github repository to your Github from https://github.com/texnokot/DevDays2019
Clone your fork to your computer and navigate to the application directory
$ git clone https://github.com/YOUR_GITHUB_ACCOUNT/DevDays2019.git
$ cd BikeSharingApp/
AKS cluster should be created in a supported region for AKS Dev Spaces
Create a resource group DevDaysOslo2019 where all resources will be located:
$ az group create --name DevDaysOslo2019 --location westeurope
Create an AKS cluster aksdevdays:
$ az aks create -g DevDaysOslo2019 -n aksdevdays --location westeurope --node-vm-size Standard_DS2_v2 --node-count 1 --disable-rbac --generate-ssh-keys
Enable Azure Dev Spaces on created AKS cluster and dev space
$ az aks use-dev-spaces -g DevDaysOslo2019 -n aksdevdays --space dev --yes
We need container registry where to store containers for AKS. Create acr acrdevdays by running the following command:
$ az acr create --resource-group DevDaysOslo2019 --name acrdevdays --sku Basic
Check that it runs successfully by login
$ az acr login --name acrdevdays
Grant permssions for your AKS to use ACR by running aksgrant.sh command from the cloned repository. Before running replace values with your resource group, acr and aks values. Update, save and run:
$ ./aksgrant.sh
Use the azds show-context command to show your AKS cluster’s HostSuffix for dev. When azds runs first time it installs istelf in command line tool
$ azds show-context

Name          ResourceGroup     DevSpace    HostSuffix
----------    -------------     --------    -----------
aksdevdays  DevDaysOslo2019  dev       5bsfq5jg95.weu.azds.io
Open charts/values.yaml and replace all instances of <REPLACE_ME_WITH_HOST_SUFFIX> with the HostSuffix value you retrieved earlier. Save your changes and close the file.
The commands for running the sample application on Kubernetes are part of an existing process and have no dependency on Azure Dev Spaces tooling. In this case, Helm is the tooling used to run this sample application but other tooling could be used to run your entire application in a namespace within a cluster. The Helm commands are targeting the dev space named dev you created earlier, but this dev space is also a Kubernetes namespace. As a result, dev spaces can be targeted by other tooling the same as other namespaces.
You can use Azure Dev Spaces for team development after an application is running in a cluster regardless of the tooling used to deploy it.
Use the helm init and helm install commands to set up and install the sample application on your cluster.
$ cd charts/
$ helm init --wait
$ helm install -n bikesharing . --dep-up --namespace dev --atomic --wait
The helm install command may take several minutes to complete. The output of the command shows the status of all the services it deployed to the cluster when completed:
$ cd charts/
$ helm init --wait
...
Happy Helming!
$ helm install -n bikesharing . --dep-up --namespace dev --atomic --wait
    Hang tight while we grab the latest from your chart repositories...
    NAME               READY  UP-TO-DATE  AVAILABLE  AGE
    bikes              1/1    1           1          4m32s
    bikesharingweb     1/1    1           1          4m32s
    billing            1/1    1           1          4m32s
    gateway            1/1    1           1          4m32s
    reservation        1/1    1           1          4m32s
    reservationengine  1/1    1           1          4m32s
    users              1/1    1           1          4m32s
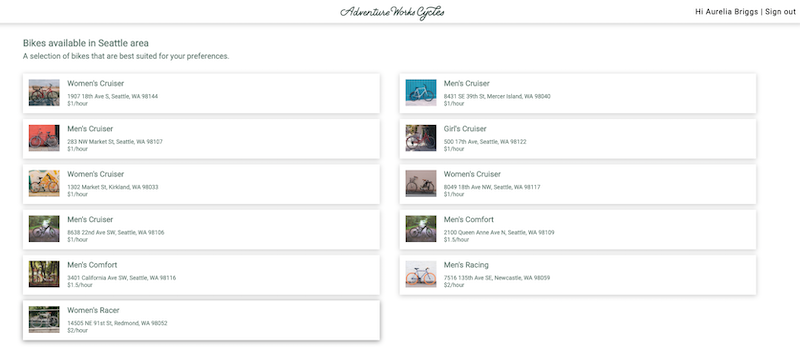
Navigate to the bikesharingweb service by opening the public URL from the azds list-uris command. In the below example, the public URL for the bikesharingweb service is http://dev.bikesharingweb.<random suffix>.weu.azds.io/
$ azds list-uris
    Uri                                                       Status
    --------------------------------------                    -------
    http://dev.bikesharingweb.<random suffix>.weu.azds.io/    Available
    http://dev.gateway.<random suffix>.weu.azds.io/           Available
Navigate to the bikesharingweb service by opening the public URL from the azds list-uris command.
In the above example, the public URL for the bikesharingweb service is http://dev.bikesharingweb.<random suffix>.weu.azds.io/
Select Aurelia Briggs (customer) as the user. Then select a bike to rent.
If you don't have the Azure Pipelines app in your Github account already, install it from: https://github.com/marketplace/azure-pipelines.
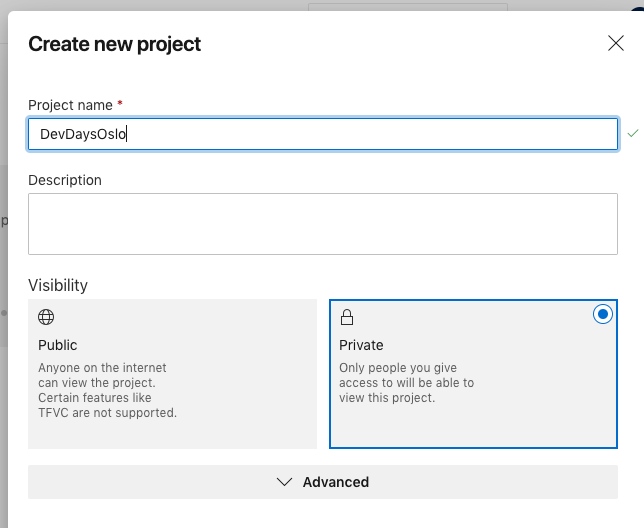
Create the project:
Install Github AzureDevOps Rest Api Integration extension in your Azure DevOps organization where Project was created.
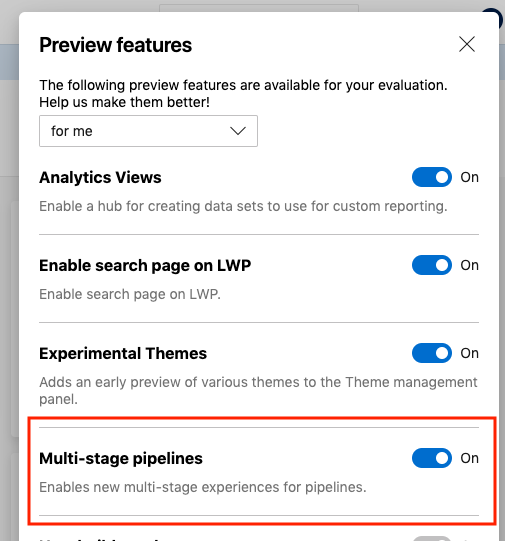
In Azure DevOps under Preview features, enable Multi-stage pipelines:
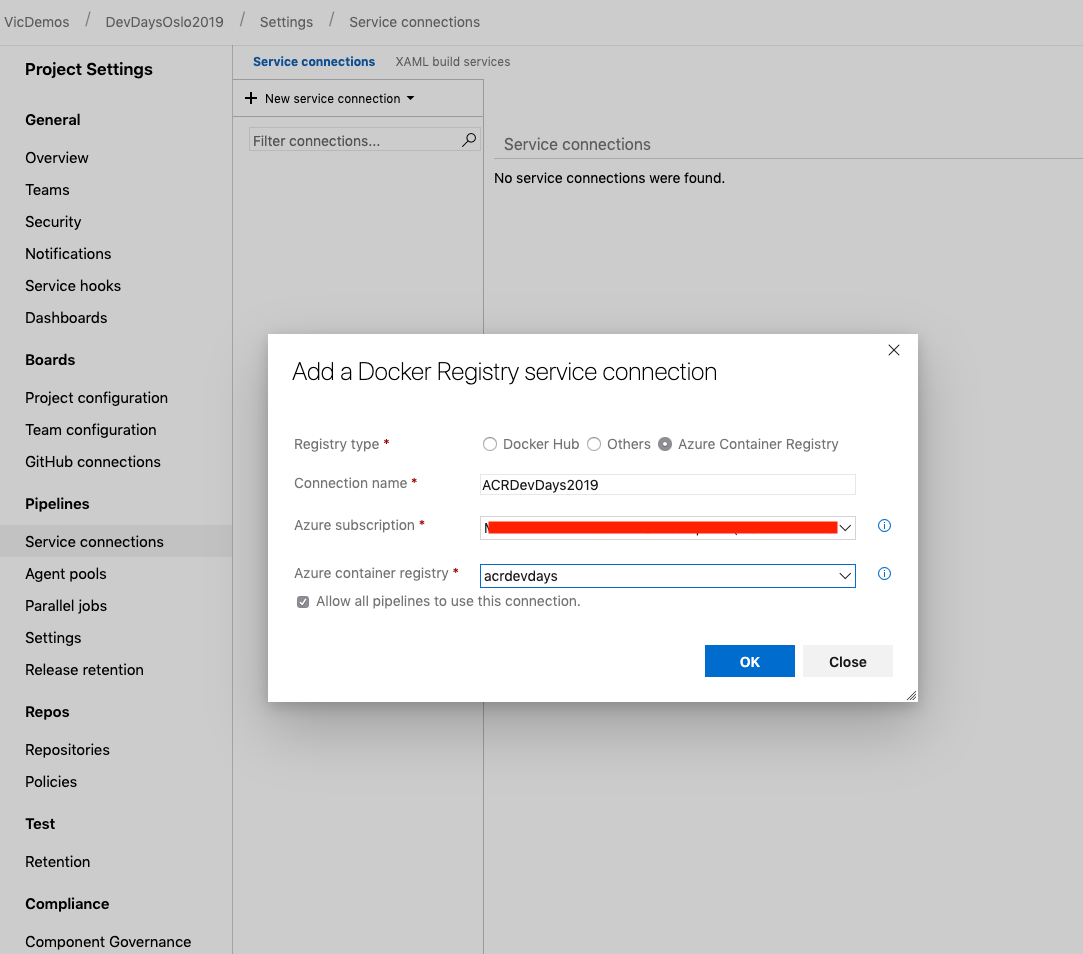
To create Service Connections go to Project Settings and choose Service connections under Pipelines. Create 4 Service Connections.
- Docker Registry (Azure Container Registry)
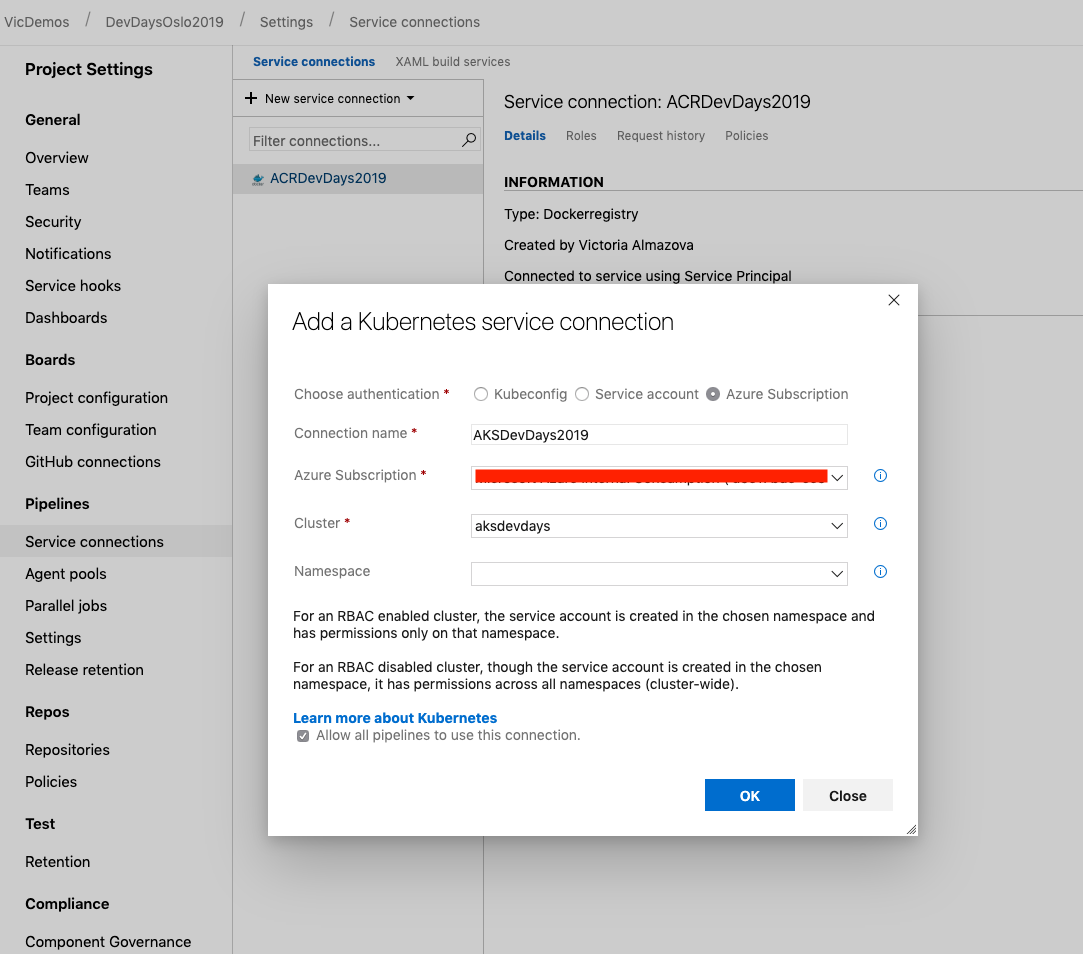
- Kubernetes (Azure Subscription)
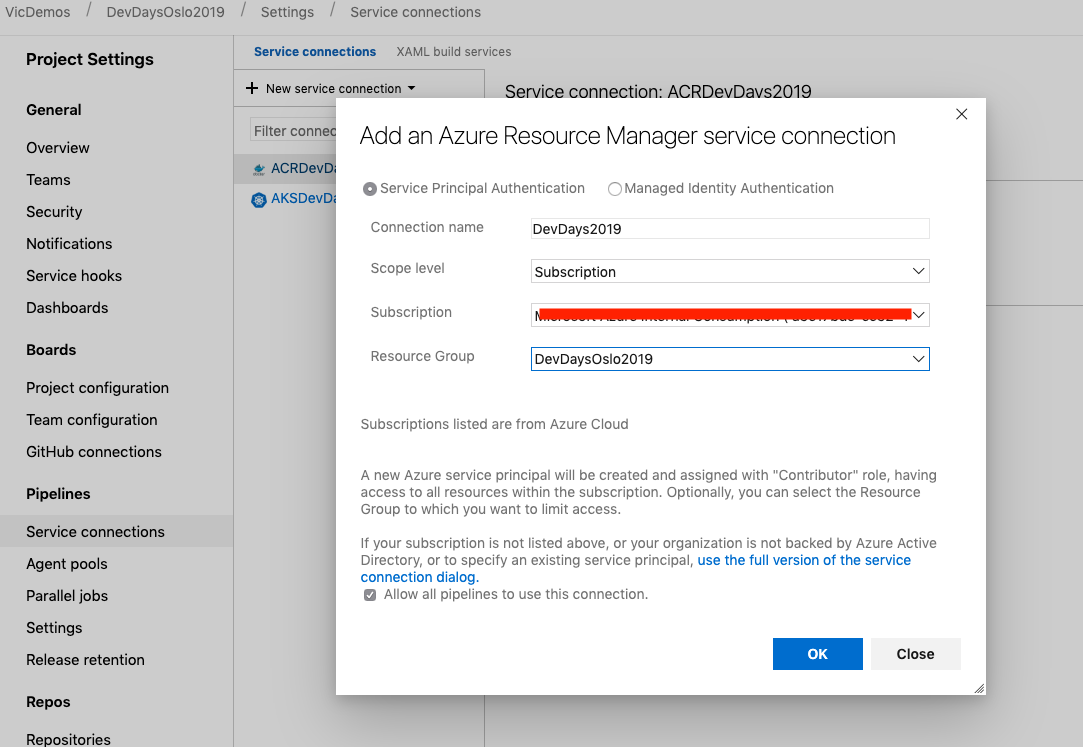
- Azure Resource Manager (Service Principal Authentication)
- GitHub

After you have created your Service Connections, navigate to Pipelines and create a new Pipeline. In the next step you will be asked to point to your code repository. Select GitHub and choose the repository you forked earlier.
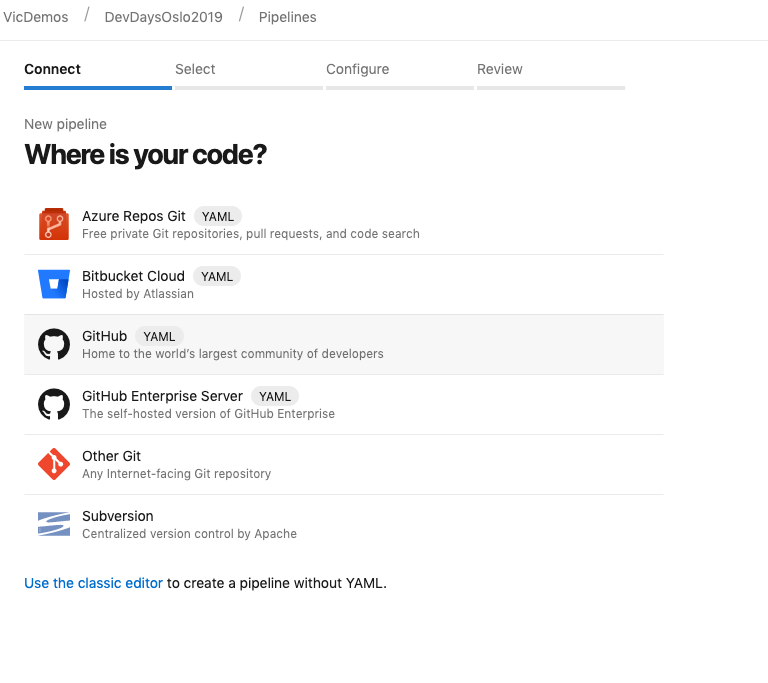
Choose your forked repository. Azure Pipelines will analyze your repository content and suggest CI/CD templates.
Select “Existing Azure Pipelines YAML file”.
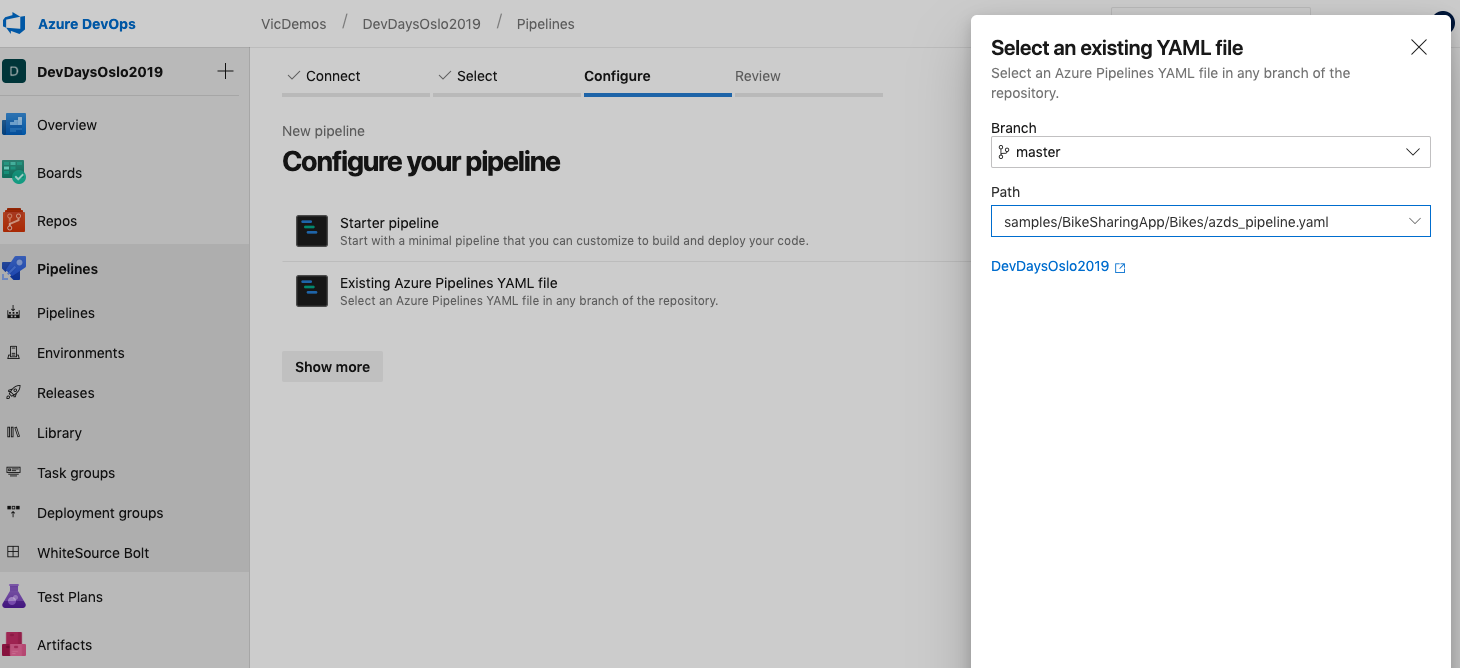
Type the path BikeSharingApp/Bikes/azds_pipeline.yaml to the YAML file in the Bikes directory and continue.

Edit the YAML. Do following:
- Replace CONTAINER-REGISTRY-CONNECTION-NAME with the Docker Registry service connection name.
- Replace CONTAINER-REGISTRY-URL. You can find this information in the Azure Portal under your Azure Container Registry. It should look something like this: login server: devdays2019.azurecr.io.
- Replace KUBERNETES-CONNECTION-NAME with the Kubernetes service connection name.
- Replace the KUBERNETES-CLUSTER-NAME with your AKS cluster name.
- Replace the KUBERNETES-CLUSTER-RESOURCE-GROUP with your Azure Resource Group name in which you have created the cluster.
- Replace the AZURE-CONNECTION-NAME with your Azure Resource Manager service connection name.
- Replace GITHUB-CONNECTION-NAME with your GitHub service connection name.
When everything is changed, apply and run it. Explore how pipeline works: tasks and flow. The first time pipeline will build and deploy to Dev space.

Trigger section in pipeline ensures that pipeline will run only when you make changes to the Bikes service. There are two stages in the pipeline, and each has a condition which ensures they run only on changes to the master branch or when a pull request is created for master.
Create the new branch named bike-images and verify that you are on the bike-images branch:
$ git checkout -b bike-images
$ git status
Navigate to Bikes/server.js and remove lines:
// Hard code image url *FIX ME*
   theBike.imageUrl = "/static/logo.svg";

Stage and commit your changes to the bike-images branch. Push the branch to your Github:
$ git add Bikes/server.js
$ git commit -m "Removing hard coded imageUrl"
$ git push origin bike-images
Navigate to your forked repository on GitHub and create a new pull request. The base branch will be master and the branch you are comparing is bike-images. Or you should see notification with message: "Compare & pull request".

Navigate to your build pipeline and confirm it has started building the Bikes service.

Once the build pipeline has successfully completed, navigate back to your pull request on GitHub.
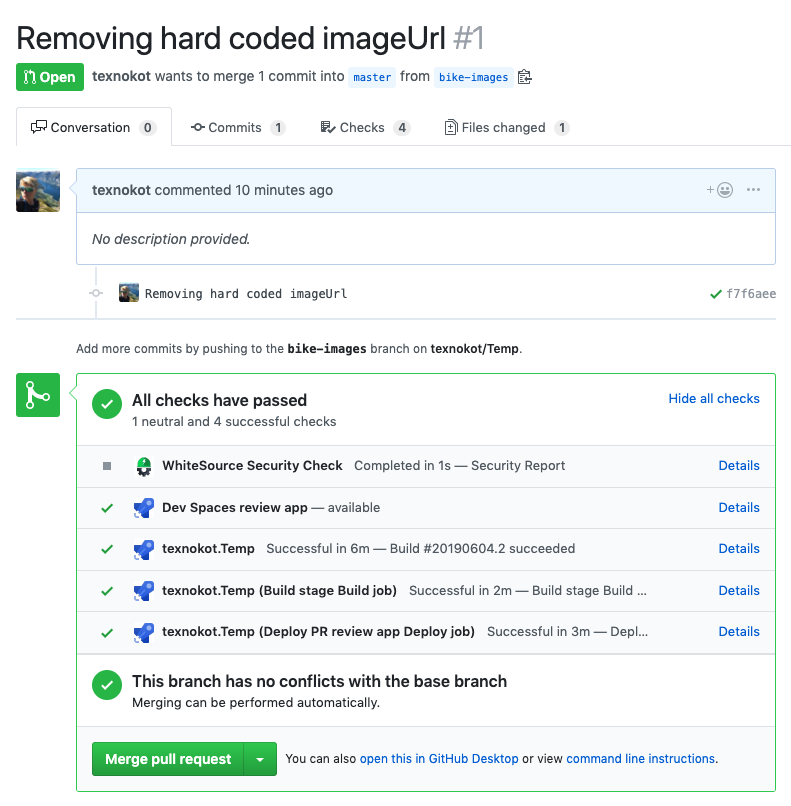
Open the review app by clicking on Details to the right of the Dev Spaces review app label.
It will open website with deployed changes. Website is deployed in separate dev space.
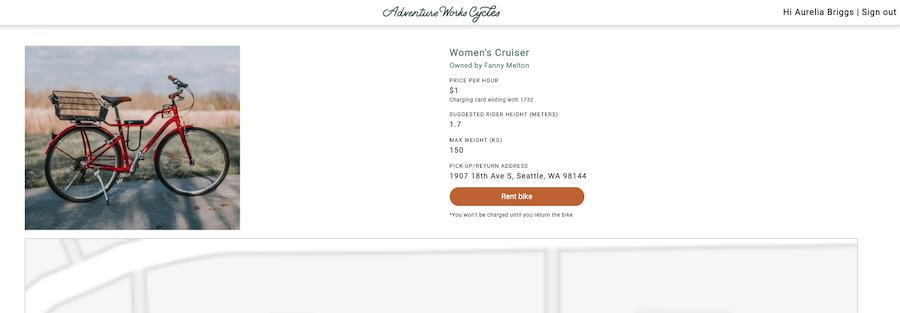
Now that we have our changes running in a new dev space, this is a great opportunity to include team members such as product managers and designers to look over our changes and provide feedback.
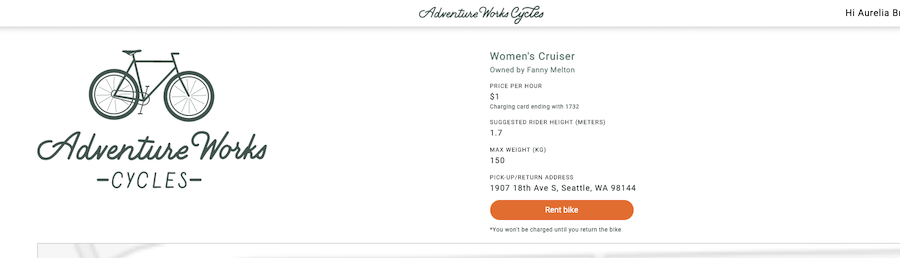
Navigate back to the detail page for renting a bike. Confirm the placeholder image has been replaced with an actual image of the bike.
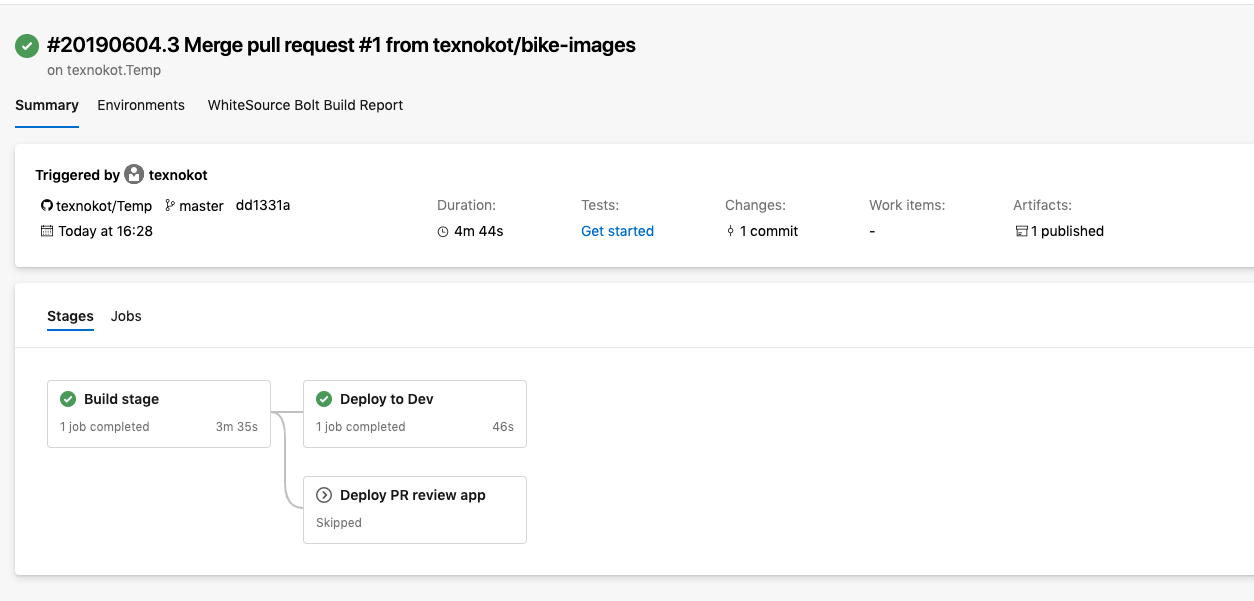
Merge pull request. Once the pull request is merged, the build pipeline will trigger and redeploy the parent branch to the parent dev space. In our scenario the master branch is deployed to the dev space named “dev”. You should try this exercise on your own.
Workshop is inspired by Build 2019 session: "End to end application development and DevOps on Azure Kubernetes Service - BRK3039"
- The article "Kubernetes, GitHub, and DevOps: Putting it all together to increase confidence in PR reviews"
- Bikes application is from Azure Dev Spaces examples Github: https://github.com/Azure/dev-spaces
- Azure Dev Spaces documentation: https://docs.microsoft.com/en-us/azure/dev-spaces/
- Azure Dev Spaces Team collaboration: https://docs.microsoft.com/en-us/azure/dev-spaces/quickstart-team-development
- Stages in Azure DevOps Pipelines: https://docs.microsoft.com/en-us/azure/devops/pipelines/process/stages?view=azure-devops&tabs=yaml