This repo is dedicated to using Adafruit’s FT232H Breakout with a Mac.
Please see the blog post Mac NeoPixel notification light 2.0 for how this kicked off.
Run each of the following at the command line (macOS’ Terminal):
brew install libusbpip3 install pyftdi adafruit-blinkaecho 'export BLINKA_FT232H=1' >> ~/.bash_profile
Now quit Terminal and the restart it to make use of the updated bash profile.
Connect a FT232H Breakout to one of your Mac’s USB ports. Depending on which version of the FT232H Breakout you have, you may need a USB adaptor. For example, the original version has a micro USB connector, so you may need to a USB-C to female USB-A adaptor to connect the required micro USB cable to a recent MacBook Pro or Air.
This repo contains a number of simple apps to try:
The first set of examples make use of an Adafruit 0.56-inch 4-digit, 7-segment LED display connected to the FT232H Breakout’s I²C pins. The display is driven by a separate library, htk1633segment_circuitpython.py, which is included here to make it easy to import. You can visit the library’s source repo here.
The last two examples, cpu.py and network.py, require psutil, installed using pip3 install psutil.
Note Don’t forget to connect pins D1 and D2 directly in addition to using D1 as the I2C SDA pin.
countdown.py— Count down from 9999 to 0.countup.py— Count up from 0 to 9999.cpu.py— See your Mac’s processor utilization in real time.network.py— See a count of received packets in real time (resets at 9999).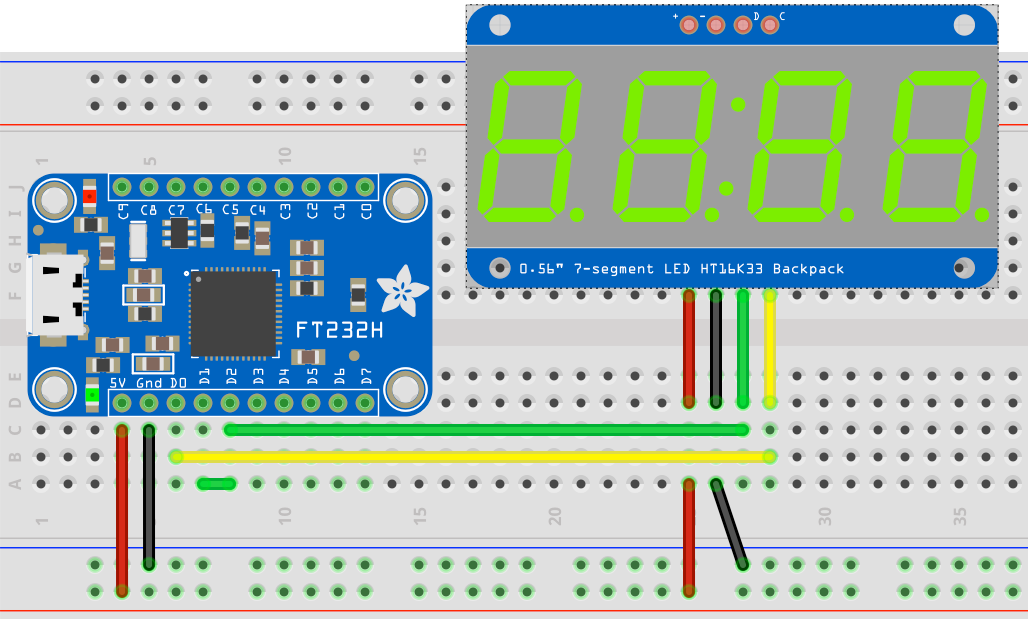

The following example uses an Adafruit MCP9808 temperature sensor breakout along with the seven-segment LED. To make use of the sensor, you need to install its driver library as follows: sudo pip3 install adafruit-circuitpython-mcp9808. That done you can run the code to display the current ambient temperature on the LED.
mcp9808.py— Display atmospheric temperature readings.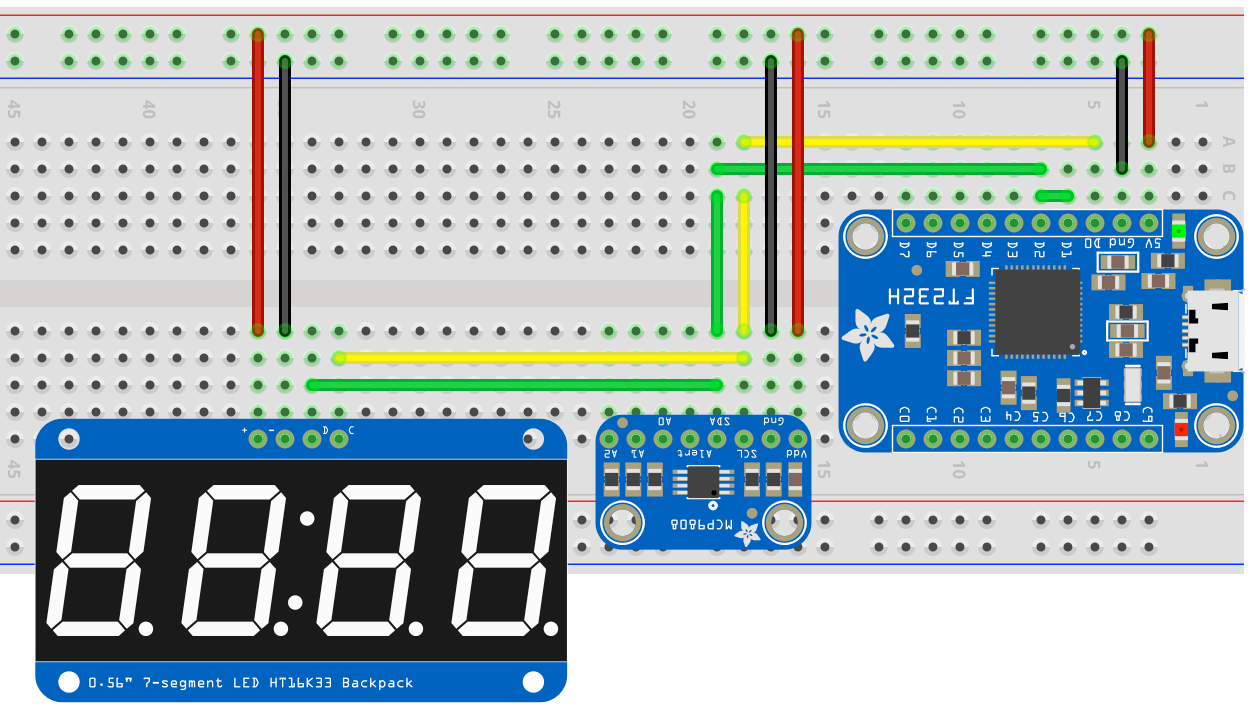

The following examples use either an Adafruit 128x32 OLED or an Adafruit 128x64 OLED panel connected to the FT232H Breakout’s I²C pins. Either display is driven by a separate library, ssd1306_circuitpython.py, which is included here to make it easy to import. macinfo.py also requires psutil, installed using pip3 install psutil.
macinfo_128x32.py— See a selection of Mac system info in real time.macinfo_128x64.py— See a wider selection of Mac system info in real time on a 128x64 display.boxes_128x32.py— Draw random boxes on the screen.boxes_128x64.py— As above but for the 128x64 display.eyes_128x32.py— Draw a pair of animated eyes. Watch them blink! See their mood change!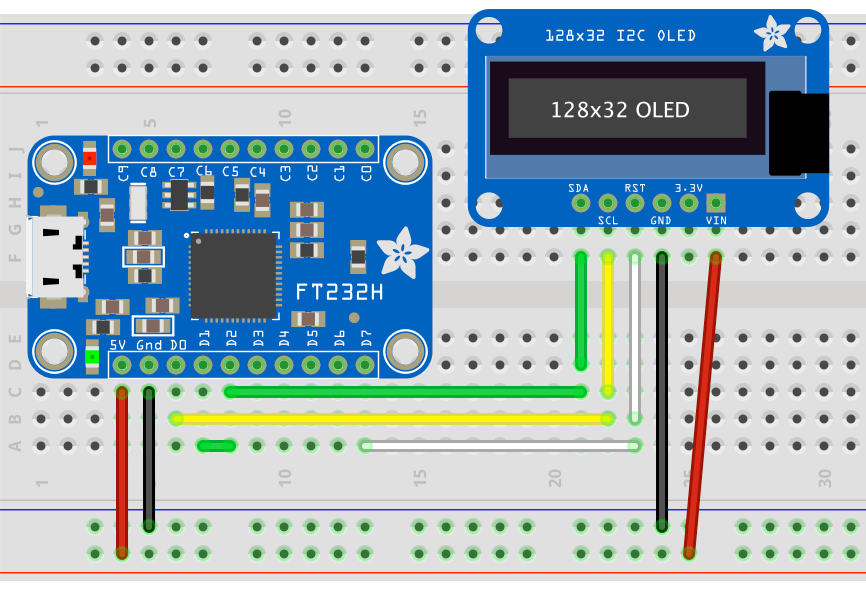

There’s a separate example of using SPI with a single NeoPixel here.
![]()
gpio_flash.py— A very simple LED flasher; requires a single-colour LED.button.py— Use a physical button to trigger an action on your computer.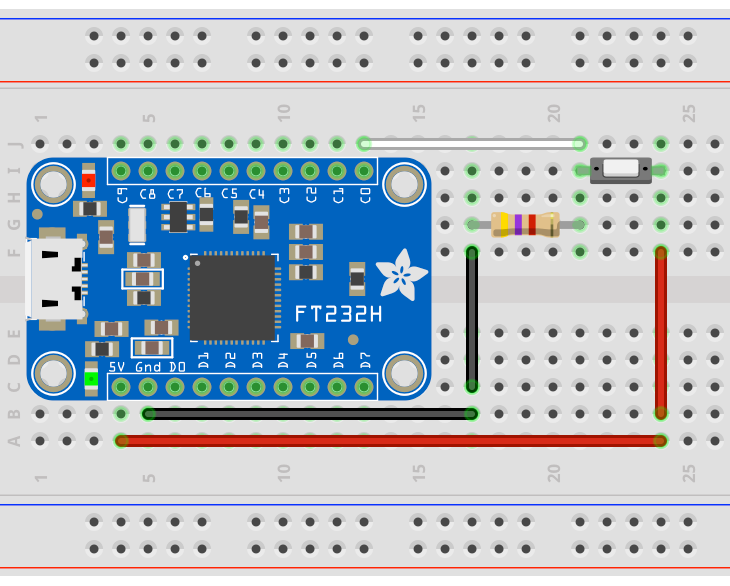
nokia.py— A demo app for the Nokia 5110 display. There are a number of products from Adafruit, Sparkfun and others that provide this display. The code is configured for mine; you may need to adjust the pins passed into the class constructor for whichever version you have. The display is driven by a separate library,nokia5110_circuitpython.py, which is included here to make it easy to import.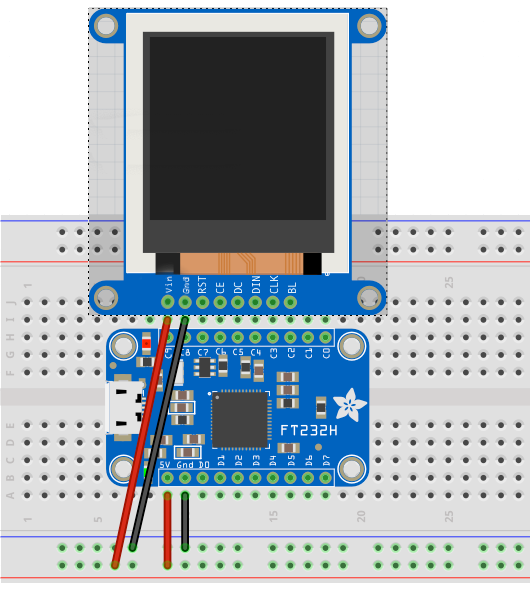


The FT232H Breakout provides UART through pins D0 (TX) and D1 (RX). The serial port is accessed as a Unix files in the /dev directory not through the Adafruit libraries which you call to access I2C, SPI and GPIO.
To find your device when it’s connected enter:
ls /dev/cu*
You’ll see something like:
crw-rw-rw- 1 root wheel 18,  3 Mar  4 09:40 /dev/cu.Bluetooth-Incoming-Port
crw-rw-rw- 1 root wheel 18,  5 Mar  4 09:40 /dev/cu.TSAirPods-WirelessiAP
crw-rw-rw- 1 root wheel 18, 17 Mar  4 17:10 /dev/cu.usbserial-1470
The entry /dev/cu.usbserial-xxxx is your FT232H Breakout as a serial port.
You can now run screen to view the data coming in on the UART:
screen /dev/cu.usbserial-1470 9600
You can also control the UART via Python using the PySerial module. Install PySerial using:
pip install pyserial
And then you can run code as follows:
import serial
uart = serial.Serial("/dev/cu.usbserial-1470")  # open serial port
uart.write(b"Hello, world")                     # write a string
uart.read_until()                               # Wait for a response terminated by a newline
uart.close()                                    # close port
The files m2m_ft232h.py, m2m_other.py and m2m_lines.txt provide a fun example of UART usage. It requires a second USB-to-UART adaptor, such as a second FT232H or and FTDI cable. You can connect them to USB ports on one machine (you’ll also need to open a second Terminal tab) or on two machines. In either case, you connect the TX and RX pins of one to the RX and TX pins of the other. You’ll need to modify m2m_ft232h.py and m2m_other.py to enter the Unix files representing, respectively, your FT232H and whatever other adaptor you’re using. If you’re using a second machine, copy m2m_other.py and m2m_lines.txt to it and place them in the same folder.
Now enter python3 m2m_other.py at the command line; the code will waiting for a message. Quickly enter python3 m2m_ft232h.py in the other Terminal tab. You should see the two machines engaging in a conversation, of sorts, over the UART link.My mis