This project was built using Nest.js, a Node.js framework for building efficient and scalable server-side applications. under the hood nestjs is using expressjs, nest also support both typescript and javascript
This project is using this project as boilerplate
# install dependencies
$ npm install

# get env variable
$ cp .env.example .env

# start service
$ npm run dependency:localNote:
- Finish installation first
- See endpoint list in here
# development
$ npm run start

# watch mode
$ npm run start:devsecure your mongodb keyfile:
make folder secret inside folder resources and execute this command
openssl rand -base64 741 > resources/secret/mongodb-keyfilecreate kubernetes secret with the mongodb keyfile you just create:
kubectl create secret generic mongo-key --from-file=resources/secret/mongodb-keyfilecheck the mongo-key secret:
kubectl get secret
- now you R ready to apply resources/kubernetes/mongodb-statefulset.yaml
kubectl apply -f resources/kubernetes/mongodb-statefulset.yaml - wait until all the 3 pods R running
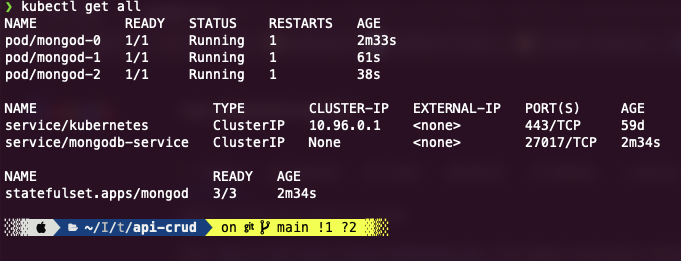
- check pvc:

kubectl get pvc
-
define replica set in mongo bash in the running pod
-
by execute:
  kubectl exec -it mongod-0 -- bash
# now you can acces the pod bash
-
in pod bash, login to mongo, by execute:
mongo -u root -p developer
-
execute this command to make your own replica set with your own host
rs.initiate({ _id: 'MainRepSet', version: 1, members: [ { _id: 0, host: 'mongod-0.mongodb-service:27017' }, { _id: 1, host: 'mongod-1.mongodb-service:27017' }, { _id: 2, host: 'mongod-2.mongodb-service:27017' } ] }) -
rs.status() to see if there is primary replica set, it will look similiar like this:
  "members" : [
      {
        "_id" : 0,
        "name" : "mongod-0.mongodb-service:27017",
        ...
        "stateStr" : "PRIMARY",
        ...
      },
      {
        "_id" : 1,
        "name" : "mongod-1.mongodb-service:27017",
        ...
        "stateStr" : "SECONDARY",
        ...
        "syncSourceHost" : "mongod-0.mongodb-service:27017",
        ...
      },
      {
        "_id" : 2,
        "name" : "mongod-2.mongodb-service:27017",
        ...
        "stateStr" : "SECONDARY",
        ...
        "syncSourceHost" : "mongod-0.mongodb-service:27017",
        ...
      }
    ],
-
if not, exec this command bellow to make host mongod-0.mongodb-service:27017 as primary
rs.secondaryOk()- it's depend on which pod you are accessing the mongo bash
-
after that you can run this application on kubernetes:
kubectl apply -f resources/kubernetes/deploy-app.yaml
-
wait until this app's pod is running
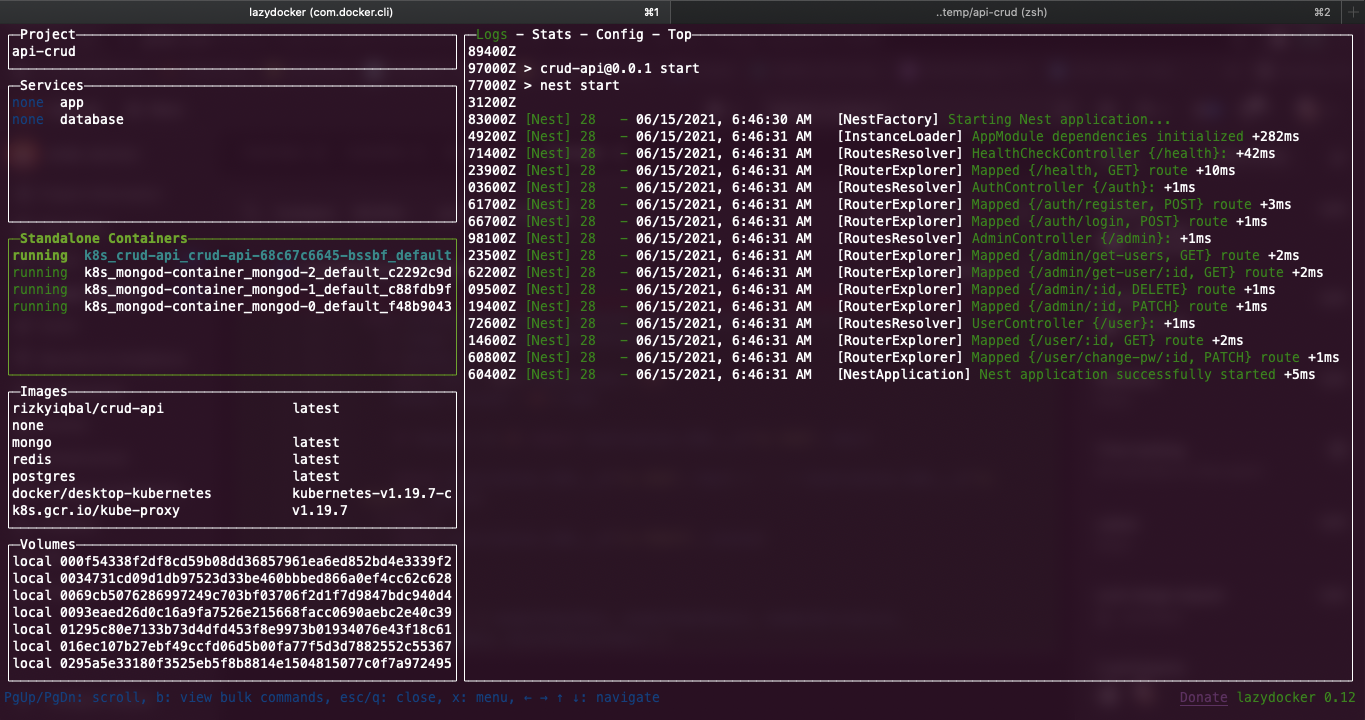
-
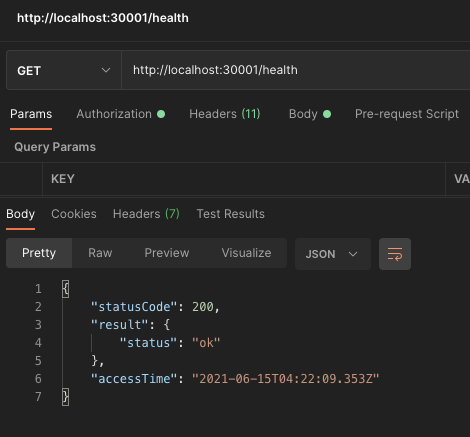
Done, the application is running on port 30001
-


Note: Finish installation first
simply exec this command:
npm run seederYou need to access the app's pod bash by execute this command:
kubectl exec -it `app-name` -- bashinside the pod bash exec this command:
npm run seeder
this is the admin credentials:
{
  "email": "admin@admin.com",
  "password": "lumosmaxima"
}You can see the test case on github action instead
User API- Success => Should get a user
- Success => User should change password and login with that password
- Error => User access API should got error: Invalid token
- Error => User access API should got error: Invalid token => authorization not set
- Error => User access API should got error: Forbidden
- Error => User access API should got error: User blocked
- Error => Get user data should got error: User can't get other user's data
- Error => Get user data should got error: No such a user
- Error => Get user data should got error: Invalid param
Authentication API- Success => Should register a user and return a token
- Success => Should login a user and return a token
- Error => login a user should got error: Wrong password or email
- Error => Register a user should got error: Email already exist
- Error => Register a user should got error: Invalid body
- Error => Register a user should got error: Invalid body => Payload isAdmin === true
Admin API- Success => Should get many user
- Success => Should delete a user
- Success => Should block and unblocking a user
- Error => Should got error: user can't access Admin API
- Error => Delete a user should got error: Invalid param
- Error => Delete a user should got error: No such a user
- Error => Blocking a user should got error: Invalid param
- Error => Blocking a user should got error: No such a user
- Error => Should block and unblocking a user: Required query not set
Health API- should hit health check endpoint
if you want to run the test locally, finish the installation first and run the command bellow
# integration tests
$ npm run test| Methode | Endpoint | API | Description |
|---|---|---|---|
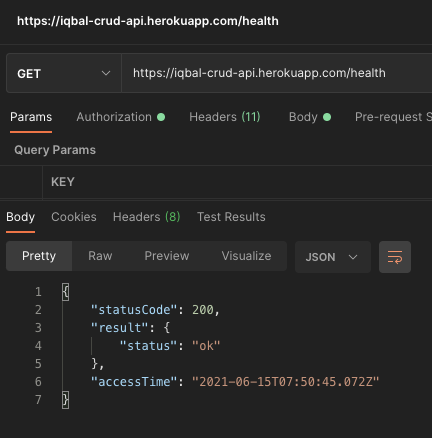
| GET | /health | Health API | Check server |
| POST | /auth/register | Auth API | User register |
| POST | /auth/login | Auth API | User Login |
| GET | /admin/get-users | Admin API | Admin get all users |
| GET | /admin/get-user/:id | Admin API | Admin get a user |
| DELETE | /admin/:id | Admin API | Admin delete a user |
| PATCH | /admin/:id | Admin API | Admin block/unblock a user |
| GET | /user/:id | User Api | User get his/her data |
| PATCH | /user/change-pw/:id | User APi | User change password |
- You can see this project's image on this link
- by default this image is set to connect to mongodb statefulset on kubernetes, but you can set it to connect to localhost by build and set the APP_ENV
docker build -t rizkyiqbal/crud-api --build-arg APP_ENV=local . - please see .env.example, Dockerfile and appConfig.js for more details
| Job Name | Description |
|---|---|
| Test | Integration test |
| Docker | Build and push this app's image to my docker hub |
| Deploy | Deploy this app to heroku |
This project is live on https://iqbal-crud-api.herokuapp.com/
Note :
- please see the endpoint list
- header["x-user-id"] is required,so please fill it with the value of user._id
- see user.schema.ts to check required body for post/patch method

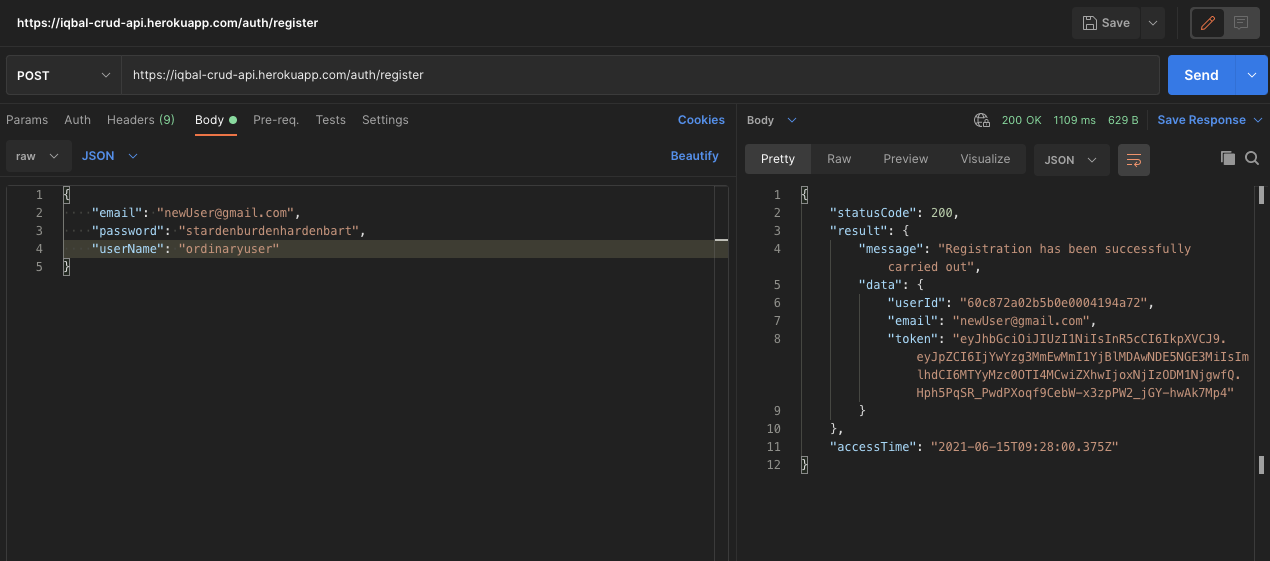
- Register a user using this endpoint https://iqbal-crud-api.herokuapp.com/auth/register with POST method
- Add header key
x-user-idwith the value of userId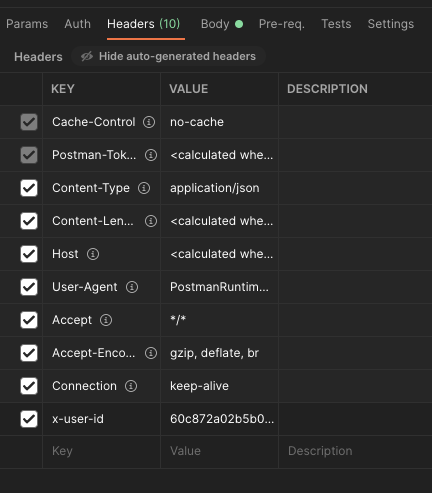
- Set auth type to
Bearer Tokenand token value of the token you just got when register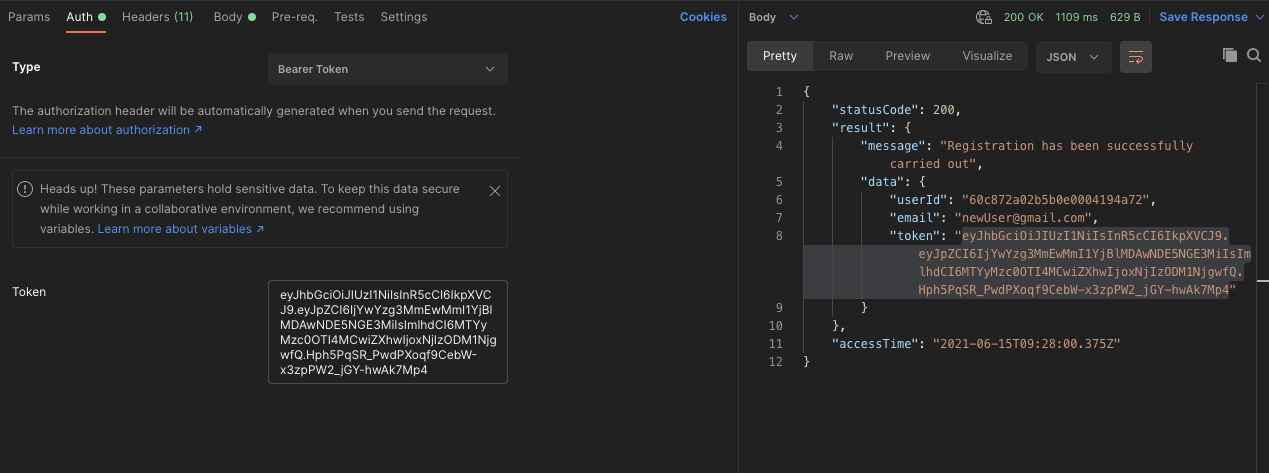
- Now you can access
USER API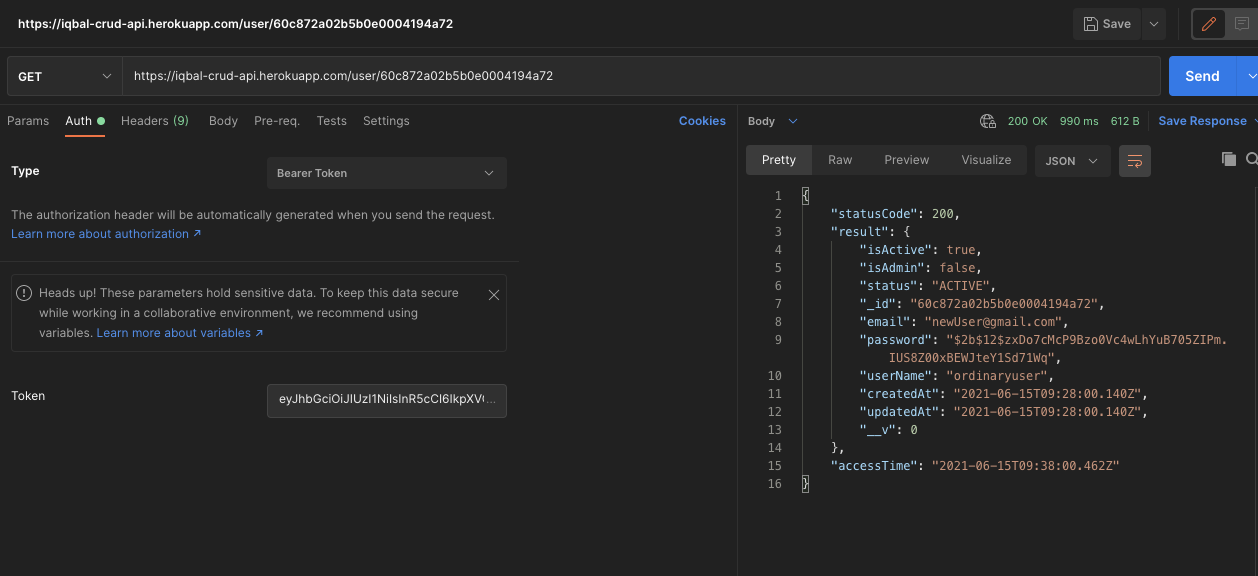


Nest is an MIT-licensed open source project. It can grow thanks to the sponsors and support by the amazing backers. If you'd like to join them, please read more here.
- Author - Rizky Iqbal
- Website - https://rizky-iqbal.netlify.app
- Instagram - @rizky_iqbal48
- Twitter - @rizkyiqbal36
- Github - Rizky-Iqbal36
- Gitlab - rizkyiqbal36
This project is MIT licensed.
if you like this project, then you may also like the following projects: