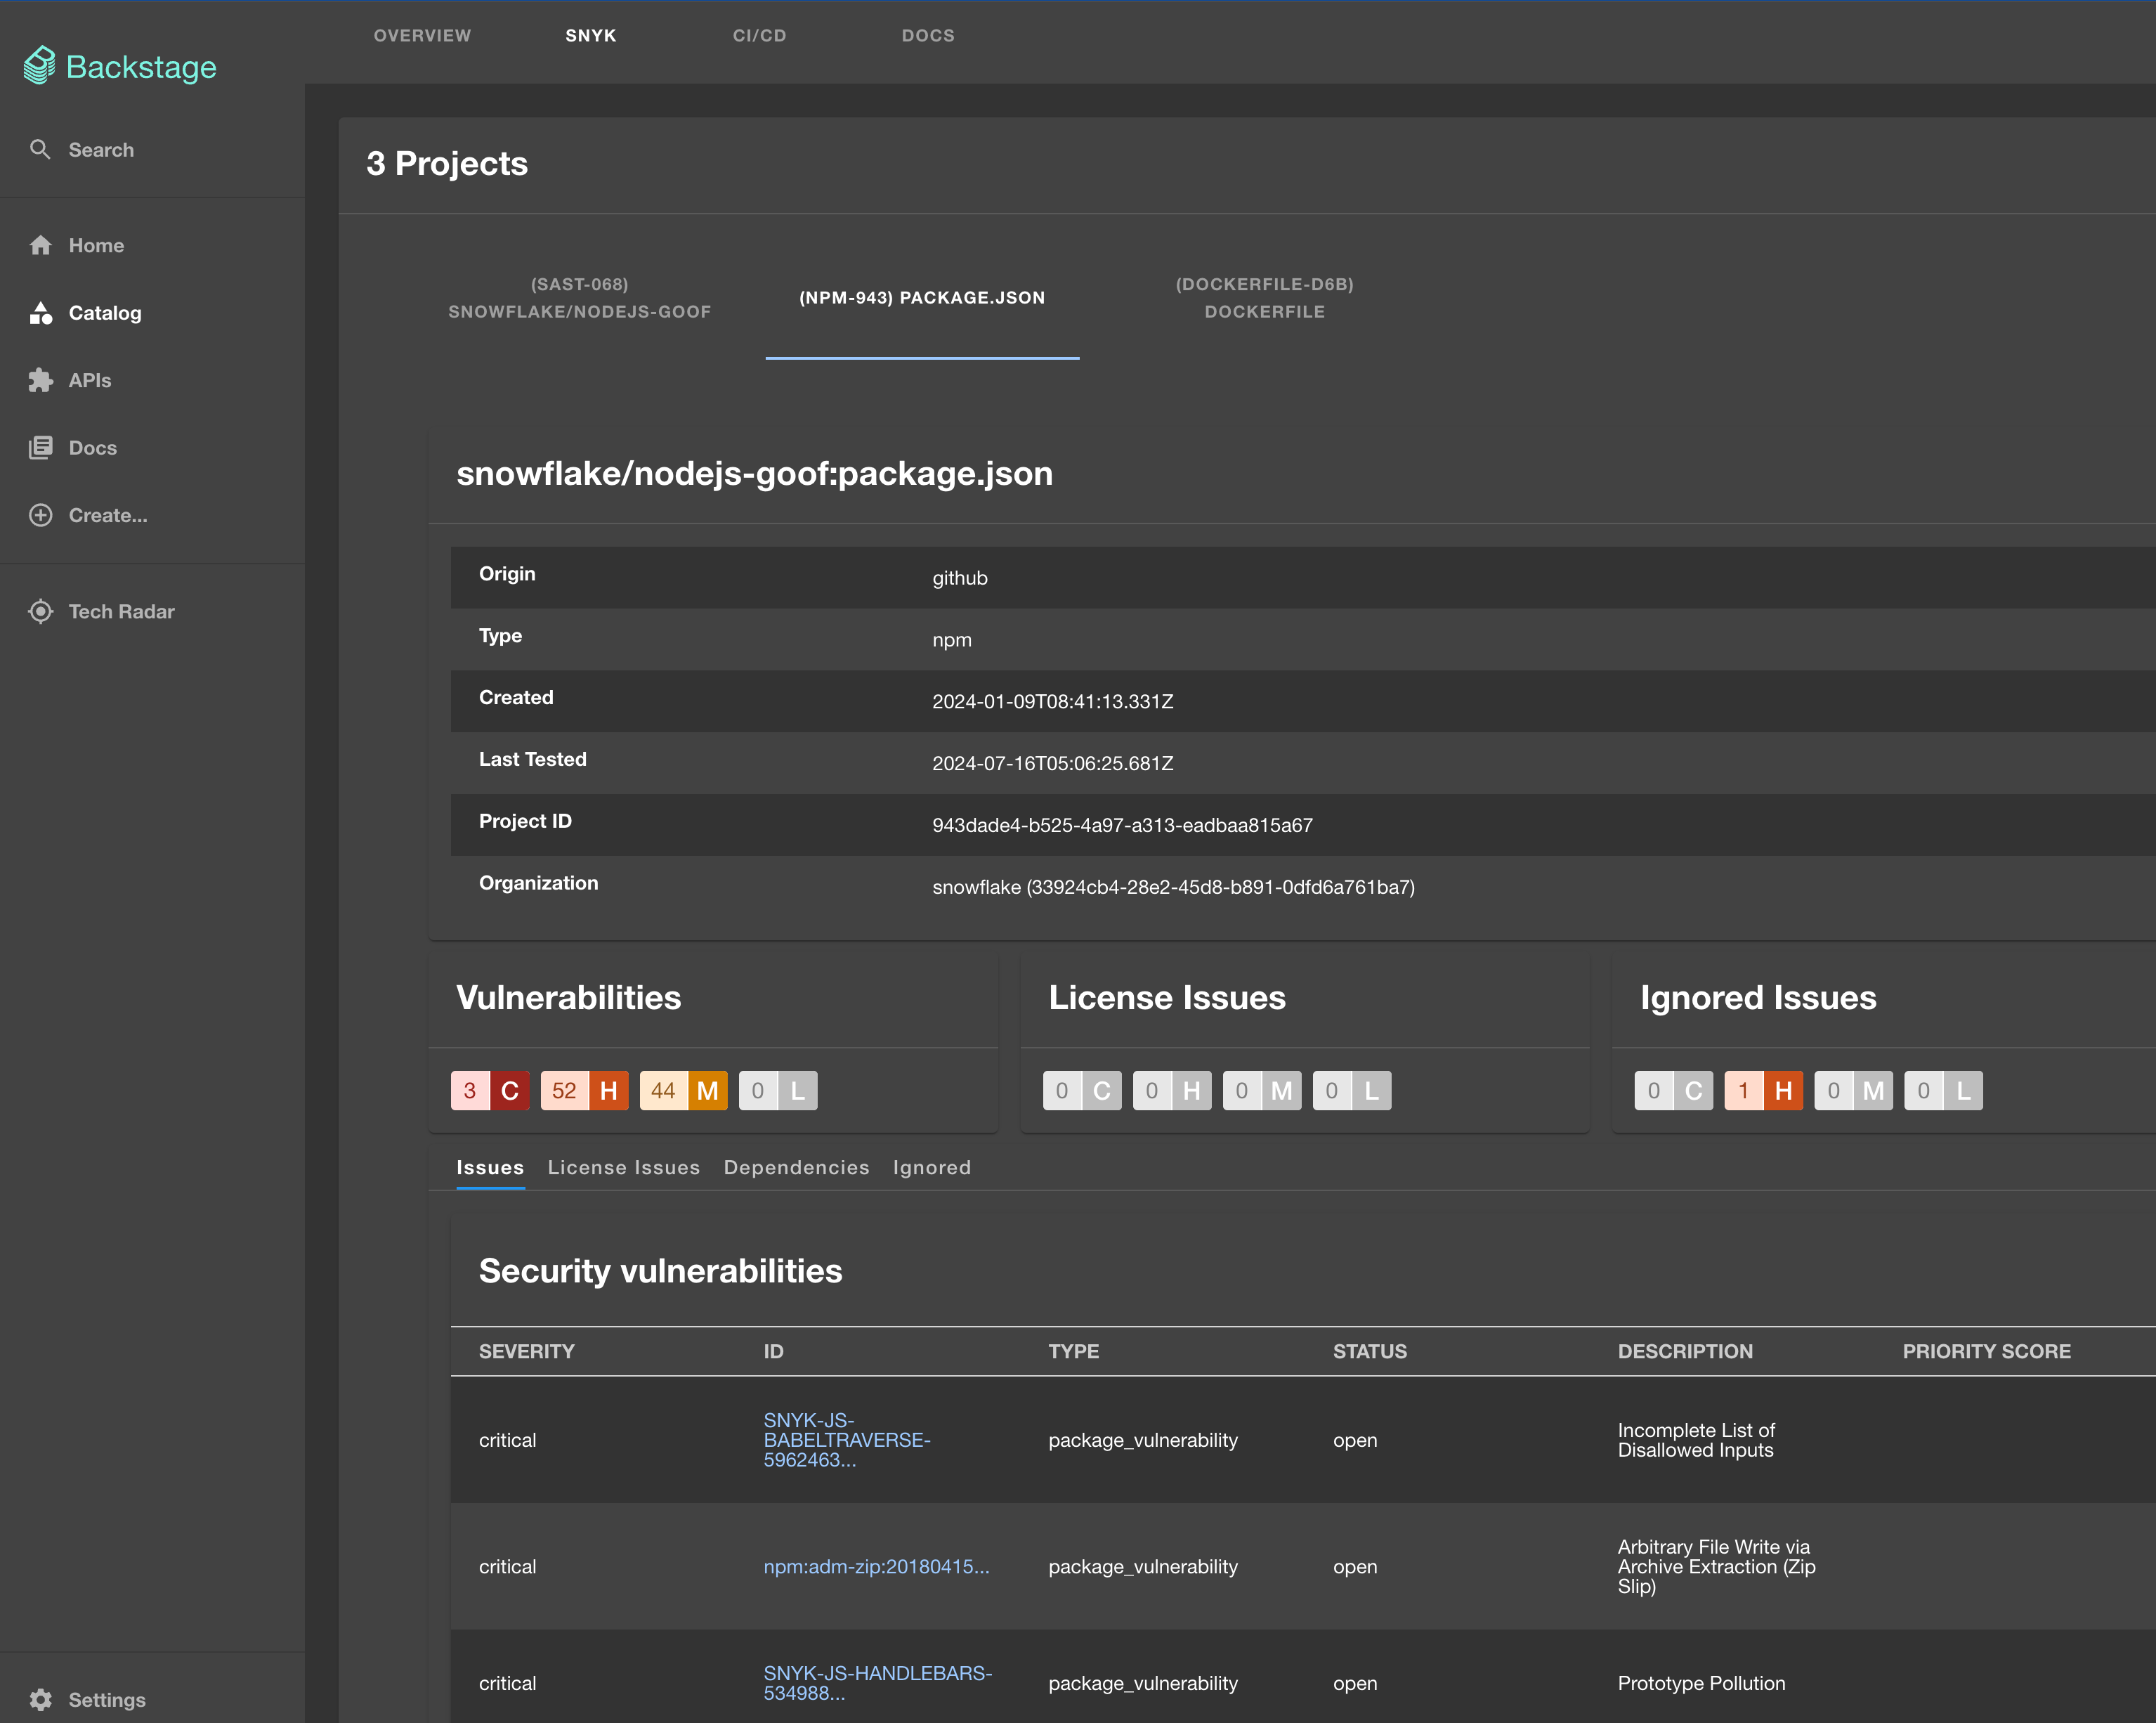
The Snyk plugin displays security details from snyk.io.
- List vulnerabilities detected by Snyk directly in Backstage with the
EntitySnykContentcomponent. - Use the
SnykOverviewwidget to get a compact vulnerability count on your entity page.
-
Ensure you are on a Snyk Paid plan to access the Snyk API.
-
Install the plugin:
yarn add --cwd packages/app backstage-plugin-snyk- Add the plugin to the
EntityPage.tsxfile. Feel free to rename the title to Security, Snyk, Vulns, or whatever you prefer.
// packages/app/src/components/catalog/EntityPage.tsx

import {
  SnykOverview,
  EntitySnykContent,
  isSnykAvailable,
} from "backstage-plugin-snyk";

...

const serviceEntityPage = (
  ...
  <EntityLayout.Route
    path="/snyk"
    title="Snyk"
    // Uncomment the line below if you'd like to only show the tab on entities with the correct annotations already set
    // if={isSnykAvailable}
  >
    <EntitySnykContent />
  </EntityLayout.Route>
);
To show the vulnerability count widget:
// packages/app/src/components/catalog/EntityPage.tsx
const overviewContent = (
  <Grid container spacing={3} alignItems="stretch">
    ...
    <Grid item md={6} if={isSnykAvailable}>
      <SnykOverview />
    </Grid>
  </Grid>
);
Or make it conditional:
// packages/app/src/components/catalog/EntityPage.tsx

const overviewContent = (
  <Grid container spacing={3} alignItems="stretch">
    ...
    <EntitySwitch>
      <EntitySwitch.Case if={isSnykAvailable}>
        <Grid item md={6}>
          <SnykOverview />
        </Grid>
      </EntitySwitch.Case>
    </EntitySwitch>
  </Grid>
);- Add the Snyk proxy configuration to the
app-config.yamlfile in the root directory. The User Agent helps us track API traffic from Backstage setups so we can invest more in the plugin!
proxy:
  endpoints:
    ...
    /snyk:
      # Host of the API to use for calls.
      # For Snyk Enterprise customers with regional contracts, change this to api.eu.snyk.io (for EU) or api.au.snyk.io (for AUS) (see https://docs.snyk.io/working-with-snyk/regional-hosting-and-data-residency)
      target: https://api.snyk.io/
      headers:
        User-Agent: tech-services/backstage-plugin/1.x
        Authorization: token ${SNYK_TOKEN}
...- Optionally, add the following configuration to your
app-config.yaml:
snyk:
  # Host of the Web UI to render links. Defaults to "app.snyk.io"
  # If you use an EU or AU Snyk account, change this to app.eu.snyk.io or app.au.snyk.io
  appHost: app.snyk.io
  #
  # Uncomment to specify the version of the API to use for calls. Defaults to "2024-02-28".
  # Override with care, not all versions have a target API.
  # apiVersion: 2024-02-28
  # Uncomment to specify the version for the issues API specifically. Defaults to 2024-01-23
  # issuesApiVersion: 2024-01-23
  #
  # Mocks the API calls, useful for development and for testing the plugin without a Snyk account. Defaults to "false".
  mocked: false
  #
  # Shows resolved issues in all graphs. Defaults to "false" to show only non-resolved issues.
showResolvedInGraphs: false-
Obtain your Snyk token (a service account with Viewer permission at your group level is preferred) and set the
SNYK_TOKENenvironment variable with its value:export SNYK_TOKEN="123-123-123-123"
-
Add one of the following annotations to your entities:
snyk.io/org-id: The ID of the Snyk organization where your project is located. You can find the ID in the Organization Settings in the Snyk dashboard.snyk.io/org-ids: Specify one or more Snyk organization IDs, comma-separated. This will try to find any targets or projects in any of the organizations.snyk.io/org-idis ignored when this annotation is set.
-
Then add one or more of the following annotations to your entities:
snyk.io/target-id: Specify a single target by name or ID. Using the target ID will avoid an API call and be faster. Use this API endpoint to get the Target IDs.snyk.io/targets: Specify one or more targets by name or ID. Using the target ID will avoid an API call and be faster. Use this API endpoint to get the Target IDs.snyk.io/project-ids: The project ID (see slug in URL or ID in project settings). If there are multiple projects (e.g., multiple package.json or pom files), add them comma-separated.snyk.io/exclude-project-ids: Exclude specific projects you might not want.
Example:
apiVersion: backstage.io/v1alpha1
kind: Component
metadata:
  name: goof
  description: Goof
  annotations:
    snyk.io/org-id: 361fd3c0-41d4-4ea4-ba77-09bb17890967
    snyk.io/targets: Snyk Demo/java-goof,508d2263-ea8a-4e42-bc9d-844de21f4172
    snyk.io/target-id: aarlaud-snyk/github-stats
    snyk.io/project-ids: 7439e322-f9c1-4c42-8367-002b33b9d946,db066cb9-b373-46da-b918-b49b541e0d63
    snyk.io/exclude-project-ids: 4737fc9c-3894-40ba-9dc5-aa8ae658c9f6,38e02916-0cf7-4927-ba98-06afae9fef36
spec:
  type: service
  lifecycle: production
  owner: guest
  ....
More examples can be found here.
- Update the proxy target to not contain
/v1.
-
Missing or incorrect token set in the backend proxy.
-
404 errors from the Snyk API? Add the following
pathRewriteto yourapp-config.yamlproxy:
proxy:
  endpoints:
    ...
    /snyk:
      target: https://api.snyk.io/
      headers:
        User-Agent: tech-services/backstage-plugin/1.x
        Authorization: token ${SNYK_TOKEN}
      pathRewrite:
        "^/proxy/snyk/": "/"
