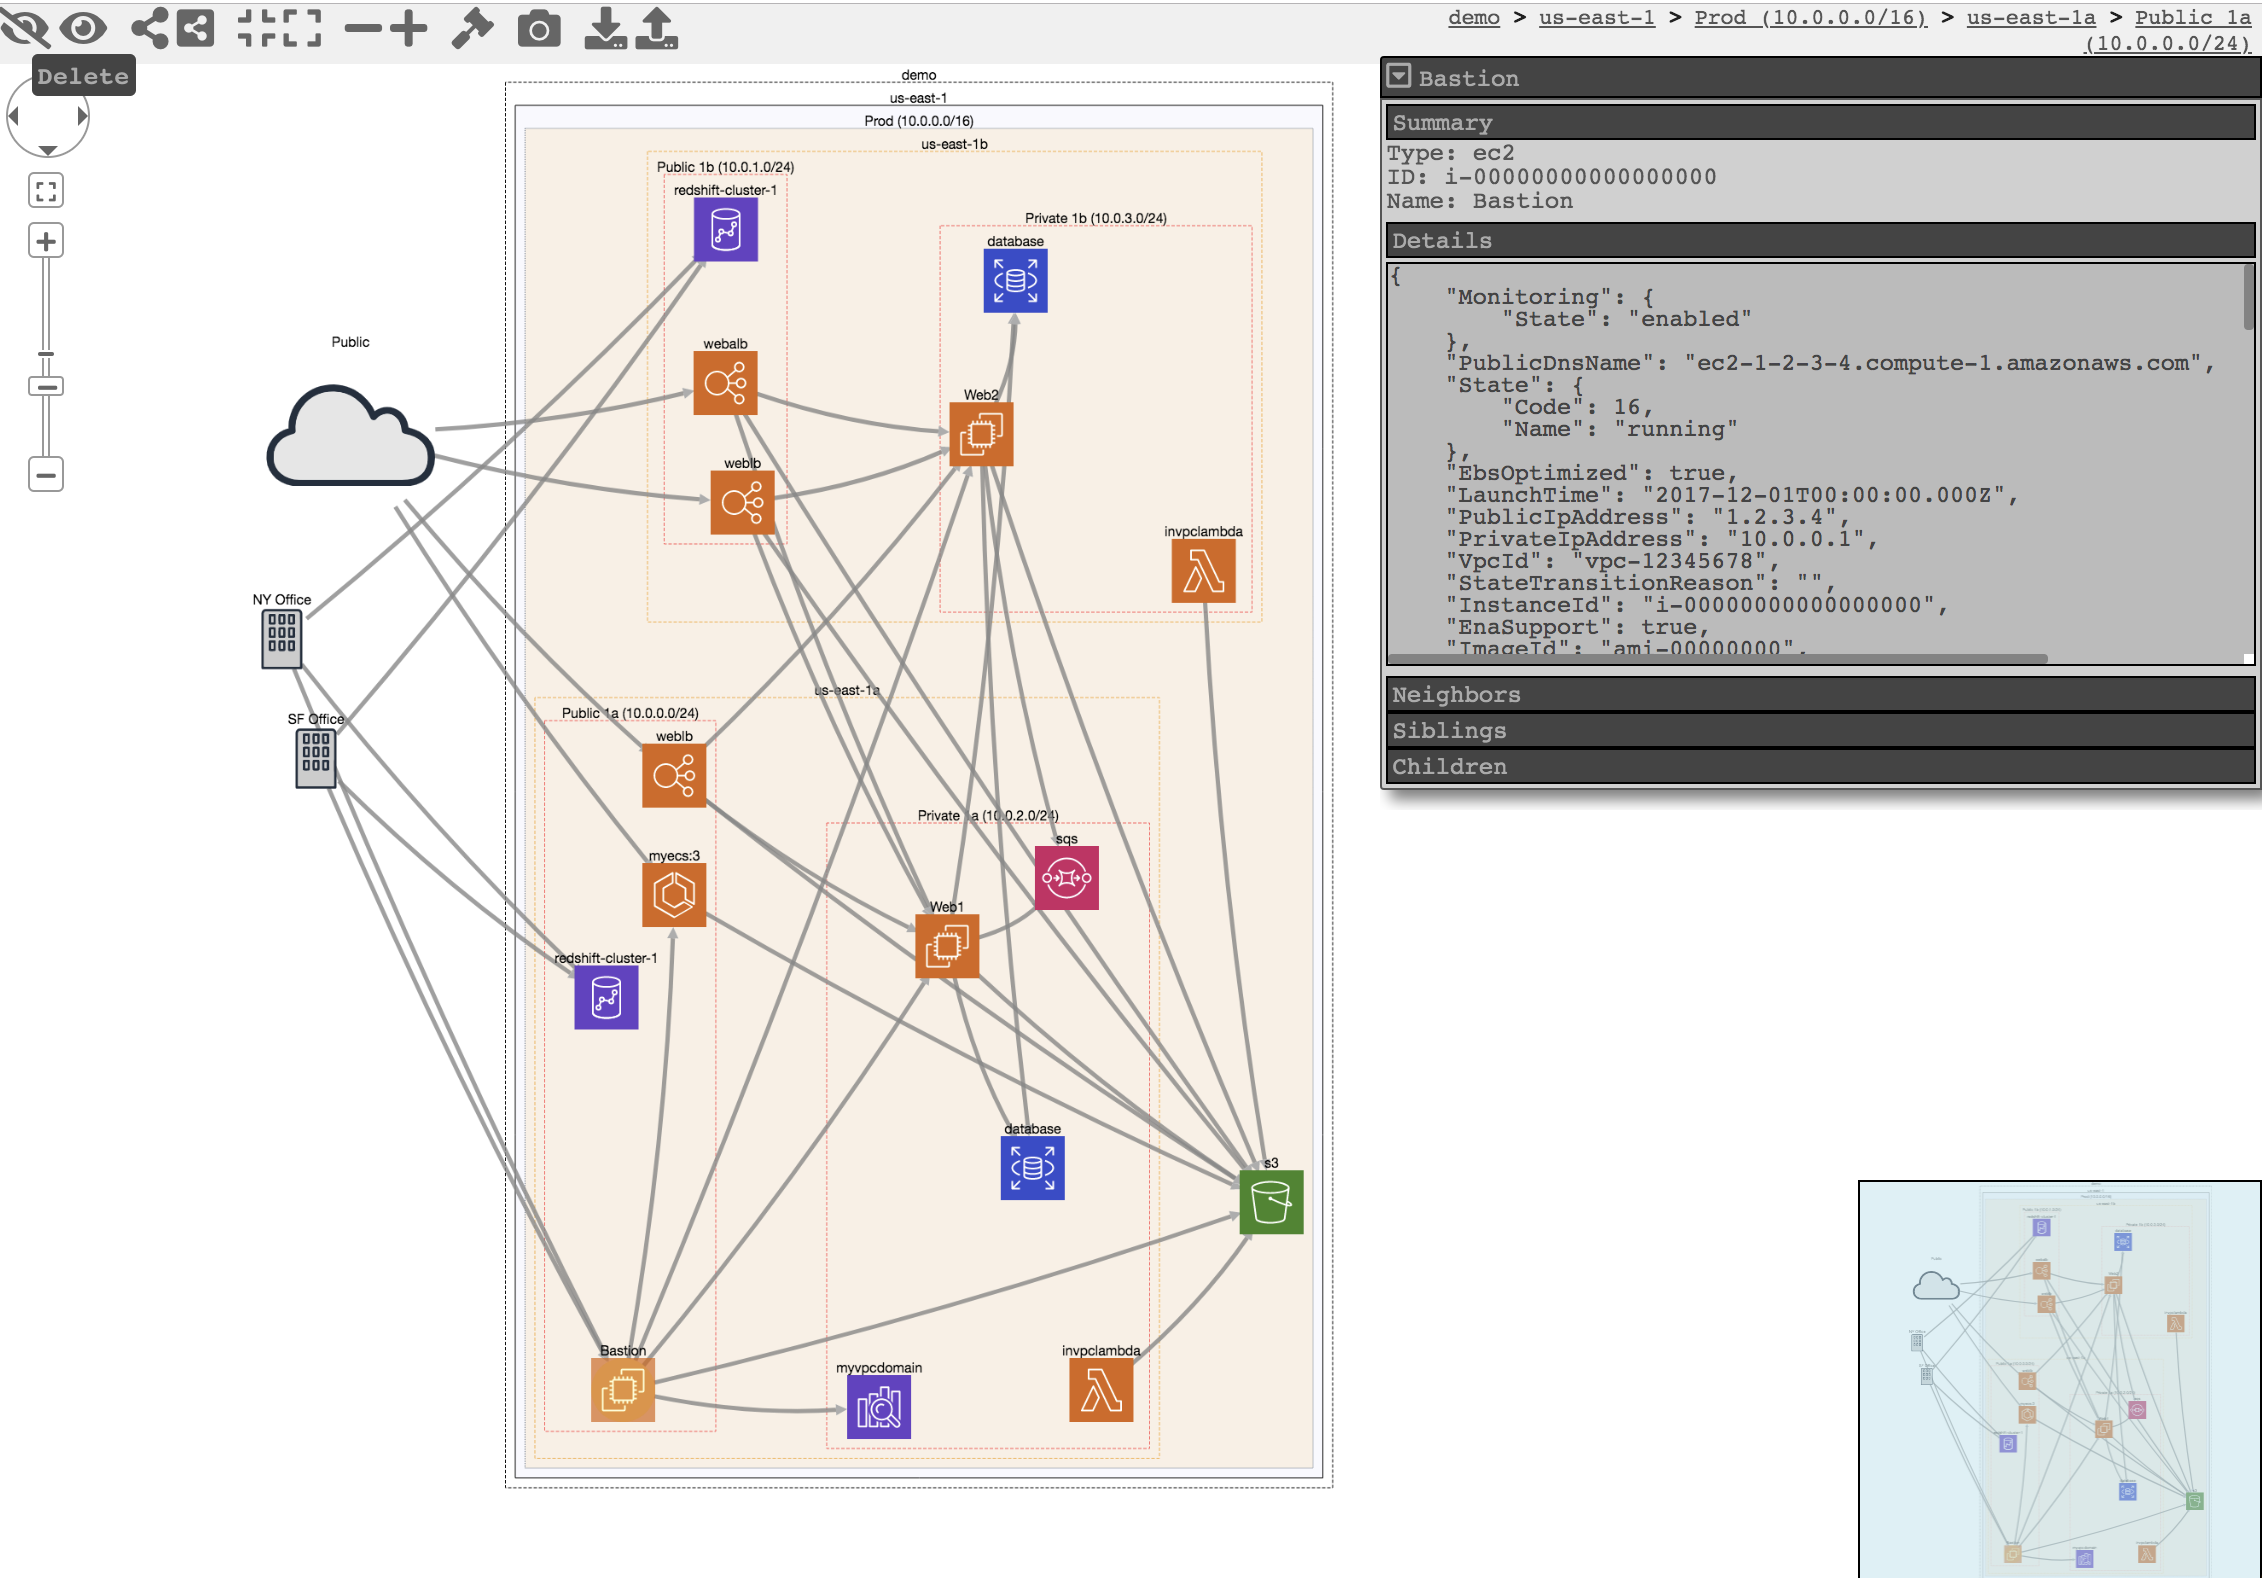
CloudMapper helps you analyze your Amazon Web Services (AWS) environments. The original purpose was to generate network diagrams and display them in your browser. It now contains much more functionality, including auditing for security issues.
- Network mapping demo
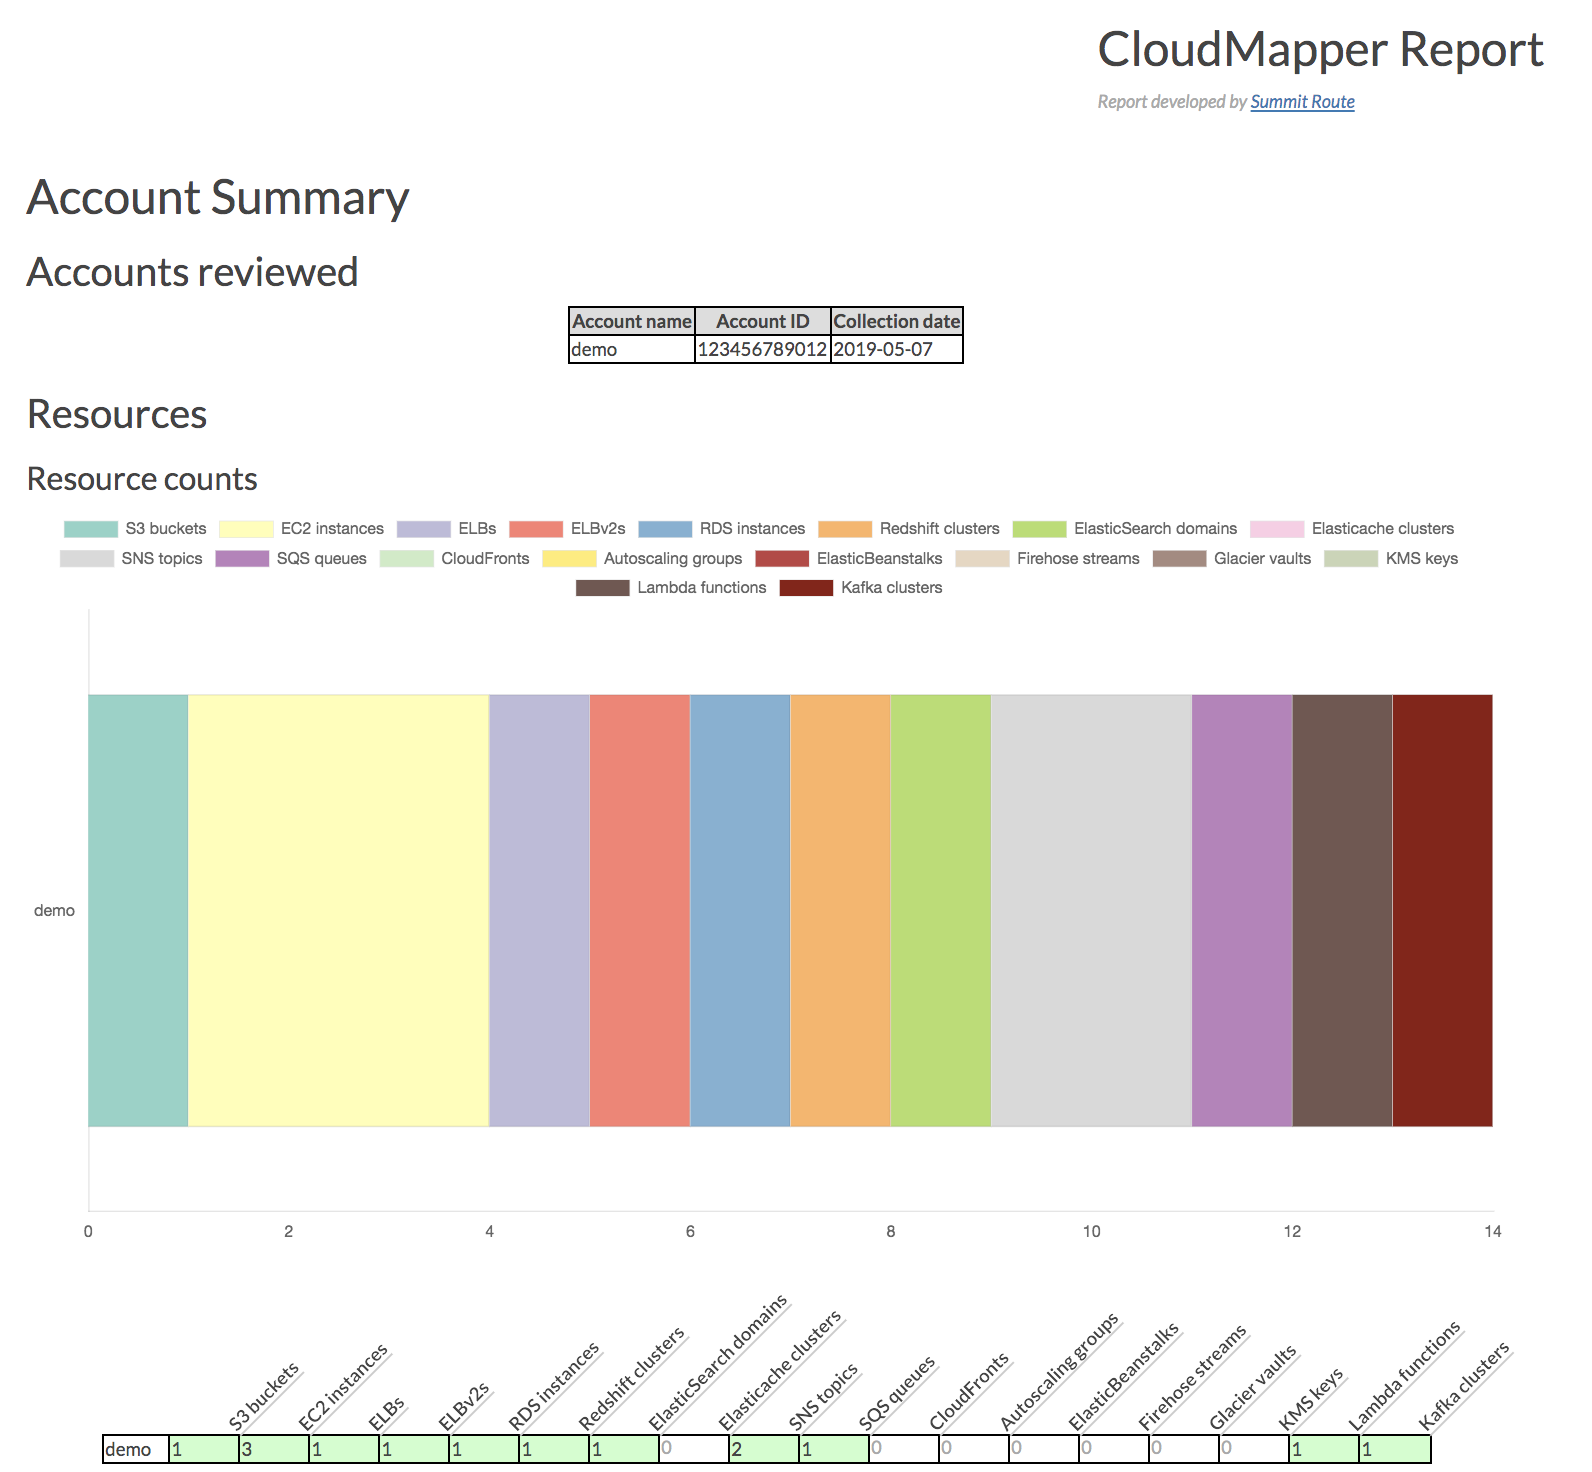
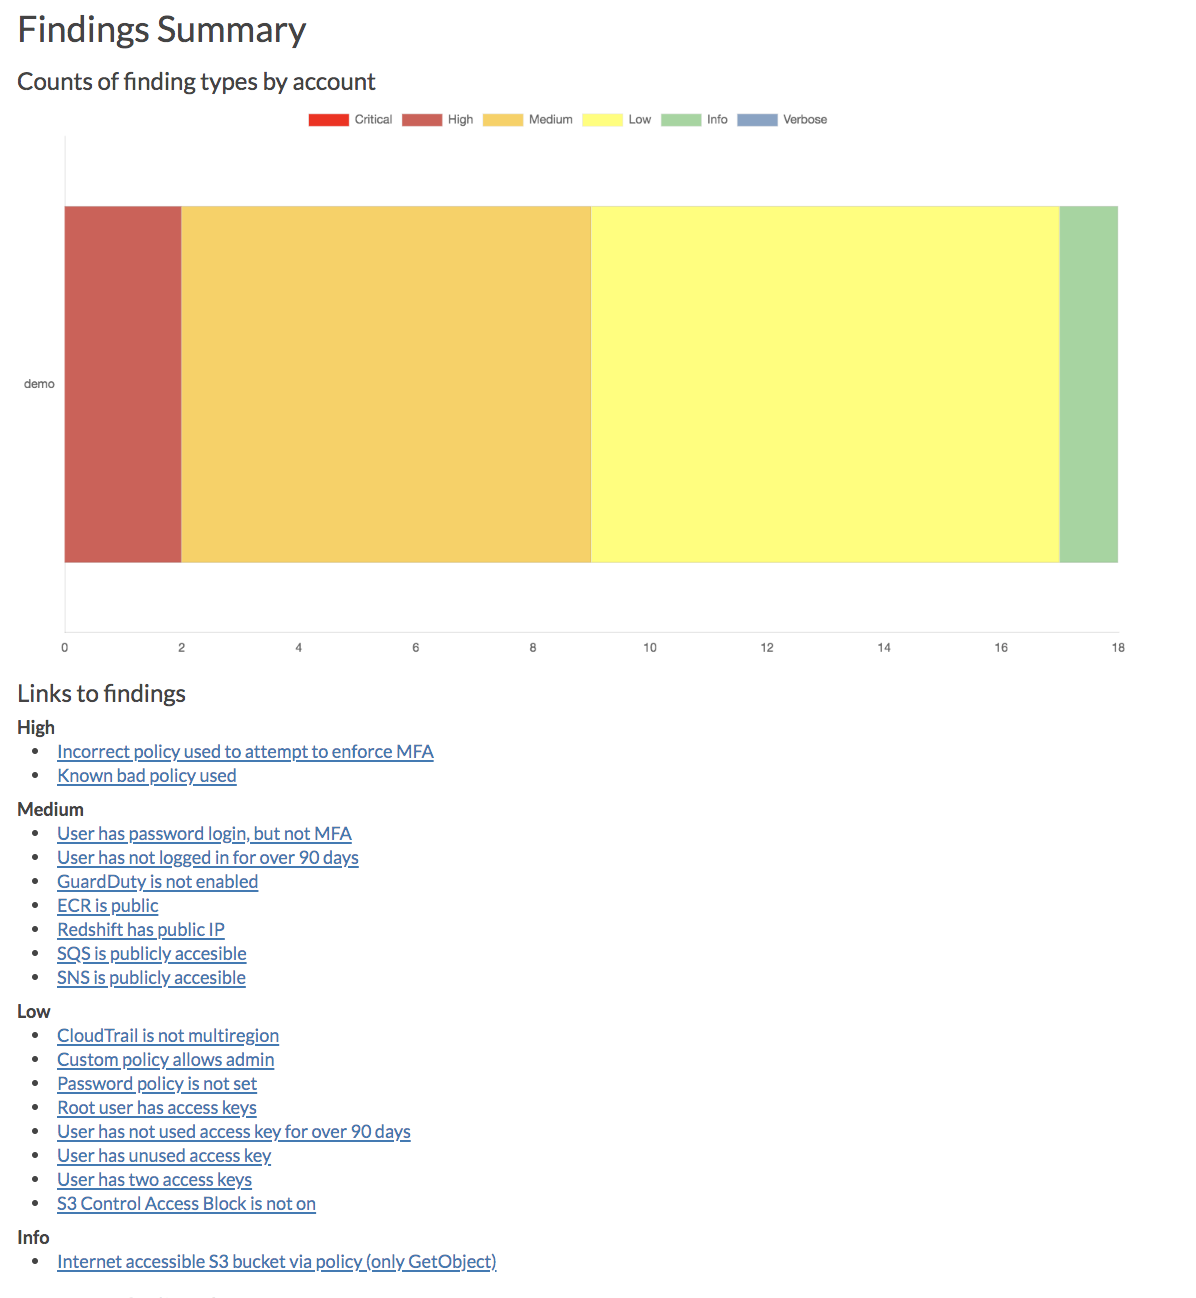
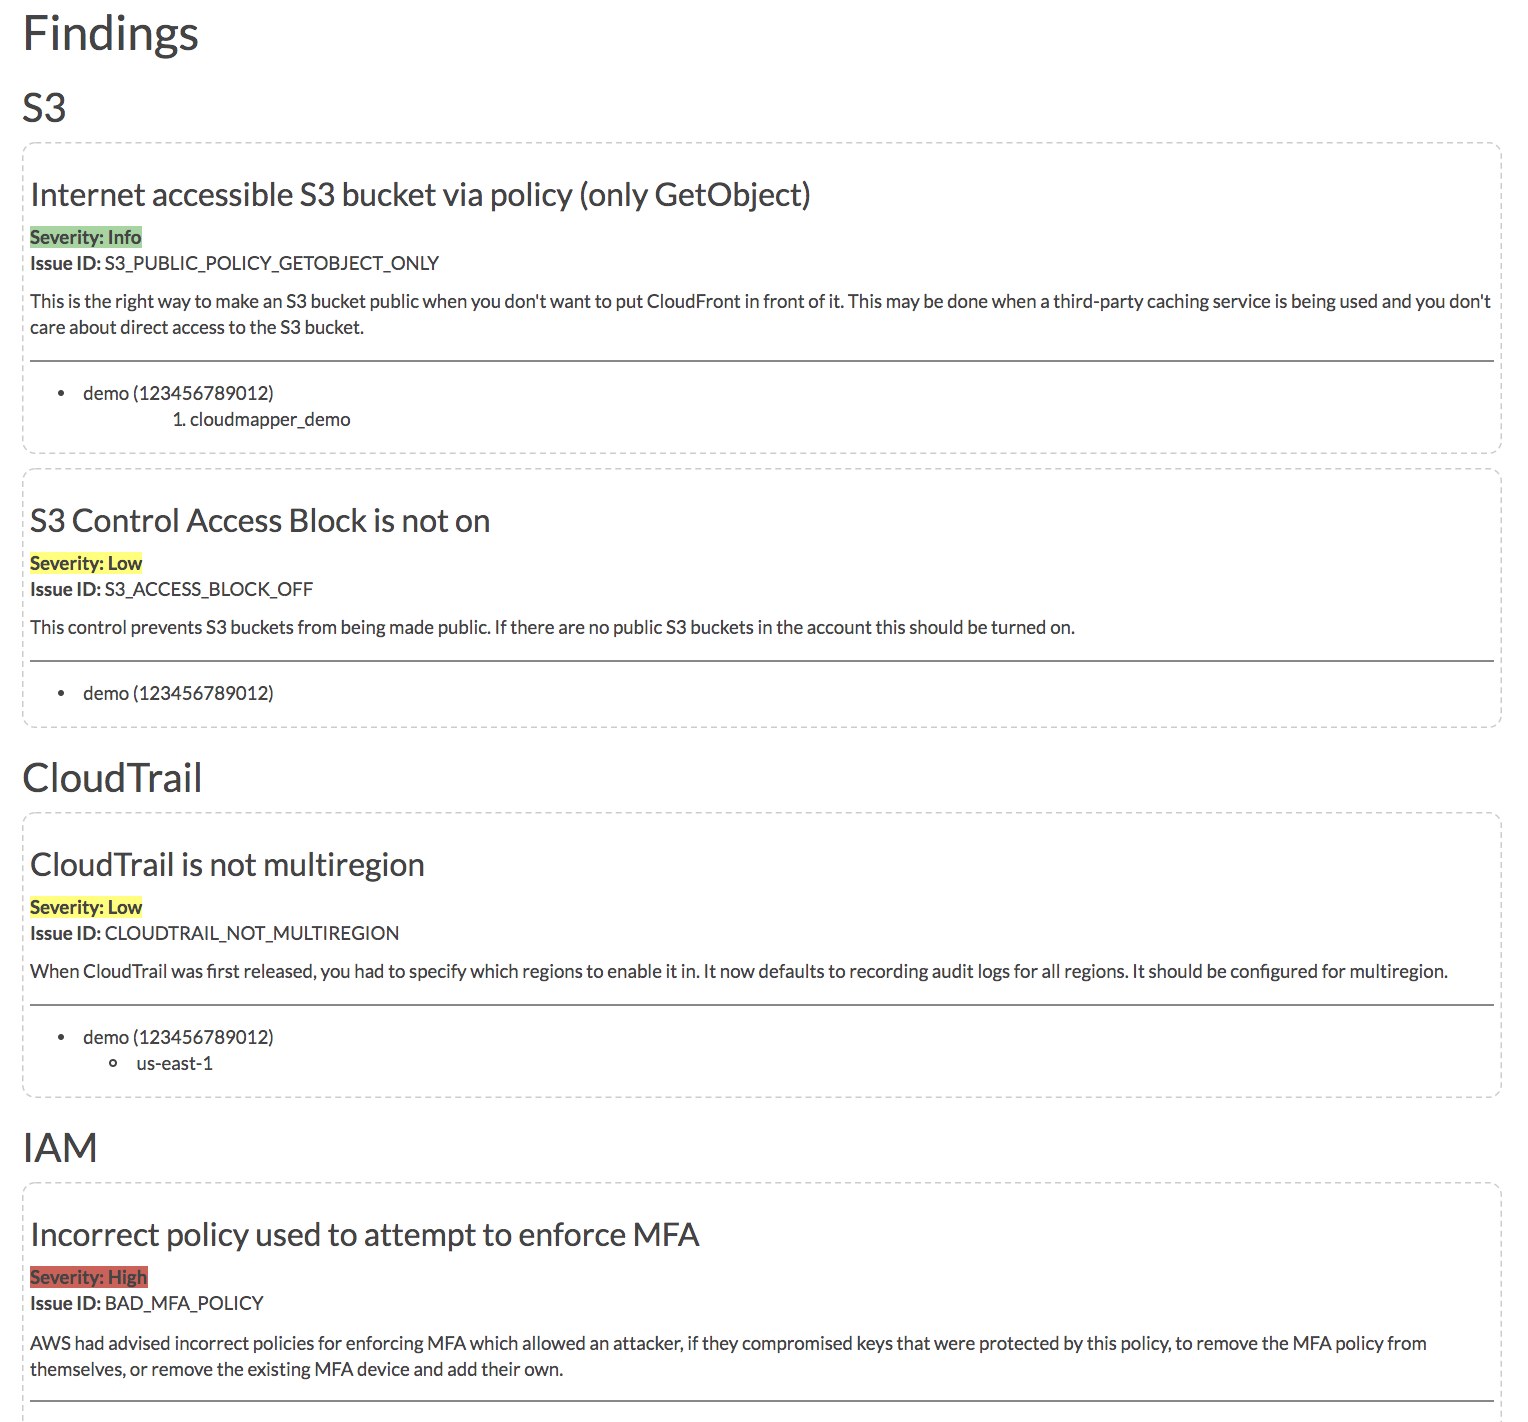
- Report demo
- Intro post
- Post to show spotting misconfigurations in networks
- Post on performing continuous auditing
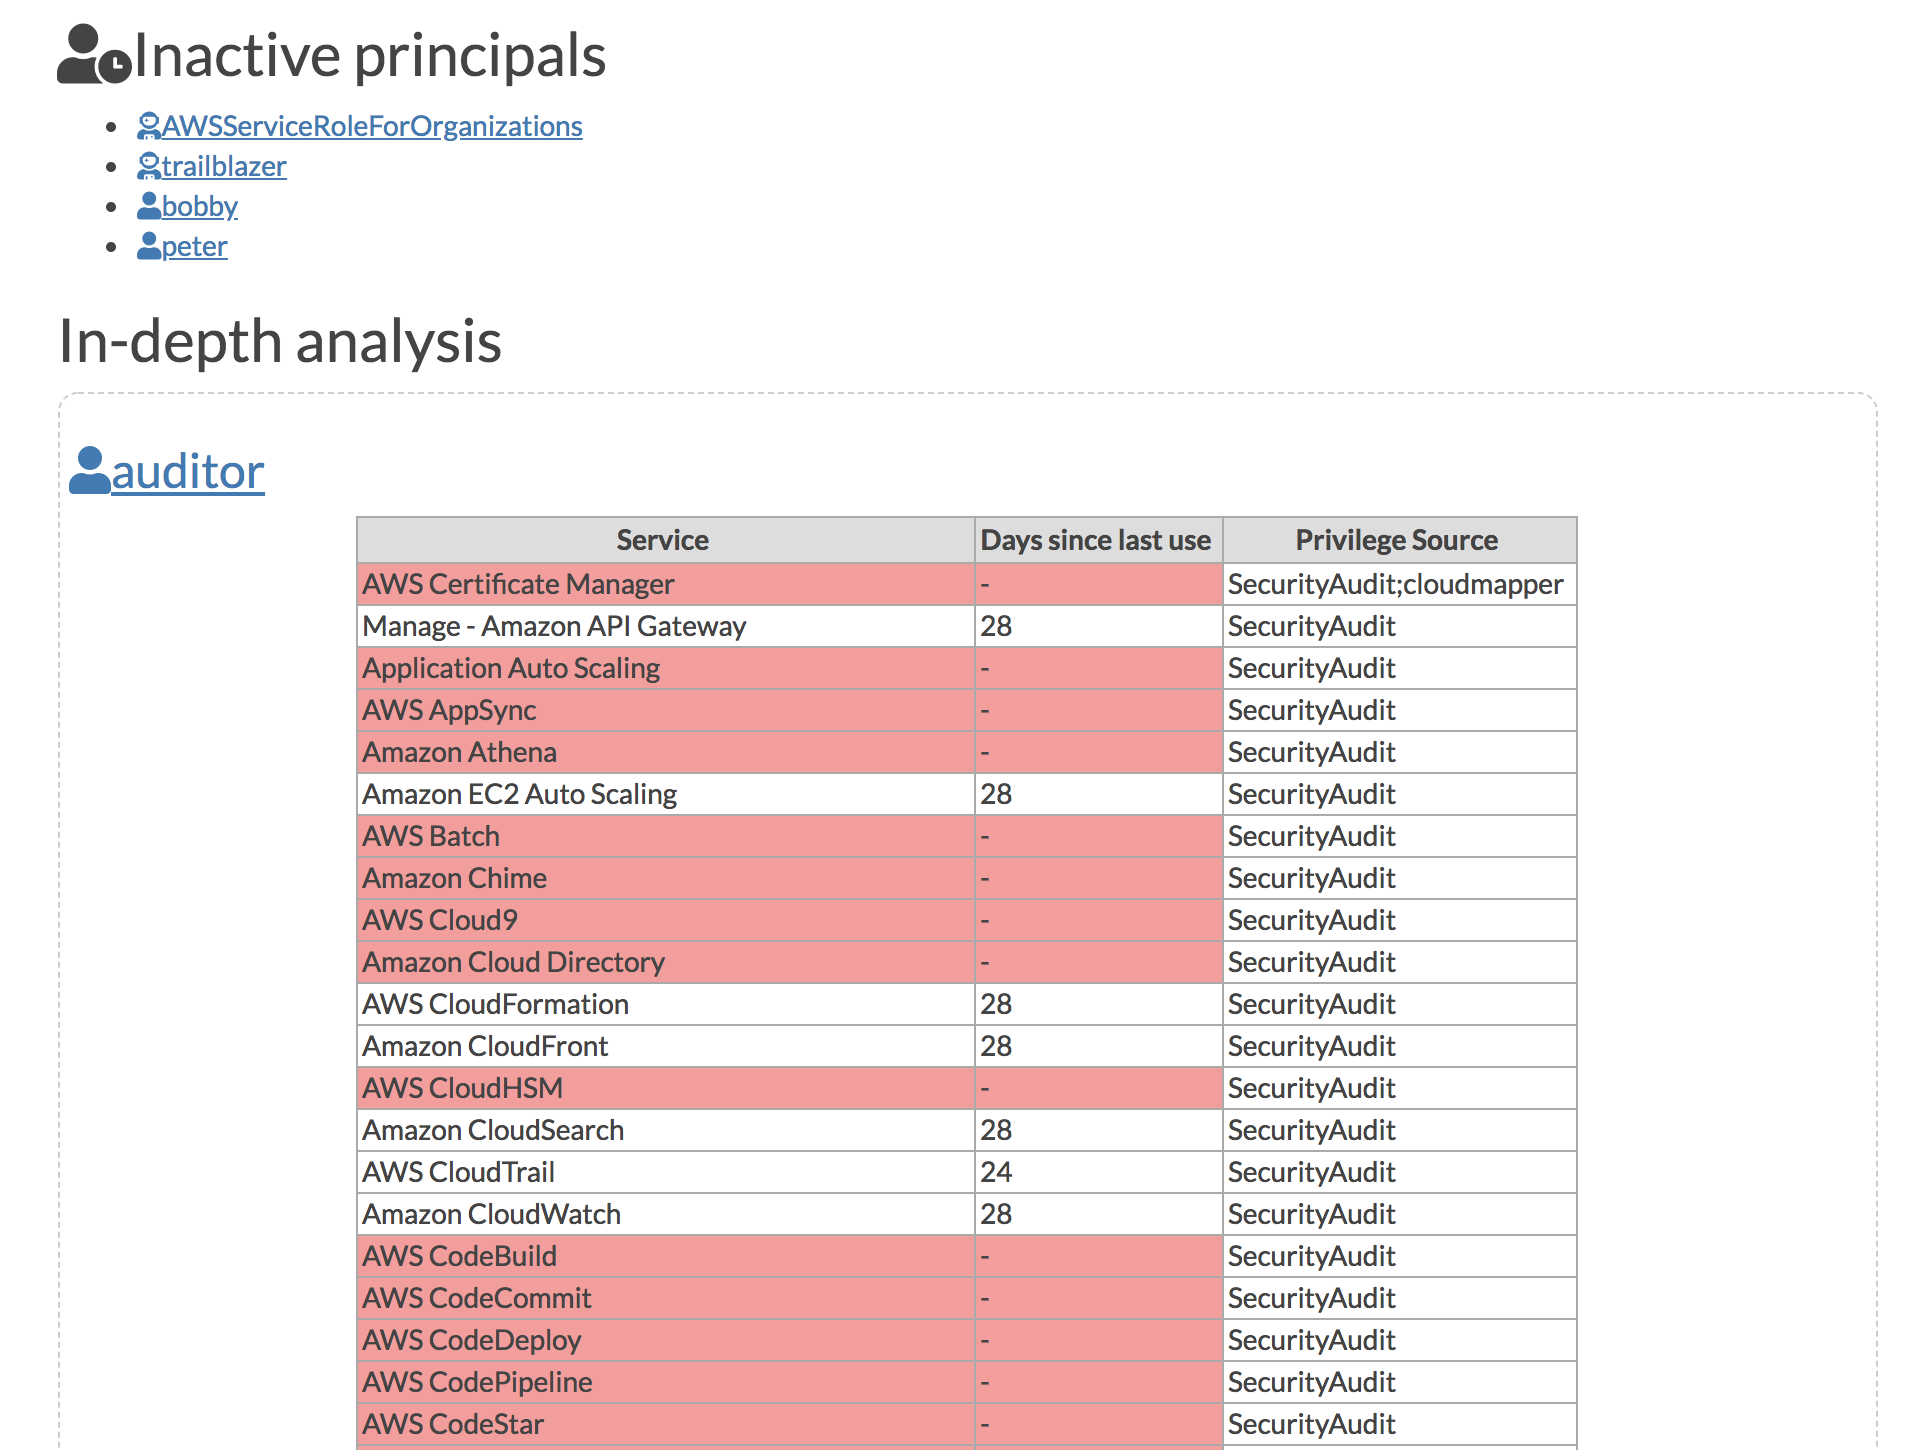
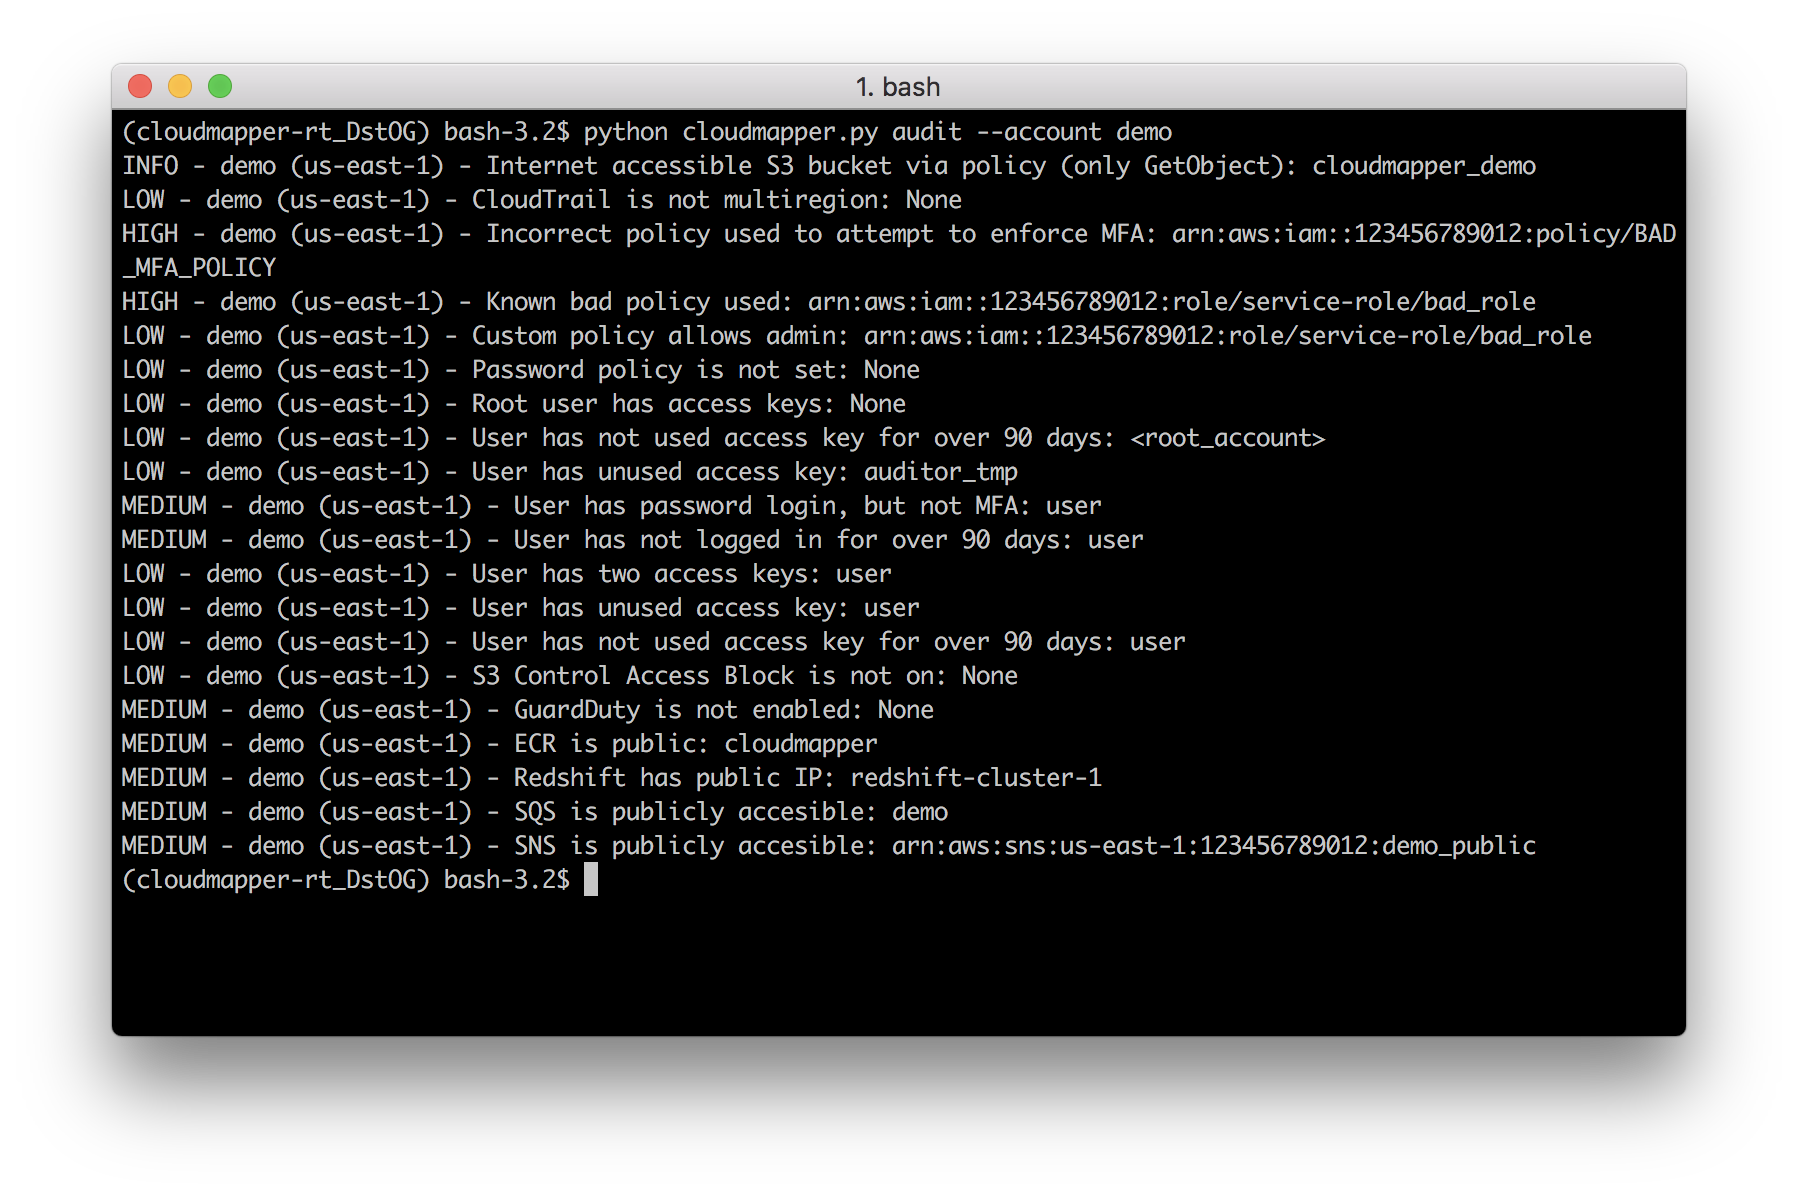
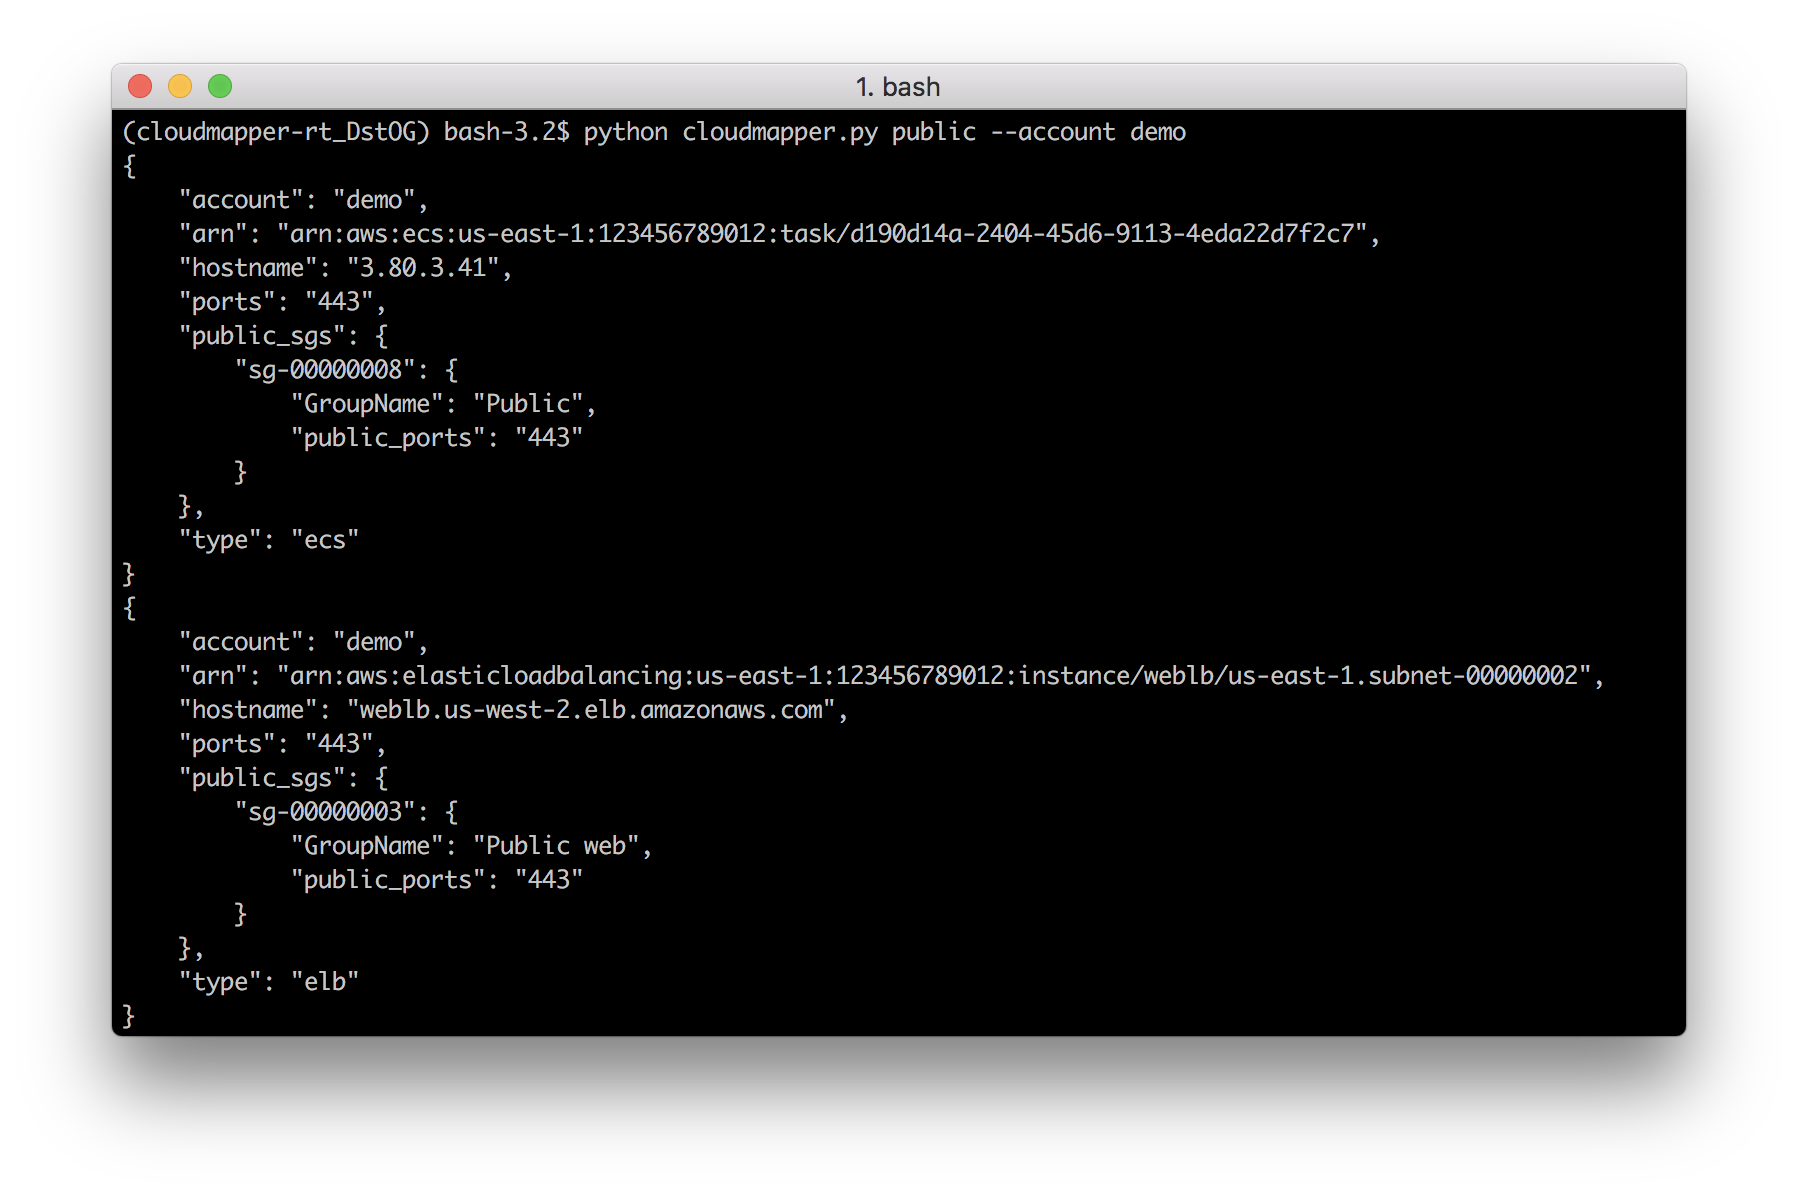
audit: Check for potential misconfigurations.collect: Collect metadata about an account. More details here.find_admins: Look at IAM policies to identify admin users and roles, or principals with specific privileges. More details here.find_unused: Look for unused resources in the account. Finds unused Security Groups, Elastic IPs, network interfaces, volumes and elastic load balancers.prepare/webserver: See Network Visualizationspublic: Find public hosts and port ranges. More details here.sg_ips: Get geoip info on CIDRs trusted in Security Groups. More details here.stats: Show counts of resources for accounts. More details here.weboftrust: Show Web Of Trust. More details here.report: Generate HTML report. Includes summary of the accounts and audit findings. More details here.iam_report: Generate HTML report for the IAM information of an account. More details here.
If you want to add your own private commands, you can create a private_commands directory and add them there.
| 
|
| 
|
| 
|
Requirements:
- python 3 (3.7.0rc1 is known to work),
pip, andvirtualenv - You will also need
jq(https://stedolan.github.io/jq/) and the librarypyjq(https://github.com/doloopwhile/pyjq), which require some additional tools installed that will be shown.
On macOS:
# clone the repo
git clone https://github.com/duo-labs/cloudmapper.git
# Install pre-reqs for pyjq
brew install autoconf automake libtool jq awscli python3
cd cloudmapper/
python3 -m venv ./venv && source venv/bin/activate
pip install -r requirements.txt
On Linux:
# clone the repo
git clone https://github.com/duo-labs/cloudmapper.git
# (AWS Linux, Centos, Fedora, RedHat etc.):
# sudo yum install autoconf automake libtool python3-devel.x86_64 python3-tkinter python-pip jq awscli
# (Debian, Ubuntu etc.):
# You may additionally need "build-essential"
sudo apt-get install autoconf automake libtool python3.7-dev python3-tk jq awscli
cd cloudmapper/
python3 -m venv ./venv && source venv/bin/activate
pip install -r requirements.txt
A small set of demo data is provided. This will display the same environment as the demo site https://duo-labs.github.io/cloudmapper/
# Generate the data for the network map
python cloudmapper.py prepare --config config.json.demo --account demo
# Generate a report
python cloudmapper.py report --config config.json.demo --account demo
python cloudmapper.py webserver
This will run a local webserver at http://127.0.0.1:8000/ View the network map from that link, or view the report at http://127.0.0.1:8000/account-data/report.html
- Configure information about your account.
- Collect information about an AWS account.
Copy the config.json.demo to config.json and edit it to include your account ID and name (ex. "prod"), along with any external CIDR names. A CIDR is an IP range such as 1.2.3.4/32 which means only the IP 1.2.3.4.
This step uses the CLI to make describe and list calls and records the json in the folder specified by the account name under account-data.
You must have AWS credentials configured that can be used by the CLI with read permissions for the different metadata to collect. I recommend using aws-vault. CloudMapper will collect IAM information, which means you MUST use MFA. Only the collect step requires AWS access.
You must have the following privileges (these grant various read access of metadata):
arn:aws:iam::aws:policy/SecurityAuditarn:aws:iam::aws:policy/job-function/ViewOnlyAccess
Collecting the data is done as follows:
python cloudmapper.py collect --account my_account
From here, try running the different commands, such as:
python cloudmapper.py report --account my_account
python cloudmapper.py webserver
Then view the report in your browser at 127.0.0.1:8000/account-data/report.html
Instead of modifying config.json directly, there is a command to configure the data there, in case that is needed:
python cloudmapper.py configure {add-account|remove-account} --config-file CONFIG_FILE --name NAME --id ID [--default DEFAULT]
python cloudmapper.py configure {add-cidr|remove-cidr} --config-file CONFIG_FILE --cidr CIDR --name NAME
This will allow you to define the different AWS accounts you use in your environment and the known CIDR IPs.
You may find that you don't care about some of audit items. You may want to ignore the check entirely, or just specific resources. Copy config/audit_config_override.yaml.example to config/audit_config_override.yaml and edit the file based on the comments in there.
The docker container that is created is meant to be used interactively.
docker build -t cloudmapper .
Cloudmapper needs to make IAM calls and cannot use session credentials for collection, so you cannot use the aws-vault sever if you want to collect data, and must pass role credentials in directly or configure aws credentials manually inside the container. The following code exposes your raw credentials inside the container.
(
    export $(aws-vault exec YOUR_PROFILE --no-session -- env | grep ^AWS | xargs) && \
    docker run -ti \
        -e AWS_ACCESS_KEY_ID=$AWS_ACCESS_KEY_ID \
        -e AWS_SECRET_ACCESS_KEY=$AWS_SECRET_ACCESS_KEY \
        cloudmapper /bin/bash
)
This will drop you into the container. Run aws sts get-caller-identity to confirm this was setup correctly. Cloudmapper demo data is not copied into the docker container so you will need to collect live data from your system. Note docker defaults may limit the memory available to your container. For example on Mac OS the default is 2GB which may not be enough to generate the report on a medium sized account.
python cloudmapper.py configure add-account --config-file config.json --name YOUR_ACCOUNT --id YOUR_ACCOUNT_NUMBER
python cloudmapper.py collect --account YOUR_ACCOUNT
python cloudmapper.py report --account YOUR_ACCOUNT
You should then be able to view the report by visiting http://127.0.0.1:8000/account-data/report.html
A CDK app for deploying CloudMapper via Fargate so that it runs nightly, sends audit findings as alerts to a Slack channel, and generating a report that is saved on S3, is described here.
For network diagrams, you may want to try https://github.com/lyft/cartography or https://github.com/anaynayak/aws-security-viz
For auditing and other AWS security tools see https://github.com/toniblyx/my-arsenal-of-aws-security-tools
- cytoscape.js: MIT https://github.com/cytoscape/cytoscape.js/blob/master/LICENSE
- cytoscape.js-qtip: MIT https://github.com/cytoscape/cytoscape.js-qtip/blob/master/LICENSE
- cytoscape.js-grid-guide: MIT https://github.com/iVis-at-Bilkent/cytoscape.js-grid-guide
- cytoscape.js-panzoom: MIT https://github.com/cytoscape/cytoscape.js-panzoom/blob/master/LICENSE
- jquery: JS Foundation https://github.com/jquery/jquery/blob/master/LICENSE.txt
- jquery.qtip: MIT https://github.com/qTip2/qTip2/blob/master/LICENSE
- cytoscape-navigator: MIT https://github.com/cytoscape/cytoscape.js-navigator/blob/c249bd1551c8948613573b470b30a471def401c5/bower.json#L24
- cytoscape.js-autopan-on-drag: MIT https://github.com/iVis-at-Bilkent/cytoscape.js-autopan-on-drag
- font-awesome: MIT http://fontawesome.io/
- FileSave.js: MIT https://github.com/eligrey/FileSaver.js/blob/master/LICENSE.md
- circular-json: MIT https://github.com/WebReflection/circular-json/blob/master/LICENSE.txt
- rstacruz/nprogress: MIT https://github.com/rstacruz/nprogress/blob/master/License.md
- mousetrap: Apache https://github.com/ccampbell/mousetrap/blob/master/LICENSE
- akkordion MIT https://github.com/TrySound/akkordion/blob/master/LICENSE
