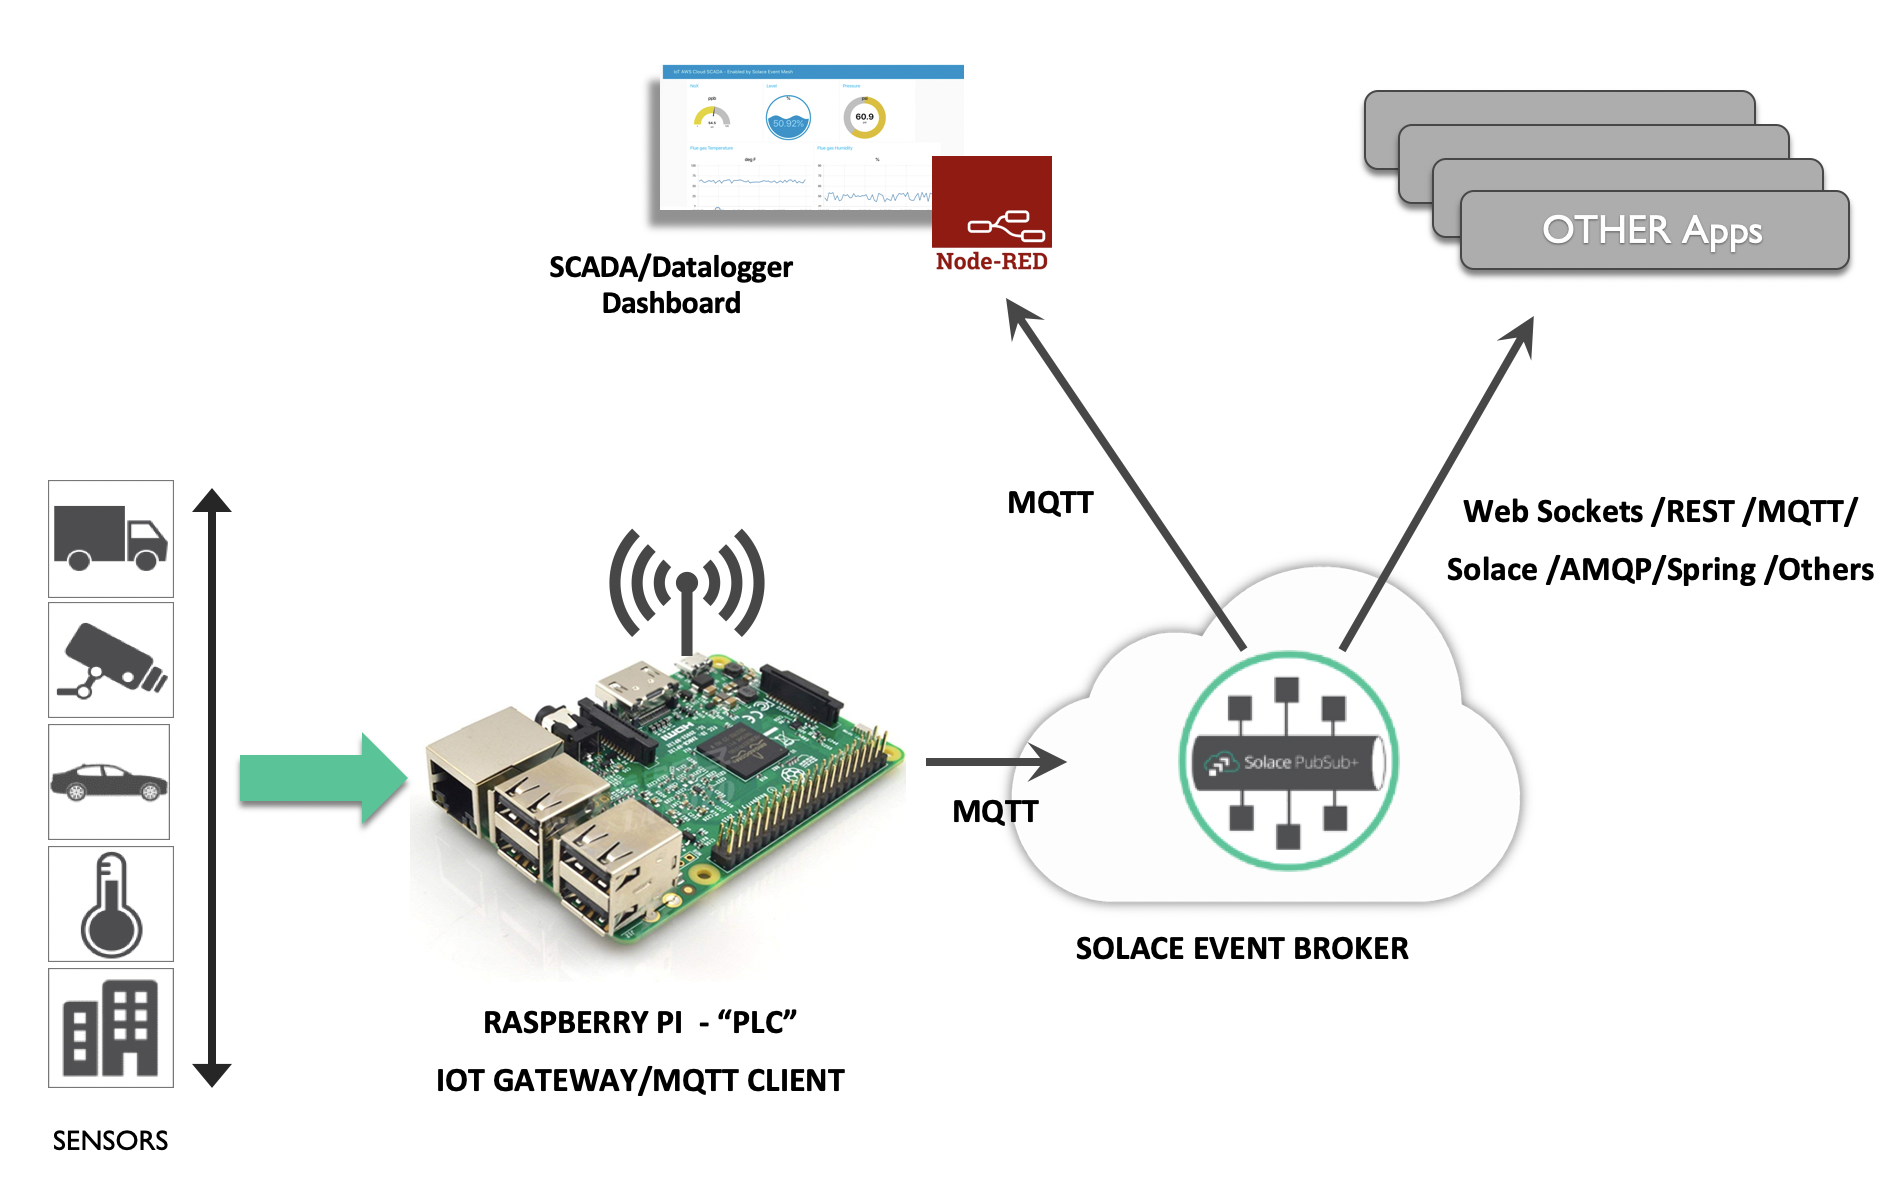
This repository holds code samples for using Solace Event Broker to distribute real-time sensor readings from Raspberry Pi to consuming applications on the edge/cloud.
The following items are available, skip to the proper section in the README below for each:
This is the demo that was presented during the MakeUofT Hackathon 2020 @ University of Toronto, CA.
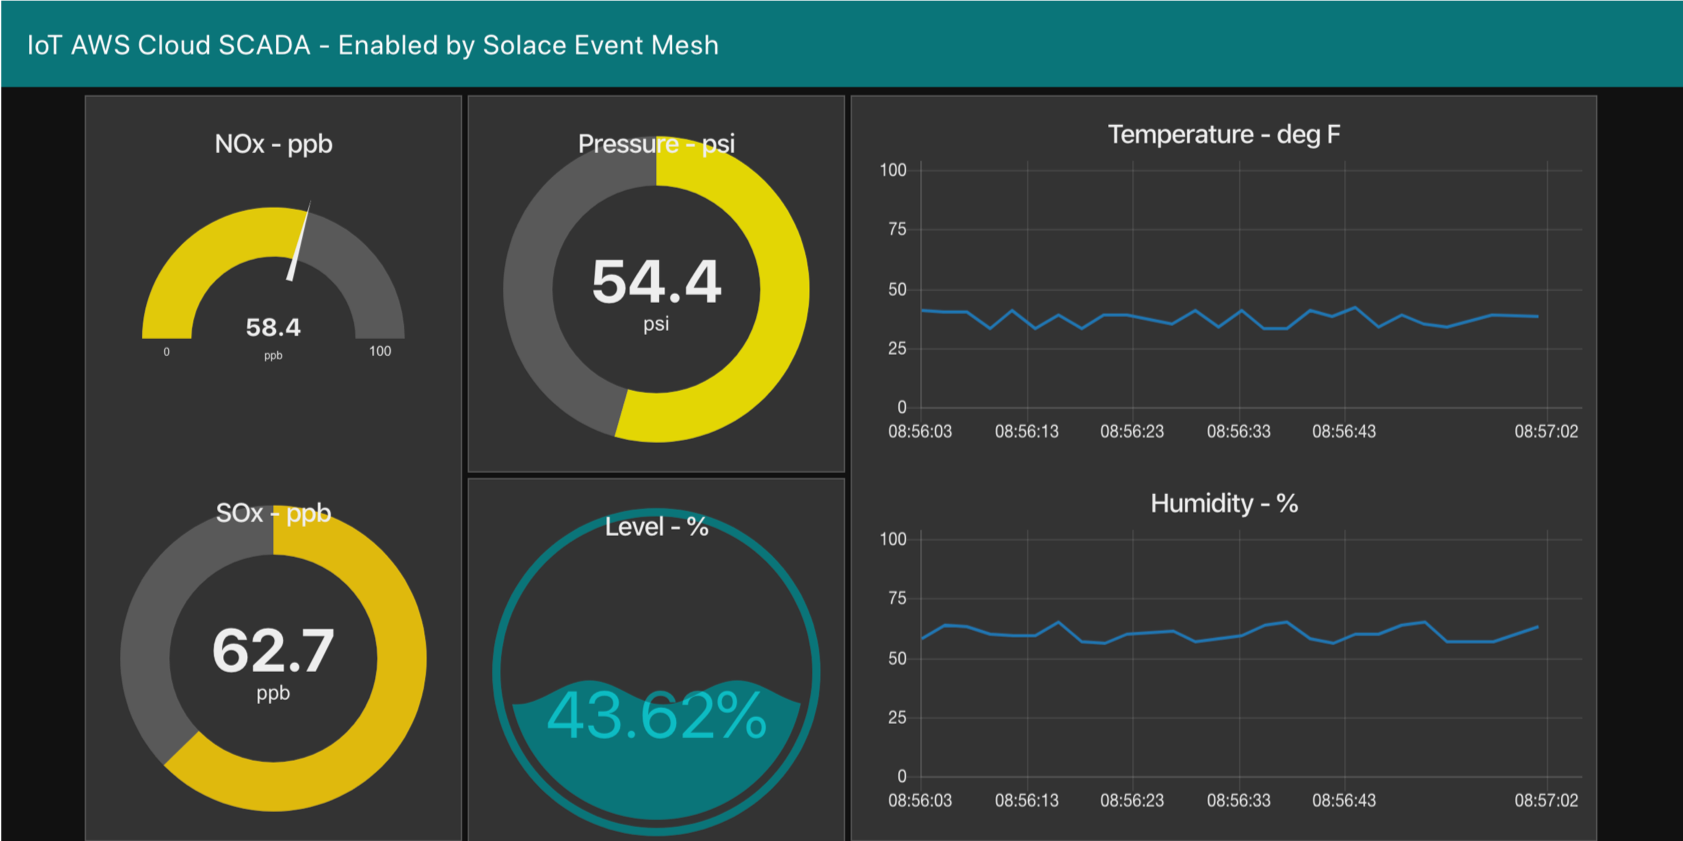
The demo that we will be creating is a Solace IoT SCADA Demo. It shows how a raspberry PI can stream data from connected sensors into Solace PubSub+ Event Brokers. Once the event streams are available the demo uses Node-RED flows to consume the events and display the sensor data on a real-time, dynamic dashboard.
- Multi-Protocol Pub/Sub
- Multi-API
- Topic filtering/routing
- Eliding (future)
- MQTT Retain (Future)
Hardware needed:
- Raspberry PI 3 (or equivalent) w/ login credentials & internet access
- (Optional) DHT11 Digital Temperature and Humidity Sensor
- Sign up here: http://bit.ly/Solace-Cloud
- Launch a free messaging service. More info here
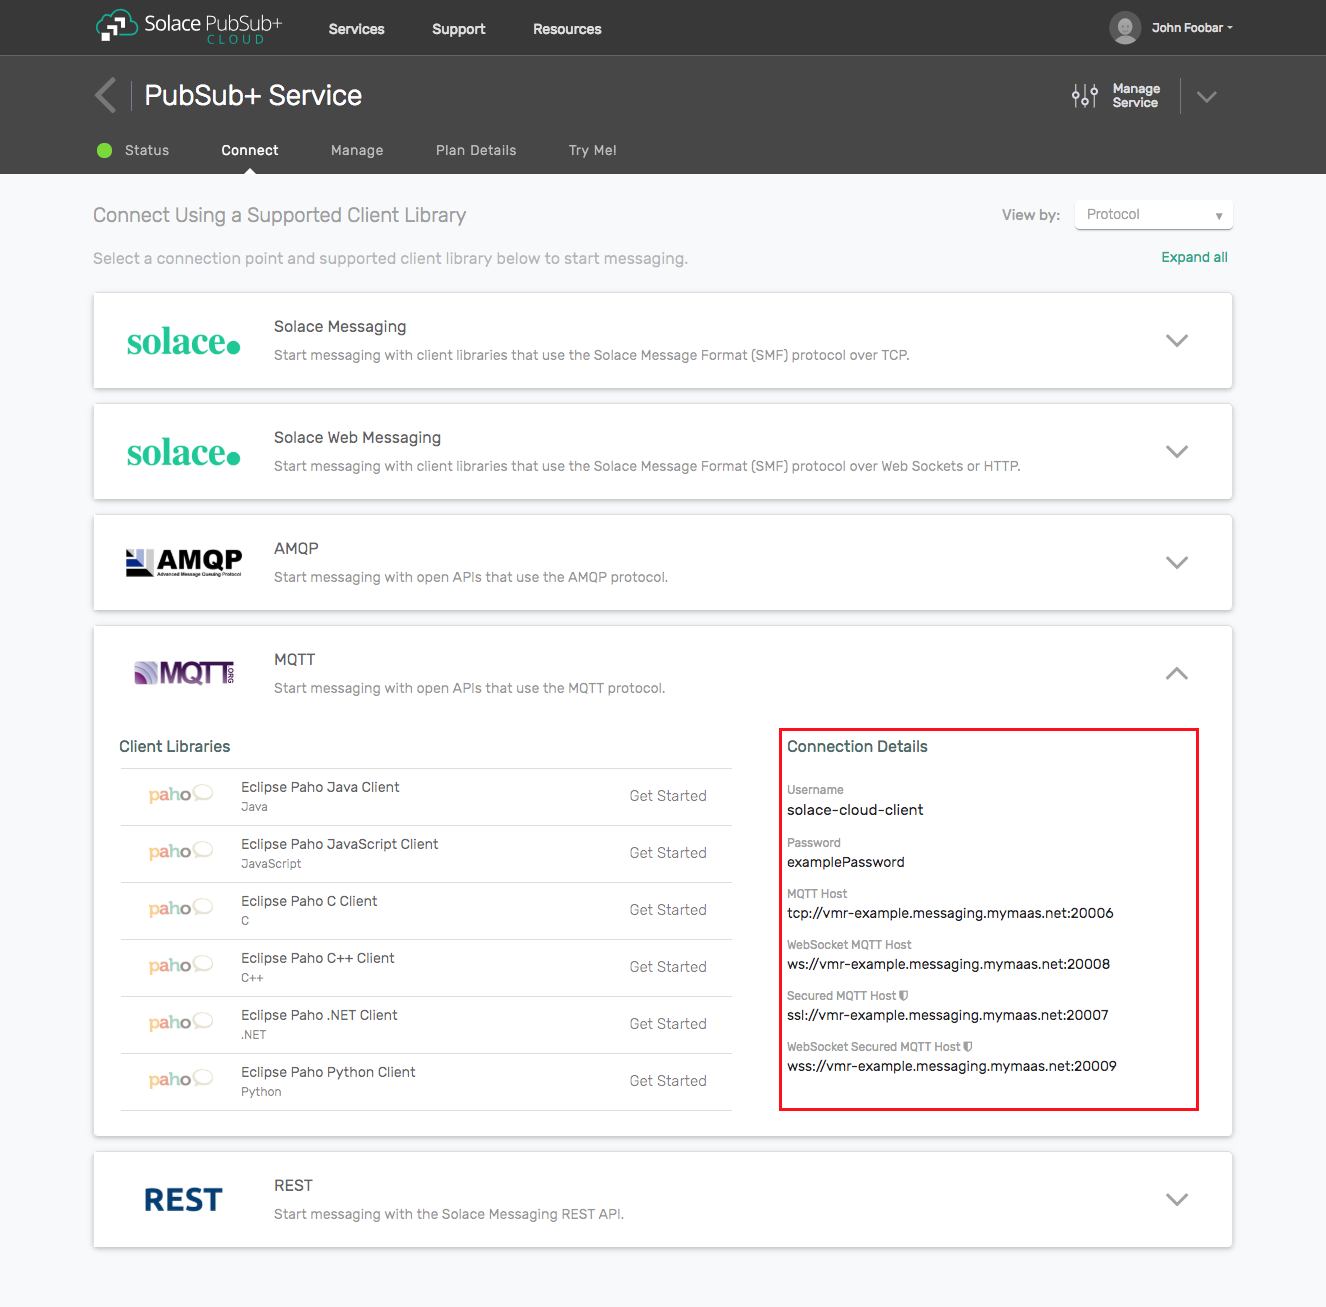
- Once you launch your free messaging service go to the Connect tab, choose MQTT and capture your connect info for later.
- Install Node-Red - https://nodered.org/docs/getting-started/local
- Run
node-redon terminal/command prompt - Go to http://localhost:1880 to verify installation
- Install Dashboard Nodes - https://flows.nodered.org/node/node-red-dashboard
- Clone this repo & from the folder - makeuoft-hackathon-master/raspberrypi2solace/subscribe copy SCADA_subscribe.json to any folder on local machine
- Import the json into Node-Red editor from Menu-Import
-
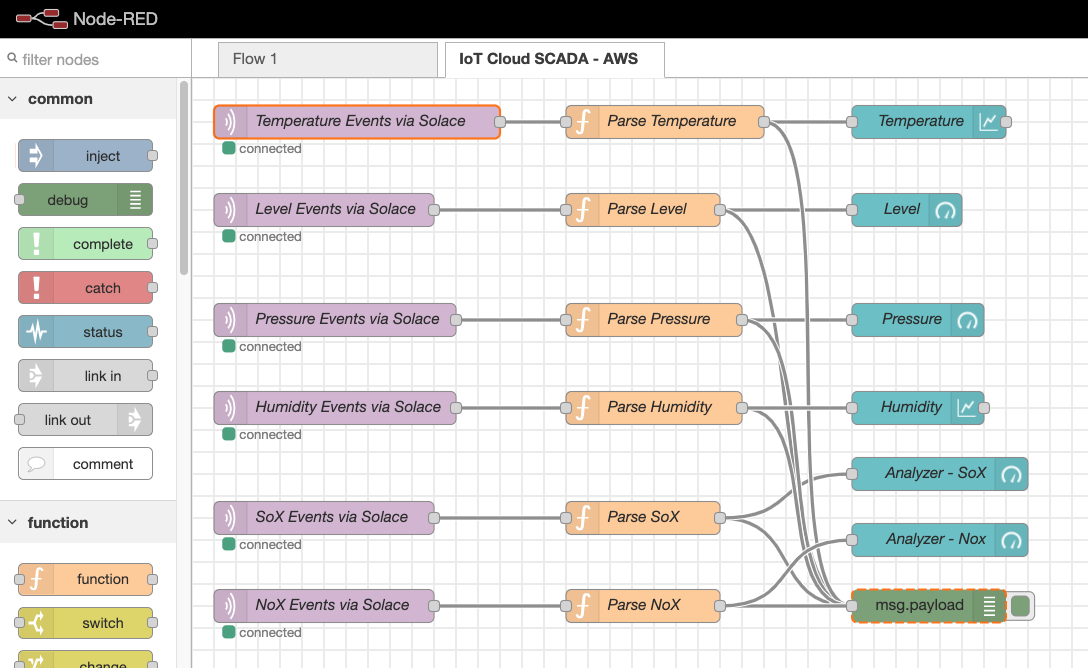
Choose the "IoT Cloud SCADA - AWS" Flow that now appears on the screen.
-
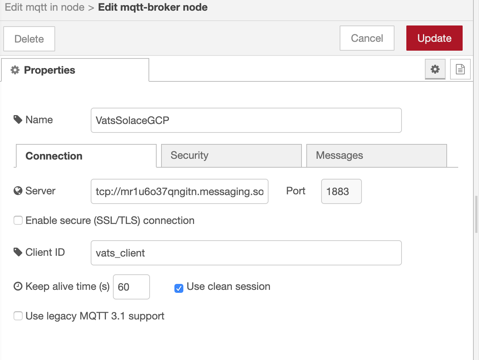
Edit the Server field and replace it with the MQTT Host URL including tcp:// and the port number
-
Provide any name for the Client ID. This is just a name that identifies the client application to the event broker.
-
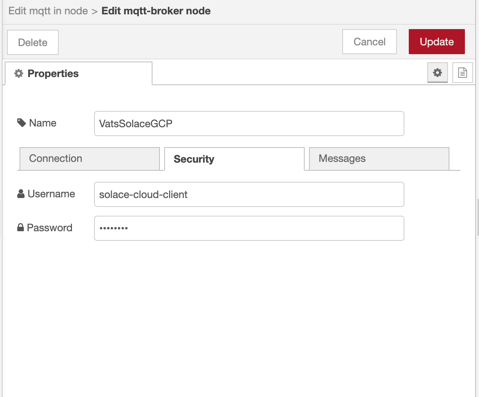
Navigate to the security tab and enter your client Username and Password. These values can be found in Solace Cloud on the connect tab that we navigated to earlier.
-
Make sure all 5 other “Event” nodes (Level Events via Solace, Pressure Events via Solace, etc) have the connectivity information you just provided as well.
-
Click “Deploy” button on right corner of the screen.
- Go to http://localhost:1880/ui
- The SCADA dashboard should be displayed with static values.
This section is only necessary if you are using the physical DHT11 sensors to supply Temperature & Humidity.
Before starting this section shutdown and unplug your raspberry pi
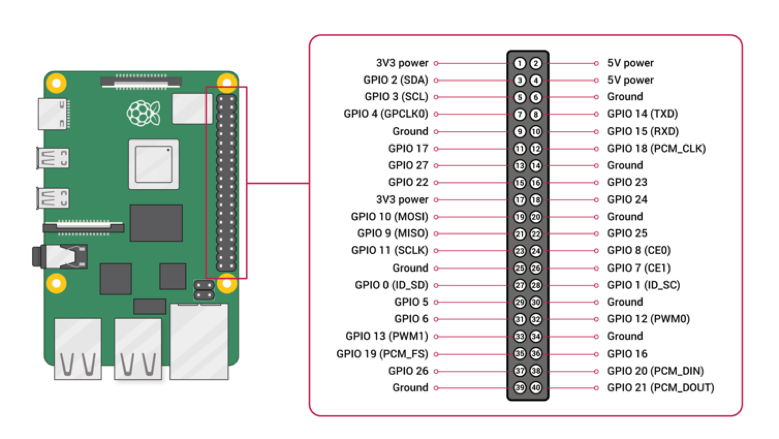
Lookup the Pin configuration for your Raspberry Pi, such as the below:
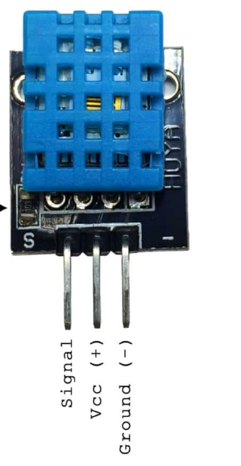
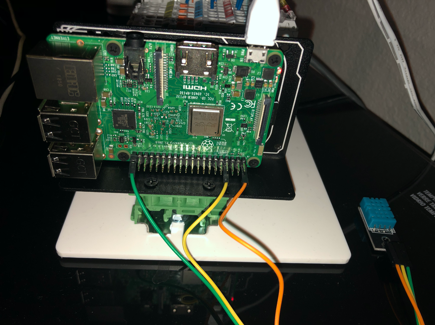
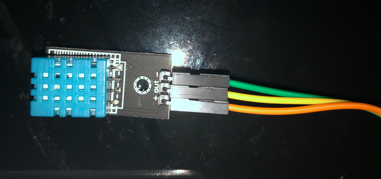
Using the cables provided with the physical sensors connect your DHT11 to your Raspberry PI. The DHT11 sensor should have 3 pins as seen in the photo below.
Connect them as follows:
- Signal/Data to a GPIO Pin on the Raspberry PI (such as GPIO 17 / physical pin 11 in the pin configuration image above)
- VCC (+) to a 3V or 5V Pin on the Raspberry PI (such as physical pin 1 in the pin configuration image above)
- Ground (-) to a Ground Pin on the Raspberry PI (such as physical pin 6 in the pin configuration image above)
You can now power-up your raspberry pi
- ssh into Raspberry Pi
- Install python 3.7
sudo apt install python3-pip - Install paho-mqtt to send events over mqtt
pip3 install paho-mqtt
Install Adafruit_DHT to read the physical sensor pip3 install Adafruit_DHT
-
Test the physical sensor by following these steps
- Edit
simpletest.pyand update thepinvariable value to match the GPIO number you connected the Signal/Data pin of your DHT11 sensor to. If you followed the pin configuration above that would be17 - Run the script:
python3 simpletest.py - You should see Humidity and Temperature reading on the screen; go ahead and kill the script using
ctrl-c
- Edit
-
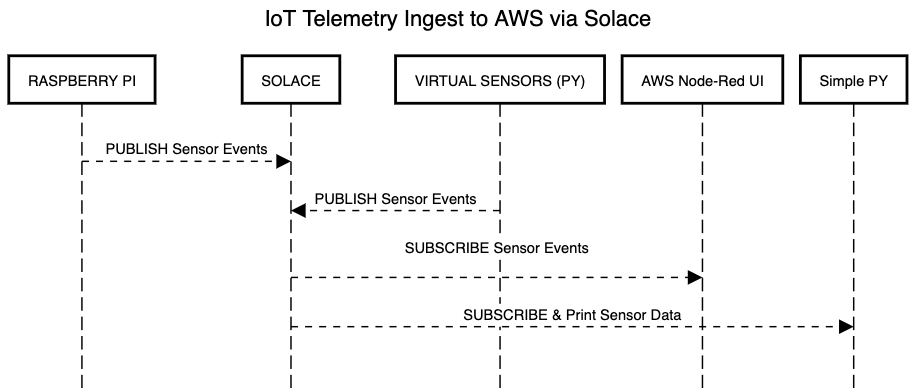
Now that we know the sensor works let's stream the data to the PubSub+ Event Broker using MQTT.
- Open the raspi_solace_publish_json.py file to edit it.
- Update the pin # again on line 13.
- Update the
solace_url,solace_port,solace_userandsolace_passwdto match your connection info from Solace Cloud. Remember we got this info under MQTT on the connect tab.
- Run the script to start streaming events:
python3 raspi_solace_publish_json.py - You should see Humidity and Temperature streaming readings on the screen and on Node-Red SCADA dashboard we setup earlier!
- Open the raspi_solace_publish_json.py file to edit it.
Let's also stream sensor data from some virtual sensors.
- Open the virtual_solace_publish_json.py file and edit
solace_url,solace_port,solace_userto &solace_passwdto match your connection info from Solace Cloud. Remember we got this info under MQTT on the connect tab. - Run the script to start streaming events:
python3 virtual_solace_publish_json.py - You should see Level, Pressure, NoX and SoX streaming readings on the screen and on Node-Red SCADA dashboard we setup earlier!
Awesome job! You have now setup the SCADA demo. Your raspberry PI is now reading data from both physical and virtual sensors and streaming them as events in real-time across the Solace PubSub+ Event Broker. Once on the PubSub+ Event Broker any application, with proper permissions, can subscribe to consume those events. In this demo we created a Node-RED dashboard to do just that, but because we are following the publish-subscribe pattern a stream of events can be consumed by multiple consumers so go ahead and add your own consumers as well!
Check out this python script which shows how to publish events to Solace PubSub+ using MQTT.
Check out this python script which shows how to subscribe to an event stream from Solace PubSub+ using MQTT.
