art-frame is an interactive, cross-media object of artwork for
transforming existing images into creative new ones. The idea behind
is similar to a digital emulation of creating a colored sand art
image. It models the image contents as a huge set of colored sand
particles flowing freely within the art frame's border, considering
gravity and acceleration literally at your finger tips. The artwork
consists of the art-frame software that runs on a Raspberry Pi, with
the RPi 7'' Touch Display and the RPi Sense Hat attached.
See this demo video on YouTube:
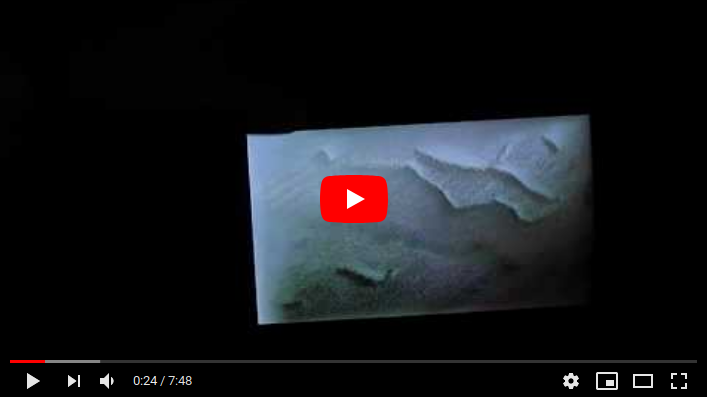 Demo Video on YouTube
In the course of the exhibition series “10 Tage — 10 Räume” (“10 Days
— 10 Spaces”), art-frame was presented at the Poly Produzenten
Galerie e.V.'s exhibition with the motto “Polymaths und
Polymorph”
in Karlsruhe, Germany, on Sunday, June 6th, 2019.

Fig. 1: art-frame @ Poly Gallery
The Karlsruhe City Magazine INKA commented:
… Er [Jürgen Reuter] zeigt seine Objekt-Installation „Paint It Yourself“, einen Automaten als interaktiven digitalen Bilderrahmen, der z.B. mit berühmten Gemälden korrespondieren kann. …
Translation into English:
… He [Jürgen Reuter] shows his object installation “Paint It Yourself”, an automaton as interactive digital photo frame, which can correspond with e.g. famous paintings. …
Web Source: https://www.inka-magazin.de/kunst-design/10-tage-10-raeume.html
The current version of art-frame considers two main sources for
processing the particles flow:
- gravity, and
- acceleration from touch movements.
Some future version of art-frame may also consider acceleration data
from the Sense Hat, e.g. by affecting particles flow when the device
is heavily shaken.
In this time lapse recording, you will see the effect of gravity, with the darker particles effectively sinking down and the lighter particles raising up. Roughly in the middle of the video, the particles flow almost stops. The art-frame is then rotated counterclockwise by 90° (you can not see the rotation in the video, since the video is a screen recording rather than a video showing the art-frame object). After rotating the device, the particles again start flowing until finally the flow abates again.
After the flow has abated, in the this time lapse recording you can see the sweep effect: just move one finger tip across the surface of the touch display to manually move sand particles across the frame.
art-frame does not at all strive to be physically correct — in
fact, art-frame is meant as an interesting artwork, and not as a
scientifically exact tool. In the previous video, you can clearly see
that there are additional, unexpected turbulences, and that the flow
quickly abates at a time when not nearly all particles have flown to
their expected location. That is, art-frame does not implement a
physically correct simulation. It rather implements some kind of
simulation that comes somewhat close to real physics, but yields
interesting, possibly unexpected results.
Here are some impressions of manipulated images, derived from the desktop background images, that are delivered with the Raspbian OS:

Fig. 2: Road 1

Fig. 3: Road 2

Fig. 4: Temple 1

Fig. 5: Temple 2

Fig. 6: Waterfall 1

Fig. 7: Waterfall 2

Fig. 8: Waterfall 3
The above videos are time lapse recordings. In reality, the simulation takes somewhat more time, heavily depending on which Raspberry Pi is used and at which frequency it is operating. Additionally, the software automatically slows down the simulation if the CPU gets hot. The details of this behavior can be configured in the software's configuration file. In other words, if the CPU is well cooled (e.g. by using a wide or open case, or by installing a fan), the simulation will run faster.
- Raspberry Pi 3 or higher (cp. note 1)
- Raspberry Pi 7'' Touch Display (cp. note 2)
- Raspberry Pi Sense Hat (cp. note 3)
- Highly recommended: a case similar to one for a digital photo frame
- Optionally: Cooling Fan (cp. note 4)
- Optionally: USB keyboard or media center controller (cp. note 5)
Note 1: I have the software successfully running on a Raspberry Pi 3. I seriously expect that the software will also run on a Raspberry Pi 3B+ or 4, though I have not yet had the opportunity to test it.
Note 2: The touch display is required to be attached to the Raspberry Pi and properly installed.
Note 3: The sense hat is required to be attached to the Raspberry Pi and properly installed.
Note 4: Pin GPIO 4 is configured to control the cooling fan, provided a fan is installed. High voltage level on that pin should result in running the fan, while low voltage on that pin should result in keeping it off. Note that the GPIO pins do not provide enough current to directly drive a fan. In fact, connecting a fan directly to the GPIO pin may damage your Raspberry Pi. Instead, use the output level of the GPIO pin to drive a transistor that switches the fan on and off. If you do not install a fan or do not want to make use of the signal provided on the GPIO 4 output, it is fully ok to leave the GPIO 4 pin unconnected.
Note 5: Usually, for ordinary user control, the touch screen is fully sufficient. However, for certain functions like shutting down the system (especially when the action button for this function is disabled in the graphical UI), a USB keyboard or media center controller or similar device may be very useful. Also, support for making screenshots is currently available only in a rudimentary state, and therefore you may eventually want to use a keyboard for switching into a text console and transferring your screenshots.
Source code is licensed as open source under GPL v3 and is available here:
https://github.com/soundpaint/art-frame
For details, see the file INSTALL.md.
In summary:
- Install some additional packages for Qt, XML, USB, audio and processing of art work.
- Download the sources.
- Compile the sources.
- Tweak some spots of the Pi's boot process.
- Configure the application to tailor your needs.
- Optionally provide additional images.
- Run it & have fun.
While the art-frame application is running, you can alyways access the control GUI by double-touching the screen (just like a double click with a mouse), unless you have explicitly disabled the control GUI in the application's configuration. Be careful that both touches apply to the very same location on the screen. If the second touch is slightly off regarding the position on the screen, the double touch will show no effect. Similarly, the double touch will show no effect if it either occurs to fast, or if the amount of time between the first and the second touch is too large. You probably best achieve a double touch if you keep your finger our pointing device very close to the surface and perform a very light touch. This way, you have better fine-control over your touch and increase the chance to hit exactly the same position twice.

Fig. 9: Fully-Fledged Access Control Window
The Sensors group shows sensor values from the sensor hat:
- the orientation of the art frame (pitch and roll), and
- the acceleration of the art frame (ax and ay).
The Temperature group shows sensor values from the Raspberry Pi main board:
- the temperature of the CPU (in °Celsius), and
- the temperature of the case (also in °Celsius).
The Art Frame group contains action buttons to
- show the About window,
- show the License window, and
- quit the application (and, by default, thereby completely shut down the system).
The Simulation group contains
- an action button to stop / resume the simulation, and
- a dial widget to control the violence of the simulation.
The violence of the simulation is a still experimental feature. The selected value should be a value near 0, but not equal to 0. A value of 0 will effectively pause the simulation.
The Image group contains action buttons for
- switching to the previous of all configured images,
- resetting the current image to its initial state, and
- switching to the next of all configured images.
The Audio group contains
- an action button for muting / unmuting audio output, and
- a dial widget for controlling the audio volume.
The art frame application creates a (nearly) white noise sound. The loudness of the sound is proportional to the number of particles that are currently moving.
Use the Close action button to explicitly close the access control
window. By default, the access control window will automatically
close if, for a specific amount of time, no button is pressed and no
dial value changed. The specific amount of time can be configured
with the control-autohide-after control variable in the kiosk-mode
section of the config.xml configuration file.
The access control window also provides access to an About window. This window can be activated either by the About button or by any of the configured keys for the About action (be default, the A key).

Fig. 10: About Window
There is also a window showing the software license. The art-frame
software is licensed as open source under the GNU Public License,
Version 3 (GPL v3). The window that displays the license can be
activated either by the License button or by any of the configured
binding keys for the License action (be default, the C key).

Fig. 11: License Window
In specific environments such as in an art exhibition, users may be
encouraged to play with the art frame, without a supervisor always
being present. In such a setting, one may want to disable some
functionality such as shutting down the system or displaying audio
control features when no speaker is attached to the device. The
configuration file config.xml contains specific configuration
variables, most of them in the kiosk-mode section, to enable or
disable specific functionality.
In particular, the following functions can be disabled via
configuration variables in the config.xml configuration file:
- Quit button,
- Volume dial only, while still showing the Mute button,
- Audio group altogether, and
- Gravity dial.
Ultimately, the access control window can be completely deactivated, if desired.

Fig. 12: Minimal Access Control Window
See the comments in the config.xml file for details on the
configuration variables.
The usual way to exit the art frame application is to either use the Quit button on the access control window or to press any of the configured key for the Quit action (by default, either the Esc key or the Q key). Upon quit, a confirmation dialog pops up.

Fig. 13: Shutdown Confirmation Dialog
Especially when installing the art-frame in a public room, you probably do not want to let people access the internals of your Raspberry Pi and / or shutting down the system via the GUI.
As explained above, the art-frame application's configuration file offers many possibilities for access restrictions (called “kiosk-mode” in the configuration file), from just disabling the “quit” button to disabling the complete GUI control widget. However, if you disable all that stuff, how can you then ordinarily shut down the system by yourself?
There some options:
- Connect a USB keyboard to the Pi. Depending on the configuration,
you may quit the art-frame application with a single key stroke.
Alternatively, you may press, say,
CTRL + ALT + F3to get the login prompt for a text console which enables you to kill theart-frame.shshell script. - If you have disabled keyboard functionality (because you fear people
may connect a keyboard via USB), you may alternatively enable the
SSH server on your Pi and then login from a remote host and kill the
art-frame.shshell script via the remote shell. - You may configure a cron job that automatically shuts down the Pi at some time of the day.
There is an experimental feature for capturing images. Currently,
this feature is accessible only by a key press, but not yet via the
GUI. By default, the key T maps to the capture action. When
pressing that key, the currently displayed image (more precisely: the
current image representation of the simulation status) is saved to a
file. The target directory is specified with the path configuration
variable in the capturing section of the config.xml configuration
file. By default, the path maps to the current working directory .,
which usually resolves to the path /home/pi/art-frame/bin/build,
where the art-frame binary resides. The filename consists of a
prefix, a timestamp, and the .png suffix for the portable network
graphics media type of the generated image file.
- When the particles flow abates, rotate the device e.g. by 90° or 180° degrees.
- The effect of a sweeps works best in areas with differently colored particles.
- When you feel that sweeps with your finger have only little effect, try rotating the device, then wait for a short while for particles of different color to mix, and then try again sweeping.
- Try sweeping across areas with different dominating colors to create areas of unrest.
- Try sweeping along the border of areas with different dominating colors in order to emphasize contours that already exist in the image.
- Making fast sweeps with your finger will result in rather straight lines, while making slow sweeps will result in rather curved lines.