The SparkFun Inventor's Kit for Photon, or SIK for Photon for short, is the latest and greatest in Internet of Things kits. Whether you're a software developer just getting in to hardware, an electronics engineer learning software, or somewhere in between, this kit will help you get your projects hooked up to the Internet in no time.
For an overview of the Photon RedBoard and a preview of the kinds of experiments you'll get to build with this kit, check out the demo video.
Set Aside Some Time - Each experiment in this kit has two parts, with the second half usually containing an Internet-connected component. Please allow yourself ample time to complete each experiment. You may not get through all the experiments in one sitting.
Here is a complete list of all the parts included in the SIK for Photon.
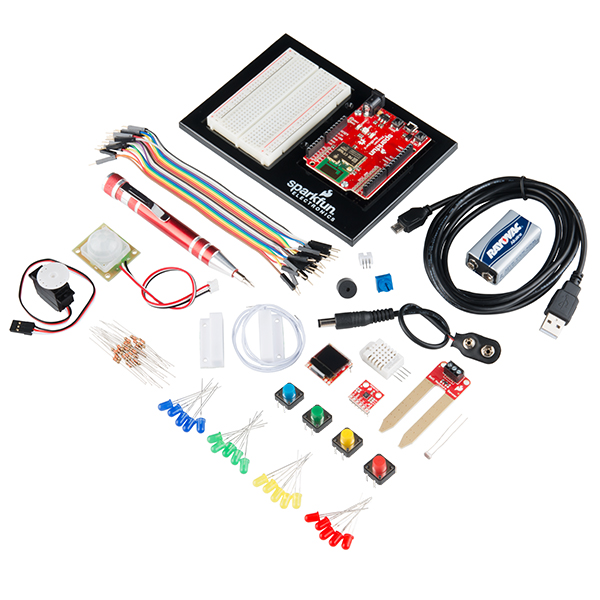
The SparkFun Inventor's Kit for Photon Includes the following:
- SparkFun Photon RedBoard
- Photon RedBoard and Breadboard Holder
- White Solderless Breadboard
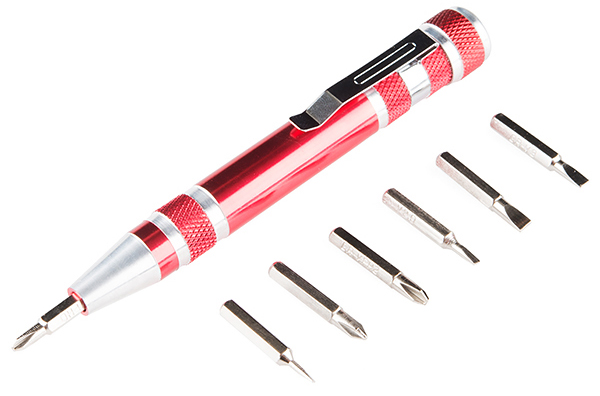
- Pocket Screwdriver Set
- Small Servo
- 9V Alkaline Battery
- 9V to Barrel Jack Adapter
- USB microB Cable - 6 Foot
- Jumper Wires
- JST Right Angle Connector - Through-Hole 3-Pin
- Soil Moisture Sensor
- SparkFun Micro OLED Breakout (with Headers)
- SparkFun Triple Axis Accelerometer Breakout - MMA8452Q (with Headers)
- PIR Motion Sensor (JST)
- RHT03 Humidity and Temperature Sensor
- Magnetic Door Switch Set
- Photocell
- Red, Blue, Yellow, and Green LEDs
- Red, Blue, Yellow, and Green Tactile Buttons
- 10K Trimpot
- Piezo Speaker
- 330 Ohm Resistors
If, at any time, you are unsure which part a particular experiment is asking for, reference this section.
The following links are here to help guide you in your journey through the SIK for the Photon. Referencing these documents throughout this guide will help you get the most out of this kit.
- The Photon RedBoard Hookup Guide - This guide goes over the features of the Photon RedBoard in great detail, from the functions of each pin to a compare and contrast between the Photon RedBoard, the Photon, and the classic Arduino Uno.
- Photon Development Guide - Learn how to develop with your Photon or Photon RedBoard using the three different methods described in this tutorial.
- Getting Started with Particle - The Particle website has tons of great documentation to get you started in the world of IoT development.
Before embarking upon the experiments, there are a few items to cover first. If you have completed one of our other Inventor's Kits before, you should already be familiar with most of the concepts in this section. If this is your first Inventor's Kit, please read carefully to ensure the best possible SIK experience.
The SparkFun Photon RedBoard is an over-the-air-programmable WiFi development board that is compatible with the Particle cloud, and it is the heart of the SIK for Photon. To learn more about the Photon RedBoard and all it's functionality, visit the Photon Redboard Hookup Guide.
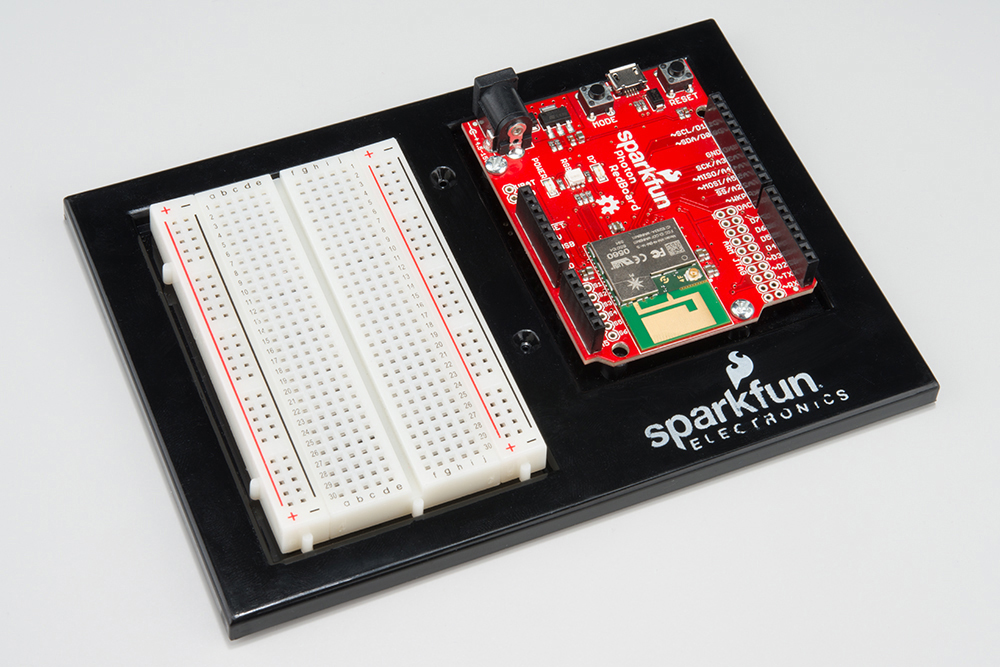
To make circuit development easier, we have included a baseplate onto which you can attach your breadboard and your Photon RedBoard.
To attach the breadboard, peel off the adhesive backing, and place the breadboard on the baseplate, making sure that the SparkFun logo and text on your breadboard all face the same direction.
To attach the Photon RedBoard, use the included screws and screwdriver to attach the board tot he baseplate. Again, be sure that the text on the pins matches the directions of the breadboard text and the SparkFun logo. The USB connector should be pointing up when looking directly at the baseplate.
Solderless breadboards are the go to prototyping tool for those getting started with electronics. If you have never used a breadboard before, we recommend reading through our How to Use a Breadboard tutorial before starting with the experiments.
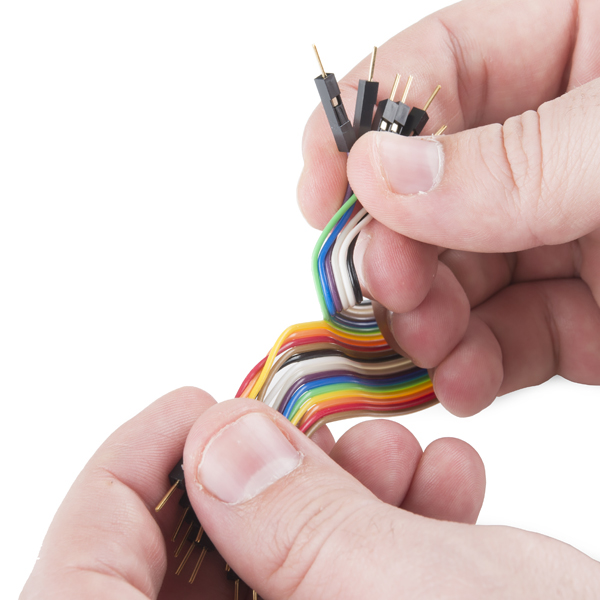
This kit includes twenty 6" long jumper wires terminated as male to male. Multiple jumpers can be connected next to one another on a 0.1" header or breadboard.
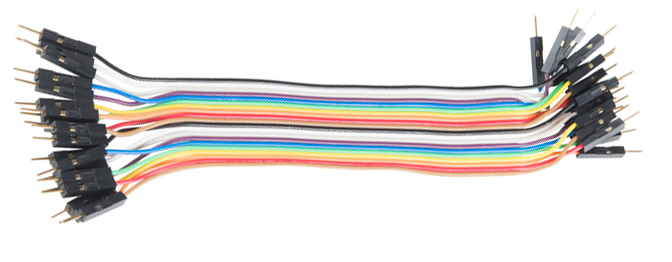
Each group of jumpers are connected to each other and can either be pulled apart in any quantity or kept whole based on you needs.
Last, we've included a pocket screwdriver set to aid you in any mechanical portions of this guide. Unscrew the cap on the tail end of the screwdriver to reveal the various tips that can be inserted into the head of the screwdriver.
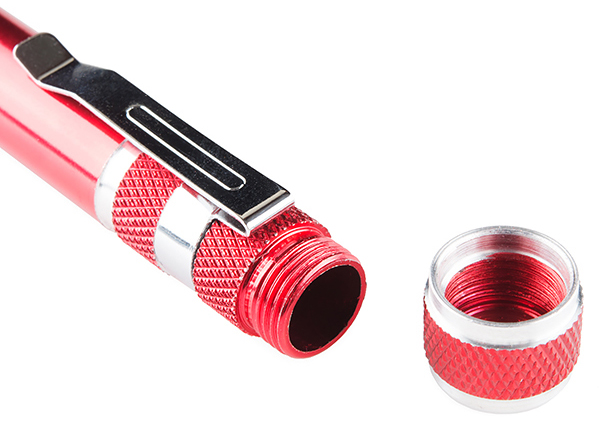
You will need to swap out tips for various tasks throughout this guide.
If you've worked with Arduino or with our SparkFun Inventor's Kit for Arduino, then you are familiar with the Arduino IDE, short for Integrated Development Environment. Particle has created their own cloud-based IDE, and they have adopted the Arduino language and syntax allowing you to move from an Arduino to the Photon and Photon RedBoard with ease.
Particle has written a great getting started guide for using their Web IDE, called Particle Build. You can read through their documentation by following the link below.
Getting Started with Particle Build
We have also written a Photon Development guide to help aid you in your experience. There are numerous ways to develop with the Photon and Photon RedBoard, and this guide covers the three most common methods: Particle Build, Particle Dev, and ARM GCC.
For the purposes of this guide, we recommend sticking to the online Particle Build IDE. However, once you feel comfortable using the Photon RedBoard, you are free to explore the other methods for development.
The Photon RedBoard can be powered over either USB (using the included Micro-B Cable) or with a 4.5-15V barrel jack power supply (like either our 5V and 9V wall warts). To begin using your Photon RedBoard, plug it in!
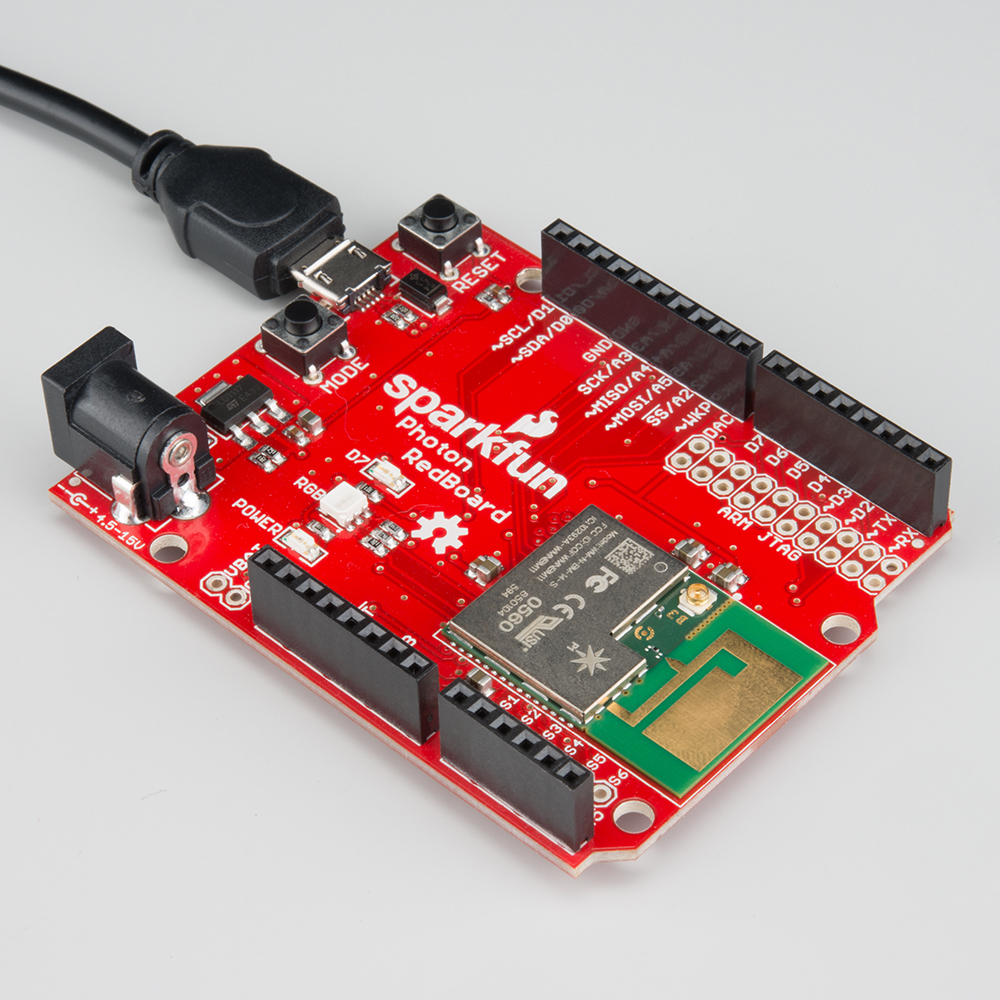
The red "POWER" LED should illuminate to indicate the Photon RedBoard is on. Once that's verified, it's time to set up WiFi.
To use the Particle cloud -- and their online IDE -- you'll need a Particle account. Head over to build.particle.io to sign up, if you haven't already.
When you power on a Photon RedBoard for the first time, it should boot up into listening mode -- indicated by a blinking, blue LED. It'll remain in listening mode until configured with your WiFi network and password.
There are a handful of ways to configure a Photon's WiFi credentials, including with the Particle smartphone app (iOS8+ or Android), or through a serial terminal. Unless you're very comfortable with serial terminals -- or just don't have a smartphone nearby -- we recommend using the app.
Both setup methods are described below, click one of the buttons to expand your section of interest:
The Partice app is available for both iOS (8.0 and up) and Android phones: iPhone | Android.
1. After opening the app, press "Get Started", to arrive at the device list screen. Scroll to the bottom and select Setup a Photon...
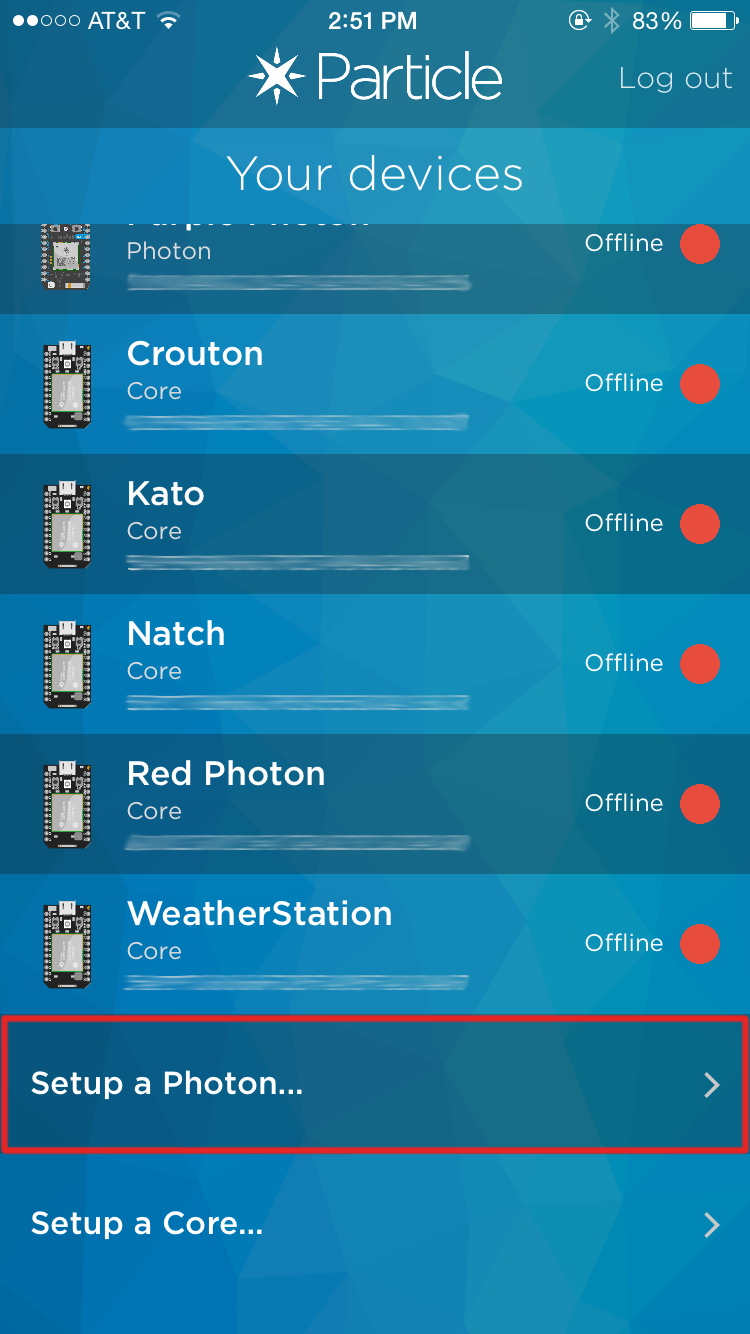
Select "Setup a Photon..." to begin setting up your Photon RedBoard.
2. Verify that your Photon RedBoard's RGB LED is blinking blue, then select "READY" on the next screen.
3. Navigate to your phone's WiFi settings and find a network named something like Photon-9XYZ (with a random set of four characters as the suffix). Select it.
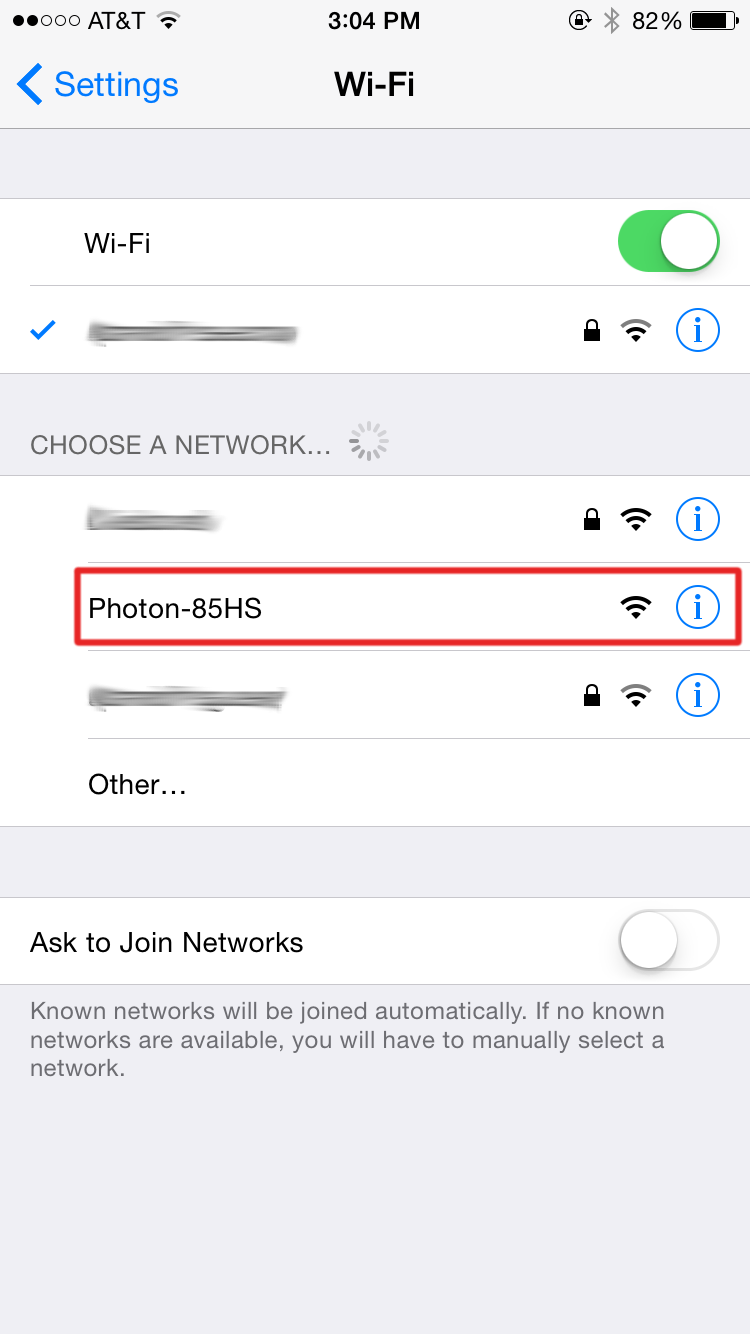
Your Phone should find a network name prefaced with "Photon-", connect to it.
4. Switch back to the Particle app. After a few seconds, the app should present you with a list of WiFi networks. Select the network you want to connect your Photon RedBoard to. On the next screen type in the network's password.
5. The penultimate screen will show the Photon RedBoard's progress as it connects to your WiFi network and the Particle cloud.
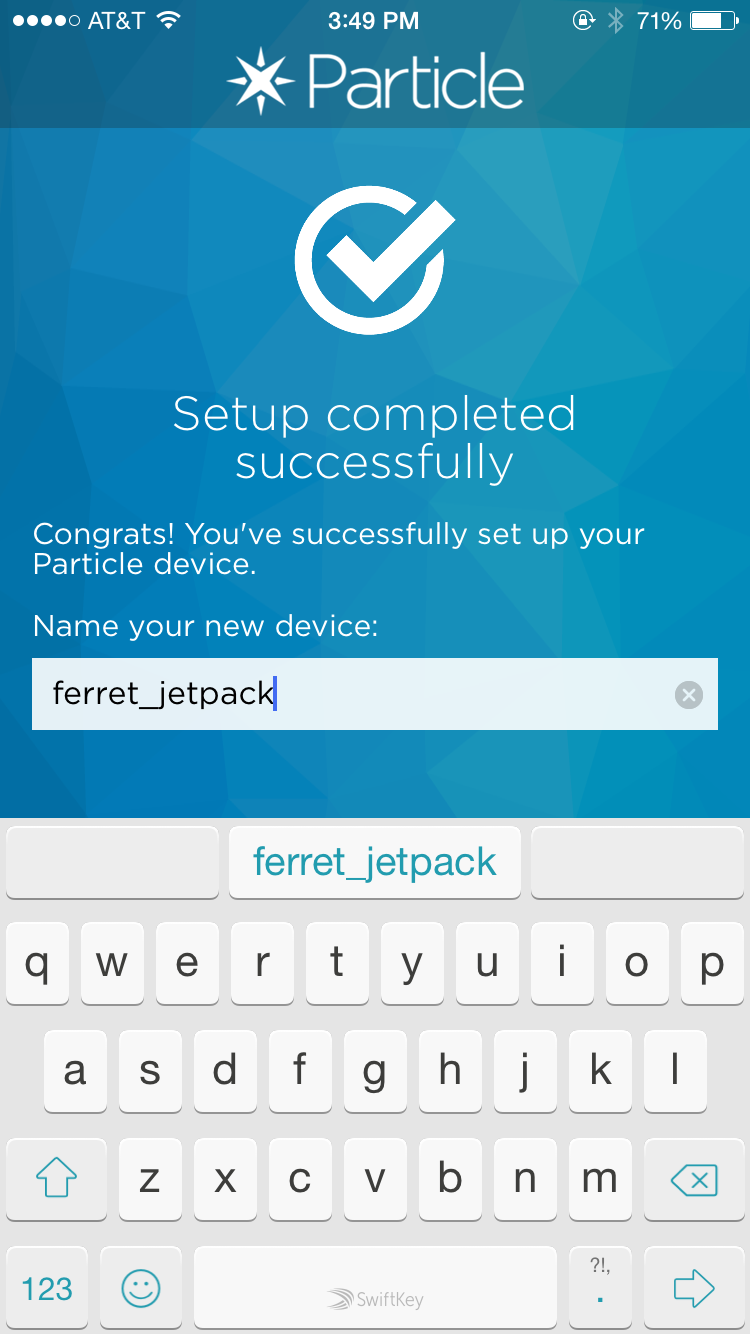
6. Finally, create a name for your Photon. You can go with Particle's (wonderfully random) suggestion, or one of your own.
If, for some reason or another, you can't use the Particle app to commision your Photon RedBoard, one alternative is using a Serial Terminal.
particle setup command to run through device setup. More information on that here.1. Open a serial terminal program (check out our Serial Terminal Basics tutorial for suggestions) to your Photon's serial port. On Windows, the port should look something like COM#. On Mac, the port will be something like /dev/tty.usbmodem####.
2. Type i to get your Photon's Device ID. Copy it down – at least temporarily.
3. Type w to enter WiFi configuration. Then follow along with the prompts to enter you WiFi network's name and password.
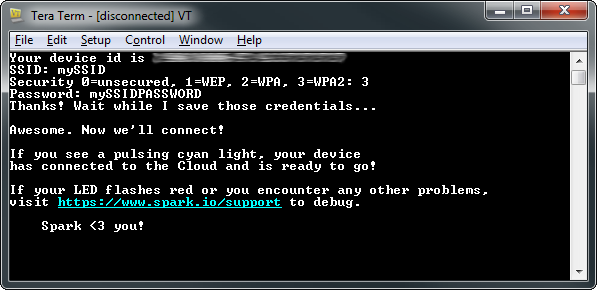
Type 'i' to get your Photon's Device ID, then 'w' to configure its WiFi.
4. Go to the Particle Build IDE. Create an account if you haven't already, or log in.
5. Hop over to the "Devices" tab. Select Add New Device, and paste in your Photon RedBoard's Device ID.
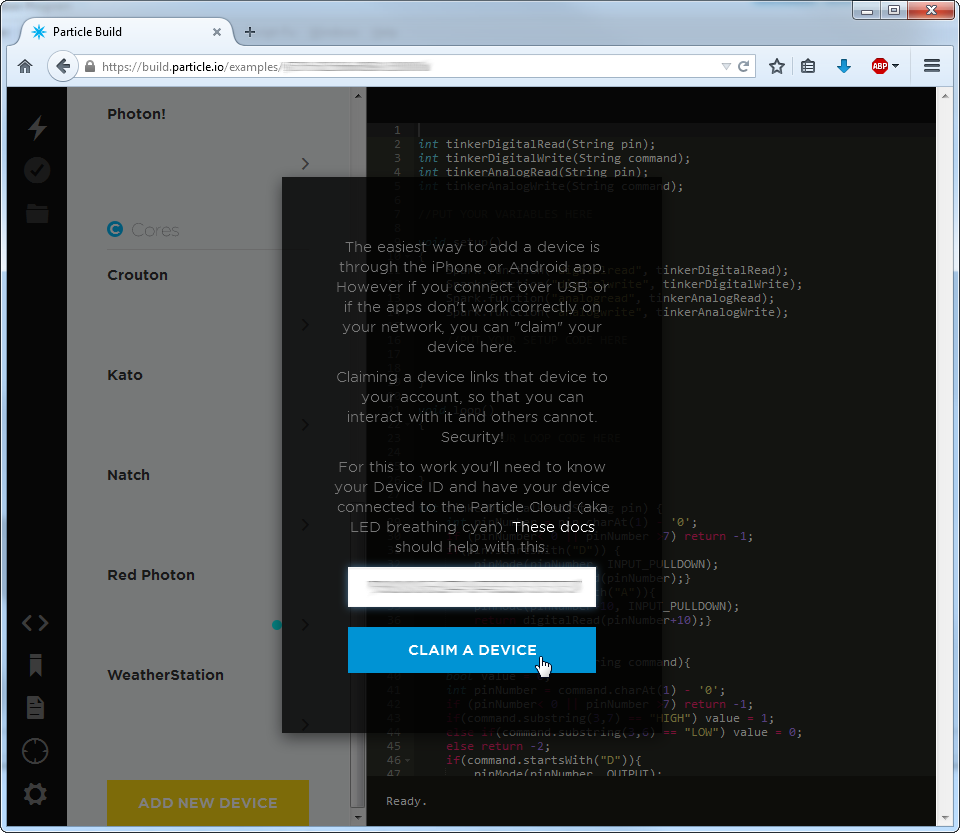
Paste your Photon's Device ID into the Build IDE.
6. Name your new Photon RedBoard
7. Your Photon RedBoard will initially appear under the "Other" section, but after reloading the IDE, it should find its home under the "P1s" section.