Run Airflow on MariaDB repository
This example reviews installing Apache Airflow and re-configuring it to use MariaDB.
The procedures for setting up the AWS instance and connecting to it are outlined here. For this example, we will install Airflow in the same Linux RHEL 8 AWS instance that is running the master MariaDB node.
Since we will have multiple applications running on this instance we should ensure that it is at least a t2.large (if it is already running as a smaller size we can easily resize it by stopping the instance, going to Actions -> Instance Settings -> Change Instance Type, selecting t2.large, and starting the instance back up)
First we will need to install/configure Python36 and Pip (the recommended way to install Apache Airflow)
As root user (or using sudo) run the following commands:
yum install python36
yum install python36-devel
Python36 should automatically install pip3 which will be used to install Airflow
As root user install the additional MariaDB packages that will be used by apache-airflow:
yum install --disablerepo=rhel-8-appstream-rhui-rpms MariaDB-devel MariaDB-shared
and modify the configuration (/etc/my.cnf.d/server.cnf) to include the additional property shown:
[mysqld]
...
explicit_defaults_for_timestamp = 1
and restart MariaDB (service mariadb restart).
Without the above setting you will likely get an error when attempting to initialize the database.
As self, we will install Apache Airflow as follows (we can subsequently set AIRFLOW_HOME in the ~/.bashrc). You can optionally create the airflow user (i.e., useradd airflow) and change the filesystem ownership to airflow:
export AIRFLOW_HOME=/somedir/airflow
mkdir -p $AIRFLOW_HOME
chown airflow. $AIRFLOW_HOME
For this installation, I will run the commands as myself (but set up the airflow user in the database):
export AIRFLOW_HOME=~/airflow
pip3 install --user "apache-airflow[mysql,celery]"
Log in to the mariadb instance (mariadb -u root -p) and run the below commands:
CREATE DATABASE airflow CHARACTER SET utf8 COLLATE utf8_unicode_ci;
CREATE USER 'airflow'@'localhost' IDENTIFIED BY 'airflow';

grant all on airflow.* TO 'airflow'@'localhost' IDENTIFIED BY 'airflow';
Edit the ~/airflow/airflow.cfg File to include the Connection String (instead of the default sqlite one):
# The SqlAlchemy connection string to the metadata database.
# SqlAlchemy supports many different database engine, more information
# their website
sql_alchemy_conn = mysql://airflow:airflow@localhost:3306/airflow
The additional fields below should be set as shown (there will be a few others we will set when we get ready to start the Webserver and Scheduler):
# The executor class that airflow should use. Choices include
# SequentialExecutor, LocalExecutor, CeleryExecutor, DaskExecutor, KubernetesExecutor
executor = CeleryExecutor

...

# The Celery broker URL. Celery supports RabbitMQ, Redis and experimentally
# a sqlalchemy database. Refer to the Celery documentation for more
# information.
# http://docs.celeryproject.org/en/latest/userguide/configuration.html#broker-settings
broker_url = sqla+mysql://airflow:airflow@localhost:3306/airflow

# The Celery result_backend. When a job finishes, it needs to update the
# metadata of the job. Therefore it will post a message on a message bus,
# or insert it into a database (depending of the backend)
# This status is used by the scheduler to update the state of the task
# The use of a database is highly recommended
# http://docs.celeryproject.org/en/latest/userguide/configuration.html#task-result-backend-settings
result_backend = db+mysql://airflow:airflow@localhost:3306/airflow
and the airflow initdb command
You show see output as command sets up the database:
DB: mysql://airflow:***@localhost:3306/airflow
[2020-04-27 16:34:22,747] {db.py:378} INFO - Creating tables
INFO  [alembic.runtime.migration] Context impl MySQLImpl.
INFO  [alembic.runtime.migration] Will assume non-transactional DDL.
INFO  [alembic.runtime.migration] Running upgrade d2ae31099d61 -> 0e2a74e0fc9f, Add time zone awareness
INFO  [alembic.runtime.migration] Running upgrade d2ae31099d61 -> 33ae817a1ff4, kubernetes_resource_checkpointing
INFO  [alembic.runtime.migration] Running upgrade 33ae817a1ff4 -> 27c6a30d7c24, kubernetes_resource_checkpointing
INFO  [alembic.runtime.migration] Running upgrade 27c6a30d7c24 -> 86770d1215c0, add kubernetes scheduler uniqueness
INFO  [alembic.runtime.migration] Running upgrade 86770d1215c0, 0e2a74e0fc9f -> 05f30312d566, merge heads
INFO  [alembic.runtime.migration] Running upgrade 05f30312d566 -> f23433877c24, fix mysql not null constraint
INFO  [alembic.runtime.migration] Running upgrade f23433877c24 -> 856955da8476, fix sqlite foreign key
INFO  [alembic.runtime.migration] Running upgrade 856955da8476 -> 9635ae0956e7, index-faskfail
INFO  [alembic.runtime.migration] Running upgrade 9635ae0956e7 -> dd25f486b8ea, add idx_log_dag
INFO  [alembic.runtime.migration] Running upgrade dd25f486b8ea -> bf00311e1990, add index to taskinstance
INFO  [alembic.runtime.migration] Running upgrade 9635ae0956e7 -> 0a2a5b66e19d, add task_reschedule table
INFO  [alembic.runtime.migration] Running upgrade 0a2a5b66e19d, bf00311e1990 -> 03bc53e68815, merge_heads_2
INFO  [alembic.runtime.migration] Running upgrade 03bc53e68815 -> 41f5f12752f8, add superuser field
INFO  [alembic.runtime.migration] Running upgrade 41f5f12752f8 -> c8ffec048a3b, add fields to dag
INFO  [alembic.runtime.migration] Running upgrade c8ffec048a3b -> dd4ecb8fbee3, Add schedule interval to dag
INFO  [alembic.runtime.migration] Running upgrade dd4ecb8fbee3 -> 939bb1e647c8, task reschedule fk on cascade delete
INFO  [alembic.runtime.migration] Running upgrade 939bb1e647c8 -> 6e96a59344a4, Make TaskInstance.pool not nullable
INFO  [alembic.runtime.migration] Running upgrade 6e96a59344a4 -> d38e04c12aa2, add serialized_dag table
Revision ID: d38e04c12aa2
Revises: 6e96a59344a4
Create Date: 2019-08-01 14:39:35.616417
INFO  [alembic.runtime.migration] Running upgrade d38e04c12aa2 -> b3b105409875, add root_dag_id to DAG
Revision ID: b3b105409875
Revises: d38e04c12aa2
Create Date: 2019-09-28 23:20:01.744775
INFO  [alembic.runtime.migration] Running upgrade 6e96a59344a4 -> 74effc47d867, change datetime to datetime2(6) on MSSQL tables
INFO  [alembic.runtime.migration] Running upgrade 939bb1e647c8 -> 004c1210f153, increase queue name size limit
INFO  [alembic.runtime.migration] Running upgrade c8ffec048a3b -> a56c9515abdc, Remove dag_stat table
INFO  [alembic.runtime.migration] Running upgrade a56c9515abdc, 004c1210f153, 74effc47d867, b3b105409875 -> 08364691d074, Merge the four heads back together
INFO  [alembic.runtime.migration] Running upgrade 08364691d074 -> fe461863935f, increase_length_for_connection_password
INFO  [alembic.runtime.migration] Running upgrade fe461863935f -> 7939bcff74ba, Add DagTags table
INFO  [alembic.runtime.migration] Running upgrade 7939bcff74ba -> a4c2fd67d16b, add pool_slots field to task_instance
INFO  [alembic.runtime.migration] Running upgrade a4c2fd67d16b -> 852ae6c715af, Add RenderedTaskInstanceFields table
INFO  [alembic.runtime.migration] Running upgrade 852ae6c715af -> 952da73b5eff, add dag_code table
Done.
You can now verify that the back-end is set up by logging in and running commands shown below:
[myuser@ip-xxx-xxx-xxx-xxx ~]$ mariadb -u airflow -p
Enter password:
Welcome to the MariaDB monitor.  Commands end with ; or \g.
Your MariaDB connection id is 14
Server version: 10.4.12-MariaDB-log MariaDB Server

Copyright (c) 2000, 2018, Oracle, MariaDB Corporation Ab and others.

Type 'help;' or '\h' for help. Type '\c' to clear the current input statement.

MariaDB [(none)]> show databases;
+--------------------+
| Database           |
+--------------------+
| airflow            |
| information_schema |
+--------------------+
2 rows in set (0.000 sec)

MariaDB [(none)]> use airflow;
Reading table information for completion of table and column names
You can turn off this feature to get a quicker startup with -A

Database changed
MariaDB [airflow]> show tables;
+-------------------------------+
| Tables_in_airflow             |
+-------------------------------+
| alembic_version               |
| chart                         |
| connection                    |
| dag                           |
| dag_code                      |
| dag_pickle                    |
| dag_run                       |
| dag_tag                       |
| import_error                  |
| job                           |
| known_event                   |
| known_event_type              |
| kube_resource_version         |
| kube_worker_uuid              |
| log                           |
| rendered_task_instance_fields |
| serialized_dag                |
| sla_miss                      |
| slot_pool                     |
| task_fail                     |
| task_instance                 |
| task_reschedule               |
| users                         |
| variable                      |
| xcom                          |
+-------------------------------+
25 rows in set (0.000 sec)

MariaDB [airflow]>
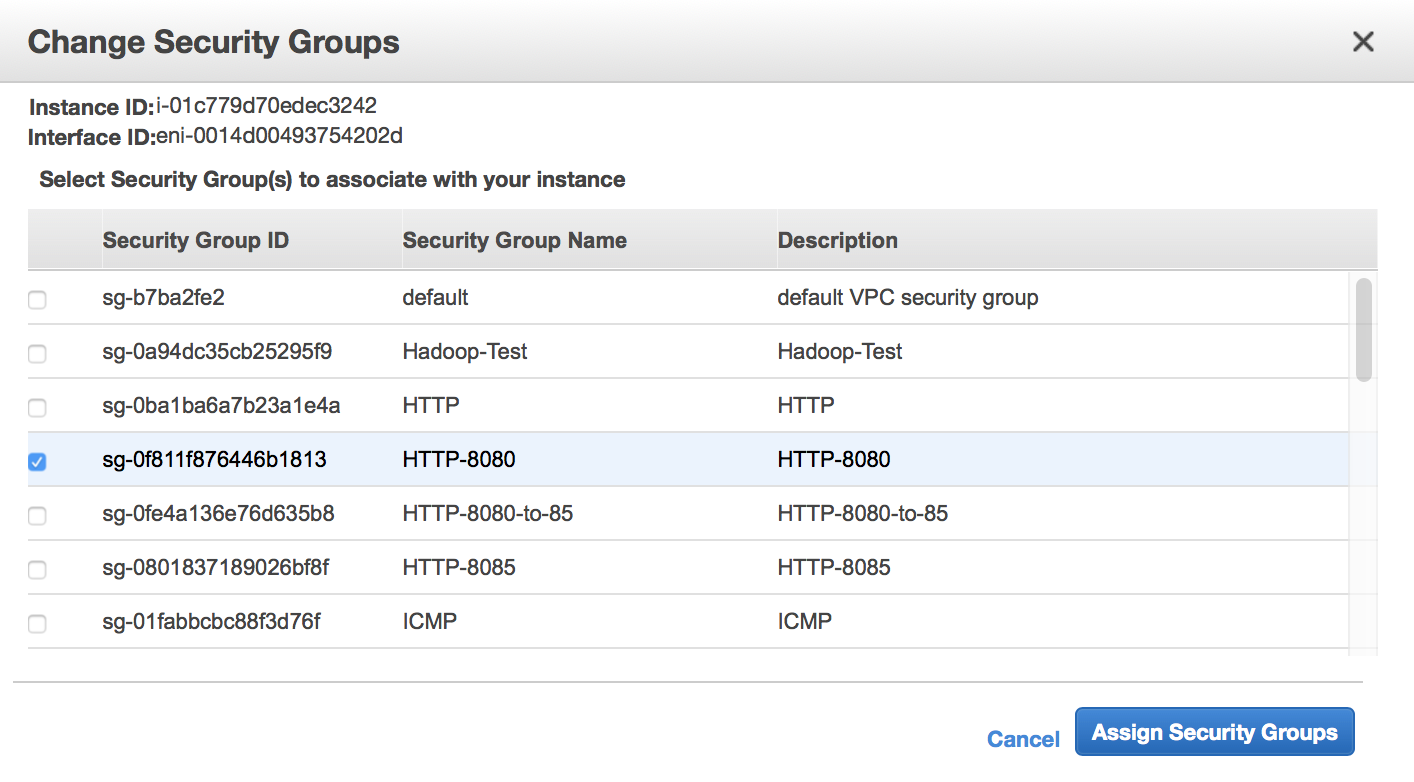
Before starting, lets open up our target port 8080 in AWS by navigating to the AWS Console, selecting our current instance checkbox, and then in the top menu navigating to Actions -> Networking -> Change Security Groups and, as shown in the Screenshot below, selecting our target security group.
Next, navigate to ~/airflow and edit the airflow.cfg file by modifying the below properties to use the public DNS (here we are duplicating and then commenting out the default properties). For the base_url and web_server_host I leave it set to "localhost" and open up an ssh tunnel to browse locally (i.e., ssh -i /path/key.pem -L 8080:localhost:8080 myuser@ec2-xxx-xxx-xxx-xxx.compute-1.amazonaws.com)
[webserver]
# The base url of your website as airflow cannot guess what domain or
# cname you are using. This is used in automated emails that
# airflow sends to point links to the right web server
#base_url = http://localhost:8080
base_url = http://ec2-xxx-xxx-xxx-xxx.compute-1.amazonaws.com:8080

...

# The ip specified when starting the web server
#web_server_host = 0.0.0.0
web_server_host = ec2-xxx-xxx-xxx-xxx.compute-1.amazonaws.com
Run the following commands:
airflow webserver &
airflow scheduler &
airflow worker &
The webserver defaults to port 8080 but can be changed in the configuration or by using the option -p at startup. The scheduler queues the tasks defined in the DAG and the worker instantiates a Celery executor to run the task(s).
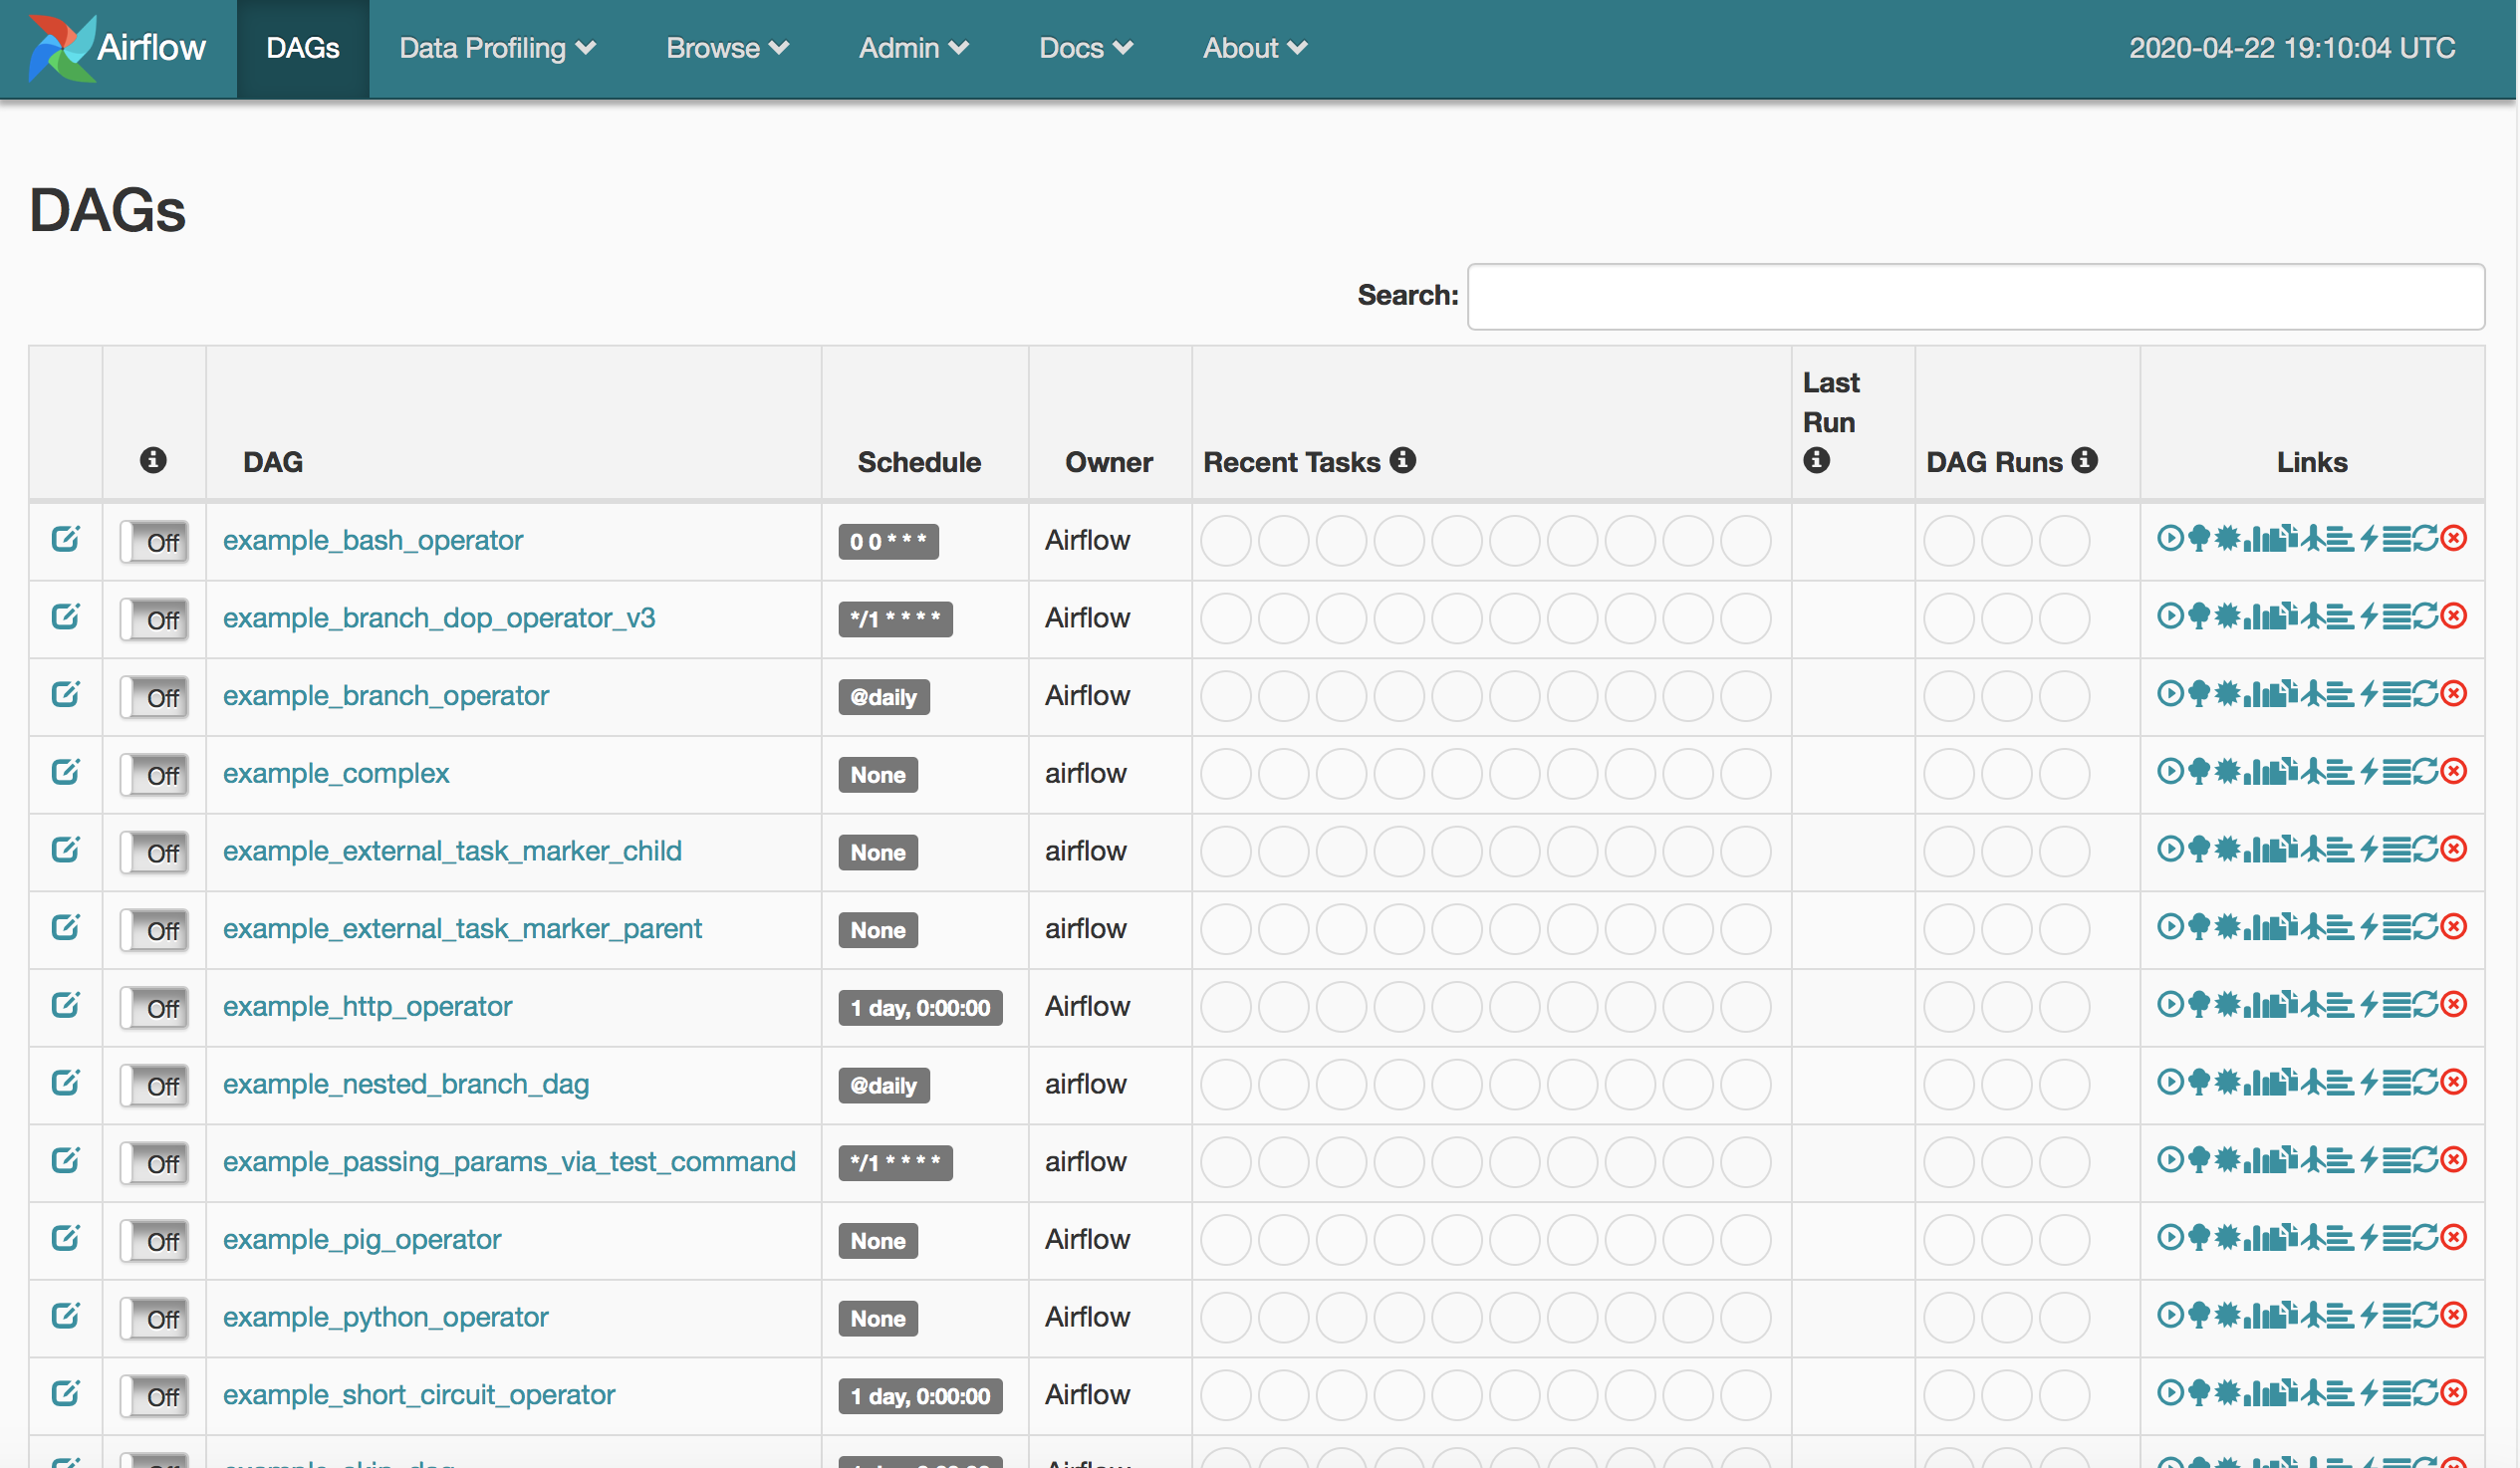
Navigating to the base_url (or localhost:8080, if you set up a local tunnel on that port) will render the UI:
As shown in the screenshot, Airflow comes pre-installed with a list of example DAGs. I this example, we will simply clone the existing "tutorial" DAG into our own DAG location and make some minor modifications.
Ensure that the ~/airflow/airflow.cfg property file includes the following setting:
[core]
# The folder where your airflow pipelines live, most likely a
# subfolder in a code repository. This path must be absolute.
dags_folder = /home/<myuser>/airflow/dags

...
Then run the following:
mkdir ~/airflow/dags
cd ~/airflow/dags
cp ~/.local/lib/python3.6/site-packages/airflow/example_dags/tutorial.py my_tutorial.py
We will then edit the my_tutorial.py DAG to ensure that the top-level configuration uses the new name and change the schedule_interval to "None":
# [START instantiate_dag]
dag = DAG(
    'my_tutorial',
    default_args=default_args,
    description='A simple tutorial DAG',
    schedule_interval=None
)
# [END instantiate_dag]
While we can execute/test the DAG command-line, for this exercise we will use the UI
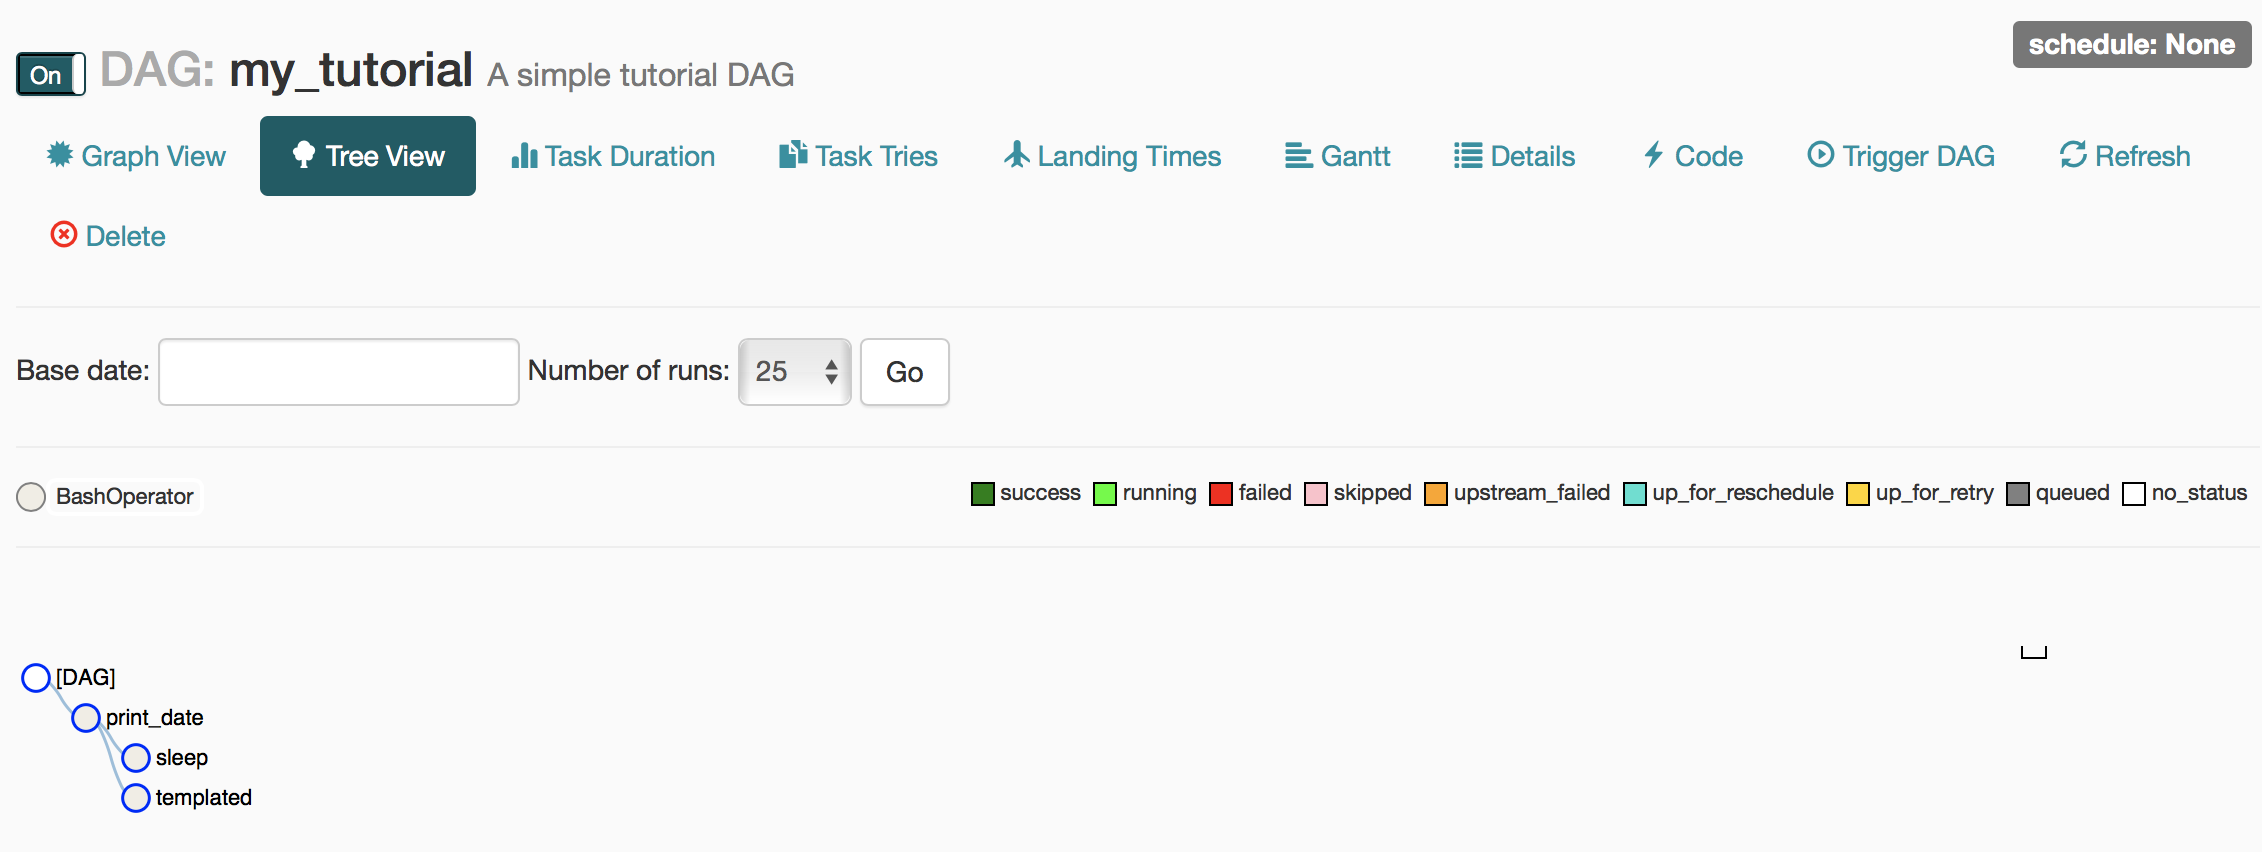
If you refresh the webserver (or restart, if required) you should now see towards the bottom the new DAG my_tutorial which we dropped in our DAG repository. After you turn it On (switch on the left) you can click on the DAG name and it will bring you to the Tree View shown below:
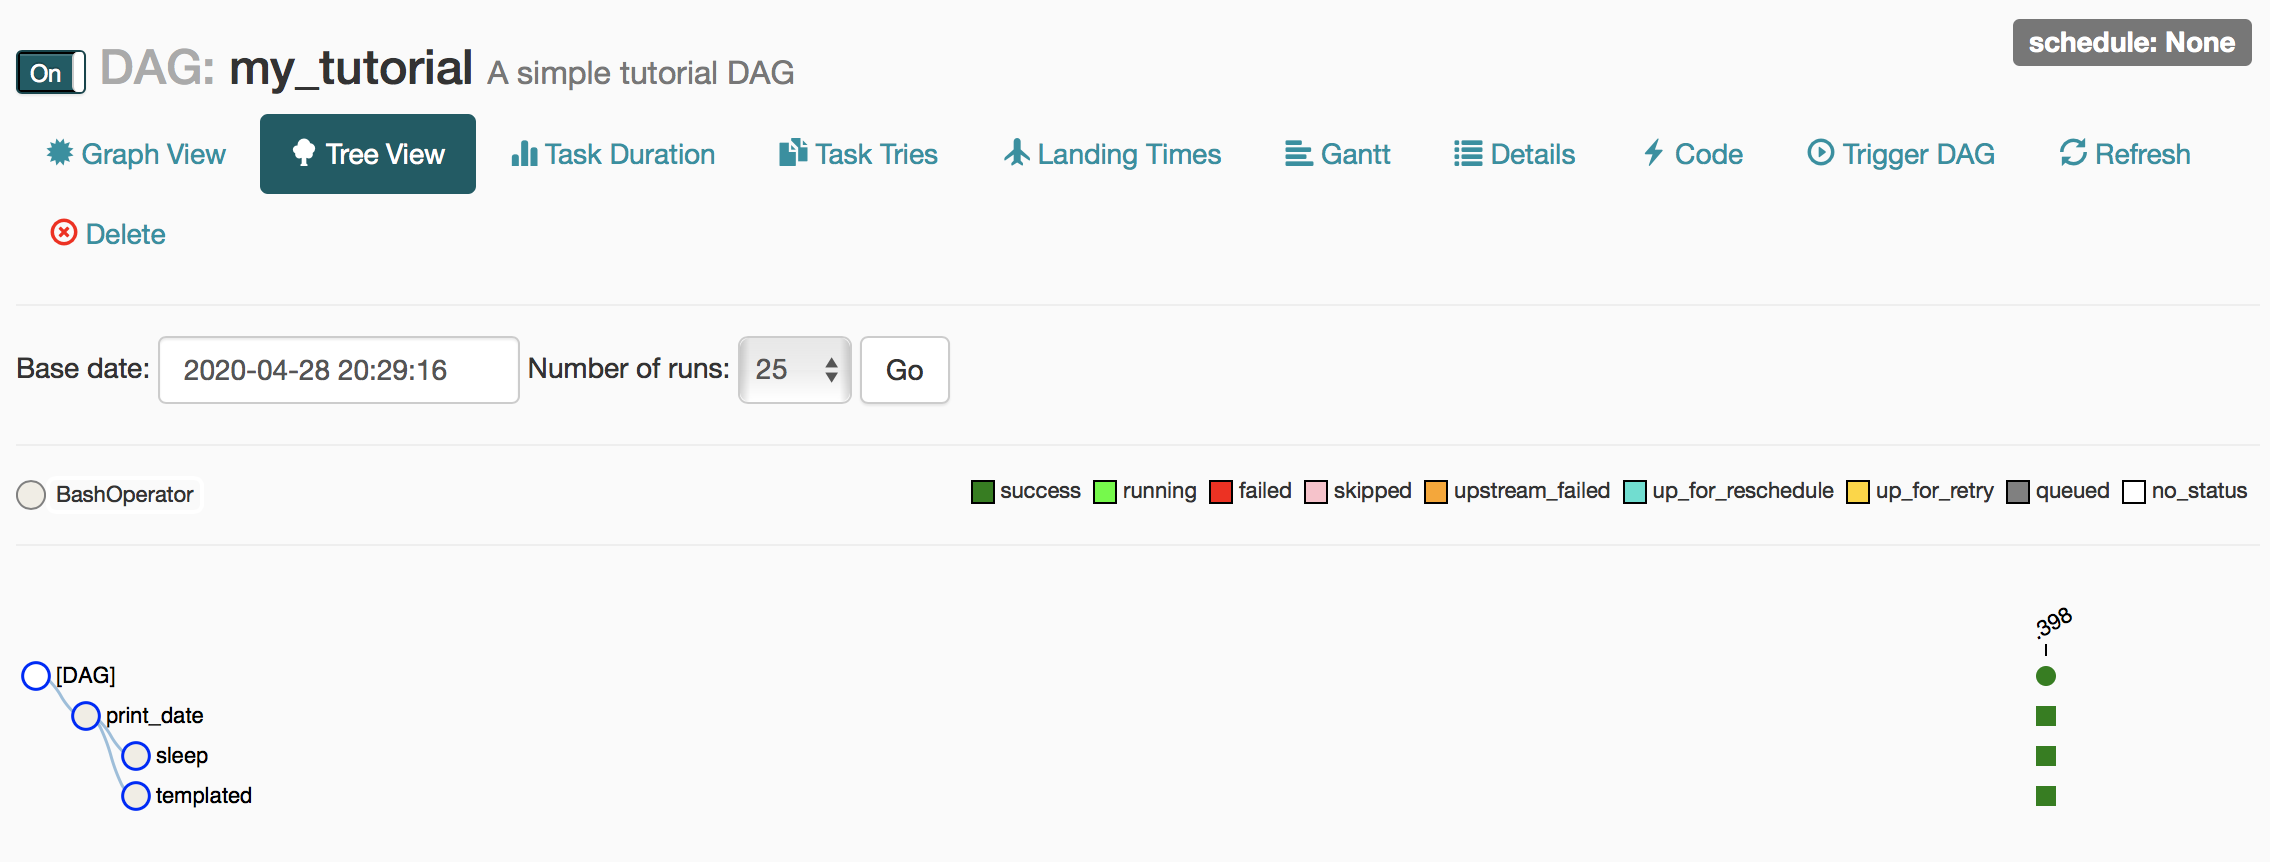
To run this DAG, you can simply click on Trigger DAG (top right) and then Trigger from the pop-up window. If successful, it will run through all tasks starting with print_date and then, in parallel, sleep and templated (the References section has an Airflow tutorial that describes the structure of this DAG) and show the output below.
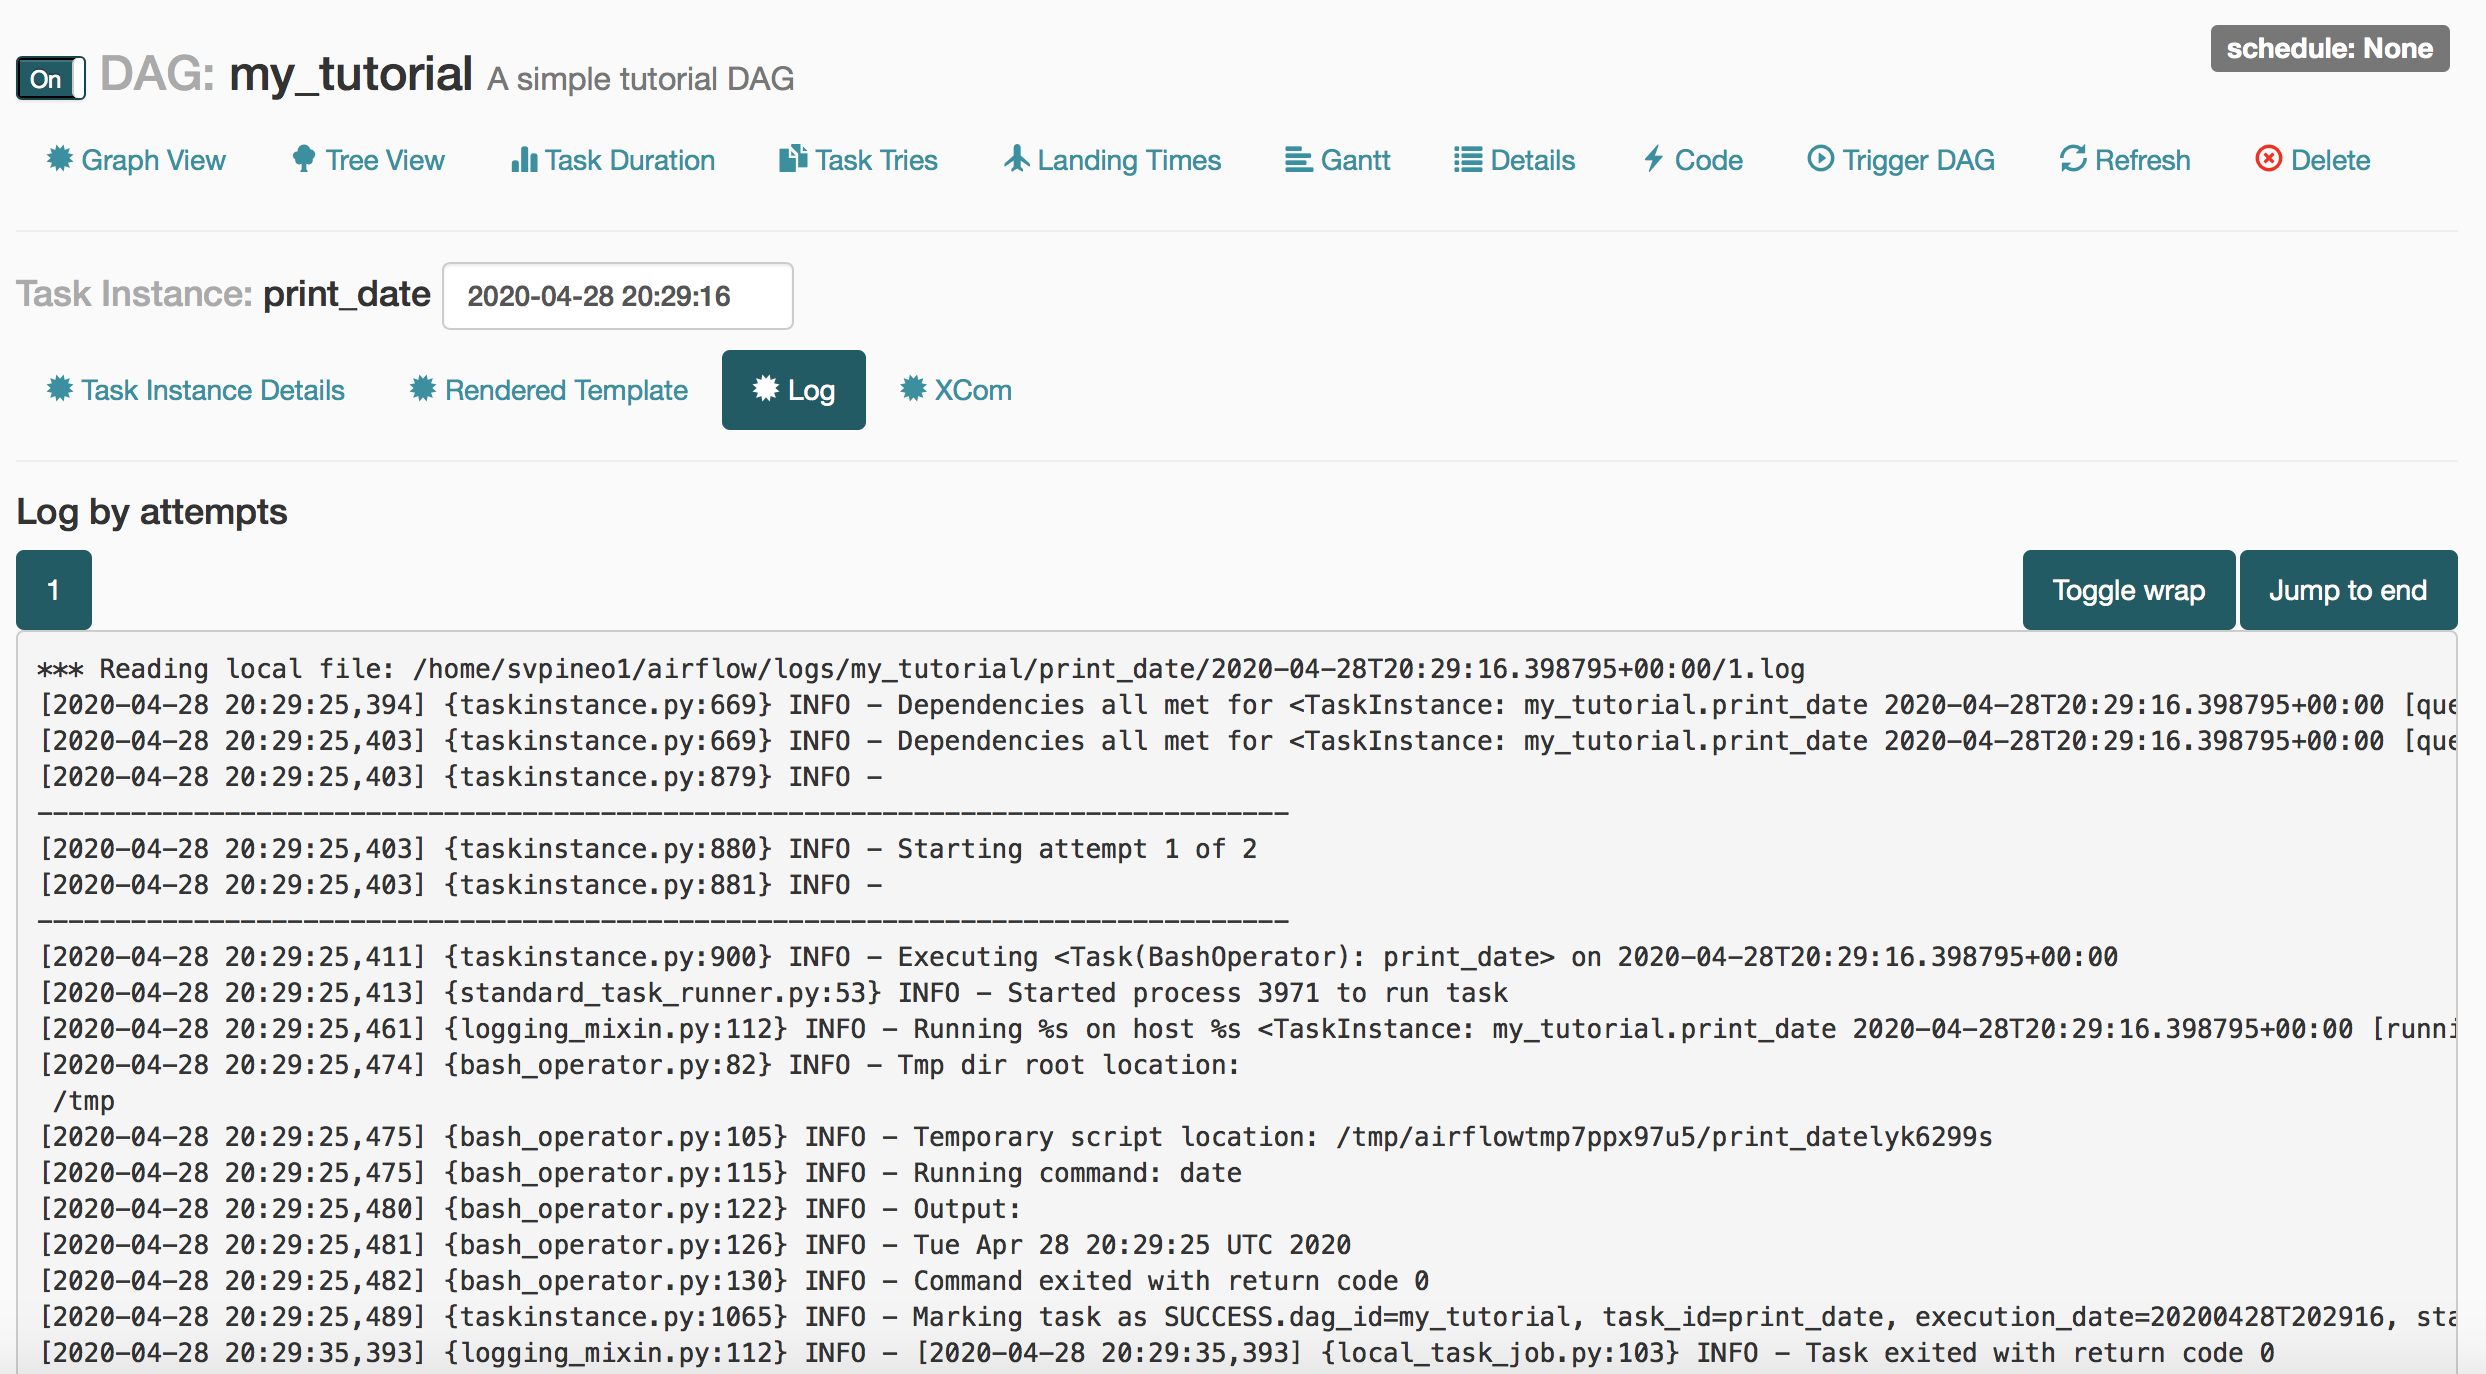
If we click on any of the small green squares to the right (i.e., the one associated with print_date) a pop-up window will appear with, among other options, View Log. If we click on that button, the logs associated with the print_date task execution will be displayed as shown below.
As I started up the Web server I initially got the error Error: No module named airflow.www.gunicorn_config
Problem was easily resolved by running the below commands:
pip3 uninstall gunicorn
pip3 install --user gunicorn
Indeed, a good number of times these problems can be linked directly to a Python library installed incorrectly the first time around.
By default, Airflow uses the SQLite database so we will run airflow initdb to reconfigure the application to use MariaDB.
