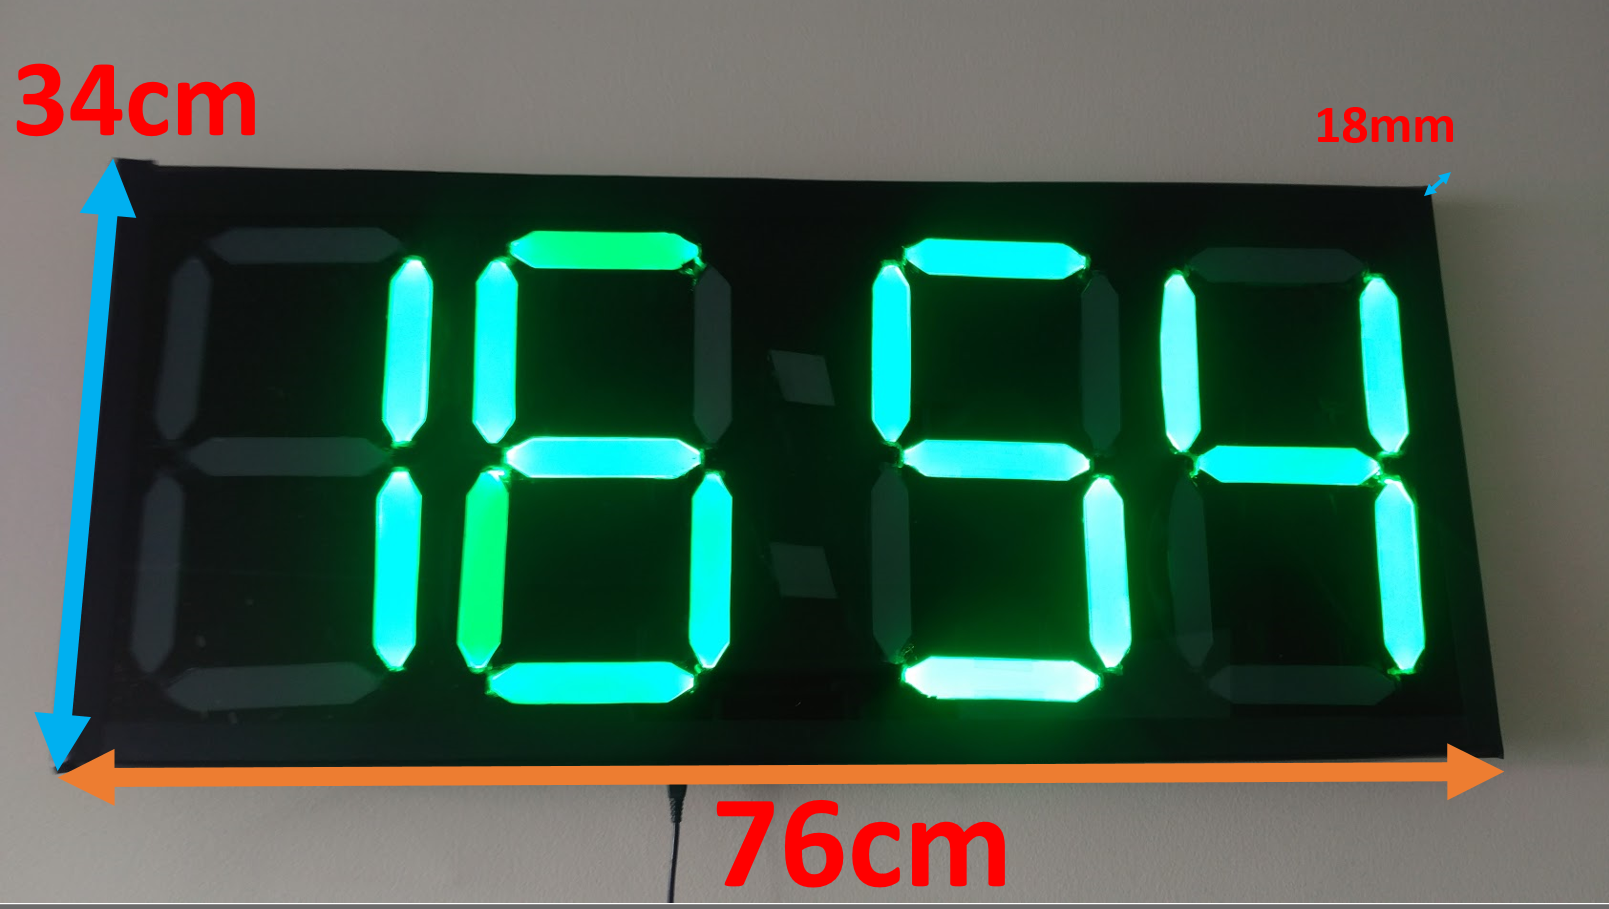
Base code and schemes for a very large RGB wall clock.
There are many great DIY projects on the internet on how to do very large 7 digit display clocks, I've been trying to do my own for years also but always come short of good results. Now i've something decent and i think this are the advantages over other projects:
- Cheap: The components of this project on worse case scenario should not cost above 50 usd.
- Large: It's a wall clock, you want them as large as possible.
- Efficient: Some of the clocks I’ve seen use 10w or above, the objective of this clock was that it will run on a smartphone charger, that means normally 5w or less (with the normal adjustments it runs between 800mw and 2.5w).
- Uniform: I want the digits to glow in a uniform light. some of the techniques I’ve seen to create this 7 segment display create brighter and darker spots because of the nature of led light and diffusion.
- Thin: Given the last point, one of the most common techniques is use separation between the led and the front of the display, making them thick. This clock is very thin (10mm for the digit and 18 mm with casing)
- Extendable. The current version of Titan RGB clock does simple by hour color change according to a predetermined table. However, the display can be controllable per segment with decent refresh rate, that means animations. You just need to upgrade the soft in the controller or change the controller.
- Arduino nano, the cable for programming and connecting to the charger
- 1 ds3231 module for arduino
- 1 1000 µF, 6.3V or higher. As recommended for using the rgb leds in a string.
- 56 ws2812b or similar rgb leds in 5050 or 3030 package, I’m using the mini breakout boards to help with soldering.
- 1 smartphone charger
- 1 damaged lcd monitor or tv, older ones are better as they have thicker diffuser sheets that fit the 5050 profile.
- 1 transparent acrylic sheet, the size of your display
- 1 sheet of polarized film, the ones used for car tinting, i used 35%.
- Lots of cables to wire the segments
- Foamcore board, wood or any other base material for the box of the clock.
Optional
- 4x 3 Pin jst sm connector or similar to make your display modular and not soldering them to the arduino
Tools
- Soldering iron and solder
- Wire stripper
- Saw for acrylic, but I recommend using laser to get optical quality cuts.
- Glue
