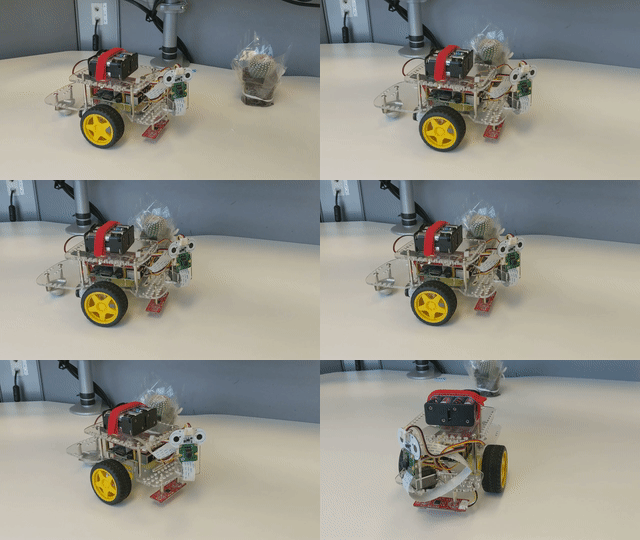
RoboRover is a two-wheeled robot equipped with a pan/tilt camera and sensors, controlled via REST APIs through AWS IoT infrastructure and integrated into AWS Rekognition (object detection & classification) service.
RoboRover was originally meant to be part of an introductory course to Robotics, Machine Learning, Cloud and APIs but due to unforseen circumstances, that is no longer the case.
Instead, I've decided to open source the entire codebase. This will serve as a great introduction to robotics, cloud, machine learning, HTTP REST APIs, IoT and a bunch of other interesting general software engineering concepts and algorithms.
Whilst there is sufficient documentation, I will continue to refine it and add more content.
RoboRover comes in 3 parts:
- RoboRover base hardware
- Roborover base software dependencies (Raspbian for Robots OS, dependencies); and
- Application stack (Basestation UI, Infrastructure & roverOS Services)
RoboRover is built upon an existing robotics platform from Dexter Industries, and can be purchased here in it's entirety: GoPiGo3.
The base kit costs around $100 and includes the most essential components (without the Raspberry Pi):
- Primary controller board
- Chassis (frame, wheels, hardware)
- Motors
- Encoders
- Power battery pack & cables
You can purchase the complete kit for $200 that comes with additional hardware:
- Raspberry Pi 3
- Camera / Distance Sensor Mounts
- Distance Sensor
- microSD Card
- Power Supply wall adapter
- Ethernet cable
You can buy the individual parts from the manifacturer, particularly if you have your own Raspberry Pi 3 (or 4).
The original kit comes only with a distance sensor, so you will have to purchase some additional hardware if you want to give your RoboRover some eyes :)
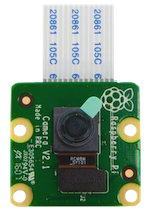
- Raspberry Pi Camera
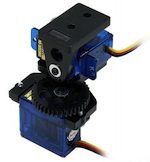
- Servo Motor Package
The single servo motor setup will only give your camera single axis pan capabilities, so if you'd like to have tilt capabilites too, you will
need to purchase an additional Servo Motor Package. I recommend getting a pan\tilt combo kit mount. Here is an example kit: PanTiltKit
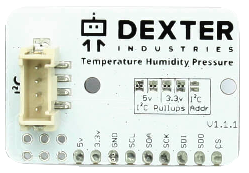
If you'd like to purchase additional sensors, you may do so from Dexter Industries website. I've purchased the Temperature Humidity Pressure sensor,
and data captured will be offloaded as part of the telemetry payload. They have other sensors, however, you will need to extend my original code-base
and expose those measurements if you wish to do so.
The RoboRover software stack will be divided in few parts, but first we need to make sure that once we've assembled the RoboRover, we install all
of the dependencies required to successfully run roverOS services on top.
Dexter Industries has two different options when it comes to the Raspberry Pi's operating system for your robotics projects. RoboRover prefers that you install Raspbian for Robots instead of DexterOS, since DexterOS is better suited to teaching and learning with "drag-and-drop" style of programming. Raspbian, on the other hand, is more suitable for OEM-type projects, and more control of the underlying operating system.
To install Raspbian for Robots, please select either or both of the below links:
- YouTube Video: https://www.youtube.com/watch?v=1J8AAww6Ucw
- Dexter Industries How-To: https://www.dexterindustries.com/howto/install-raspbian-for-robots-image-on-an-sd-card/
NOTE You also need to make sure to configure your RoboRover to connect to your Wi-Fi network (and the internet), by configuring connectivity settings. Please visit Connecting to your Raspberry Pi and configuring WiFi. (Also make sure you enable SSH)
Although Raspbian for Robots comes pre-installed with dependencies, make sure they are all there and up to date.
- Upate Operating System and Hardware Profiles
$ sudo apt-get update
$ sudo apt-get upgrade
- Install latest Node
$ wget https://nodejs.org/dist/v13.9.0/node-v13.9.0-linux-armv7l.tar.gz
$ tar -xzf node-v13.9.0-linux-armv7l.tar.gz
$ cd node-v13.9.0-linux-armv7l/
$ sudo cp -R * /usr/local/
Check if node and npm has been installed corretly:
$ node -v
$ npm -v
- Install latest Python
$ sudo apt-get install -y build-essential tk-dev libncurses5-dev libncursesw5-dev libreadline6-dev libdb5.3-dev libgdbm-dev libsqlite3-dev libssl-dev libbz2-dev libexpat1-dev liblzma-dev zlib1g-dev libffi-dev
$ wget https://www.python.org/ftp/python/3.7.0/Python-3.7.0.tgz
$ sudo tar zxf Python-3.7.0.tgz
$ cd Python-3.7.0
$ sudo ./configure
$ sudo make -j 4
$ sudo make altinstall
Check for correct version:
$ python3.7 -V
Make Python3.7 the default version:
$ nano ~/.bashrc
Add the following alias:
alias python='/usr/local/bin/python3.7'
and source the .bashrc file:
$ source ~/.bashrc
Check for correct version:
$ python -V
Python 3.7.0
Finally!!!! Here comes the fun part :)
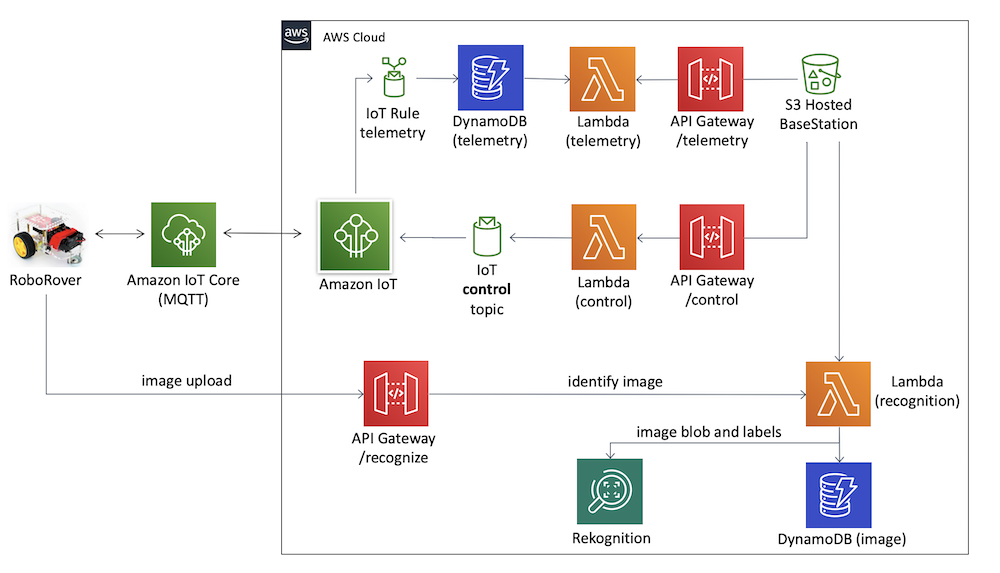 Top-level RoboRover Architecture
The RoboRover Application Architecture comes in 3 parts, and we will discuss each individually.
NOTE: Infrastructure needs to be deployed first
RoboRover infrastructure is fully hosted on AWS Cloud. It provides the primary conduit for RoboRover's telemetry, control and offloading of images for processing
by AWS' Machine Learning services, namely AWS Rekognition.
The entire infrastructure stack is created using serverless framework, with the codebase living in the infrastructure folder. To create the RoboRover infrastructure, run
the roborover CLI from the root of the repository:
$ ./roborover deploy <infrastructure|infra>
NOTE: Make sure that you configure your default AWS_DEFAULT_PROFILE profile, so that you are deploying the infrastructure to the right AWS account.
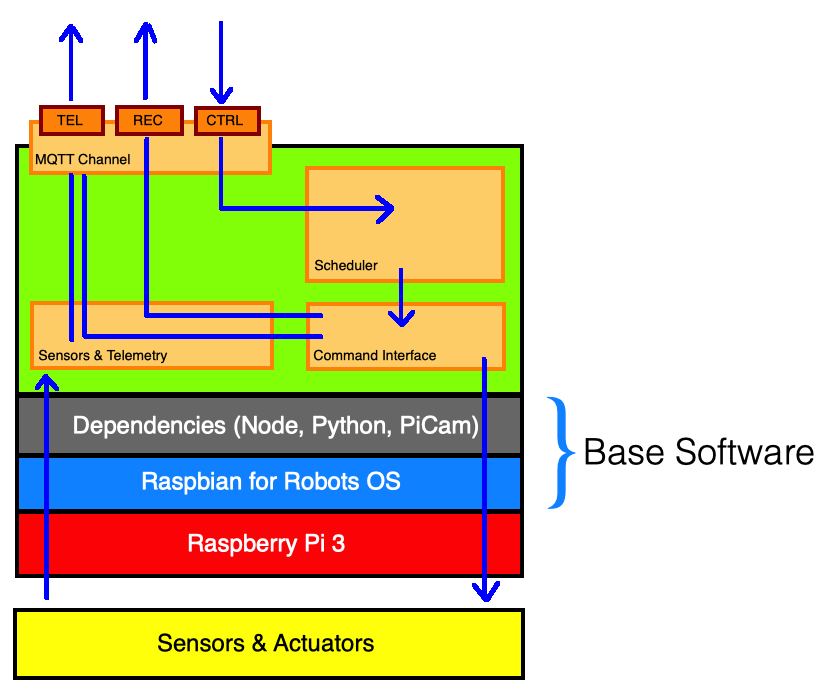
RoboRover roverOS is a simple Node based operating system. It runs on RoboRover Raspbian for Robots OS as a background service. It's primary purpose is:
- Connecting to the AWS IoT infrastructure via an MQTT (Message Queueing Telemetry Transport) protocol. MQTT is a light-weight protocol used on connecting IoT devices. RoboRover can loosely be classified as an IoT device.
- Receiving control commands via IoT infrastructure
- Scheduling command execution via a command scheduler
- Interfacing directly with RoboRover's hardware via a SDK, written by the good people of Dexter Industries, specifically for GoPiGo3 board.
- Collecting and sending telemetry (sensor readings, or GPS location if you decide to integrate a GPS sensor)
RoboRover roverOS lives in the roveros folder.
Once you have assembled your RoboRover, installed all of the dependencies and connected to your WiFi network, deployed the infrastructure (previous step), you can
proceed to install the roverOS by simply running the following command from the repository root:
$ ./roborover setup
The setup will run through the following:
- Create certificates required by the IoT infrastructure for secure MQTT communication
- Generate HTTP REST API endpoints
- Package, transfer and install
roverOSon the RoboRover (by connecting directly via SSH) - Run
roverOSin the background
NOTE:
You may also like to provide additional parameters to the roborover setup:
# Usage: ./roborover setup <env> <region>
$ ./roborover setup prod ap-southeast-2
RoboRover Basestation is, at this stage, a very simple HTML/CSS and JS based UI, with the primary aim to be able to control control the RoboRover via the web.
NOTE: Currently the UI is still W.I.P. and I aim to make it pretty
To deploy basestation, run:
$ ./roborover deploy <basestation|base>
RoboRover comes with a small CLI that you can use to setup the RoboRover, deploy various pieces of infrastructure and send it control commands:
./roborover deploy [infrastructure|basesestation] <environment> <region> (optional)
./roborover roveros [start|stop]
./roborover refresh
./roborover setup
./roborover command [pan|tilt|forward|backward|left|right|stop|drive_cm|drive_deg|speed|image] <value>
./roborover help
There will probably be some gotchas, especially when dealing with Raspberry Pi :) ... I've tried to keep them at a minimum, but here is one to note:
NOTE: All gotchas will be addressed over time.
- If you're running a command:
./roborover forward 1000for example, and you get:
$ ./roborover left 2000

    ____        __          ____
   / __ \____  / /_  ____  / __ \____ _   _____  _____
  / /_/ / __ \/ __ \/ __ \/ /_/ / __ \ | / / _ \/ ___/
 / _, _/ /_/ / /_/ / /_/ / _, _/ /_/ / |/ /  __/ /
/_/ |_|\____/_.___/\____/_/ |_|\____/|___/\___/_/


✔  (check_dependencies) dependencies ok
endpoint:
✘  (validate) RoboRover control API env variable ROBOROVER_CONTROL_ENDPOINT not set. run ./runbot setup
You can run:
$ ./roborover refresh
For support, please please raise a support ticket or reach out on LinkedIn :)

