Prepare your Object Storage configuration. In case of Amazon S3
- Bucket
- Region
- Access Key ID
- Access Key
- Prepare Object Storage configuration including S3 access Key ID, access Key Secret, Bucket Name, endpoint and Region
- Create Bucket
-
Admin Console
- Navigate to Storage -> Object Storage -> Object Bucket Claims
- Create ObjectBucketClaim
- Claim Name: oadp
- StorageClass: openshift-storage.nooba.io
- BucketClass: nooba-default-bucket-class
-
Command line with oadp-odf-bucket.yaml
oc create -f config/oadp-odf-bucket.yaml
-
Retrieve configuration into environment variables
S3_BUCKET=$(oc get ObjectBucketClaim oadp -n openshift-storage -o jsonpath='{.spec.bucketName}')
REGION="us-east-1"
ACCESS_KEY_ID=$(oc get secret oadp -n openshift-storage -o jsonpath='{.data.AWS_ACCESS_KEY_ID}'|base64 -d)
SECRET_ACCESS_KEY=$(oc get secret oadp -n openshift-storage -o jsonpath='{.data.AWS_SECRET_ACCESS_KEY}'|base64 -d)
ENDPOINT="https://s3.openshift-storage.svc:443"
DEFAULT_STORAGE_CLASS=$(oc get sc -A -o jsonpath='{.items[?(@.metadata.annotations.storageclass\.kubernetes\.io/is-default-class=="true")].metadata.name}')
-
-
This demo use existing S3 bucket used by OpenShift's Image Registry
S3_BUCKET=$(oc get configs.imageregistry.operator.openshift.io/cluster -o jsonpath='{.spec.storage.s3.bucket}' -n openshift-image-registry)
AWS_REGION=$(oc get configs.imageregistry.operator.openshift.io/cluster -o jsonpath='{.spec.storage.s3.region}' -n openshift-image-registry)
AWS_ACCESS_KEY_ID=$(oc get secret image-registry-private-configuration -o jsonpath='{.data.credentials}' -n openshift-image-registry|base64 -d|grep aws_access_key_id|awk -F'=' '{print $2}'|sed 's/^[ ]*//')
AWS_SECRET_ACCESS_KEY=$(oc get secret image-registry-private-configuration -o jsonpath='{.data.credentials}' -n openshift-image-registry|base64 -d|grep aws_secret_access_key|awk -F'=' '{print $2}'|sed 's/^[ ]*//')
-
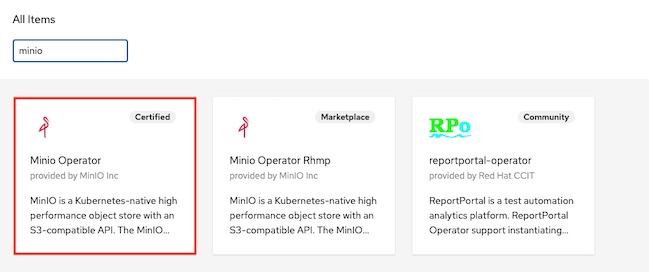
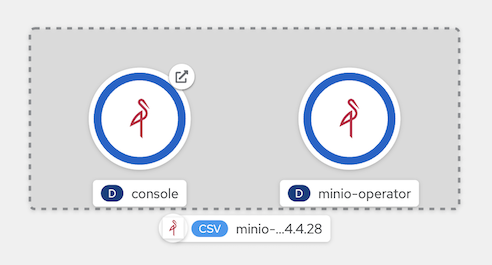
Install Minio Operator from OperatorHub
-
Install minIO kubctl plugin
-
Initial tenant
kubectl minio init -n openshift-operators
-
Check service on namespace openshift-operators
oc get svc/console -n openshift-operators
Output
NAME      TYPE        CLUSTER-IP       EXTERNAL-IP   PORT(S)             AGE
console   ClusterIP   172.30.109.205   <none>        9090/TCP,9443/TCP   11m
-
Create route for MinIO console
oc create route edge minio-console --service=console --port=9090 -n openshift-operators
-
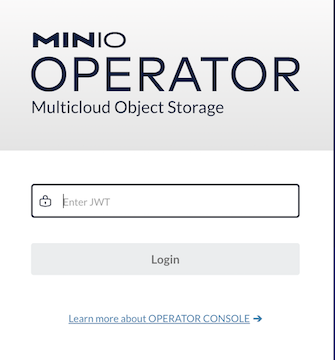
Login with JWT token extracted from secret
oc get secret/console-sa-secret -o jsonpath='{.data.token}' -n openshift-operators | base64 -d
-
Create project minio
oc new-project minio --description="Object Storage for OADP" -
Check ID from minio
oc get ns minio -o=jsonpath='{.metadata.annotations.openshift\.io/sa\.scc\.supplemental-groups}'Write down the number before slash (/). You need this ID when configure tenant
-
Create tenant with MinIO Console
-
Setup: tenant name, namespace, capacity and requests/limits
-
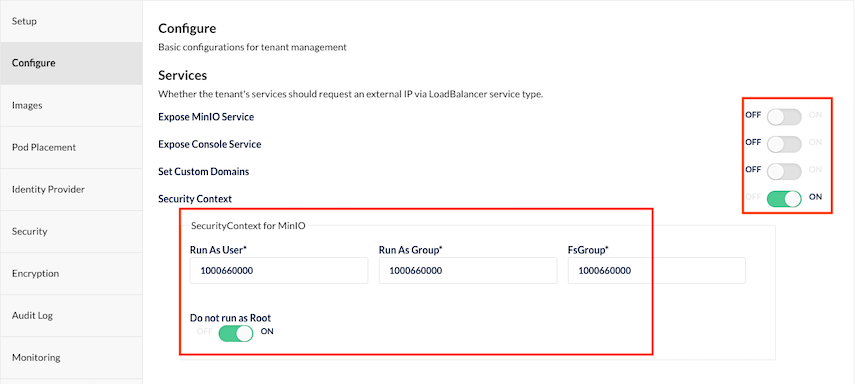
Configure: Disable expose MinIO Service and Console (We will create OpenShift's route manually) enable security context with number extracted from namespace supplemental-groups
-
Pod placement: Set to None in case your environment is small not have many nodes to do pod anti-affinity
-
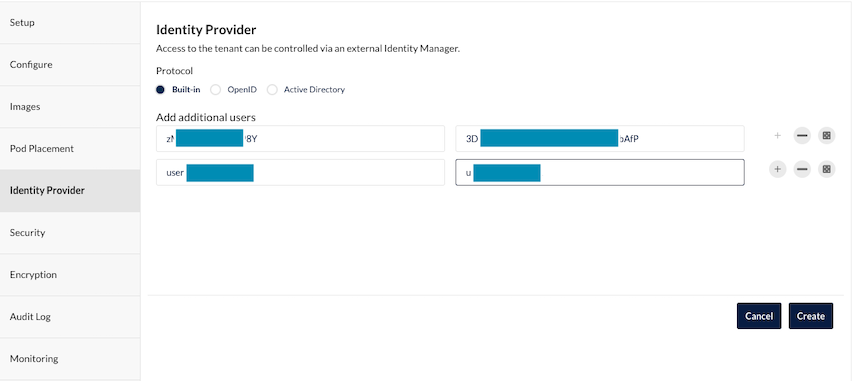
Identiy Provider: add user
-
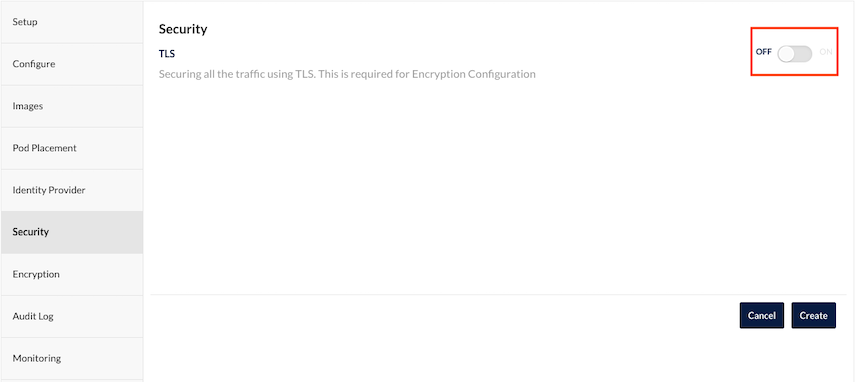
Security: Disable TLS
-
Audit: Disabled
-
Monitoring: Disabled
-
Click Create and wait for tenant creation
-
-
Edit Security Context for console
-
Login to OpenShift Admin Console
-
Select namespace minio
-
Operators->Installed Operators->Minio Operator->Tenant
-
Edit YAML. Add following lines to spec:
console:
  securityContext:
    fsGroup: <supplemental-groups>
    runAsGroup: <supplemental-groups>
    runAsNonRoot: true
    runAsUser: <supplemental-groups>
-
-
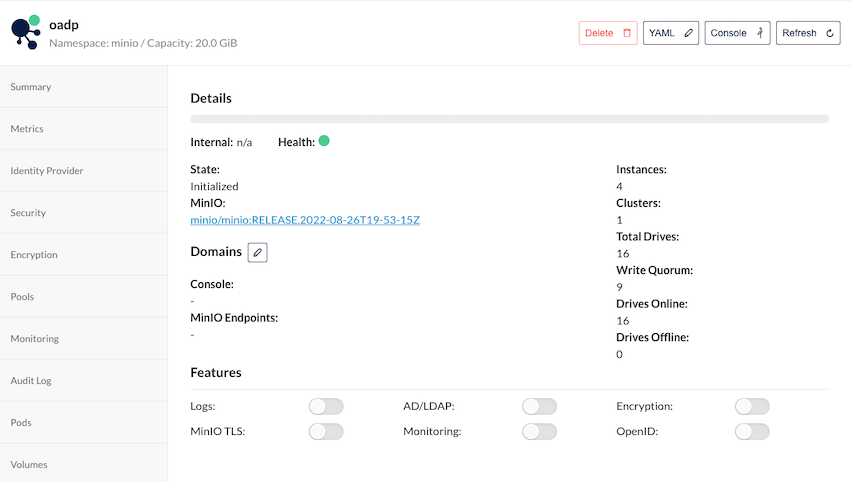
Verify that Tenant is up and running
Details
check stateful set
oc get statefulset -n minio
Output
NAME              READY   AGE
cluster1-pool-0   4/4     18m
-
Verify CPU and Memory consumed by MinIO in namesapce minio
CPU utilization
Memory utilization
-
Create Route for Tenant Console
oc create route edge oadp-console --service=oadp-console --port=9090 -n minio
-
Create Route for Minio
oc create route edge minio --service=minio -n minio
-
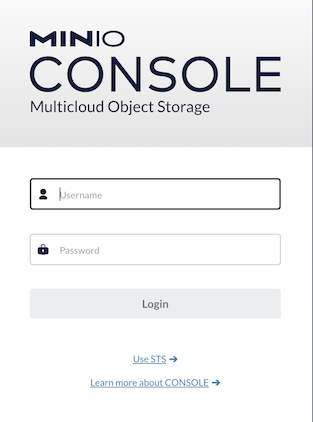
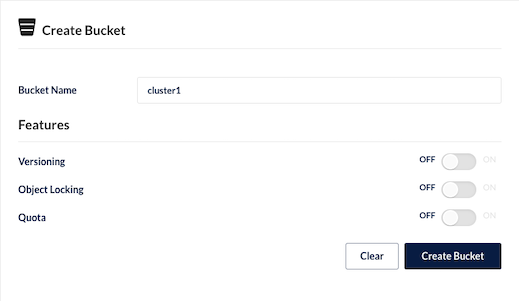
Login to tenant console with user you specified while creating tenant and create bucket name cluster1
Login page
Create bucket
-
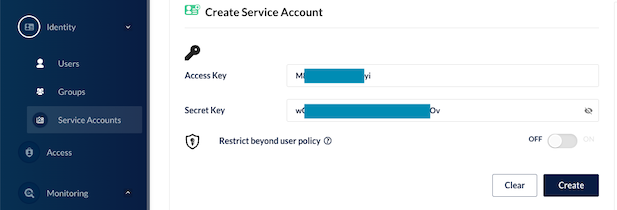
Create Service Account for OADP
-
Deploy todo app to namespace todo with kustomize.
oc create -k todo-kustomize/overlays/jvm
Output
namespace/todo created
secret/todo-db created
service/todo created
service/todo-db created
persistentvolumeclaim/todo-db created
deployment.apps/todo created
deployment.apps/todo-db created
servicemonitor.monitoring.coreos.com/todo created
route.route.openshift.io/todo created
-
Setup Database
TODO_DB_POD=$(oc get po -l app=todo-db -n todo --no-headers|awk '{print $1}')
oc cp config/todo.sql $TODO_DB_POD:/tmp -n todo
oc exec -n todo $TODO_DB_POD -- psql -Utodo -dtodo -a -f /tmp/todo.sql
Output
drop table if exists Todo;
DROP TABLE
drop sequence if exists hibernate_sequence;
DROP SEQUENCE
create sequence hibernate_sequence start 1 increment 1;
CREATE SEQUENCE
create table Todo (
      id int8 not null,
      completed boolean not null,
      ordering int4,
      title varchar(255),
      url varchar(255),
      primary key (id)
    );
CREATE TABLE
alter table if exists Todo
    add constraint unique_title unique (title);
ALTER TABLE
-
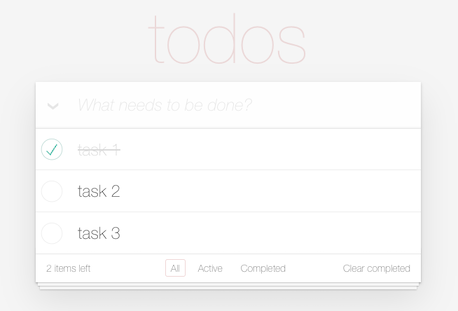
Add couple of your tasks to todo app
-
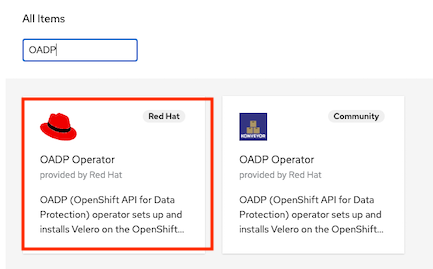
Install OADP Operator from OperatorHub
-
Edit file credentials-velero with ID and key of Service Account you created for tenant.
[default]
aws_access_key_id=<ID>
aws_secret_access_key=<KEY>
-
Create credentials for OADP to access MinIO bucket
oc create secret generic cloud-credentials -n openshift-adp --from-file cloud=credentials-velero
-
Create DataProtectionApplication
- Check for
- REGION
- ENDPOINT
- S3_BUCKET
apiVersion: oadp.openshift.io/v1alpha1
kind: DataProtectionApplication
metadata:
  name: app-backup
  namespace: openshift-adp
spec:
  configuration:
    velero:
      defaultPlugins:
        - aws
        - openshift
    restic:
      enable: true # If you don't have CSI then you need to enable restic
  backupLocations:
    - velero:
        config:
          profile: "default"
          region: REGION # In case of ODF use available AWS zone , Minio use minio
          # In case of Minio, http://minio.minio.svc.cluster.local:80
          s3Url: ENDPOINT
          insecureSkipTLSVerify: "true"
          s3ForcePathStyle: "false"
        provider: aws
        default: true
        credential:
          key: cloud
          name: cloud-credentials # Default. Can be removed
        objectStorage:
          bucket: S3_BUCKET
          prefix: oadp # Optional
- Check for
-
Run following command
cat config/DataProtectionApplication.yaml \ |sed 's/S3_BUCKET/'$S3_BUCKET'/' \ |sed 's|ENDPOINT|'$ENDPOINT'|' \ |sed 's|REGION|'$REGION'|' \ |oc apply -f - -
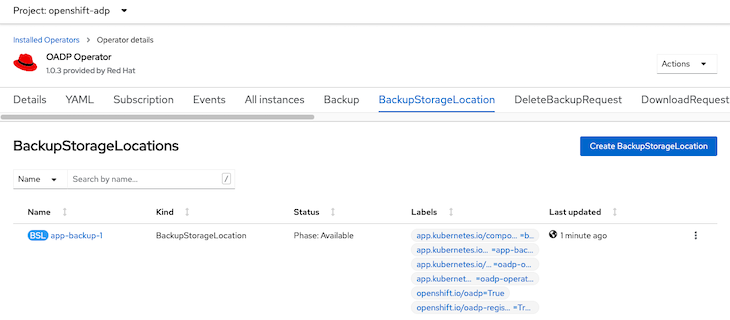
Verify that BackupStorageLocation is ready
oc get BackupStorageLocation -n openshift-adp
Output
NAME           PHASE       LAST VALIDATED   AGE    DEFAULT
app-backup-1   Available   36s              2m2s   true
-
Create backup configuration for namespace todo
apiVersion: velero.io/v1
kind: Backup
metadata:
  name: todo
  labels:
    velero.io/storage-location: default
  namespace: openshift-adp
spec:
  defaultVolumesToRestic: true
  hooks: {}
  includedNamespaces:
  - todo
  storageLocation: app-backup-1
  ttl: 720h0m0s
Run following command
oc create -f config/backup-todo.yaml
-
Verify backup status
oc get backup/todo -n openshift-adp -o jsonpath='{.status}'|jq
Output
{
  "completionTimestamp": "2022-08-30T09:50:00Z",
  "expiration": "2022-09-29T09:49:24Z",
  "formatVersion": "1.1.0",
  "phase": "Completed",
  "progress": {
    "itemsBackedUp": 69,
    "totalItems": 69
  },
  "startTimestamp": "2022-08-30T09:49:24Z",
  "version": 1
}
Test with 10GB data
{ "completionTimestamp": "2022-10-12T12:51:45Z", "expiration": "2022-11-11T12:50:18Z", "formatVersion": "1.1.0", "phase": "Completed", "progress": { "itemsBackedUp": 89, "totalItems": 89 }, "startTimestamp": "2022-10-12T12:50:18Z", "version": 1 } -
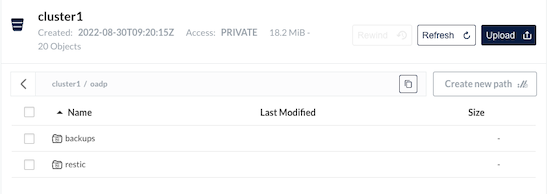
Check data in MinIO
-
Create schedule for backup namespace todo
apiVersion: velero.io/v1
kind: Schedule
metadata:
  name: todo
  namespace: openshift-adp
spec:
  defaultVolumesToRestic: true
  schedule: '*/5 * * * *' # Backup every 5 minutes for demo purpose.
  template:
    hooks: {}
    includedNamespaces:
    - todo
    storageLocation: app-backup-1
    defaultVolumesToRestic: true
    ttl: 720h0m0s
Create schedule backup
oc create -f config/schedule-todo.yaml
- Check result after schedule is created.
oc get schedule/todo -n openshift-adp -o jsonpath='{.status}'Output
{
  "lastBackup": "2023-10-03T06:20:02Z",
  "phase": "Enabled"
}
Check in developer console
-
Delete deployment and pvc in namespace todo
oc delete deployment/todo-db -n todo
oc delete pvc todo-db -n todo
-
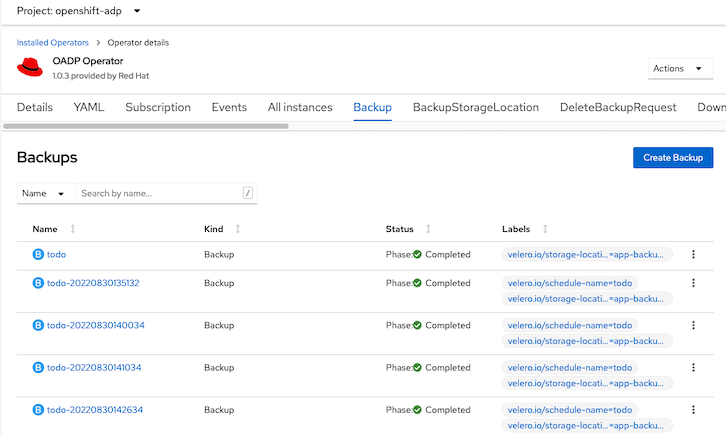
List backup name and select
oc get backup -n openshift-adp
Output
NAME                  AGE
todo                  3m18s
todo-20220830135132   3m18s
todo-20220830140034   3m18s
todo-20220830141034   3m18s
todo-20220830142634   18m
Or use OpenShift Admin Console
-
Edit restore-todo.yaml and replace spec.backupName with name from previous step.
apiVersion: velero.io/v1
kind: Restore
metadata:
  name: todo
  namespace: openshift-adp
spec:
  backupName: BACKUP_NAME
  excludedResources:
  - nodes
  - events
  - events.events.k8s.io
  - backups.velero.io
  - restores.velero.io
  - resticrepositories.velero.io
  - route
  restorePVs: true
Run following command
BACKUP_NAME=<backup name>
cat config/restore-todo.yaml| sed 's/BACKUP_NAME/'$BACKUP_NAME'/' |  oc create -f -
Check for restore status
oc get restore/todo -n openshift-adp -o yaml|grep -A8 'status:'
Output
status:
  phase: InProgress
  progress:
    itemsRestored: 47
    totalItems: 47
  startTimestamp: "2022-08-30T14:28:53Z"
Output when restoring process is completed
status:
  completionTimestamp: "2022-08-30T14:29:32Z"
  phase: Completed
  progress:
    itemsRestored: 47
    totalItems: 47
  startTimestamp: "2022-08-30T14:28:53Z"
  warnings: 5
-
Verify todo apps.
-
Ensure that user workload monitoring is enabled by checking configmap cluster-monitoring-config in namespace openshift-monitoring
data:
  config.yaml: |
    enableUserWorkload: true
Create configmap in case of it is not configured yet.
oc create -f config/cluster-monitoring-config.yaml
Verify user workload monitoring
oc -n openshift-user-workload-monitoring get pods
Output
NAME                                  READY   STATUS    RESTARTS   AGE
prometheus-operator-cf59f9bdc-ktcvg   2/2     Running   0          3m23s
prometheus-user-workload-0            6/6     Running   0          3m22s
prometheus-user-workload-1            6/6     Running   0          3m22s
thanos-ruler-user-workload-0          4/4     Running   0          3m16s
thanos-ruler-user-workload-1          4/4     Running   0          3m16s
-
Check for metrics
oc exec -n todo \
$(oc get po -n todo -l app=todo --no-headers|awk '{print $1}'|head -n 1) \
-- curl -s http://openshift-adp-velero-metrics-svc.openshift-adp:8085/metrics
Output
# TYPE velero_restore_failed_total counter velero_restore_failed_total{schedule=""} 0 # HELP velero_restore_partial_failure_total Total number of partially failed restores # TYPE velero_restore_partial_failure_total counter velero_restore_partial_failure_total{schedule=""} 0 # HELP velero_restore_success_total Total number of successful restores # TYPE velero_restore_success_total counter velero_restore_success_total{schedule=""} 2 # HELP velero_restore_total Current number of existent restores # TYPE velero_restore_total gauge velero_restore_total 1 -
Create Service Monitor for Velero service
oc create -f config/velero-service-monitor.yaml
-
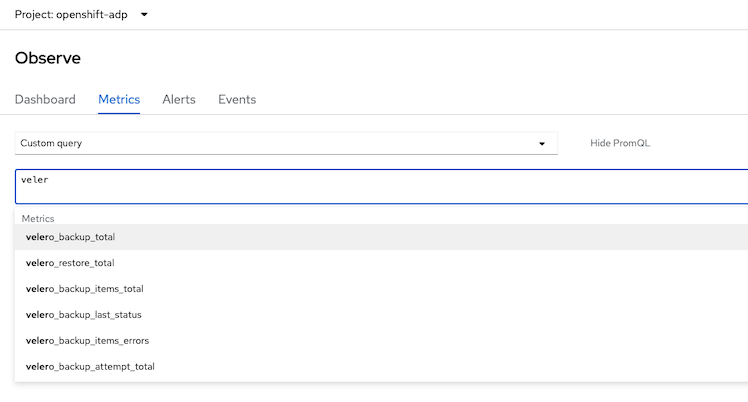
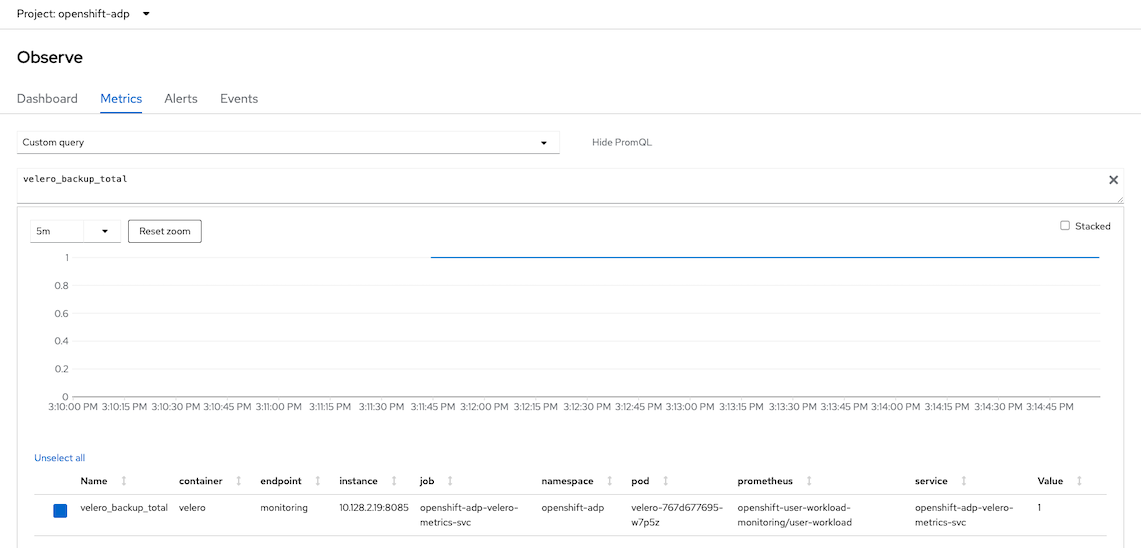
Use Developer Console to verify Velero's metrics
Backup Total Metrics
-
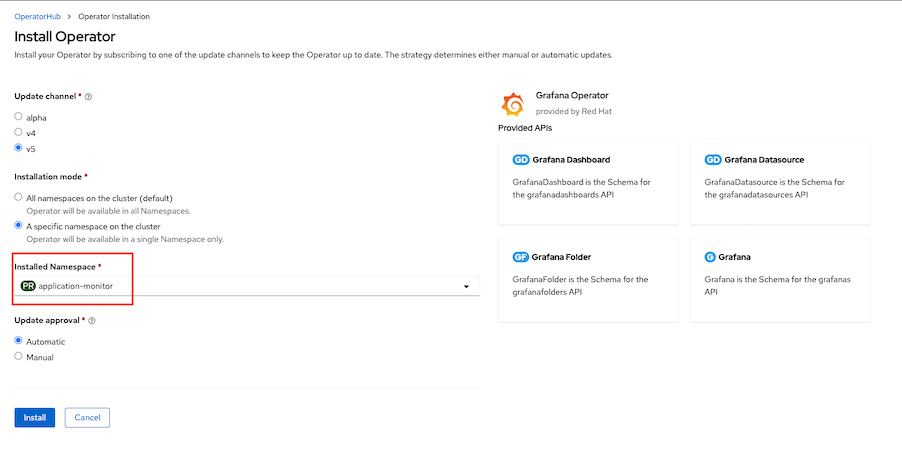
Install Grafana Operator
-
Create Grafana instance
oc apply -f config/grafana.yaml -n application-monitor
watch -d oc get pods -n application-monitor
Sample Output
NAME                                                   READY   STATUS    RESTARTS   AGE
grafana-deployment-bbffb76b6-lb7r9                     1/1     Running   0          28s
grafana-operator-controller-manager-6b5cf867c8-b5tql   1/1     Running   0          5m29s
-
Add cluster role
cluster-monitoring-viewto Grafana ServiceAccountoc adm policy add-cluster-role-to-user cluster-monitoring-view \ -z grafana-sa -n application-monitor
-
Create Grafana DataSource with serviceaccount grafana-serviceaccount's token and connect to thanos-querier
TOKEN=$(oc create token grafana-sa -n application-monitor)
cat config/grafana-datasource.yaml|sed 's/Bearer .*/Bearer '"$TOKEN""'"'/'|oc apply -n application-monitor -f -
Output
grafanadatasource.grafana.integreatly.org/grafana-datasource created
- Grafana Dashboard (WIP)
- Install OADP operator
- Create secret cloud-credentials to access minio bucket
- Create DataProtectionApplication with s3url point to minio's route
- Create Restore
-
Install Minio Client
-
For OSX
brew install mc
-
-
Configure alias to MinIO/S3 compat
mc alias set <alias name> <URL> <ACCESS_KEY_ID> <ACCESS_KEY_ID>
mc alais ls
-
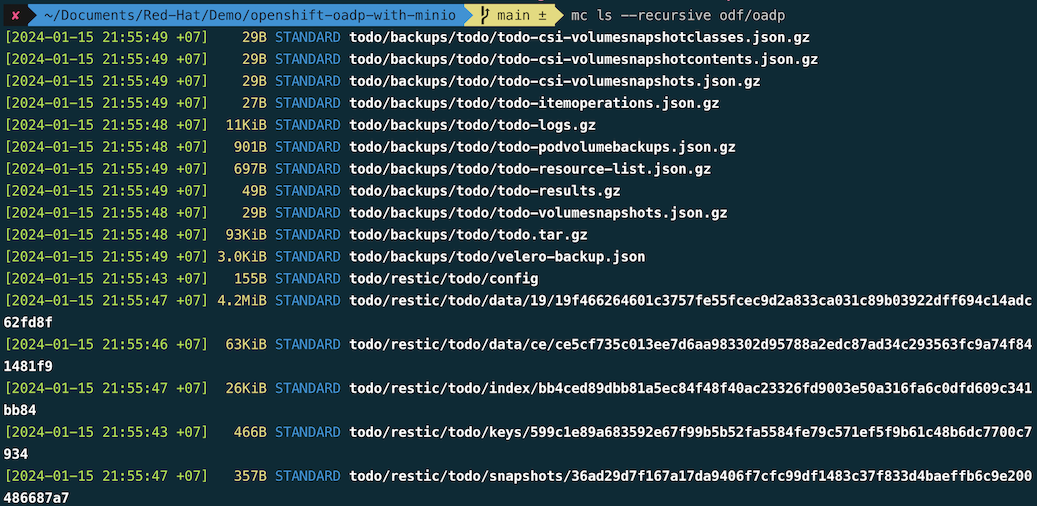
List bucket
mc ls --recursive <alias>/<bucket>
Example
-
Copy from bucket cluster1 to current directory
mc cp --recursive minio/cluster1 .Output
...re-todo-results.gz: 19.52 MiB / 19.52 MiB ━━━━━━━━━━━━━━━━━━━━━━━━━━━━━━━━━━━━━━━━━━━━━━━━━━━━━━━━━━━━━━━━━━ 2.27 MiB/s 8s
-
Verify data
cluster1 └── oadp ├── backups │ └── todo │ ├── todo-csi-volumesnapshotclasses.json.gz │ ├── todo-csi-volumesnapshotcontents.json.gz │ ├── todo-csi-volumesnapshots.json.gz │ ├── todo-logs.gz │ ├── todo-podvolumebackups.json.gz │ ├── todo-resource-list.json.gz │ ├── todo-volumesnapshots.json.gz │ ├── todo.tar.gz │ └── velero-backup.json ├── restic │ └── todo -
Copy from local to minio
mc cp --recursive cluster1/oadp minio/cluster1
Output
.../restore-todo-results.gz: 19.52 MiB / 19.52 MiB ━━━━━━━━━━━━━━━━━━━━━━━━━━━━━━━━━━━━━━━━━━━━━━━━━━━━━━━━━━━━━━━━━━━━━━━━━━━━━━━━━━━━━━━━━━━━━━ 4.83 MiB/s 4s
