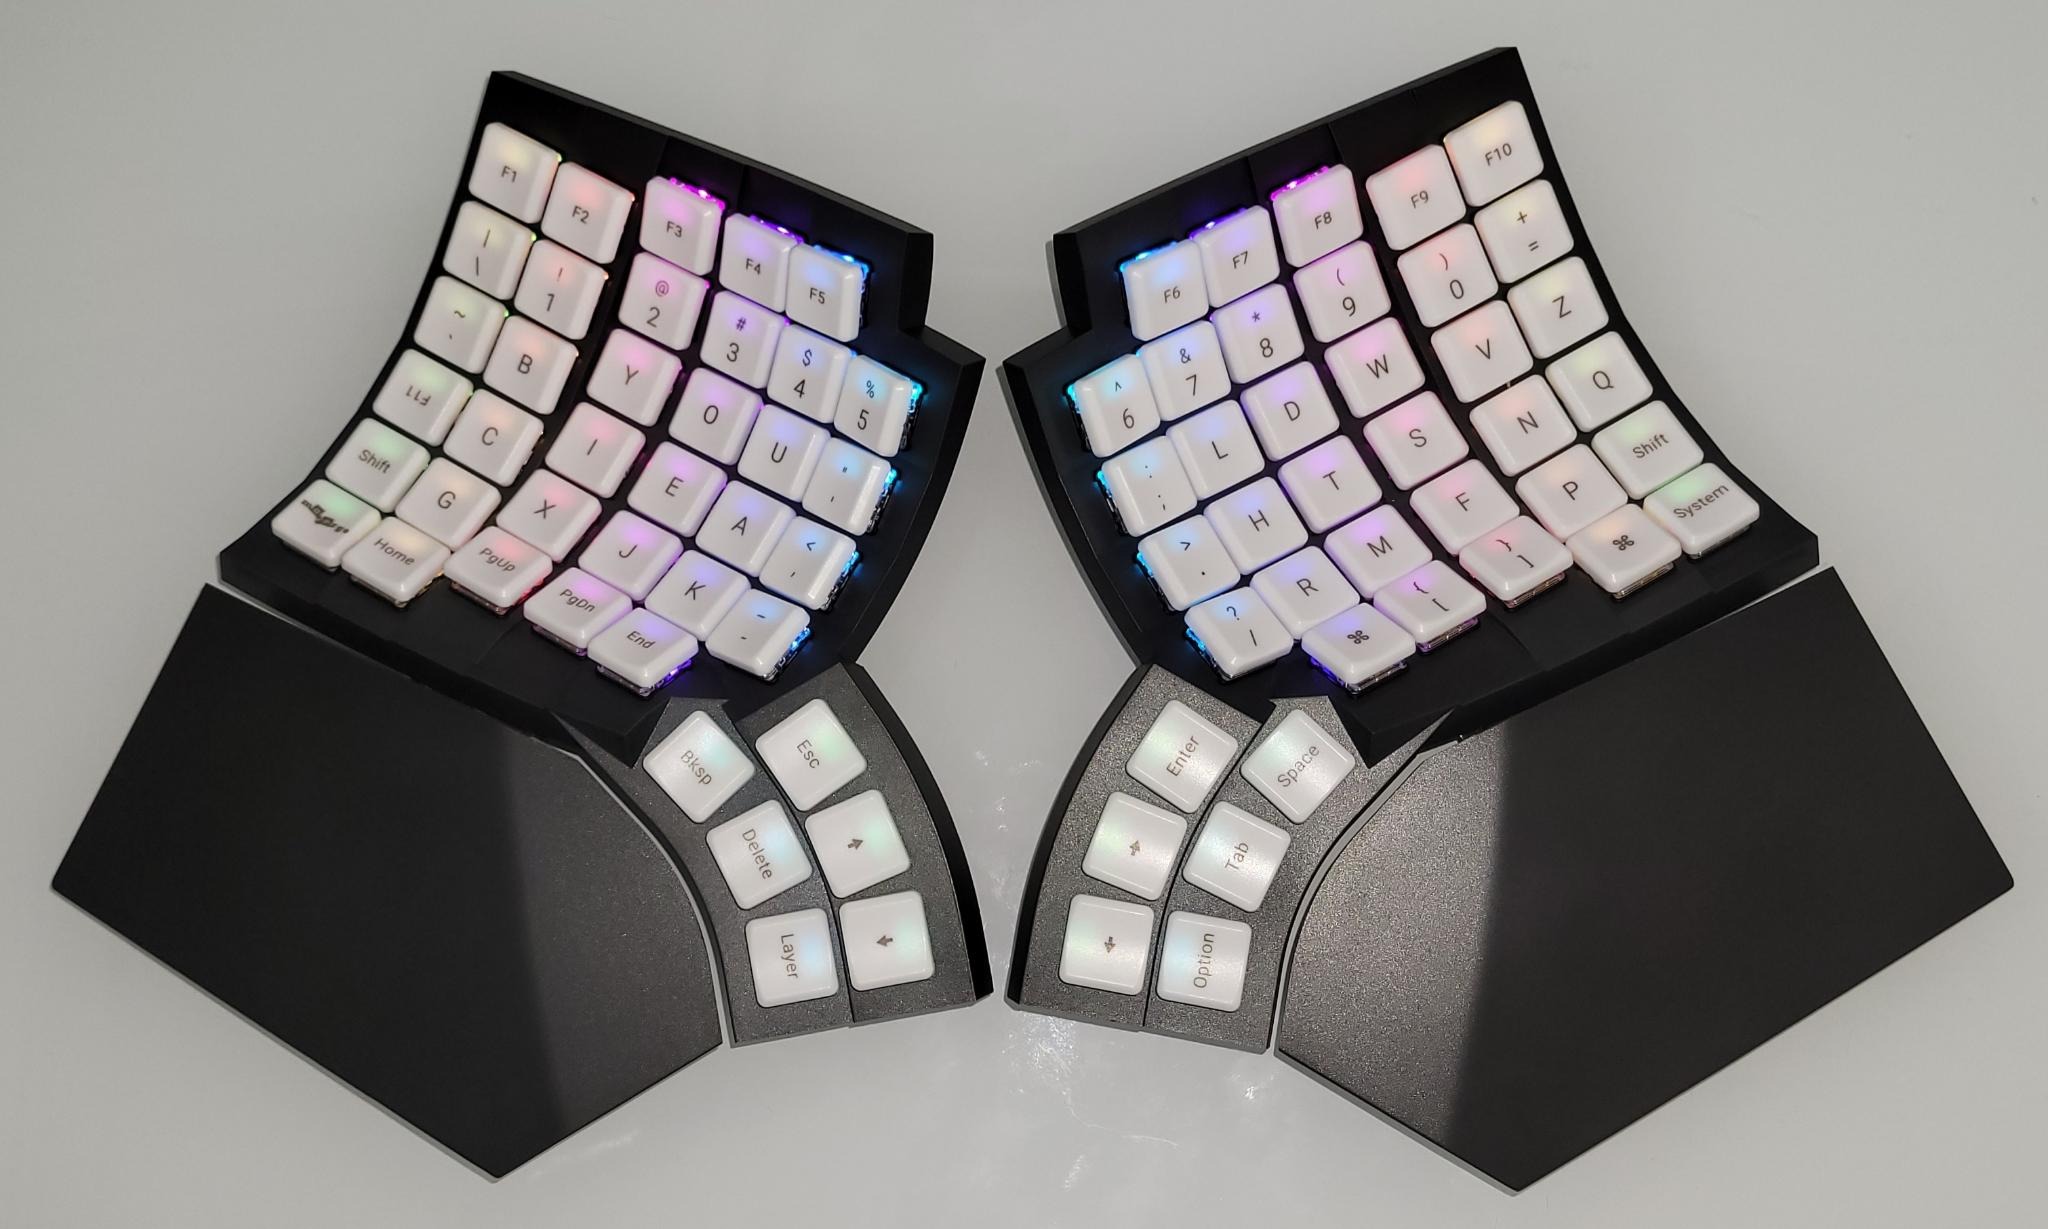
This is my Glove80 keymap featuring the Engram/mer layouts with Miryoku-style layers and home row mods. Other layouts (QWERTY, Dvorak, Colemak, Workman) and familiar keys (arrows, pinky shifts, function row) are also provided as "training wheels" to aid your transition to the full glory, at your convenience.
https://my.glove80.com/#/layout/user/5b237589-6ea9-44ba-9f84-aeac86a2eb8e
See interactive layer map for overview and documentation.
NOTE: This is also available as a printable PDF document.
See release notes for a visual overview of recent updates.
Open the keymap link above and follow these instructions:
- Log in (account is required)
- Clone the keymap to customize and/or build it!
- Choose your base layout (place at top as layer number #0) via drag & drop.
- Customize the keymap behavior in this text box.
- Build the firmware and download the
*.uf2file.

-
For the initial flash, follow "Loading new ZMK firmware onto your Glove80" (see page 28 of the Glove80 User Guide) or, if that doesn't work, try the "bootloader mass storage device mode" method (see page 31 in the user guide).
-
If you're installing a different firmware version compared to what your keyboard currently has, then
⚠️ after flashing both halves⚠️ perform a "Configuration Factory Reset" on both halves (see page 41 in the Glove80 User Guide) and then turn RGB effects on, watch them illuminate, and finally turn them back off. This allows the newly installed firmware to take full effect.
-
Copy the ZMK snippet from the "Custom Defined Behaviors" text box in either keymap linked above and paste into yours. The contents of that text box are also available in the
*.dtsifiles provided in this Git repository. -
You can diff and copy changes between a JSON export of your keymap (via "Advanced Settings" > "Enable local config" then go back to "Edit" and click "Download") and the
*.jsonfiles provided in this Git repository.
You can override the various #define settings that govern this keymap by
adding them above the snippet in the "Custom Defined Behaviors" text box:
// add your overrides here, up at the very top:
#define OPERATING_SYSTEM 3 // windows
#define EMOJI_HAIR_STYLE_PRESET 3 // curly_hair

// ... rest of snippet goes here, unchanged ...
For your reference, the following digram shows the default values for all settings and how they inherit from each other, so you can override them together as a group (by inheritance) or each individually (fine-grained).
Diagram: Default values for #define settings

Activate the typing layer, launch the QMK Configurator's testing tool, and then pretend to use home row mods. Note the
timing and duration of keystrokes reported by the tool and then use them to
adjust the #define time thresholds in the "Custom Defined Behaviors" snippet.
-
Clone or download a copy of this Git repository (if you haven't already).
-
Install dependencies OR skip this step if you have Docker on your system:
apt install rake graphviz
-
In your copy of this repository, run
rakeOR./rakeif using Docker.
You can customize the preset characters in the Emoji and World layers by
editing their respective YAML source files in this repository. Afterwards,
run the rake command and then copy the new keymap.dtsi contents back into
the "Custom Defined Behaviors" text box in the Layout Editor for your keymap.
If you rearrange home row mods on your base layer in the Layout Editor, then:
-
Export your keymap as a JSON file (via "Advanced Settings" > "Enable local config" then go back to "Edit" and click "Download") in the Layout Editor.
-
Overwrite the
keymap.jsonfile in this repository with your exported file. -
Run the
rakecommand in this repository. -
Copy the new
keymap.dtsicontents back into the "Custom Defined Behaviors" text box in the Layout Editor for your keymap.
You don't need to change the per-finger layers (such as "LeftPinky") manually.
See "Glorious Engrammer" on Discord for discussion & updates.
Like my work? 👍 Please spare a life today as thanks! 🐄🐖🐑🐔🐣🐟✨🙊✌
Why? For 💕 ethics, the 🌎 environment, and 💪 health; see link above. 🙇
(the ISC license)
Copyright 2023 Suraj N. Kurapati https://github.com/sunaku
Permission to use, copy, modify, and/or distribute this software for any purpose with or without fee is hereby granted, provided that the above copyright notice and this permission notice appear in all copies.
THE SOFTWARE IS PROVIDED "AS IS" AND THE AUTHOR DISCLAIMS ALL WARRANTIES WITH REGARD TO THIS SOFTWARE INCLUDING ALL IMPLIED WARRANTIES OF MERCHANTABILITY AND FITNESS. IN NO EVENT SHALL THE AUTHOR BE LIABLE FOR ANY SPECIAL, DIRECT, INDIRECT, OR CONSEQUENTIAL DAMAGES OR ANY DAMAGES WHATSOEVER RESULTING FROM LOSS OF USE, DATA OR PROFITS, WHETHER IN AN ACTION OF CONTRACT, NEGLIGENCE OR OTHER TORTIOUS ACTION, ARISING OUT OF OR IN CONNECTION WITH THE USE OR PERFORMANCE OF THIS SOFTWARE.